


Tessa’s Recipe Rundown
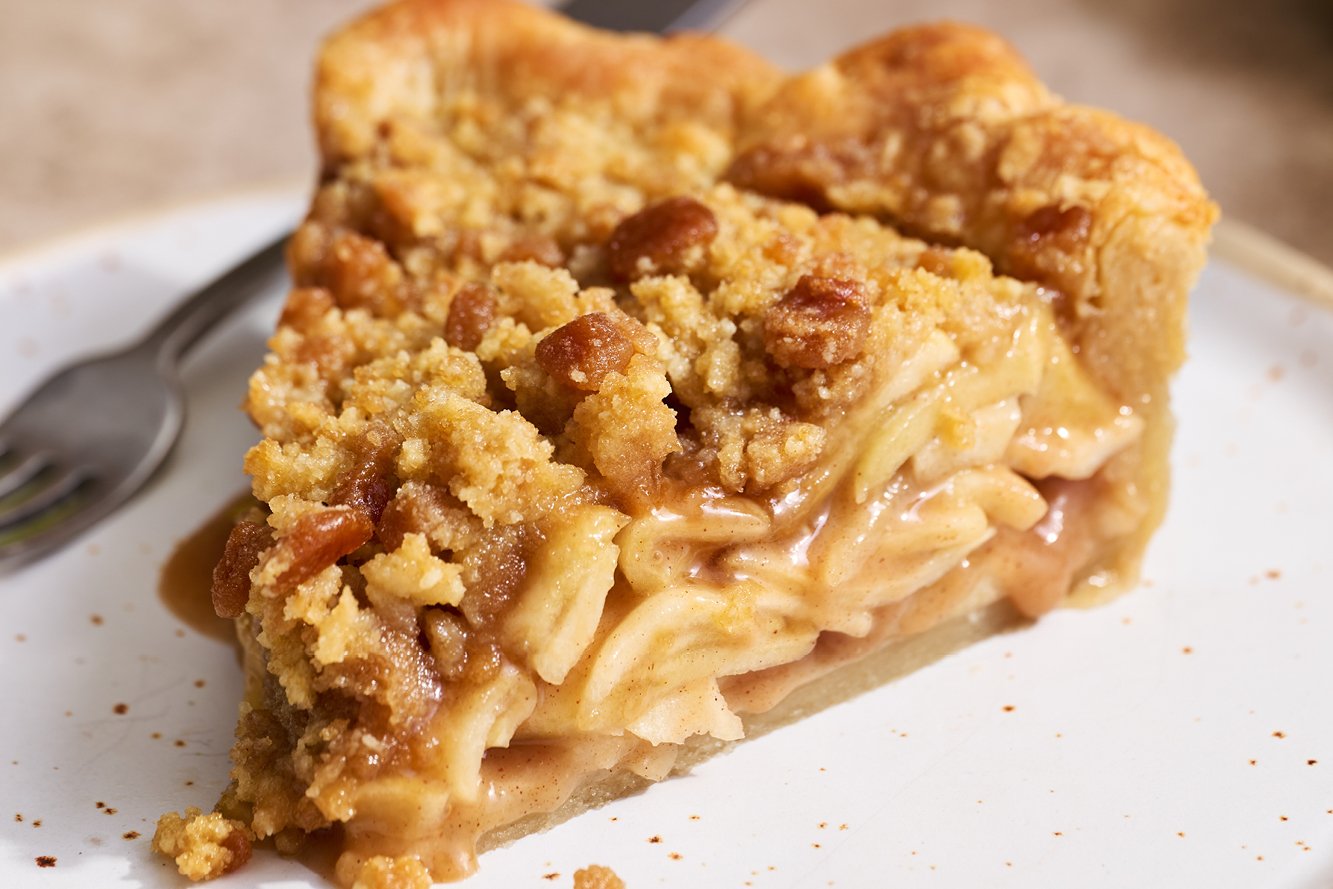
TASTE: A buttery crust meets caramel-kissed apples and a toffee-studded streusel that melts into crunchy perfection.
TEXTURE: Enjoy a flaky pie crust, apples with a bit of bite, and crumbly streusel with a slight crunch thanks to the toffee bits.
EASE: You only have to worry about one pie crust on the bottom here, so it’s a bit easier than a typical double-crust pie.
Why You’ll Love This Recipe: It’s not the quickest recipe ever, but it’s basically the best pie you’ll ever eat…and perfect for Thanksgiving!
This post may contain affiliate links. Read our disclosure policy.


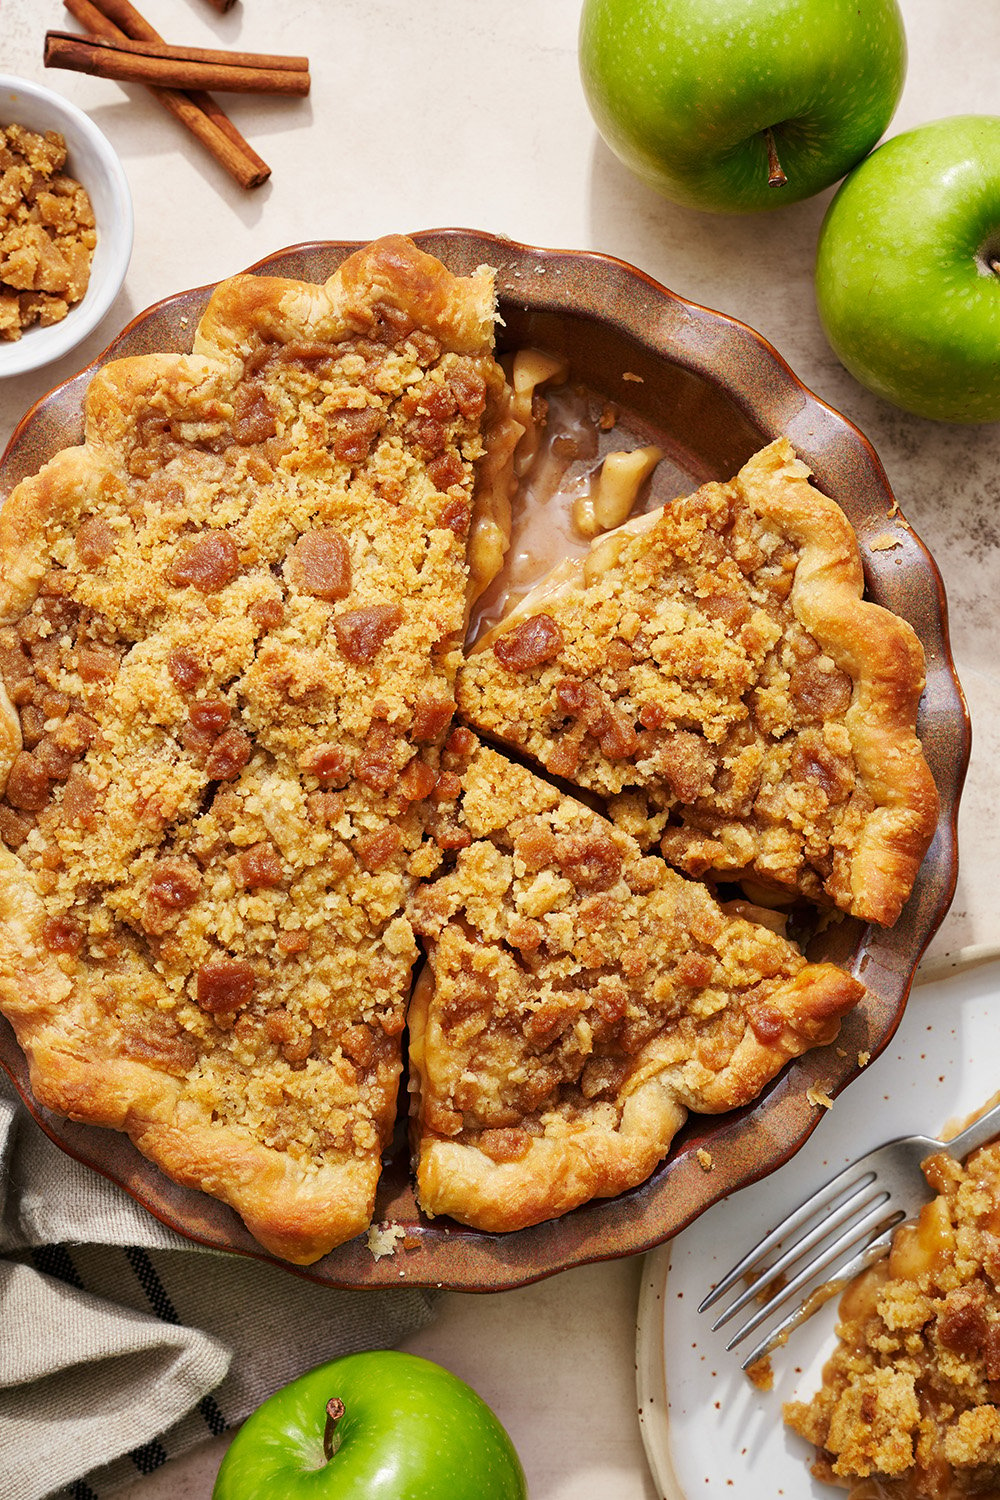
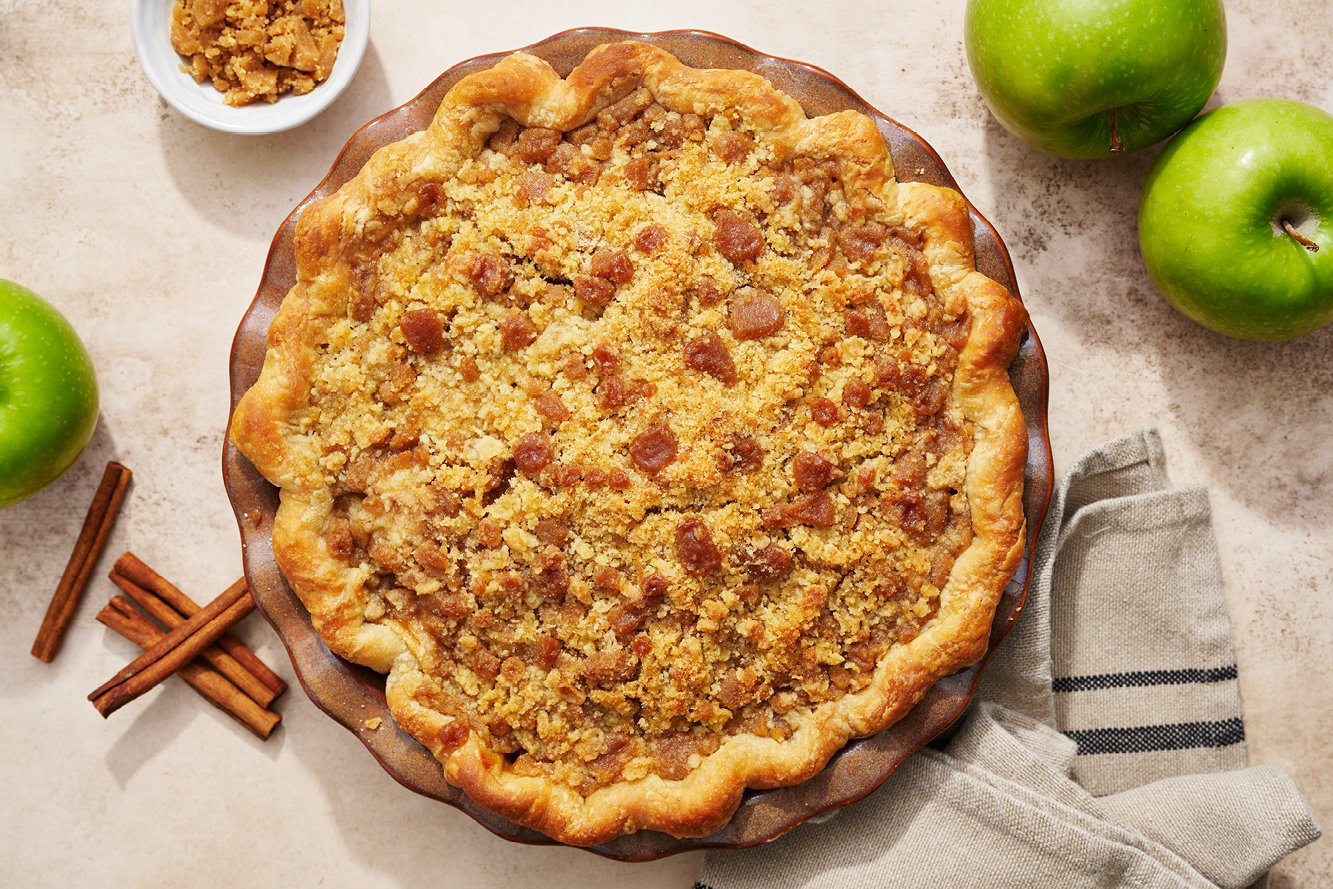
When I want a pie that feels extra special, with comforting fall spices and a little crunch in every bite, I turn to this Dutch Apple Pie. It takes some time to get it just right, but every bite is rich, cozy, and completely worth it.
This pie has quickly become a favorite for holidays, family gatherings, or any time I want a dessert that will have everyone asking for seconds.
Reader Love
This is a great recipe!! The filling is so flavorful and almost custard like, the toffee in the streusel makes this such a delicious twist on an apple pie!
–
What Makes This a Dutch Apple Pie
A Dutch apple pie swaps the traditional top crust for a buttery streusel made with flour, sugar, and butter. That crumbly topping gives it the signature “Dutch” texture and sweetness. (If you’re looking for the perfect apple pie the classic way, try my Thanksgiving Apple Pie!)
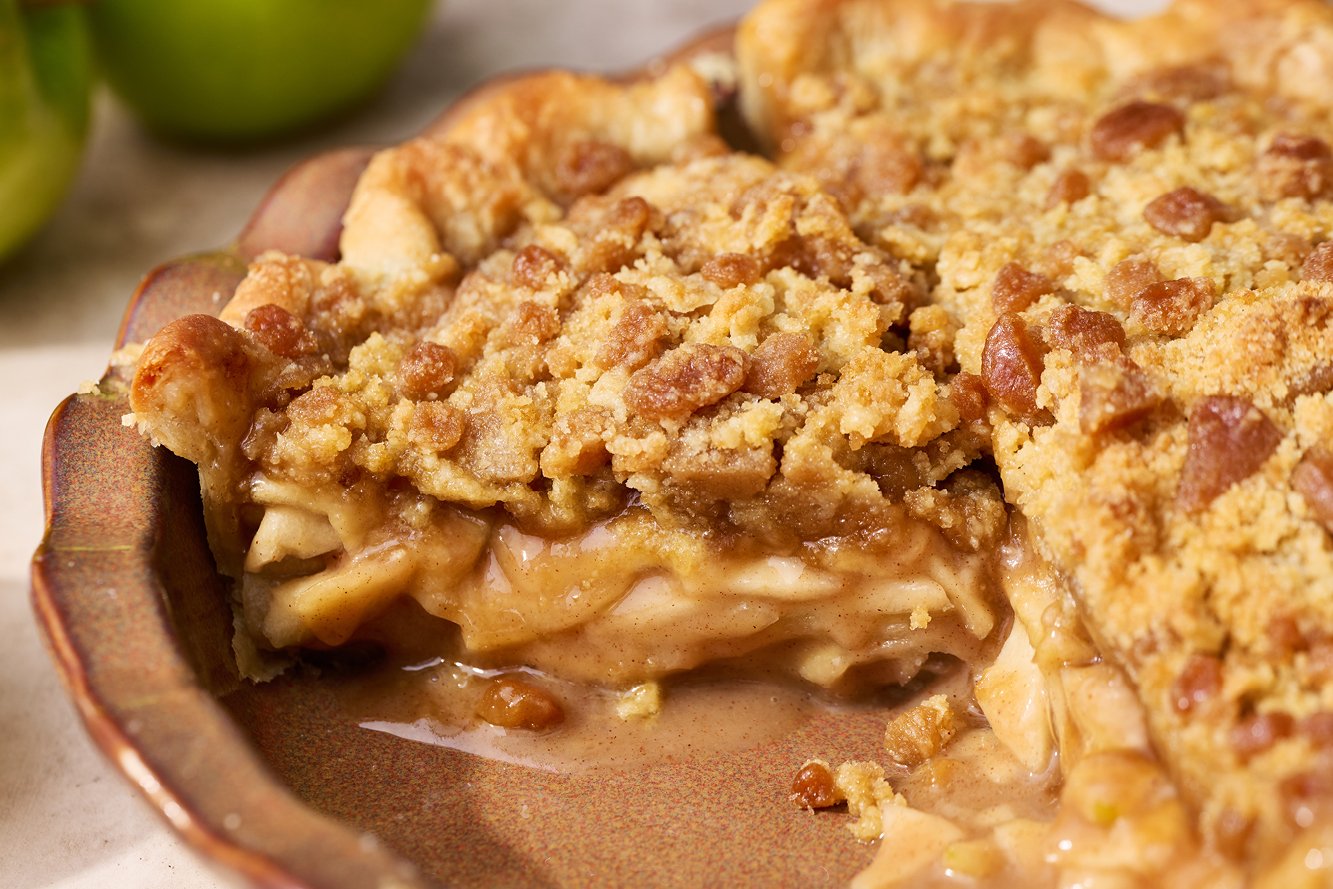
My version takes it a step further. I caramelize the apple filling with sugar, butter, and cream for a rich, toffee-like flavor, then mix real toffee bits into the streusel for extra crunch and depth. It’s the cozy, classic Dutch apple pie, but just a little more indulgent.
Reader Love
A.M.A.Z.I.N.G!! I have no critique for this pie. It is excellent – the crust easy and flaky, the apple filling divine, and the streusel topping with toffee bits outstanding! The combination is out of this world!
–
Ingredients Breakdown
This apple pie with a streusel topping has three parts: a buttery crust, a caramel-like apple filling, and a toffee-streusel topping. Here’s a bit more on key ingredients that make each piece shine:
- Pie crust: I use my Best Ever Pie Crust — an all-butter crust that’s super flaky, flavorful, and easier to make than you might think. Butter gives it that rich taste and crisp texture that store-bought crusts just can’t match. You can make it even faster in a food processor, and I always make a double batch to freeze the extra. It’s truly a gift to my future self.
- Apples: I prefer Granny Smith apples for this one. They’re a nice contrast to the sweetness of the pie filling and topping, and hold their shape well. Avoid using Red Delicious or McIntosh in pie baking. These apples tend to cook down too fast, and you’ll end up with a mushy pie.
- Cornstarch: Don’t skip this one! Cornstarch is a thickening agent. It helps thicken the pie filling as it cooks. This prevents it from seeping into the pie dough and creating a soggy bottom or running all over the plate when sliced.
- Heavy cream: When paired with sugar, a little heavy cream gives this filling a beautiful caramel-y and creamy consistency. It creates a richer flavor compared to a standard apple pie. I don’t recommend substituting milk or any dairy-free options.
- Toffee bits: This classic Dutch-style topping starts with flour, butter, and sugar, but I fold in toffee bits for a sweet, crunchy twist. They melt slightly as the pie bakes, creating pockets of caramelized flavor throughout the crumble.
Notice how there’s no caramel sauce in this pie? The caramel comes from cooking the sugar, butter, and cream for the apple filling. Feel free to drizzle my homemade salted caramel sauce on the finished pie if you’d like!
Read Next: How to Make a Lattice Pie Crust
The Best Tools for the Job
Before diving into the best Dutch apple pie, I like to have a few key tools ready. They make the process smoother and help ensure a perfectly baked pie. Here’s what I use:
- Baking stone or steel: This is optional, but if you have one, placing it on the oven rack helps keep the bottom crust crisp.
- Pie pan: I use a deep ceramic dish for even browning and a beautiful presentation. Light-colored metal pans or glass pans work, but avoid using dark or nonstick pans. They can lead to an overly brown crust. If you’re unsure what to use, refer to my guide to the best pie pans for more options.
- Baking sheet: Bake on top of a parchment paper-lined rimmed baking sheet to prevent any spillage or butter puddles on your oven floor.
- Food processor: This one is optional, but it can make quick work of mixing the pie dough if you want to speed up the prep. (If you live in a hot climate, like I do, or have hot hands, it becomes a must!)
- Pie weights: I have boxes of these in my kitchen for blind baking. They keep the crust from shrinking or slumping. Dried beans or even sugar work in a pinch.
- Baking stone or steel: This is optional, but if you have one, placing it on the oven rack helps keep the bottom crust crisp.

Sprinkle of Science
How to Make Dutch Apple Pie (Step-By-Step)
I’ve made this crowd-pleasing apple streusel pie enough times to know the secrets for the perfect balance of a flaky crust, tender apples, and a crisp, buttery topping. Here’s my guide for making a Dutch apple pie that’s so much better than store-bought.
Prepare the Crust
I use my Best Ever Pie Crust recipe for a flaky, buttery pie. Before rolling, let the chilled dough sit at room temperature for a few minutes, making it easier to handle. Roll the dough gently on a floured surface, turning it frequently to prevent sticking and ensure an even thickness.
Aim for a circle slightly larger than your pie pan so you have enough to trim the edges. I like to fold the overhang under itself and flute or crimp the edges for a classic look.
Want to make life easier? You can freeze your prepared crust. Just defrost in the fridge overnight when you’re ready to bake.
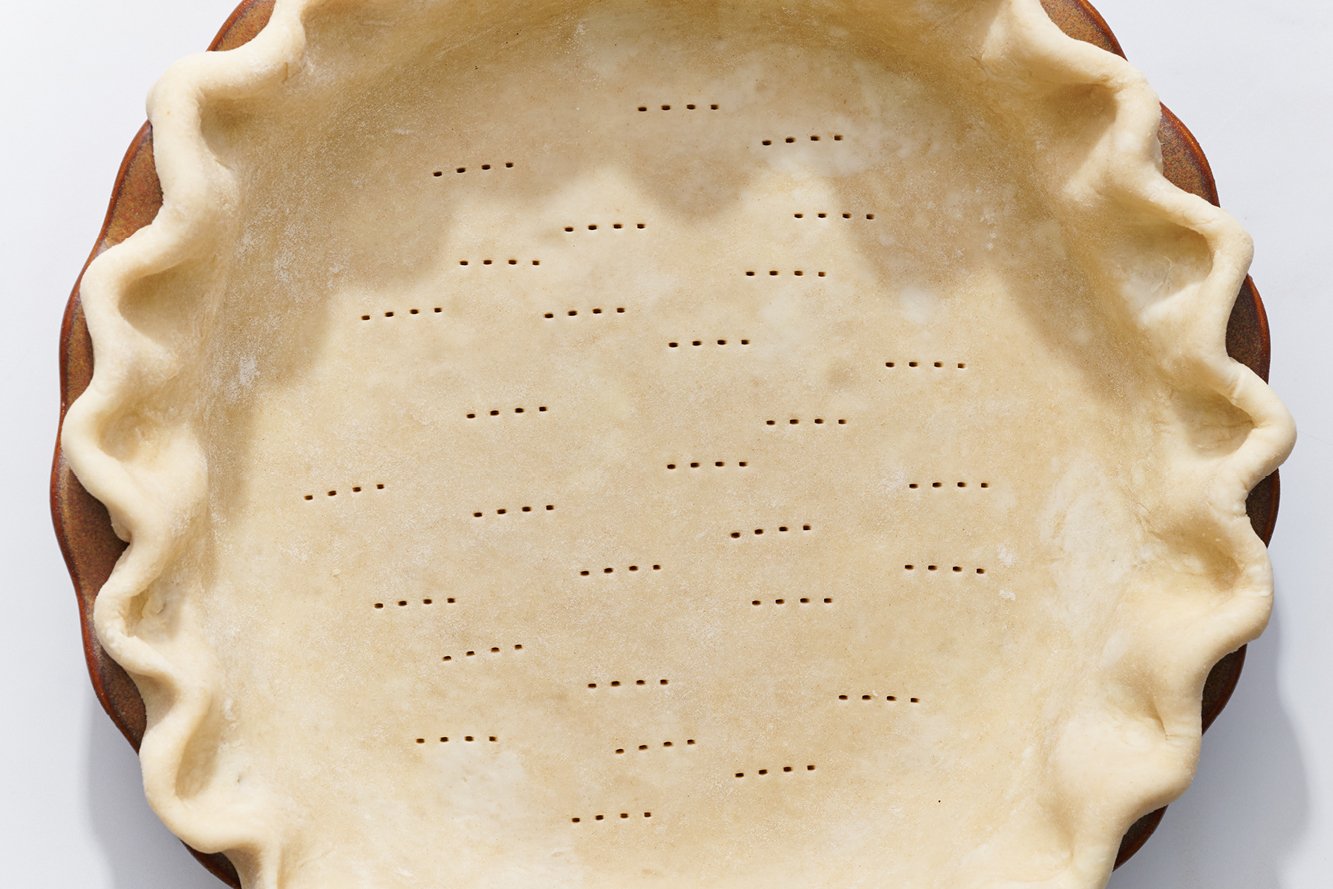
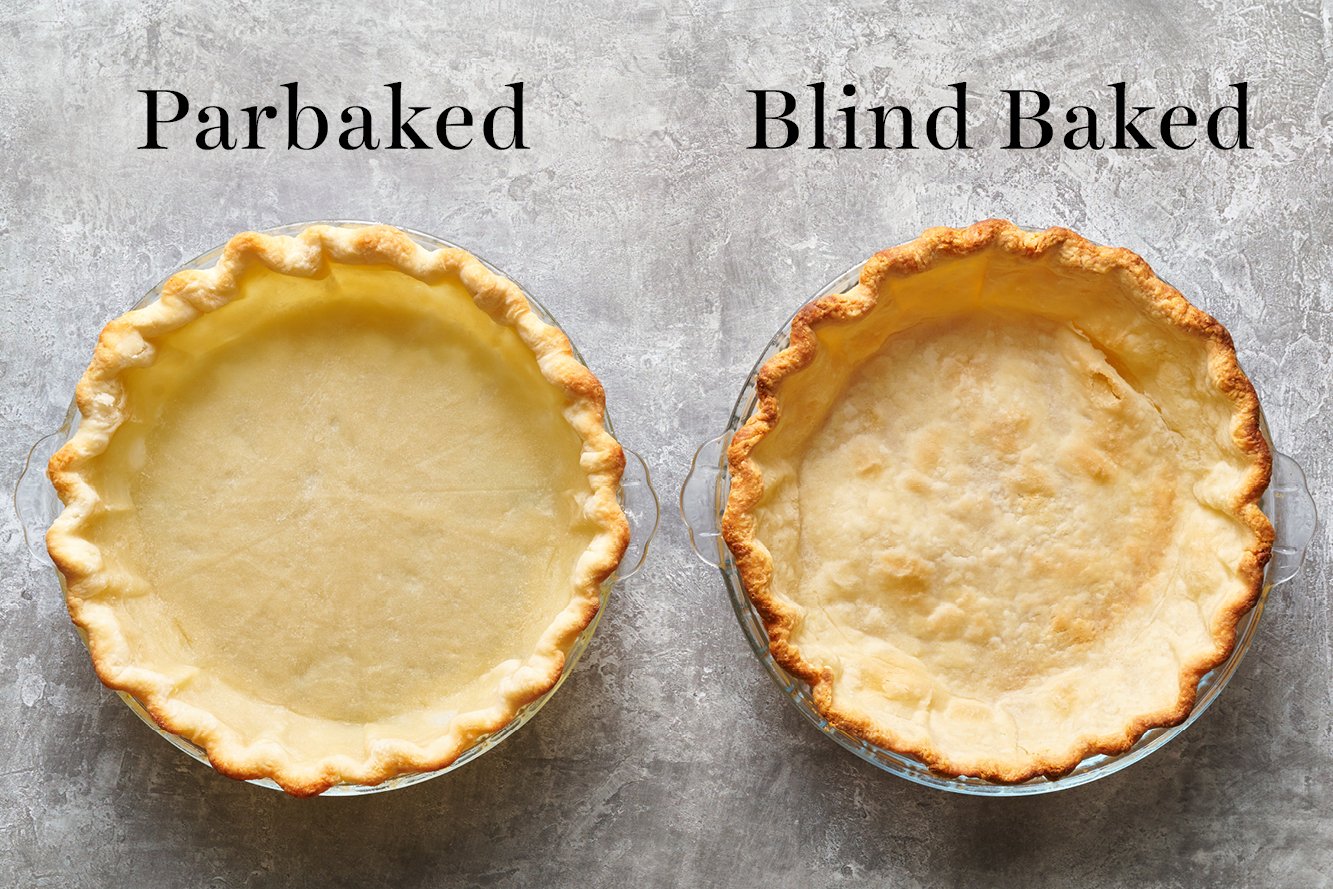
Either way, blind-baking is key here. That’s when you bake the pie dough without a filling until it’s completely cooked through to ensure the bottom stays crisp. I have a detailed guide to blind baking if you’re a first-time user of the method!
Make the Apple Filling
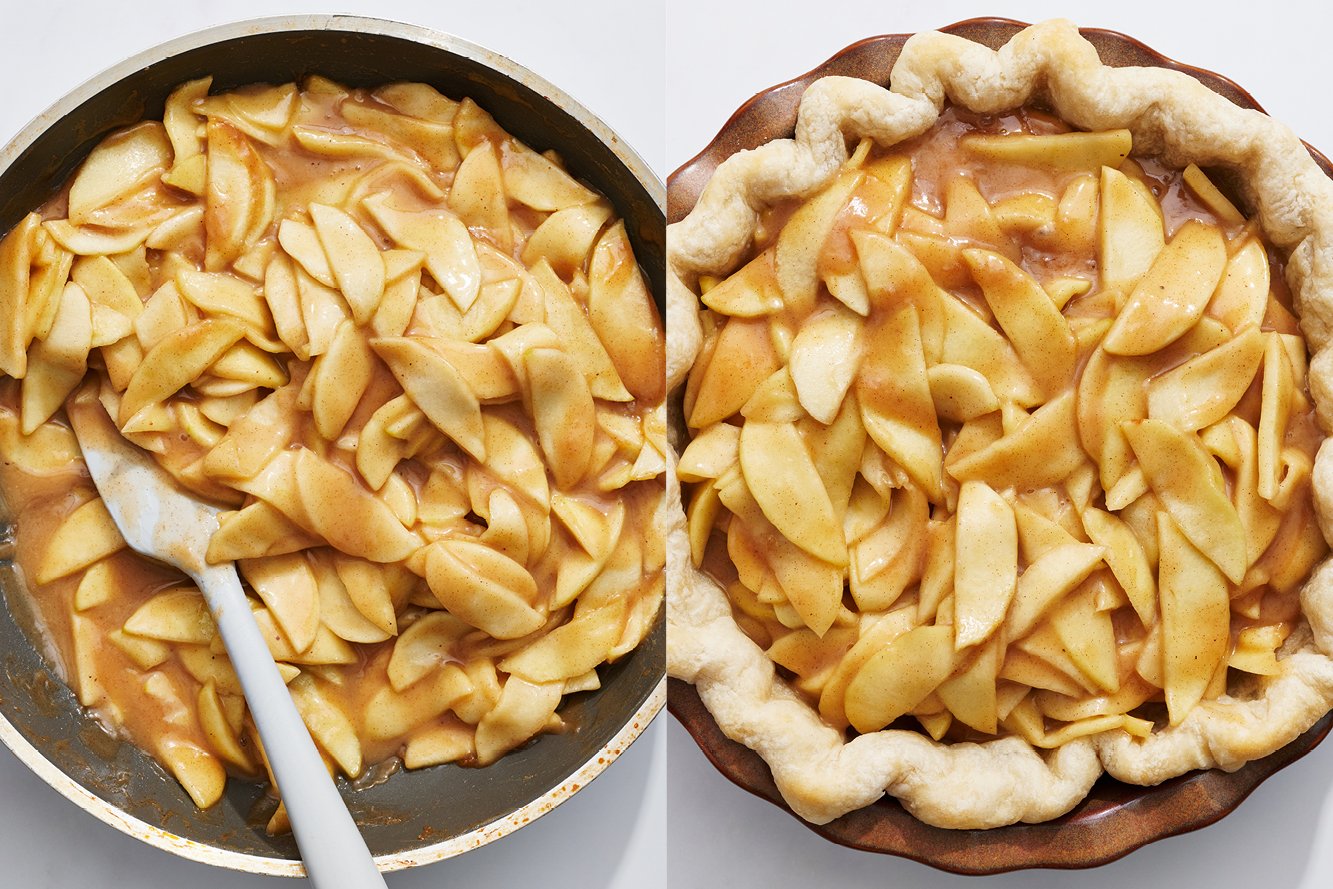
Choose firm, tart apples. I like Granny Smith the best, but Jonathan apples work, too. Peel, core, and slice the apples thinly for even cooking. I cook the sliced apples briefly with sugar, butter, and cream to release moisture, create that caramel-like flavor, and avoid a runny filling.
Add warm spices, lemon juice, and vanilla at this stage, and stir gently so the apples soften without turning mushy.
Mix the Caramel Streusel Topping
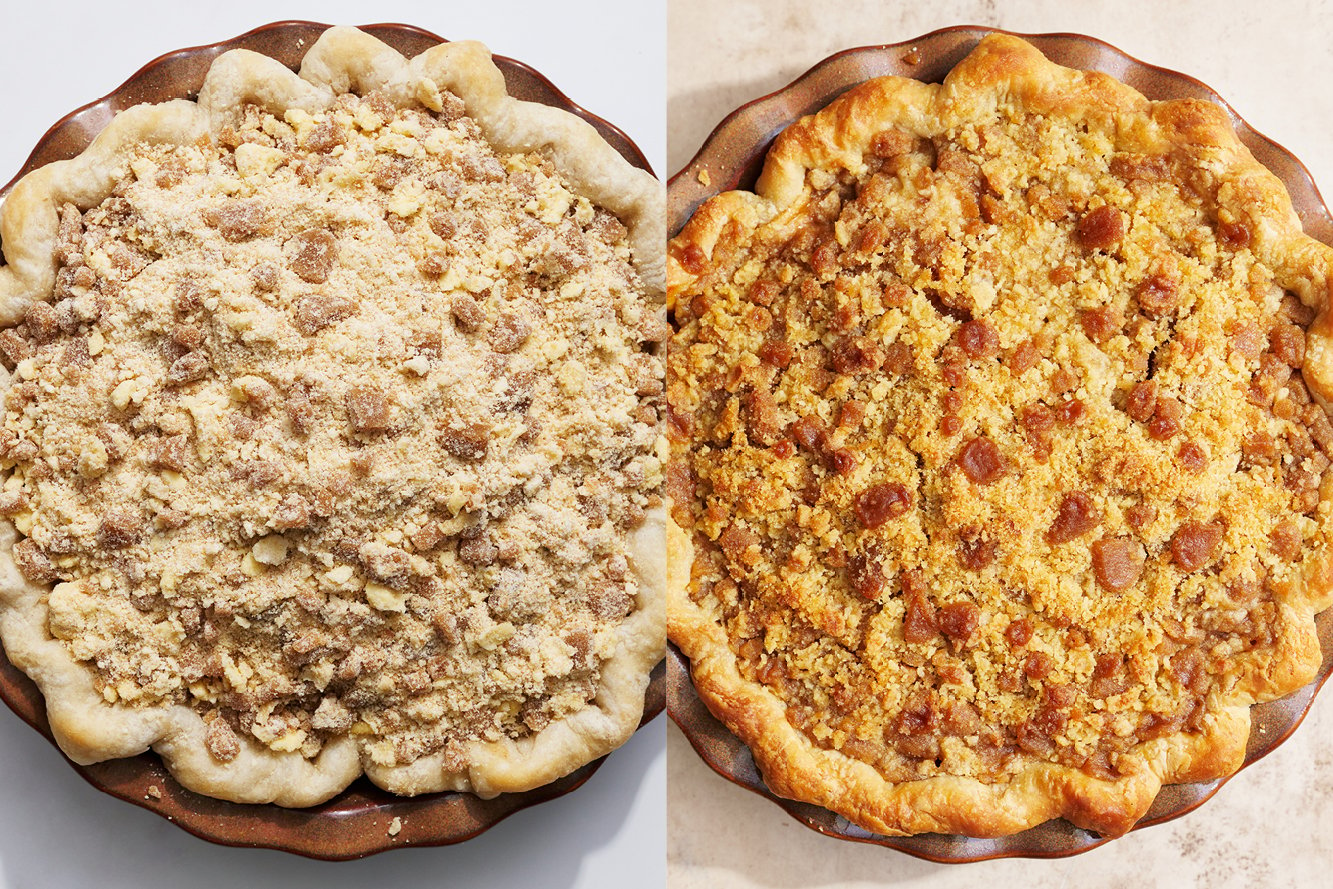
Cut cold butter into the flour and sugar until coarse, crumbly pieces form. Butter temperature is key! Too soft, and the streusel melts too quickly. Too hard, and it won’t bind. Stir in toffee bits for extra crunch. The result should be crumbly and ready to crisp up in the oven.
Assemble and Bake
Once the crust and filling are ready, it’s time to pile everything together. Layer the apple filling into the blind-baked crust, then sprinkle the streusel on top. Before baking, wrap the edges of the crust with a crust shield or aluminum foil to keep them from over-browning.
Slide the pie onto a parchment-lined baking sheet and bake on the lower wire rack for the best balance of crisp crust and golden topping. Watch the pie closely as it bakes. The topping should turn golden brown, and the apples should be bubbling around the edges. It’ll smell incredible.
Let the pie cool for about an hour before slicing, allowing the filling to set. I know the waiting is the hardest part!
Tips for the Perfect Pie
A few minor details can make the difference between a tasty pie and one that your friends and family request at every opportunity.
- Keep your crust cold. This is key to a flaky, tender crust. I always chill the dough before rolling and after shaping.
- Blind-bake completely. A fully baked, golden crust prevents a soggy bottom once the filling is added. Don’t skip this step!
- Slice apples evenly. I aim for about ⅛-inch thick slices so every piece cooks just right. Even slicing keeps the texture consistent, with no mushy or undercooked bits.
- Use cornstarch to thicken. It’s essential for a sliceable filling. Don’t swap it for cornmeal or flour. If the filling looks a little thin, I add just a touch more.
- Prevent over-browning. I always wrap the crust edges with foil or a pie shield. It keeps the edges perfectly golden without burning.
- Cool before slicing. I know it’s tempting to dive in right away, but letting the pie rest for at least an hour gives the filling time to set.
Variations You’ll Love
This Dutch Apple Pie is delicious as-is, but there’s plenty of room to get creative! Try stirring in chopped pecans or walnuts for a nutty crunch in the streusel. Swap the toffee bits for butterscotch chips or even a drizzle of maple syrup for a different kind of sweetness.
You can also experiment with different apple varieties. Honeycrisp apples work nicely in pies if you want even more sweetness. If you love the idea of baking with apples, follow this one up with my Apple Galette, Apple Crisp, or Apple Crisp Cookie Bars (one of my favorite dessert bar recipes)!
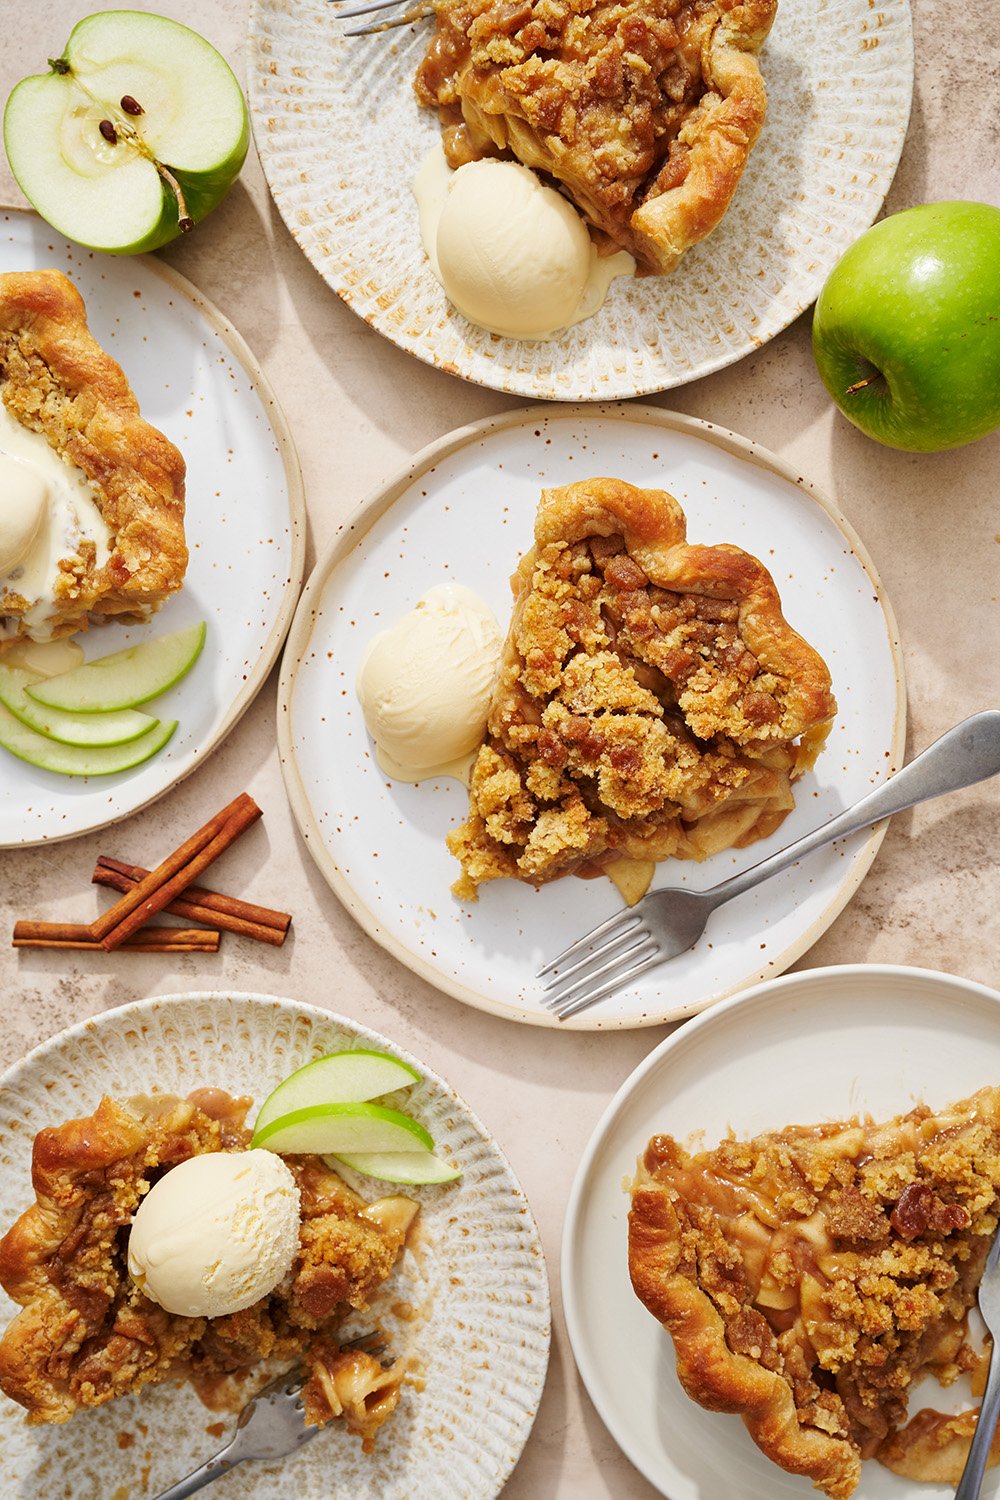
Serving Ideas
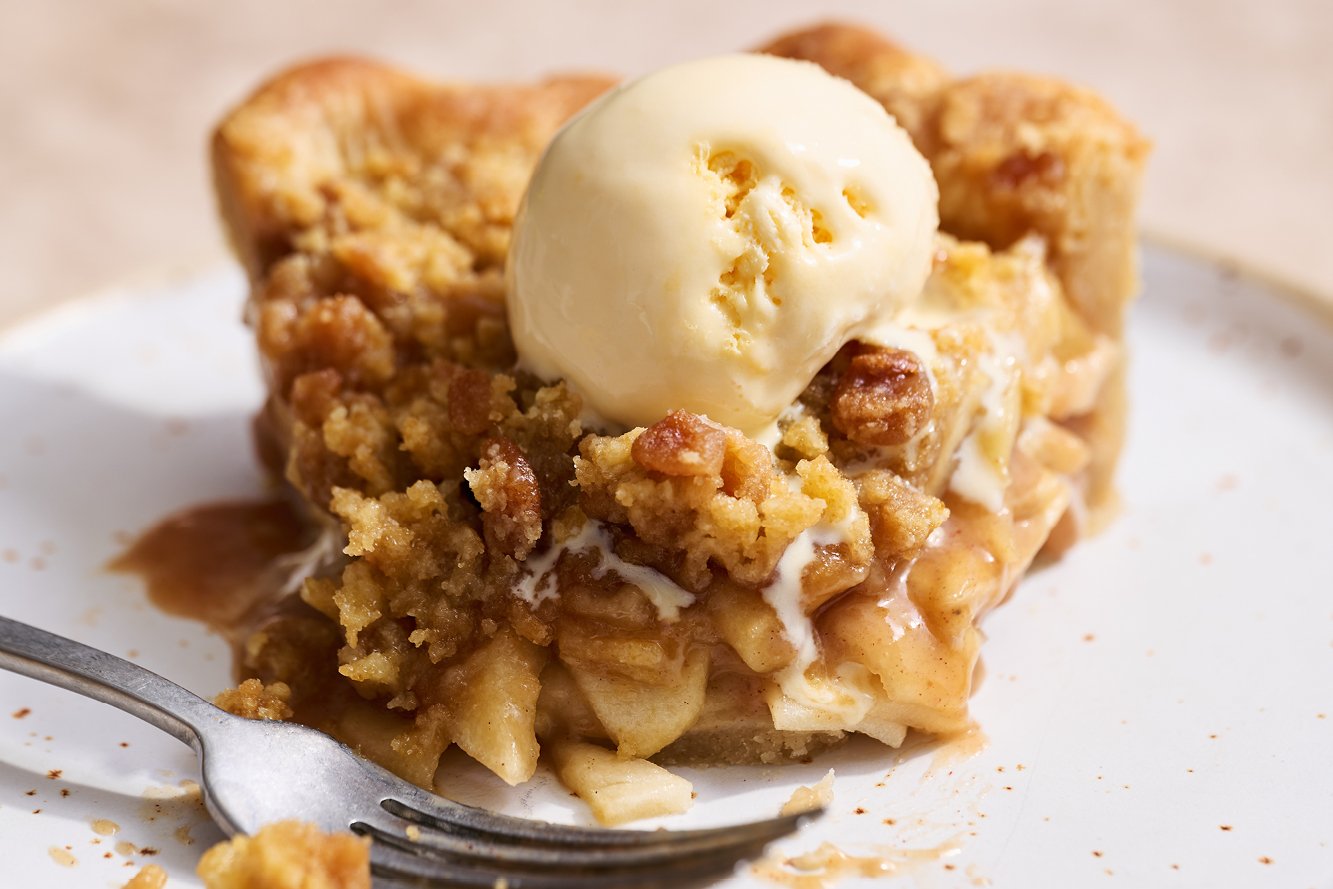
A scoop of vanilla ice cream or a drizzle of warm salted caramel sauce takes this pie over the top. If you love whipped cream, go for it! Wait until the pie is completely cool before slicing. Otherwise, you risk messy slices that lose their shape. If you prefer a warm slice, reheat it briefly in the oven after slicing.
For a little texture contrast, sprinkle on toasted pecans or a pinch of flaky sea salt just before serving. It’s an indulgent, show-stopping dessert for Thanksgiving, Christmas, or any cozy fall gathering.
Storage and Freezing Tips
If you manage to have any leftovers, wrap the pie tightly in foil and store it at room temperature for up to 2 days. When you’re ready for a slice, pop it in a 350°F oven for up to 10 minutes to get that perfectly crisp crust.
I love make-ahead baking, so I often prep the pie dough a few days ahead (you can also freeze it for up to 2 months). The filling and streusel can also hang out in the fridge for a couple of days until you’re ready to assemble everything.
Want to prep the whole pie ahead? I recommend assembling it in a disposable aluminum pan (freezes beautifully and can go straight from the freezer to the oven). Follow the recipe to blind bake the crust and cook the apple filling, then let both cool completely. Make the streusel and keep it in the fridge until everything’s chilled, then assemble the pie fully. Double-wrap it in plastic and freeze for up to 1 month.
When it’s time to bake, I skip thawing. Just place it on a baking sheet, cover the edges with foil or a crust shield, and bake at 375°F for 1-1½ hours, until the center reaches 190°F. Let it cool for an hour before slicing, just like freshly-baked.
More Delicious Desserts to Try
- Brown Butter Sweet Potato Pie
- Butterscotch Pie
- Chocolate Pudding Pie
- Classic Whoopie Pies
- French Silk Pie
FAQs
A classic apple pie typically features a double crust, consisting of one layer on the bottom and another on top. A Dutch apple pie swaps the top crust for a streusel made from flour, sugar, and butter. This gives it a crumbly, sweet, and slightly crunchy finish.
It’s called Dutch apple pie because the streusel-topped style was inspired by European pies like the Dutch appeltaart and German crumb cakes. When immigrants brought these recipes to the U.S., the name became popular for any apple pie topped with a buttery crumb over a top crust.
Gently press into the cavity of the pie pan, being careful to avoid stretching it to fit.
A soggy crumb topping usually means too much moisture or not enough baking time. Cook your apples down so they don’t release excess juice, and bake the pie long enough for the streusel to crisp up. Cooling the pie completely also helps the topping firm up properly.
Yes, you can freeze Dutch apple pie filling on its own. Once the cooked apples have cooled completely, transfer the filling to an airtight container or a heavy-duty freezer bag and pop it in the freezer for up to 3 months.
When you’re ready to bake, let it thaw in the fridge overnight. Then let it come to room temperature before using it in a pie or another dessert.
Email This Recipe
Enter your email, and we’ll send it to your inbox.
Ingredients
For the crust:
- 1 (single crust)
Best Ever Pie Crust , chilled overnight
For the filling:
- 6 large (1260 grams) Granny Smith or Jonathan apples, cored, peeled, and sliced about ⅛-inch thick
- ½ cup (100 grams) packed light brown sugar
- ½ cup (100 grams) granulated sugar
- ¼ cup (32 grams) all-purpose flour
- 1 teaspoon cornstarch
- 1 teaspoon ground cinnamon
- ¼ teaspoon nutmeg
- ½ teaspoon fine sea salt
- 1 tablespoon lemon juice
- 1 teaspoon vanilla
- ¼ cup (59 ml) heavy cream
- 4 tablespoons (57 grams) unsalted butter

For the streusel topping:
- ¾ cup (96 grams) all-purpose flour
- 2 tablespoons (25 grams) granulated sugar
- 4 tablespoons (50 grams) light brown sugar
- 5 tablespoons (71 grams) unsalted butter, cold, cut into small pieces
- 1 cup (240 grams)
homemade toffee bits ,or Heath brand
Instructions
Blind bake the crust:
- Remove the pie crust from the fridge. Let sit at room temperature for about 5 minutes, until slightly pliable.
- Roll the dough out on a floured work surface. Keep turning the dough after each roll to ensure it doesn’t stick to the counter and is of even thickness. Roll out into a 13-inch circle about 1/8-inch thick.
- Gently roll the dough up and around the rolling pin, then unroll and drape over a 9-inch pie plate. (Use a deep dish pie pan, safe for freezer-to-oven.)
- Gently press into the cavity of the pie pan, being careful to avoid stretching it to fit.
- Use scissors or a knife to trim the excess dough, leaving a 1-inch overhang. Fold the overhang under itself and crimp or flute. Pierce the bottom and sides of the crust all over with a fork.
- Freeze for 30 minutes, or until very firm.
- Meanwhile, preheat oven to 425°F. Adjust the oven rack to the lower third position. If you have one, place a baking stone or steel on the oven rack to help the bottom crust remain crispy.
- Make ahead: At this point, you can place the pie tin in a zip-top bag or wrap very well in plastic wrap and store in the freezer until ready to use. Defrost in the fridge overnight.
- Remove the pie shell from the freezer. Line the chilled crust in the pan with parchment or foil, pressing gently across the bottom and up the sides of the pie.
- Fill the crust with pie weights (or dry beans or sugar) completely flush to the top edge of the crust to prevent shrinking or slumping.
- Place on a rimmed, parchment-lined baking sheet. Bake for 18-20 minutes, or until pale and just beginning to brown but not raw.
- Carefully remove the foil and weights and continue baking for another 7-10 minutes, or until just turning golden.
- Remove pie and reduce oven temperature to 375°F.
Make the filling:
- Combine all the ingredients except the butter in a large bowl.
- Melt the butter in a large heavy skillet over medium-high heat. Add the apple mixture and cook until the apples begin to soften, stirring frequently, about 8 minutes.
- Pour the apple mixture into the pie crust.
Make the topping and bake:
- In a medium bowl, combine the flour and sugars. Cut the butter into the flour with a fork until coarse crumbs form.
- Stir in the toffee bits, then sprinkle over the apple mixture.
- Wrap the edges of the pie crust with a crust shield or foil.
- Bake the pie on a parchment-lined baking sheet for about 35 to 40 minutes, or until the top and crust are golden brown and the center of the pie is no longer wet.
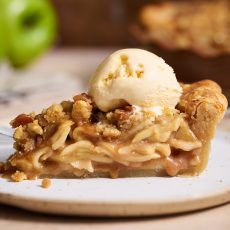
- Let cool until just barely warm, about 1 hour. Serve with vanilla ice cream.
- Store leftovers wrapped in foil for up to 2 days at room temperature. Reheat in a 350°F oven for 5 to 10 minutes to re-crisp the crust.
Notes
This post was originally published in 2017 and updated in 2025 with recipe improvements. Photos by Joanie Simon.


I made this for Thanksgiving! I haven’t made an apple pie in years. I have to pat myself on the back for making everything from scratch. The crust was so flakey!! I didn’t have time to do the toffee bits but it’s still an amazing pie.
Amazing piece! Made it last year for thanksgiving and I was asked for a repeat. Quick question: last year I printed out the instructions and it says that to make ahead, I should bake the crust, prep the apples and topping, then assemble everything when cool, wrap and freeze. The instructions this year say to fully bake the pie, then wrap and freeze. Can you clarify?
Thanks for catching that, Kathryn! Our updated instructions were a little confusing. I’ve fixed them to reflect the original make-ahead method (bake the crust, prep apples and topping, then assemble and freeze). Appreciate you checking!
I found the earlier version of this recipe in my collection and made it as a backup dessert for my husband’s birthday dinner. After a big meal AND birthday cake, everyone asked for some of this pie and went crazy for it! Their comments included “it’s not too sweet and can you make it for Thanksgiving.” The extra 2/3 cup of toffee bits in the streusel in the new version may push it over the edge for my group, but it’s definitely worth the work. Being able to make in advance is a big help. Thanks again, Tessa.
I cannot make a bad recipe if I follow Tessa’s! I would not consider myself a good baker, but I get rave reviews for all of These desserts!! This is a very time intensive recipe if you make the crust and toffee bits, but so so worth it. The amount of tips and tricks provided are so helpful for the crust. This is definitely an elevated apple pie that is worth the effort.