


Tessa's Recipe Rundown
Taste: The perfect balance of chocolate sweetness.
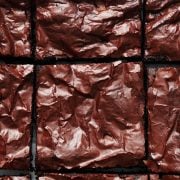
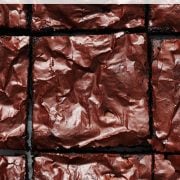
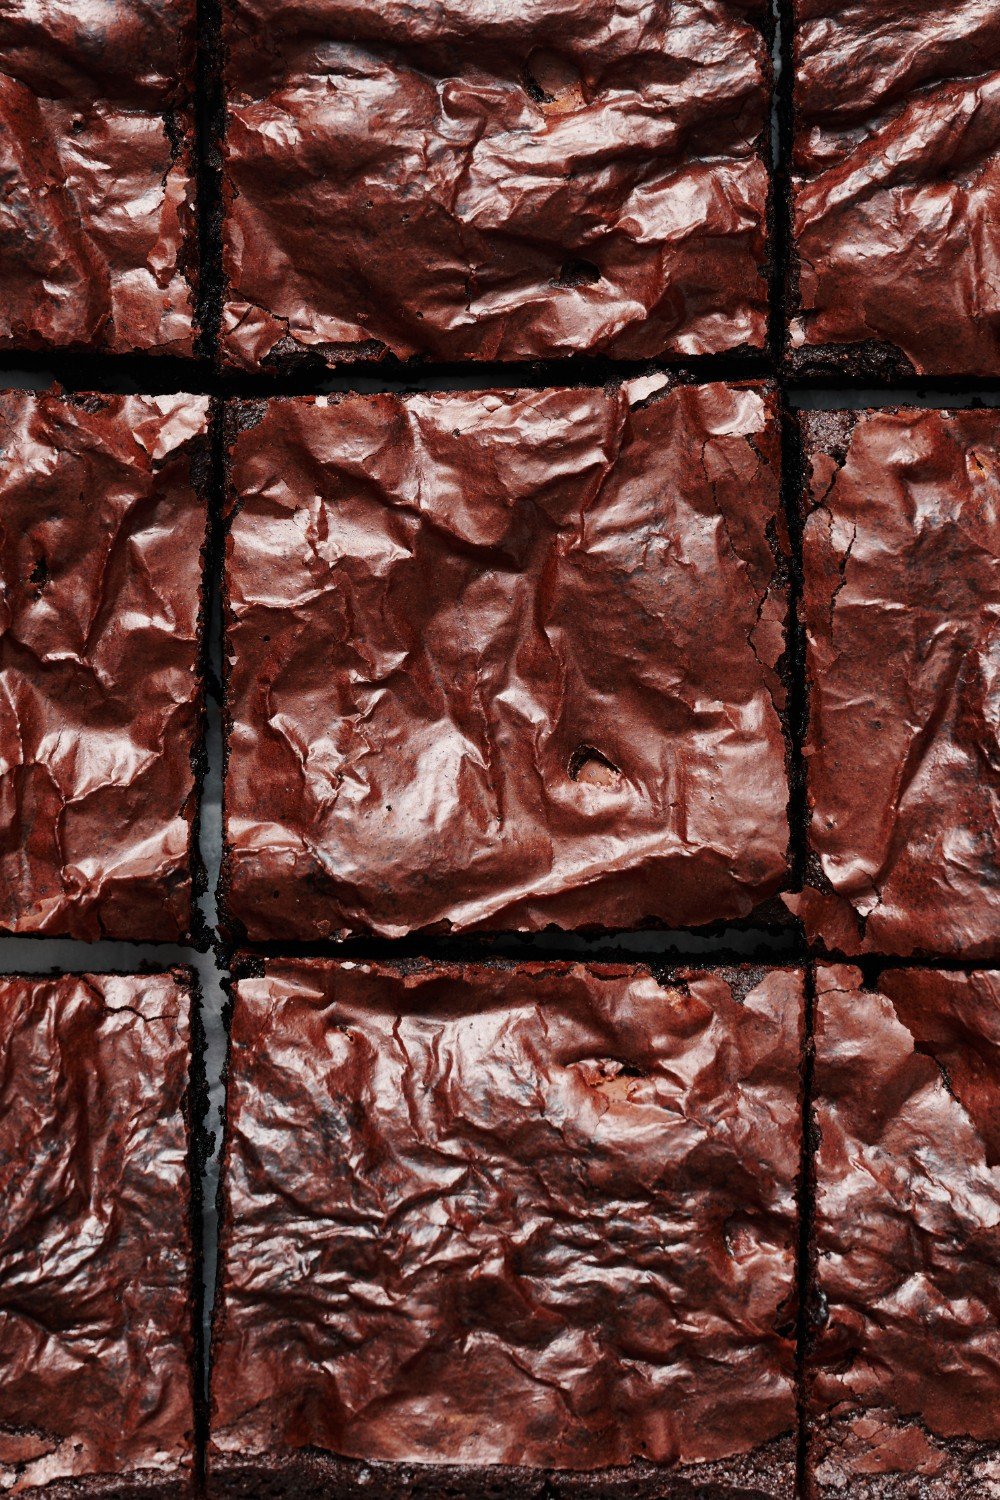
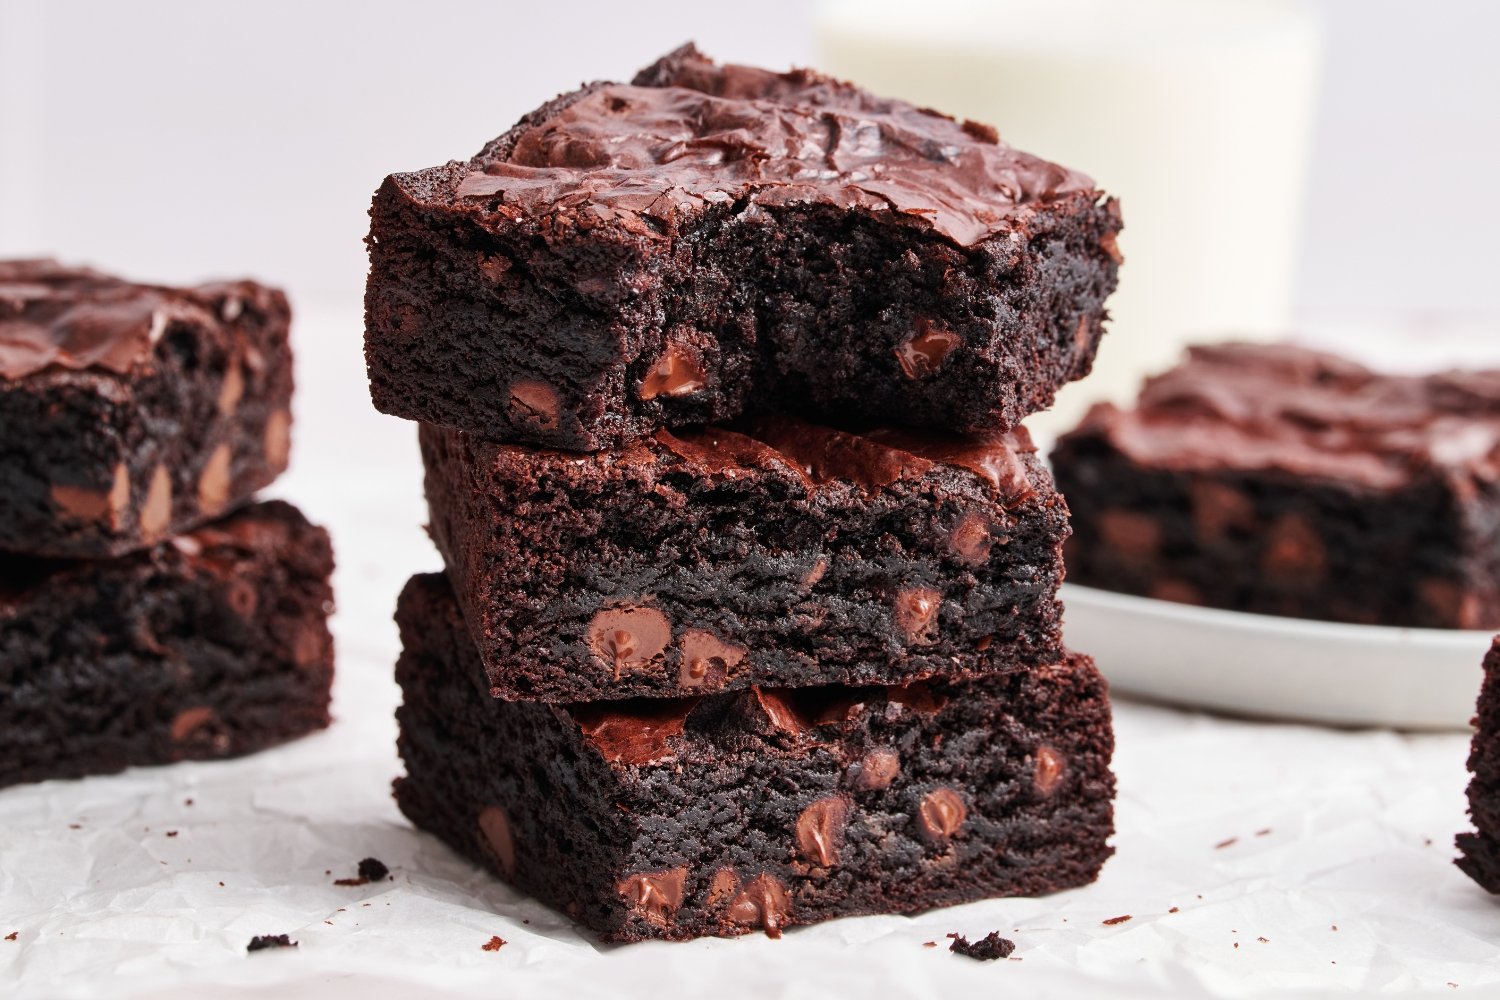
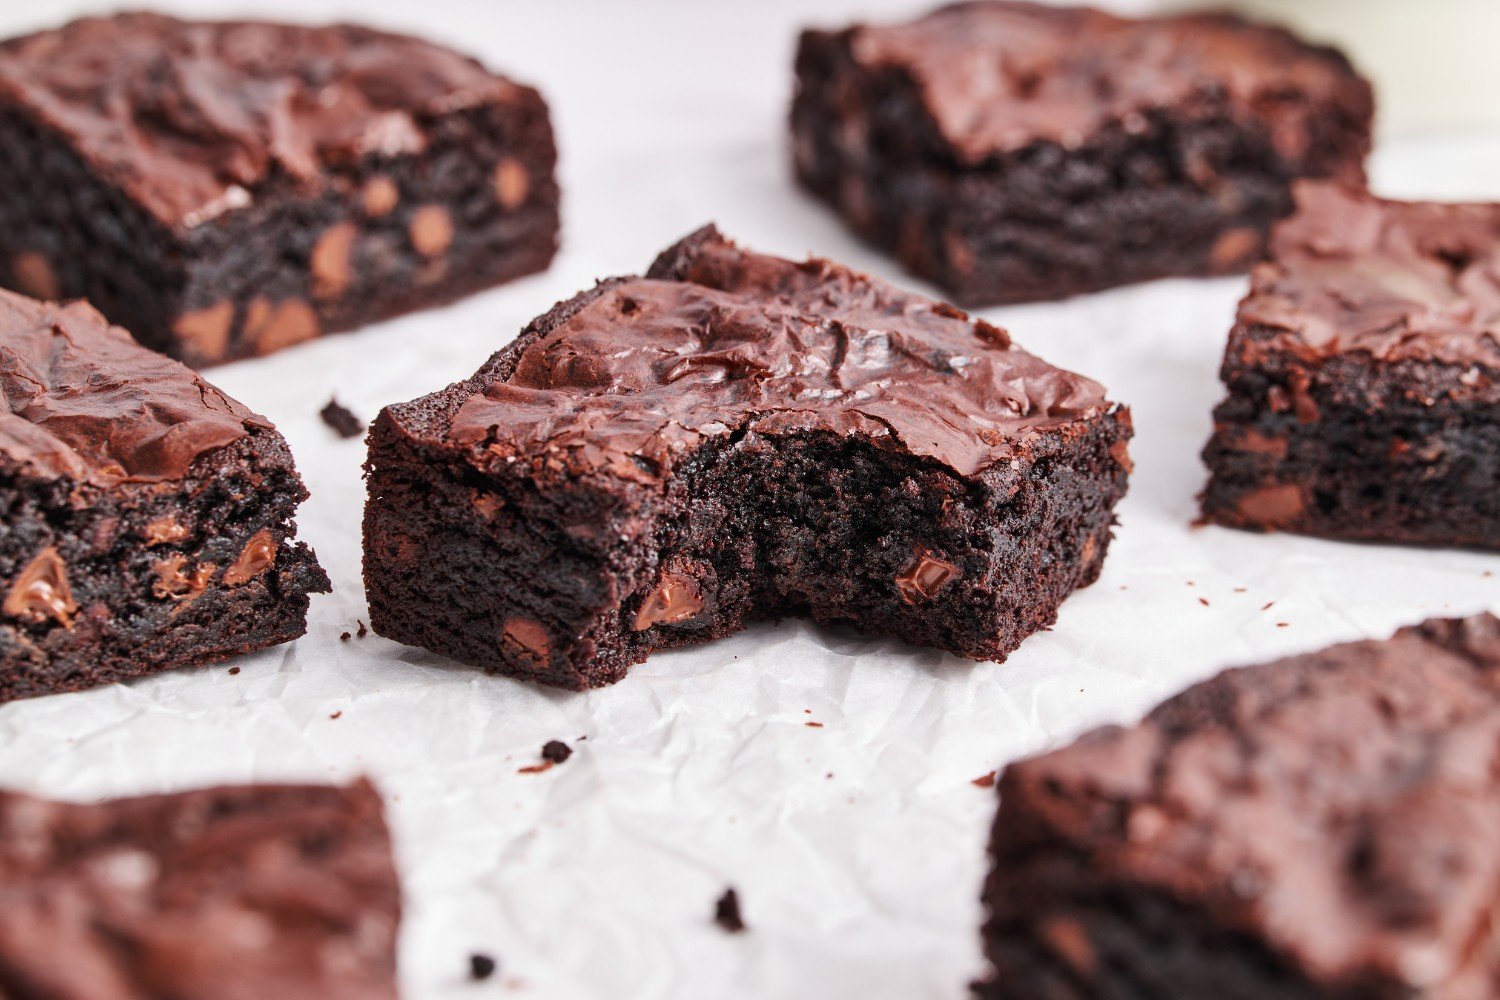
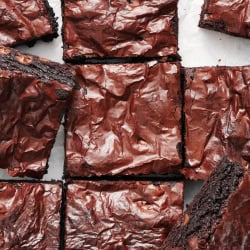
Texture: CHEWY, of course 🙂
Ease: Super easy. One bowl, no electric mixer needed.
Why You’ll Love This Recipe: This Brownie Recipe is WAY better than a box mix and almost as easy. It’s my go-to recipe!
This post may contain affiliate links. Read our disclosure policy.


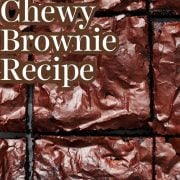


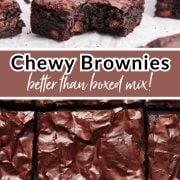
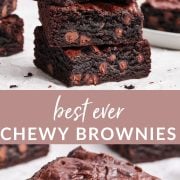
These Chewy Brownies are my go-to recipe when I need a quick, easy, crowd-pleasing dessert. I’m not exaggerating when I say I’ve made it over 200 times. It’s truly the best!
There’s even a secret ingredient that helps to mimic that box-mix texture (but with way better flavor!).
These brownies are my everyday go-to recipe. Check out just one of the 1,000+ 5-star reviews for these best homemade brownies:
Reader Love
I have been using this recipe for about a year now! It is the easiest recipe I have ever used, I get so many compliments on these brownies!! Thank you thank you thank you!!! ❤️
–
The Kitchn tested this recipe, raving about how quick and easy it is! Even Bon Appétit used the recipe as part of their research in their quest to create a perfect chocolate brownie.

Sprinkle of Science
Ingredient Notes for Success
The Cocoa Powder
I recommend using Dutch-processed cocoa powder for a deeper flavor and fudgier texture. Natural unsweetened cocoa will offer a more nostalgic chocolate flavor and a slightly drier but chewier texture.

My favorite Dutch cocoa powder for brownies is Penzey’s or Guittard. Ghirardelli is also great in a pinch. Learn more about how Natural and Dutch-process cocoas affect your baking here.
The Chocolate Chips
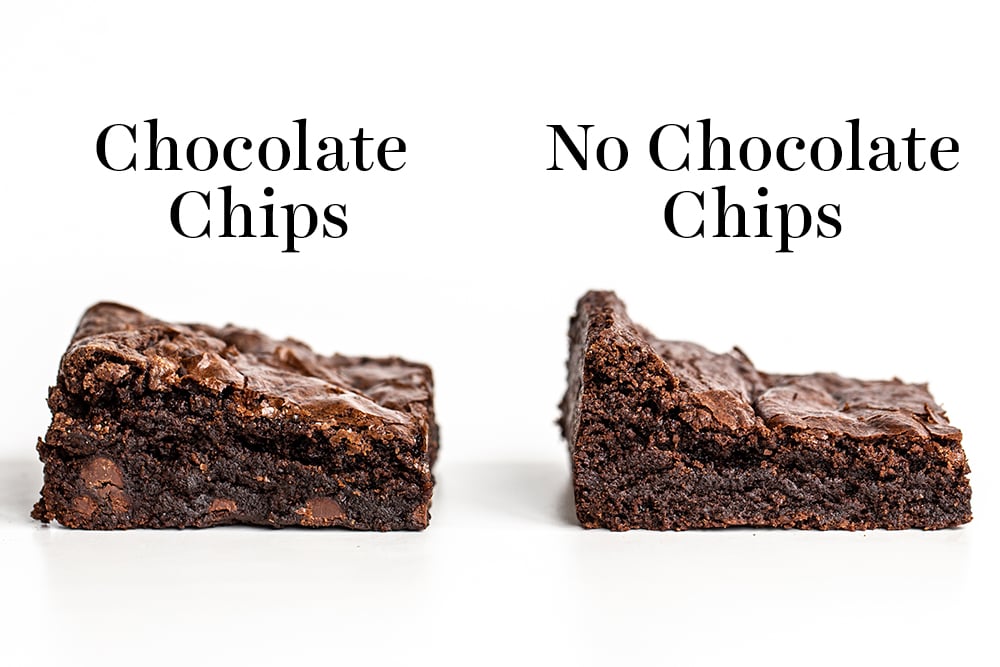
I prefer semisweet chocolate chips, but you can use any kind you like. They strengthen the chocolate flavor, thicken the texture, and help develop that shiny, crinkly crust on top.
You can also add 3/4 cup chopped walnuts or pecans in addition to the chocolate chips.
Learn my top FOUR methods for achieving a shiny thin brownie crust here.
The Fat
- Melted butter plus vegetable oil provides the best taste and texture.
- You can use avocado oil or any other neutral-flavored oil instead of vegetable oil.
- Make sure your oil is fresh to avoid any off flavors.
- Check out my side-by-side baking experiments with Butter vs Oil here.
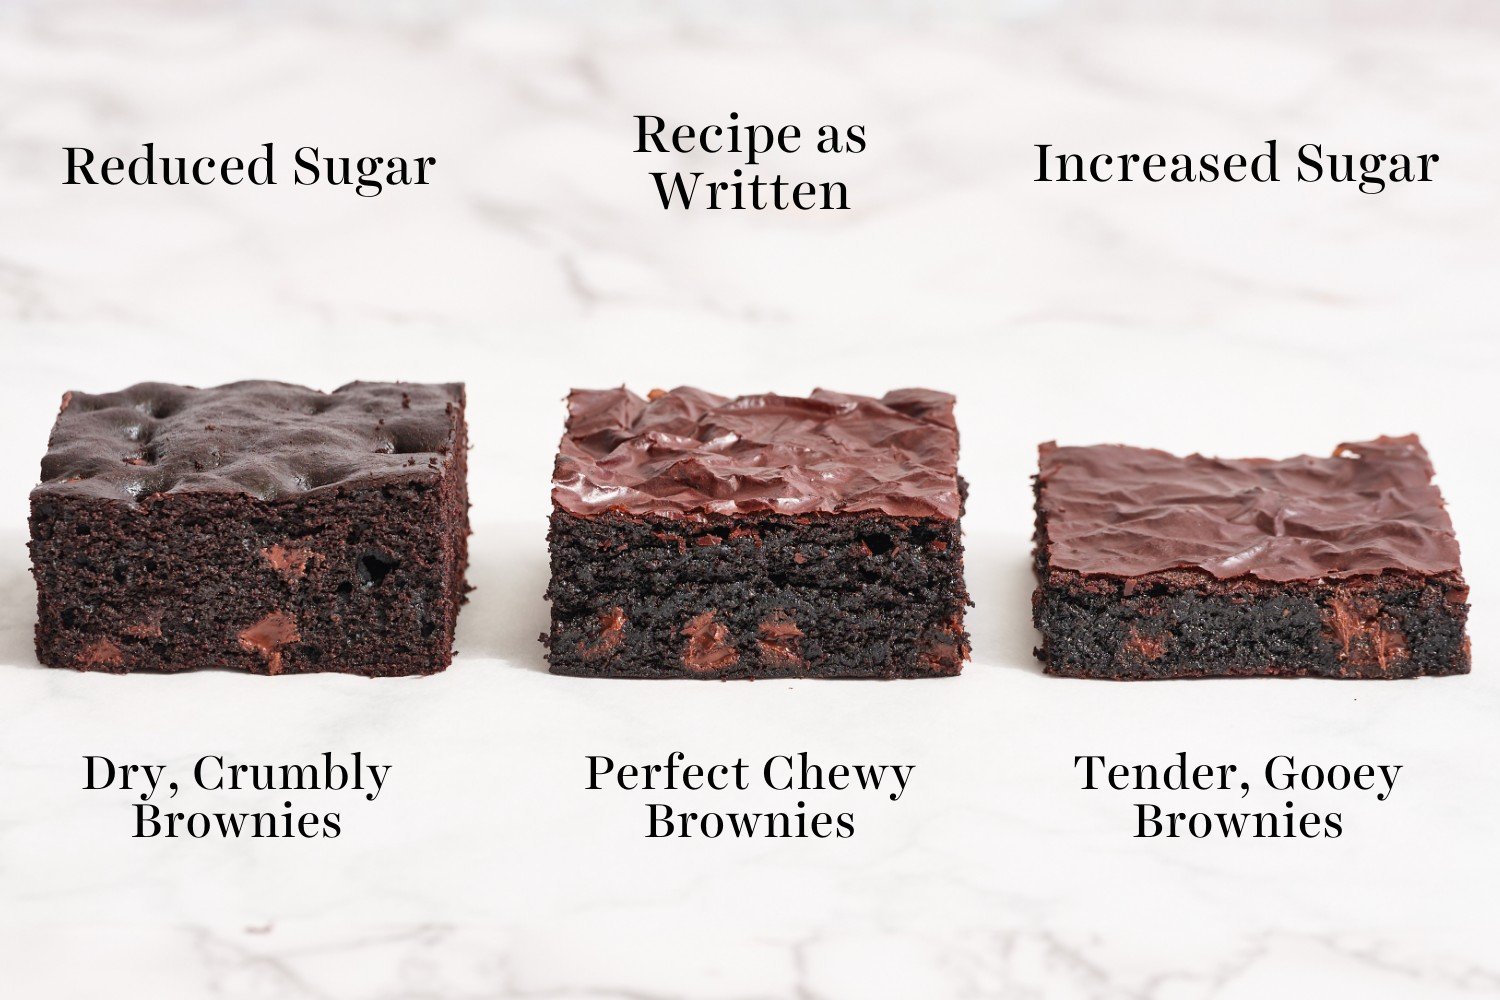
The Sugar
Don’t reduce the sugar in this Brownie Recipe, as this will cause dry, crumbly brownies that will stale faster. Learn more about sugar’s functions in brownies here.
The Eggs
These Chewy Brownies use two whole eggs plus an additional egg yolk for EXTRA chewiness and richness. Using cold eggs prevents doming and increases moisture.
The Flour
A small amount of all-purpose flour is essential for creating Chewy Brownies — but avoid adding too much, as this can cause dry, cakey brownies. Use a digital kitchen scale to prevent accidental over measuring. If you don’t have a digital scale, use the spoon-and-level method described here.
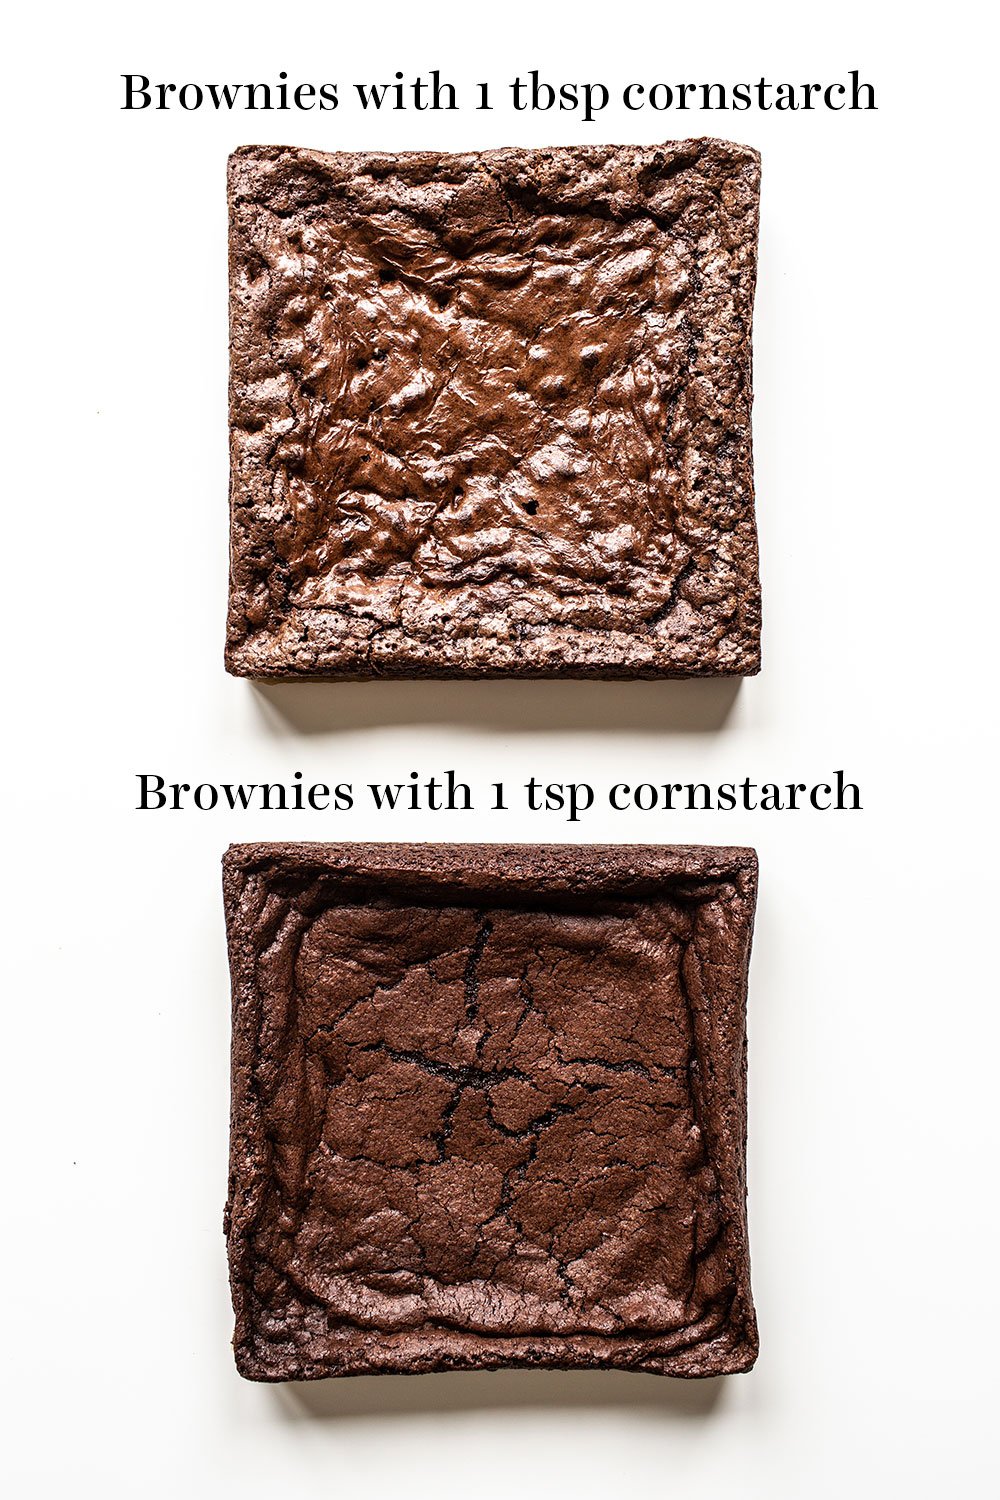
Secret Ingredient: Cornstarch!
Cornstarch mimics the texture of box mix brownies, creating thicker, chewier brownies with a nice shiny crackly top. Don’t skip it if possible.
The Best Pan for Brownies:
Struggling with gummy, sunken, underbaked (even raw) or dry-edged brownies? Ditch the glass square pan and use a light-colored metal baking pan instead.
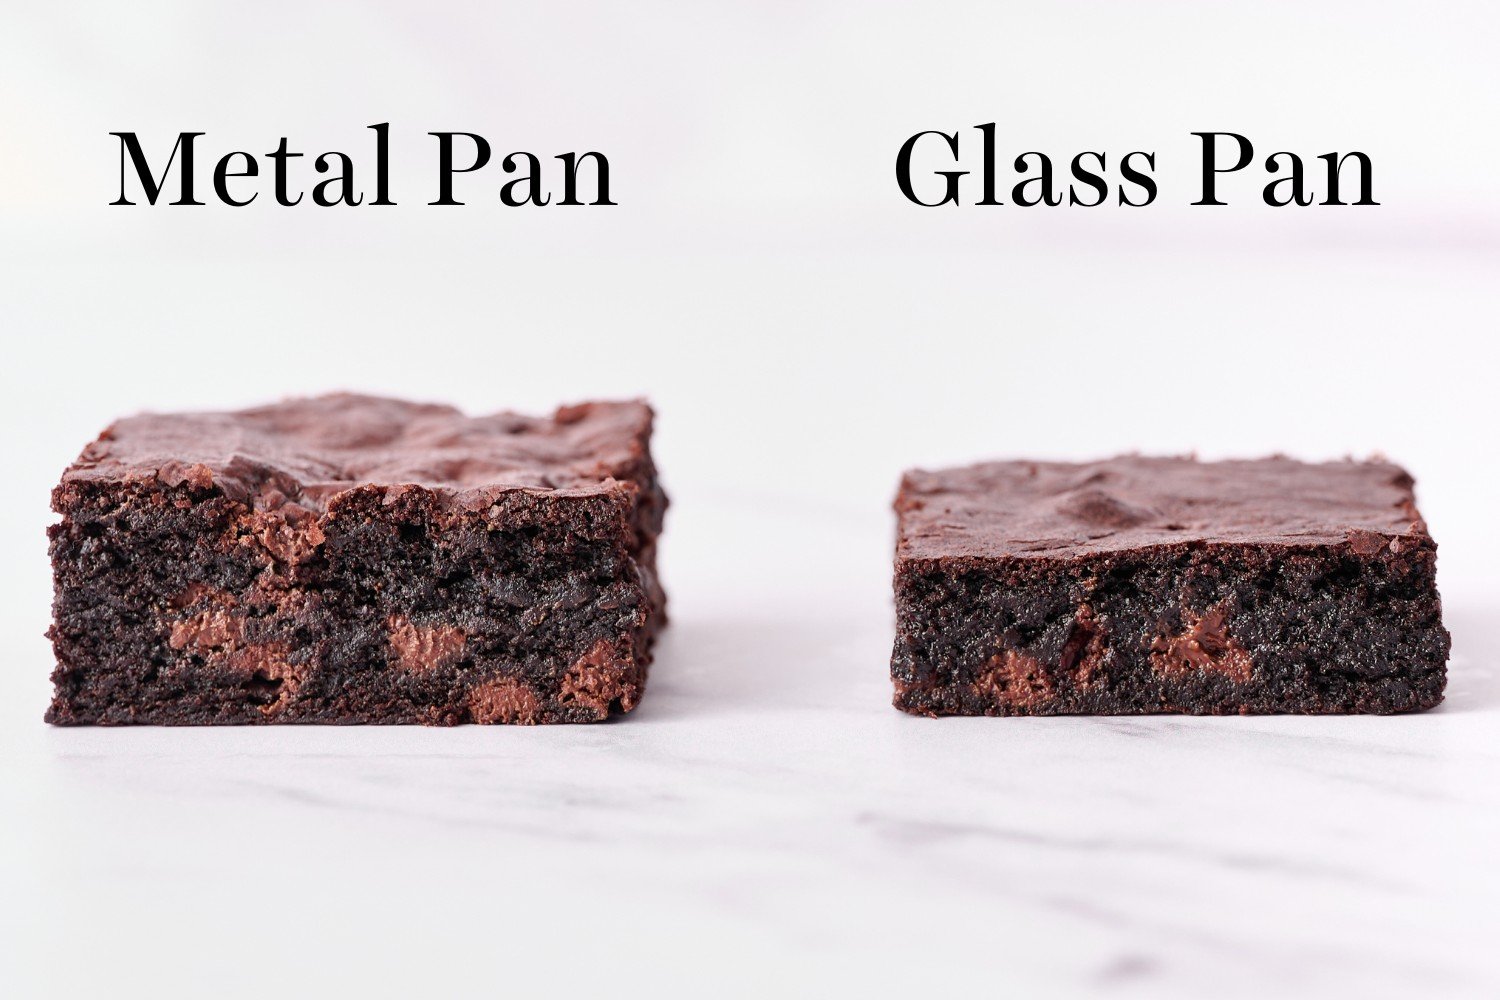
Metal conducts heat far more effectively. If all you have is glass or ceramic, add an extra 5-10 minutes baking time. Learn more about the differences between Glass vs. Metal Baking Pans here.
Storing & Freezing Brownies
Store in an airtight container for up to 3 days at room temperature or up to 5 days in the fridge. They are fudgier when they’re chilled!
To freeze, wrap the cooled whole slab or individual slices of brownies in plastic wrap inside an airtight container. Store in freezer for up to 3 months. Thaw overnight in the fridge, or for a couple hours at room temperature, before serving.
FAQs
Yes! Double all ingredients and bake in a 9 by 13-inch light-colored metal baking pan (don’t use a glass pan!) and add a few minutes to the baking time.
I prefer no baking soda or baking powder for rich, dense brownies that are not even remotely cakey. If you’re team cakey, don’t even bother with this recipe. It’ll be far too chewy and fudgy for you!
You can, but note that the brownies will be thinner and may not develop that shiny crust on top.
Not only does this make the recipe quicker and easier, but it yields denser, chewier, and fudgier brownies.
I haven’t tested that, but readers have had success with a 1:1 gluten-free flour blend. You may need to add 1/4 teaspoon xanthan gum if your GF blend doesn’t have any binders.
Yes, replace the butter with an equal amount of a vegan butter block that’s firm at room temperature. Use dairy-free chocolate chips. Or, try my Coconut Oil Brownies with dairy free chocolate instead.
I have not found a suitable replacement for the eggs in brownies yet. Feel free to experiment!
A cake tester or toothpick inserted into the center should come out with moist crumbs attached. For me, 30 minutes yields my perfect brownie that’s just ever-so-slightly gooey in the center. If you prefer a drier consistency, bake for 33-35 minutes.
Surprisingly, the best tool is a plastic knife! Yes, like the ones you buy for a picnic or BBQ. If you don’t have one, use a large sharp knife and run under hot water and wipe off after each slice.
Email This Recipe
Enter your email, and we’ll send it to your inbox.
Ingredients
- 5 tablespoons (71 grams) unsalted butter
- 1 1/4 cups (249 grams) granulated sugar
- 2 large eggs plus 1 egg yolk, cold
- 1 teaspoon vanilla extract
- 1/3 cup (74 grams) neutral oil (like vegetable or avocado)
- 3/4 cup (75 grams) cocoa powder*
- 1/2 cup (63 grams) all-purpose flour, measured correctly
- 1 tablespoon cornstarch
- 1/4 teaspoon fine sea salt
- 3/4 cup (128 grams) semisweet chocolate chips

Instructions
- Preheat the oven to 325°F. Line an 8 by 8-inch light-colored metal pan** with foil or parchment paper and spray with nonstick cooking spray.
- In a microwave-safe bowl, add the butter and sugar. Microwave for about 1 minute, or until the butter is melted. Whisk in the eggs and egg yolk, whisking vigorously for 1 minute. Whisk in the vanilla, then stir in the oil and cocoa powder.
- With a rubber spatula, stir in the flour, cornstarch, and salt until combined. Stir in the chocolate chips.
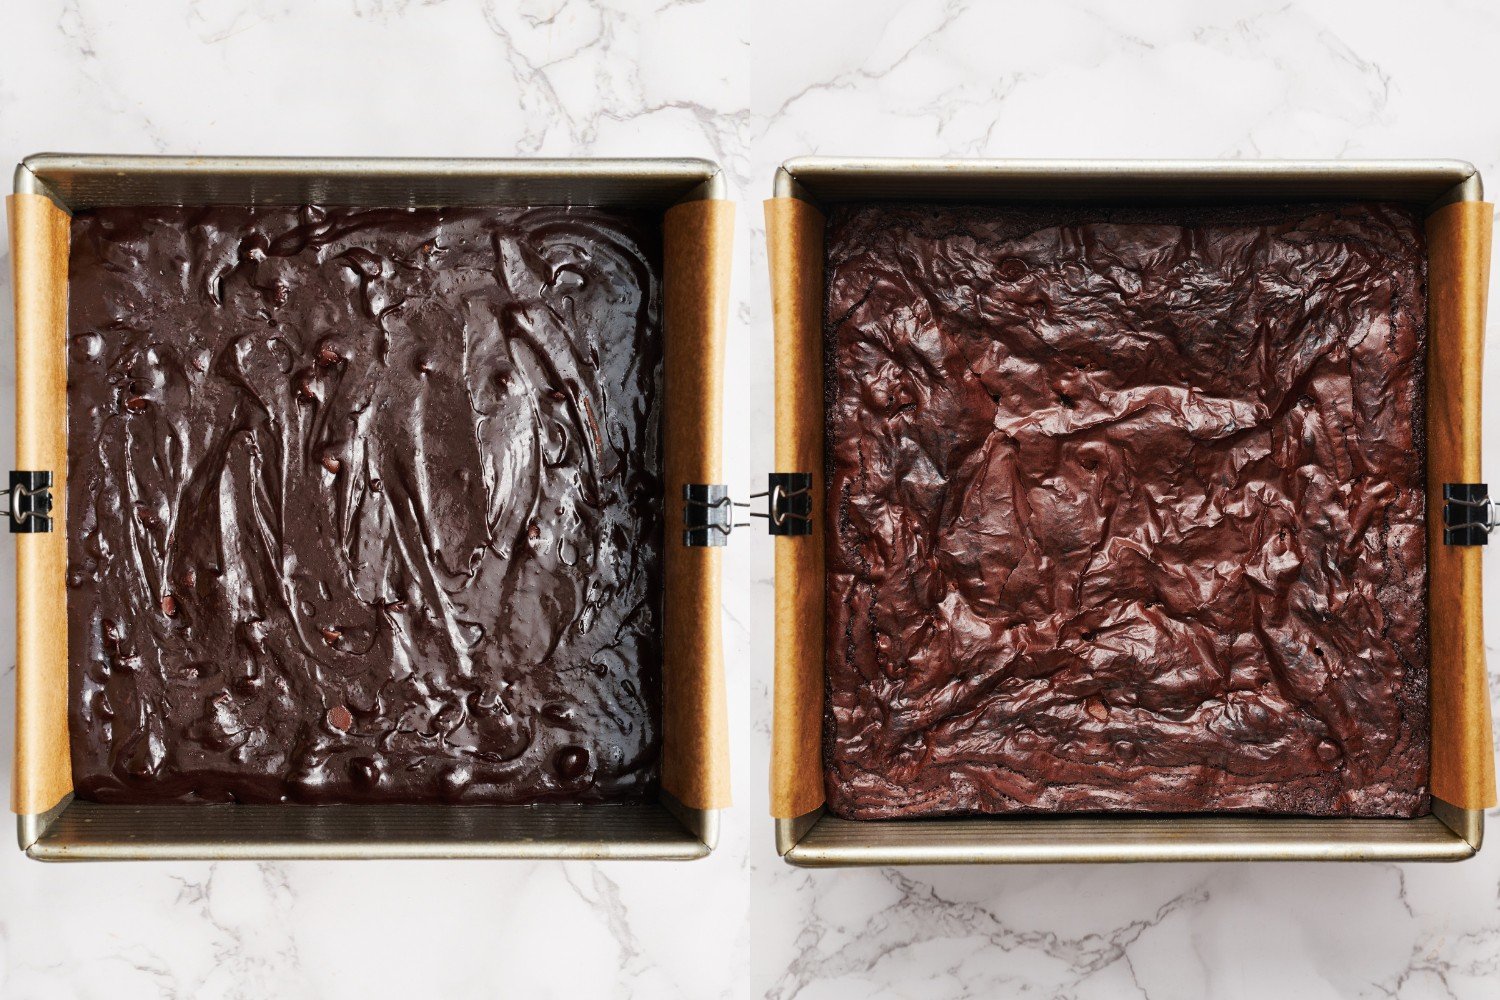
- Spread the brownie batter evenly into the prepared pan. Place in the oven and bake for 30 minutes, or until the brownies are set and a cake tester inserted into the center has moist crumbs attached. Do not overcook. Let cool completely to solidify before cutting and serving.
- Brownies can be stored in an airtight container at room temperature for up to 3 days. Brownies will be gooey when served warm, chewy when served at room temperature, and fudgy when served chilled.
Notes
More Brownies Recipes You’ll Love:
- Malted Brownies – made with brown butter!
- Toffee Brownies
- Copycat Cosmic Brownies – ultimate nostalgia!
- Peanut Butter Stuffed Brownies
- How to Make the Perfect Caramel Sauce
This recipe was originally published in 2017 and has been updated with additional baking tips and new photos. Recipe photos by Joanie Simon and Baking Science photos by Ashley McLaughlin.


Literally the perfect brownie recipe!!! Literally. I love brownies but always have trouble getting them done in the middle. Mine usually turn out too gooey in the middle and not quite done. I’ve never been able to get that perfect brownie with the crinkly top. Until now! When my oven timer went off, I expected another liquid mess but instead pulled out perfect brownies! So easy, perfect, and delicious!
So delicious! My husband immediately declared these to be “repeat brownies”, so I’ll definitely be making them again!
was deliciouss. i doubled the batter, dumped all the ingredients in and used a dish. still turned out great. will use again. siblings declared an all out war over the leftover batter. mom: its very good, older sister :oooh this is good. younger sister: this is very good zoya. LOVED ITT.
the brownies weren’t coming out of the dish properly. i floured the dish and cooled them, wonder why.
Glad to hear everyone loved these, Zoya! As for your brownies not coming out of the dish properly, did you use foil or parchment paper? Only flouring your pan will not work. You really want to make sure they are sprayed with nonstick cooking spray prior to putting in the batter. This will ensure no stick next time 🙂
My « go to » brownie recipe. I loved the « science » Tessa provided about the shiny top, totally worked.
Loved this brownies’ recipe, it was really chocolatey and enough sweet. It definitely goes to my recipes to keep, and the best part, it was easy to bake
So happy you enjoyed your brownies, Nahir!
Who doesn’t love brownies?! But these….THESE! Are TO.DIE FOR. Delish!! A fav in my house!
So happy to hear this!
Perfect shiny top crust!
These brownies are the best I’ve ever baked! I have been always looking for a recipe that could achieve the chewiness of the boxed ones and you definitely nailed it. And thank you so much for explaining every step and the importance of every ingredient so accurately. The results are mouthwatering. This will be my go to recipe from now on!!
These brownies are the best! I have been always looking for a recipe that can achieve the chewiness of the boxed ones and you definitely made it. What I love the most is how accurately you describe all the steps to achieve professional results. And they are just DELICIOSÍSIMOS! (sorry, when I get excited my Spanish always takes over ) This will be my go to recipe from now on. Thank you!
Thank you so much for your kind comment, Carolina! I’m so pleased you love these brownies!! 🙂
Hi! Is there any special reason for the use of foil instead of parchment paper?
Nope, just a personal preference. I think the brownies end up looking cleaner and neater on the sides with parchment, so if esthetics are a concern of yours, I would recommend parchment paper. Foil is nice too because you can just press it into the sides of the pan and spray-much easier to use.
Have made this recipe several times, most recently for the May 2021 challenge. We are a chewy brownie family fan!! Amazing and so easy!!
Hi do you micro the sugar too with the butter? Or you add the sugar after the butter is out of the microwave ?
Microwave the sugar and butter together, as stated in the directions 🙂 You can also watch the video right below the directions on this page to see what I do as well!