


Tessa’s Recipe Rundown
Taste: These homemade Cosmic Brownies have a much better chocolate flavor than the store-bought ones! No weird artificial flavors here.
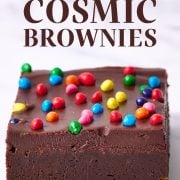
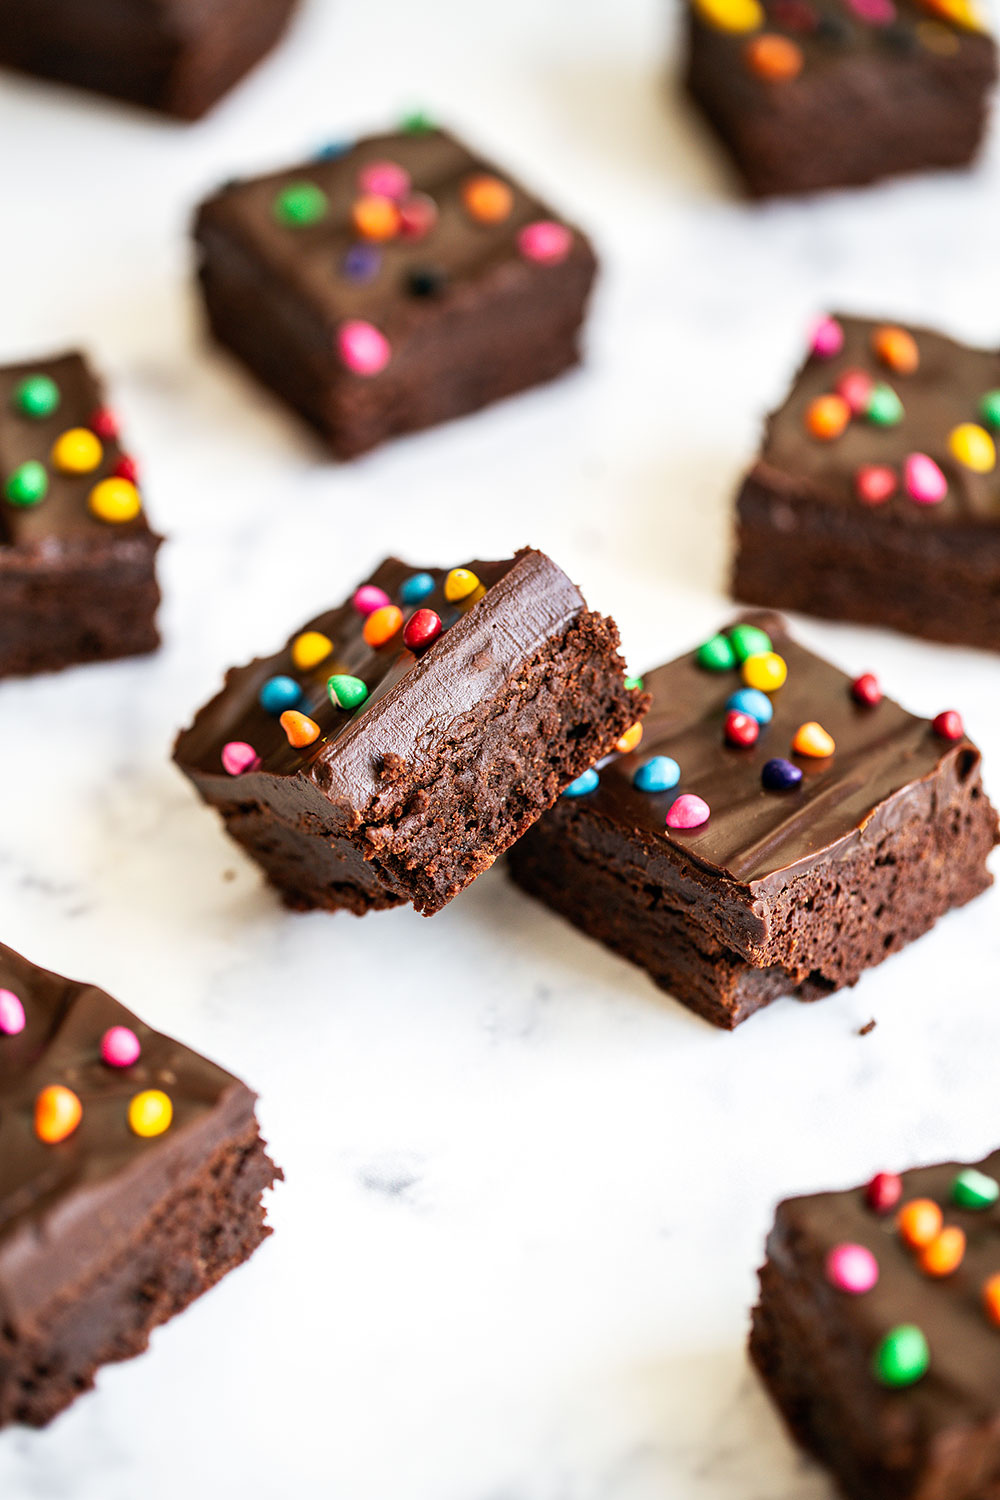
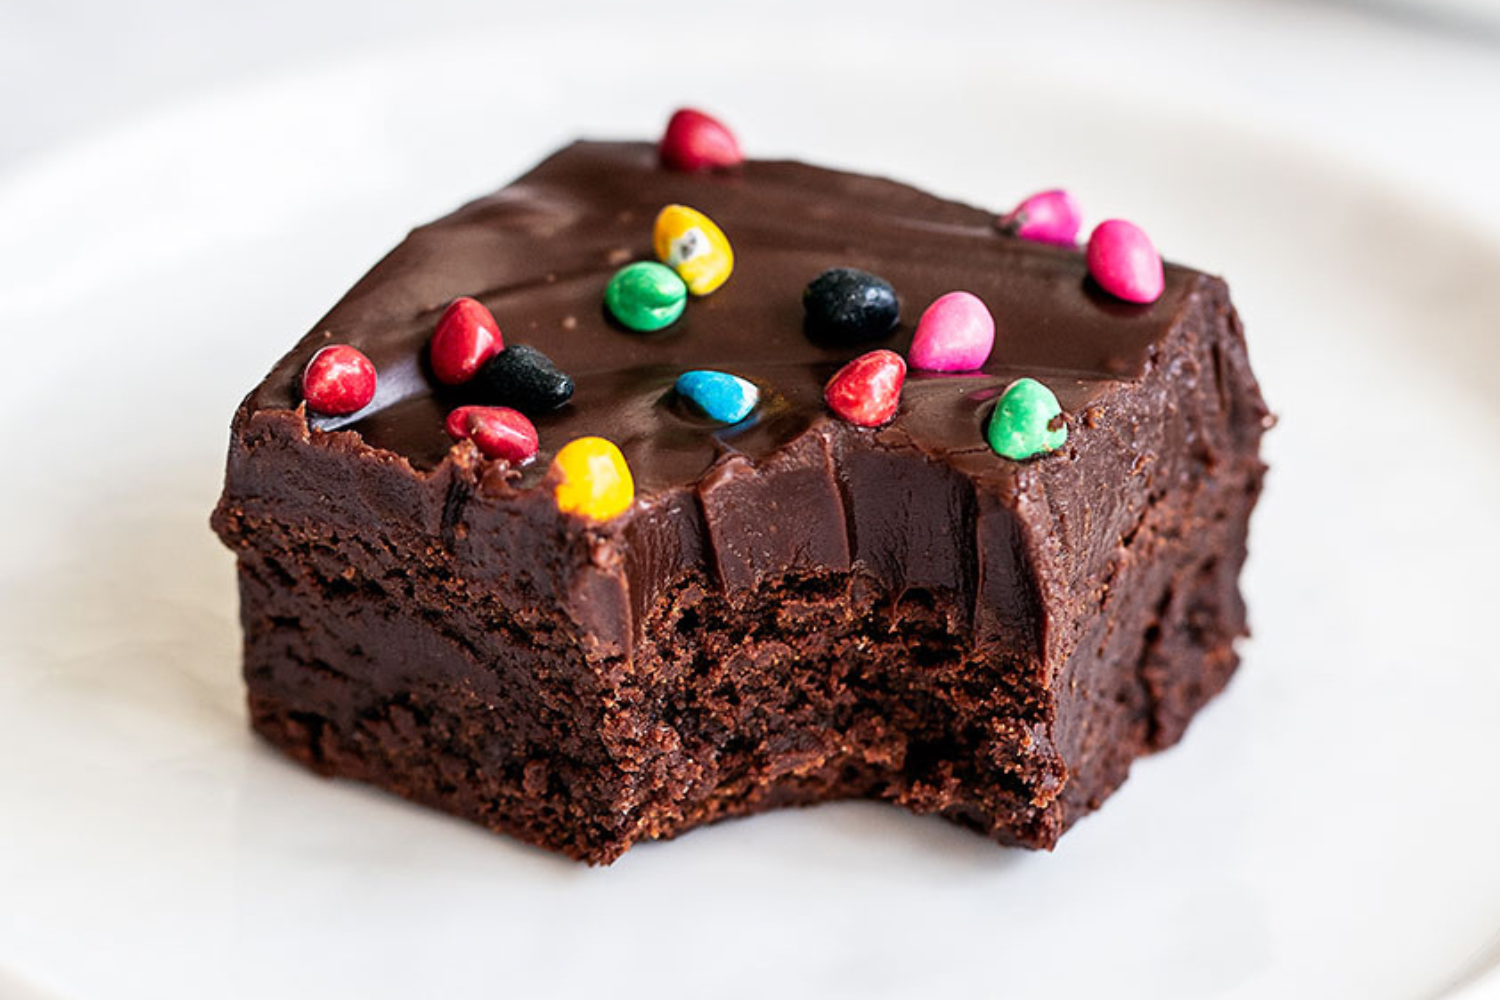
Texture: Ultra-rich, fudgy, and chewy. So good.
Ease: Very easy!! Enjoy a batch of these in just over an hour.
Why You’ll Love This Recipe: An easy DIY version of your favorite nostalgic childhood treat.
This post may contain affiliate links. Read our disclosure policy.
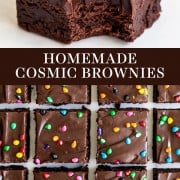

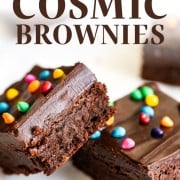
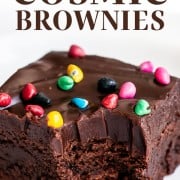
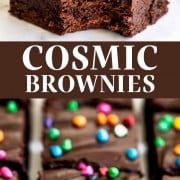
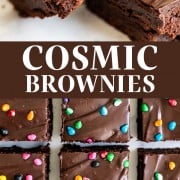
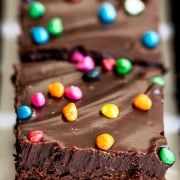

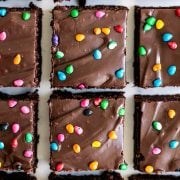
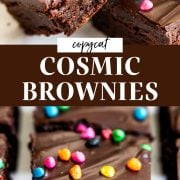
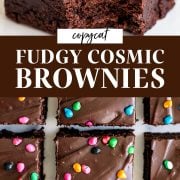
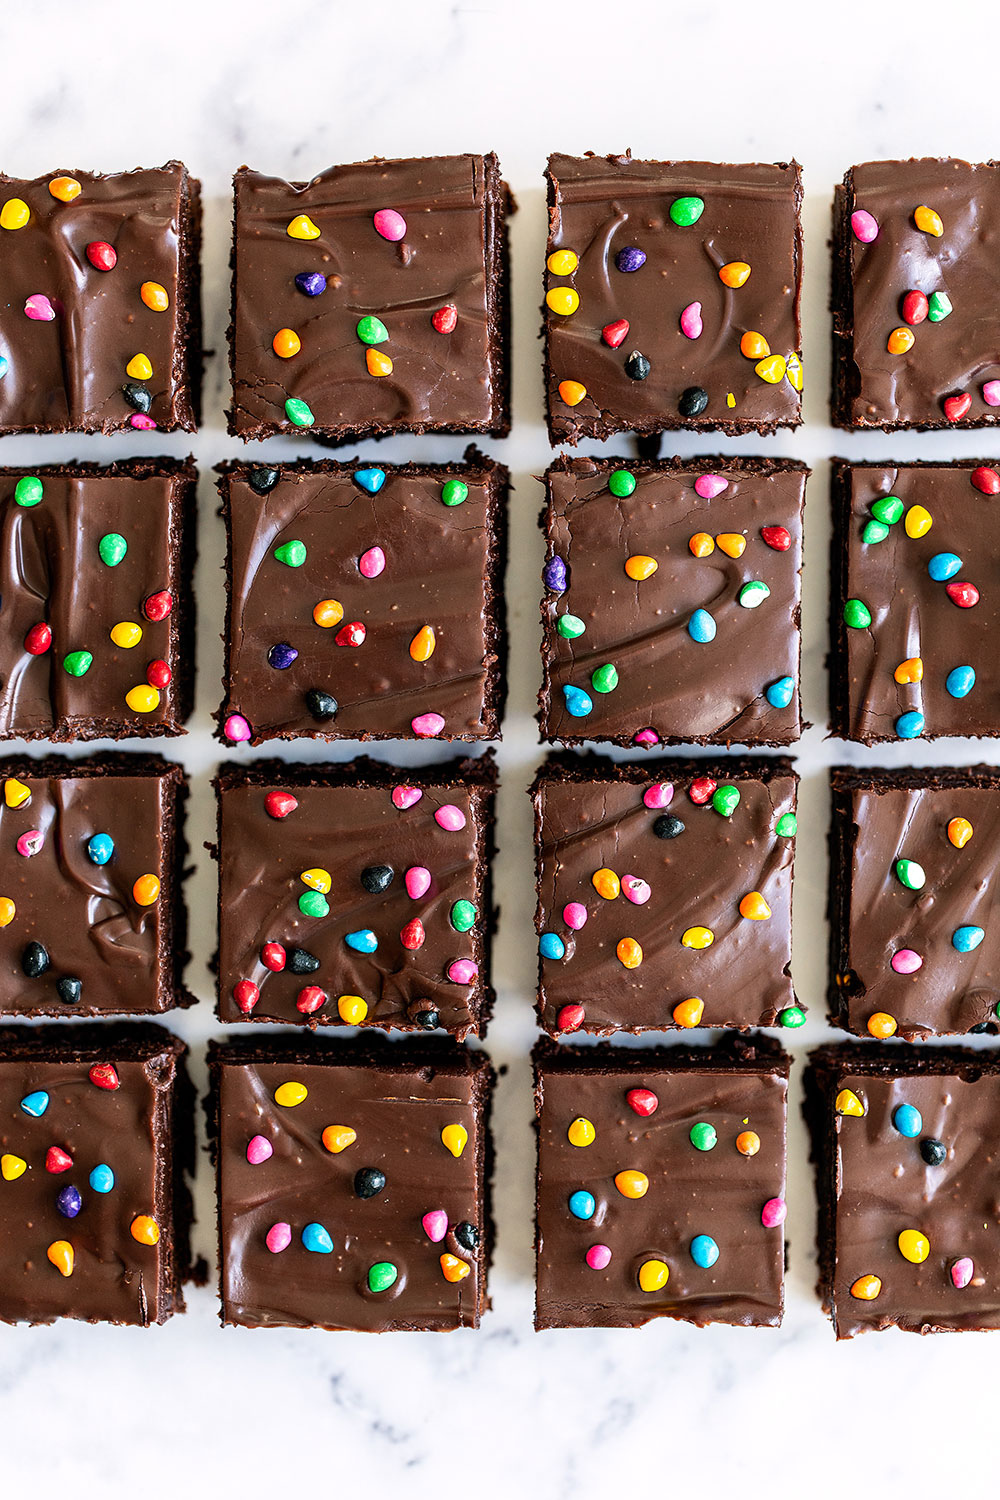
These Homemade Cosmic Brownies will evoke all those childhood memories of snacking on those little plastic-wrapped store-bought brownies – but these babies are SO much better!
Real, decadent, and satisfying chocolate, without all the crazy artificial ingredients.
When I was a kid in elementary school, I’d ALWAYS request a Little Debbie brownie as my special treat in my lunch box.
Before Cosmic Brownies, there were only the Little Debbie brownies with the nuts. I would always pick off all the nuts.
I knew I had to make my own version from scratch.
These little brownies are ultra-rich and fudgy, almost like candy. I got as close to the texture of the store-bought kind as I possibly could. I hope you love them as much as I do!

Sprinkle of Science
What are Cosmic Brownies?
Cosmic Brownies, created by snack company Little Debbie, basically summarize a childhood in the 1990s in each bite. They are chewy with a rich, fudgy frosting that’s dotted with rainbow crunch sprinkles. They come individually wrapped and are super sweet and quite artificial tasting.
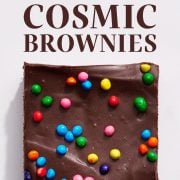
In creating my copycat version, I opted for a fudgy chocolate ganache topping that delivers a much better burst of chocolate flavor.
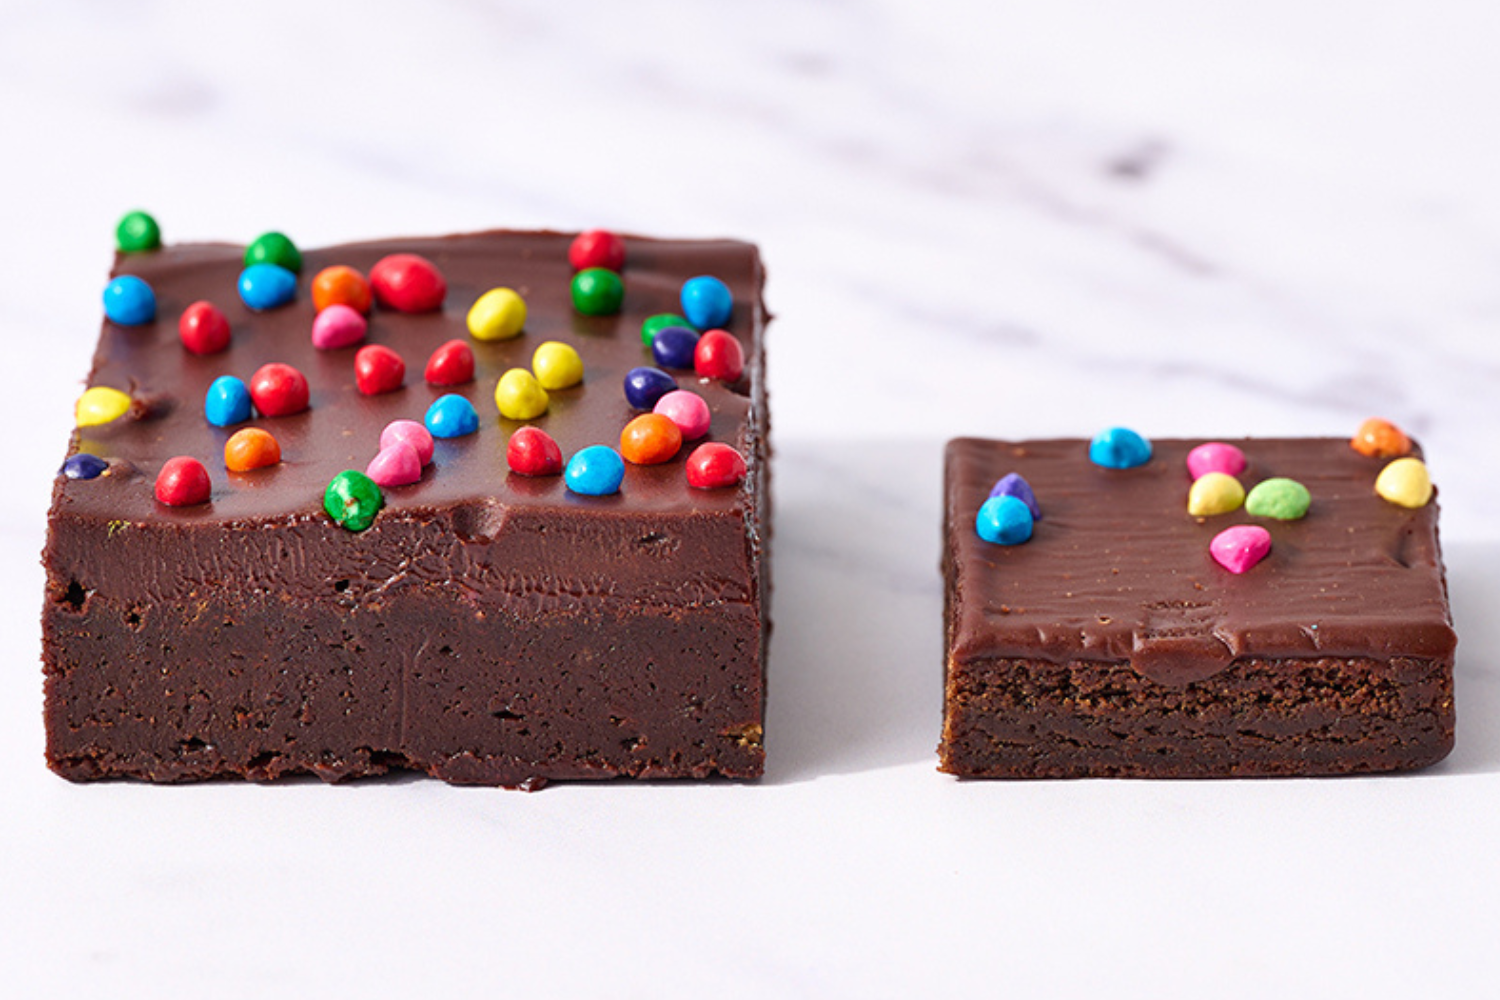
Check out the side-by-side below – my homemade version is on the left and the store-bought is on the right:
Ingredient Notes for Success
Butter vs. Oil in Brownies: Which is Better?
Brownies made with butter are fudgier and softer than oil brownies. You’ll find these Cosmic Brownies call for all butter to provide the best flavor and melt-in-your-mouth texture.
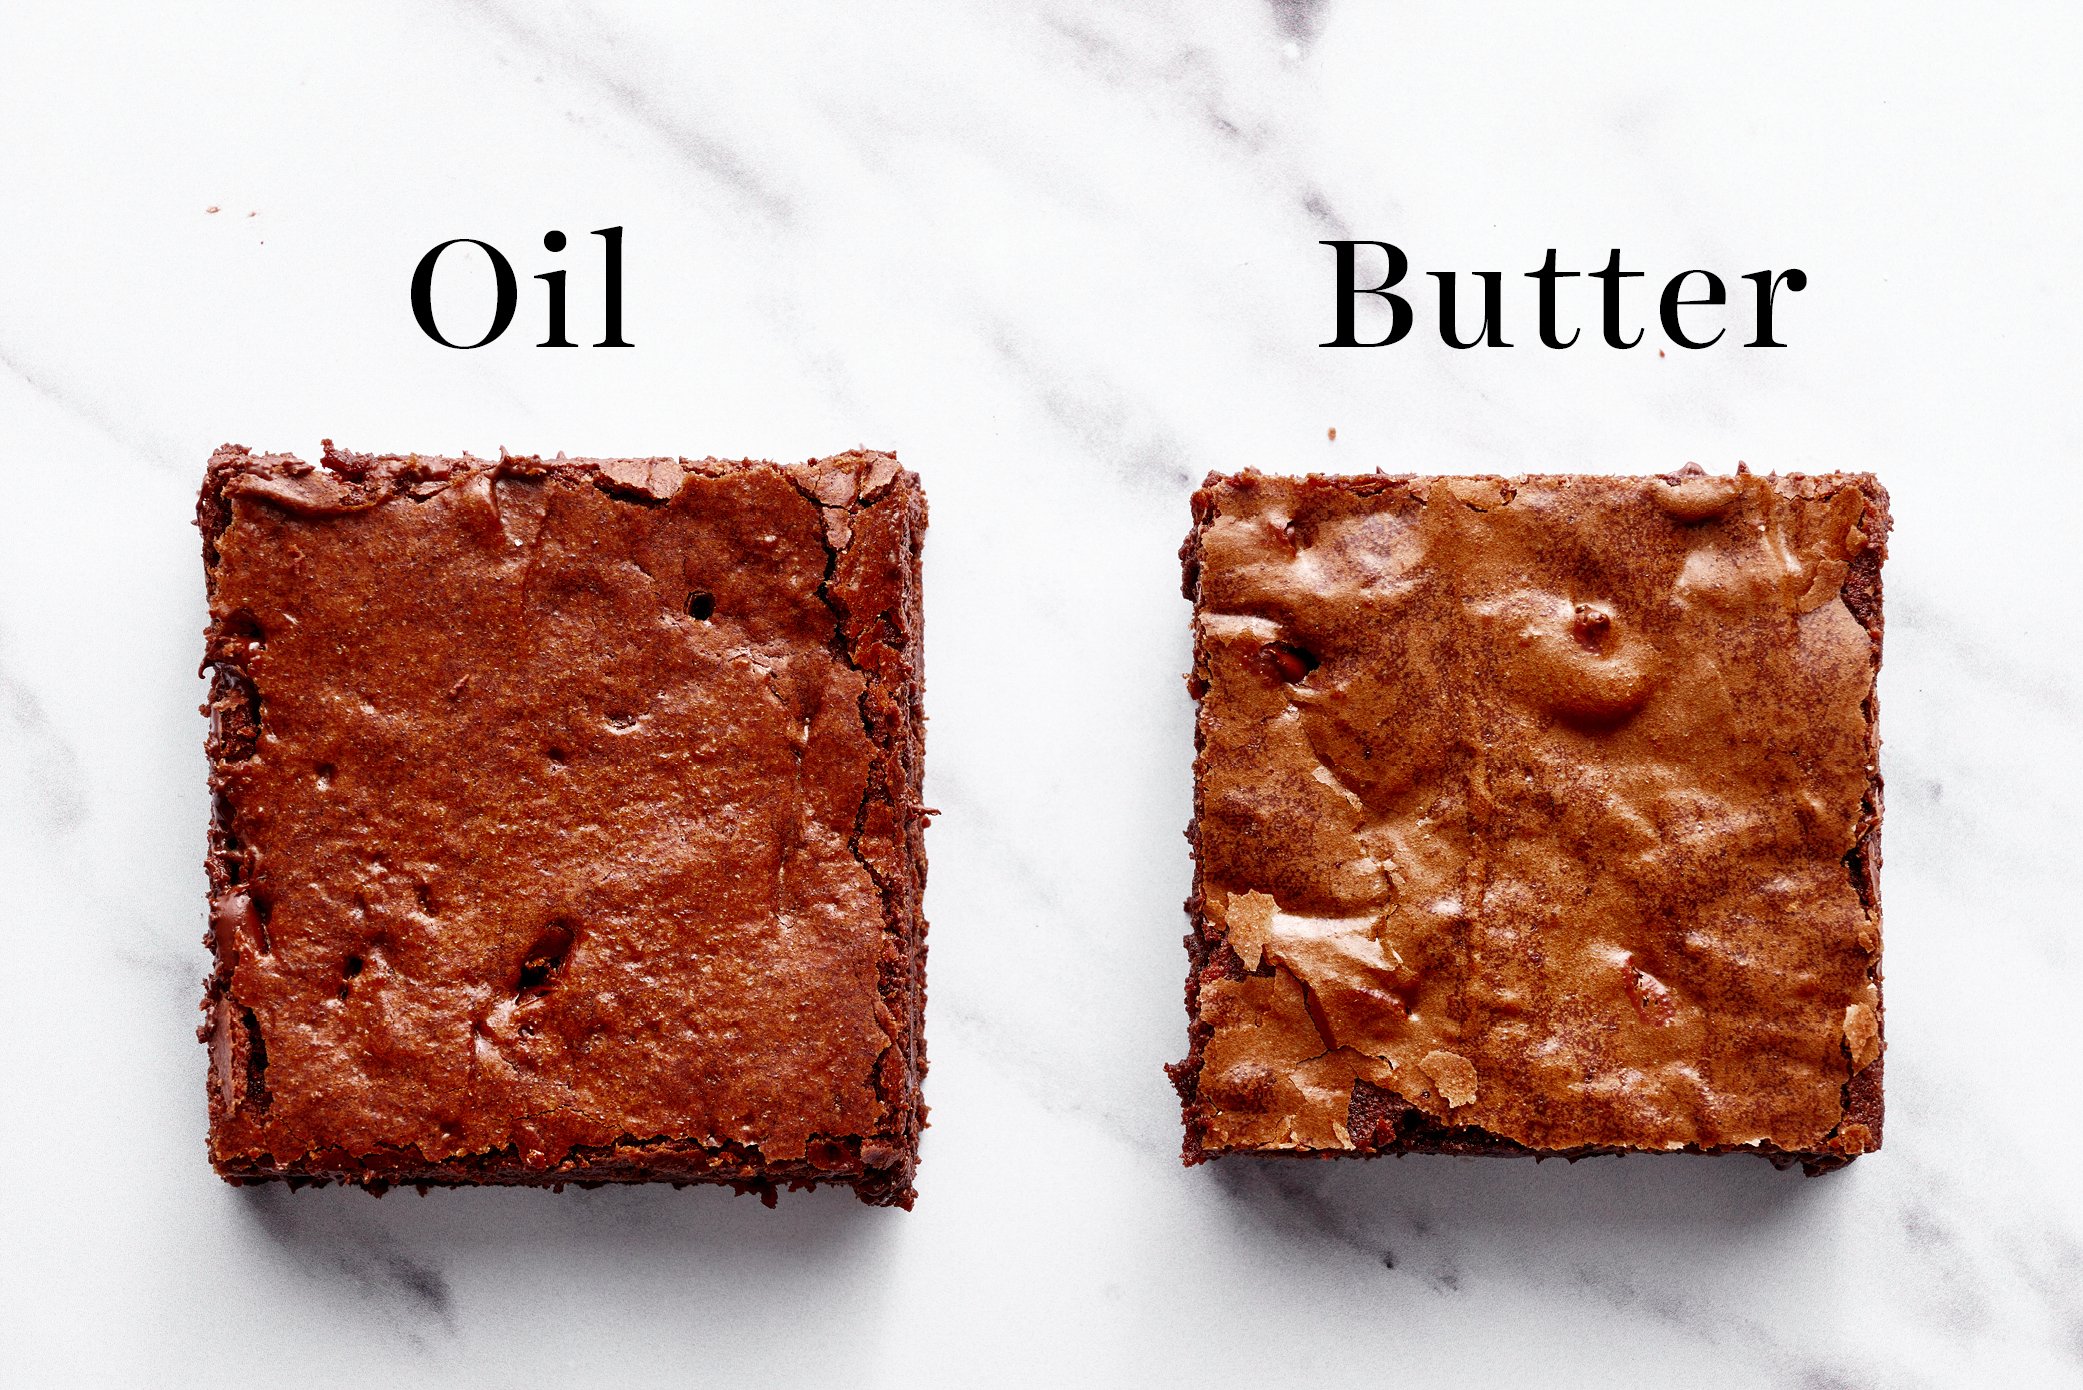
Check out my Butter vs. Oil in Baking article for a full breakdown on each of these fats and how they affect tenderness, flavor, and texture in baked goods (and not just brownies).
Cornstarch + Corn Syrup = Secret Ingredients
There is a small amount of both cornstarch and corn syrup in this recipe to help make the brownies super chewy and fudgy.
Feel free to omit the corn syrup or use golden syrup if you prefer, but note that your brownies just won’t quite have that same Cosmic texture. Don’t skip the cornstarch – learn why cornstarch is important in brownie recipes here.
Extra Egg Yolk = Fudgy & Chewy!
You’ll notice in most of my brownie recipes I add an extra egg yolk. This adds fat and protein which translates to rich, fudgy, and chewy brownies.
How to Avoid Dry, Crumbly Cosmic Brownies
The key is to measure your dry ingredients properly. It’s super easy to accidentally add too much flour and cocoa powder – unless you use a digital kitchen scale to ensure 100% accuracy.
If you don’t have a scale, use the spoon and level method for both the flour and cocoa powder to ensure accuracy, and avoid dry, hard, cakey, or crumbly brownies. You can learn more about how to measure ingredients properly here.
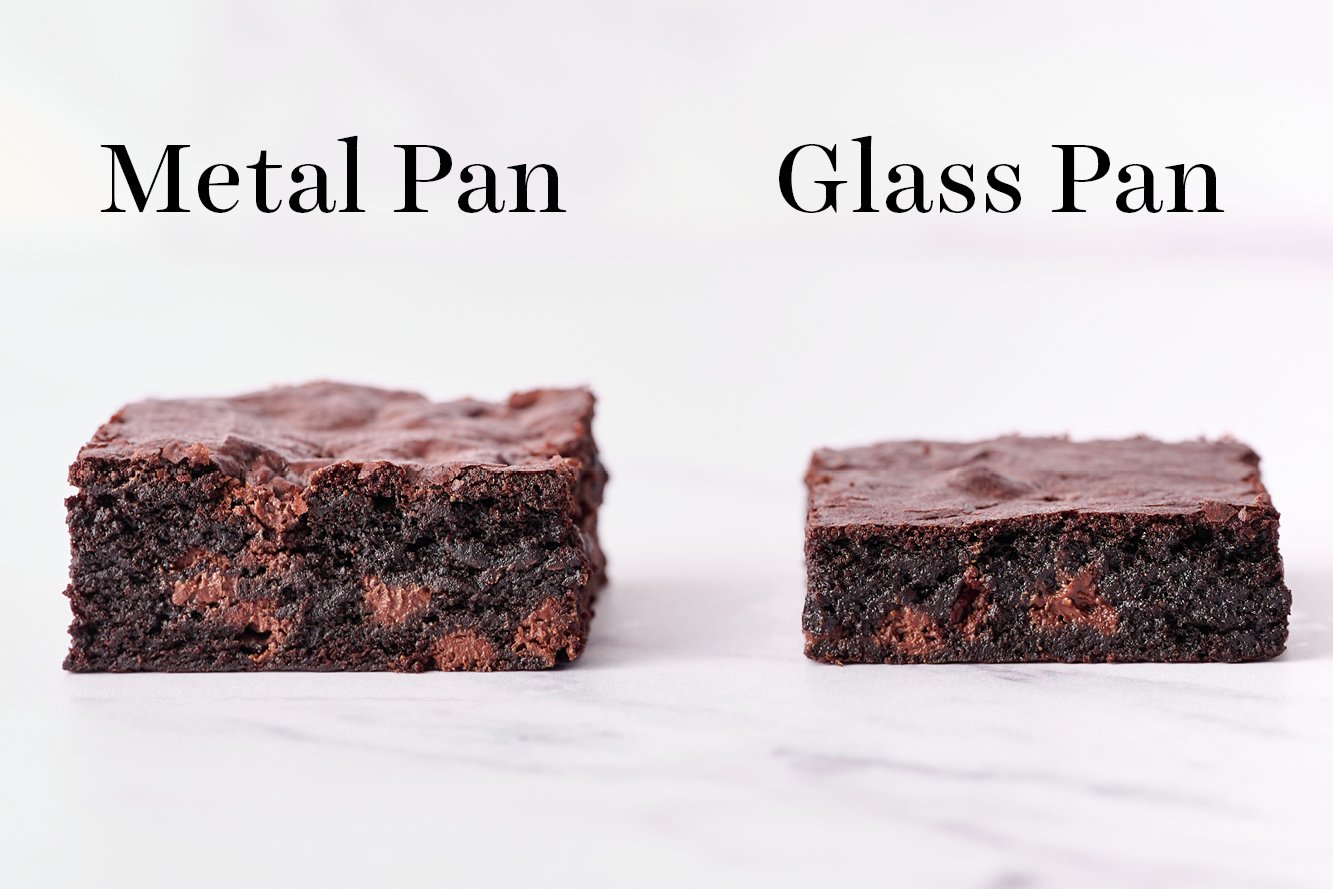
The Best Brownie Baking Pan
- I highly recommend using a light-colored metal baking pan. This is my favorite baking pan for brownies, blondies, cheesecake bars, cookie bars, and more.
- Avoid using dark-colored metal pans; the darker the color, the more likely you are to burn the edges or have dry edges.
- Glass or ceramic baking pans will take LONGER to bake these brownies, and the texture may become dense and gummy. Learn more in my Glass vs. Metal Baking Pans article.
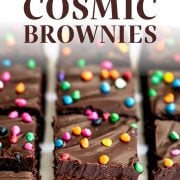
How to Cut Brownies Perfectly
Use a large sharp knife and run it under hot water, wiping it off completely between slices.
How to Store
Frosted, sliced brownies can be stored in an airtight container for 3 days at room temperature or for 1 week in the fridge. They are best served chilled, for maximum fudginess.

FAQs
I used to use Wilton Rainbow Crunch for topping Cosmic Brownies (as seen in the pictures here), but those are increasingly difficult to find. This Baker’s Choice version is available on Amazon, but feel free to use rainbow sprinkles, mini M&Ms, or whatever you like to top these brownies.
Yes, just not your brownies may not be as chewy. You can use golden syrup or invert syrup, instead.
Yes, simply double all ingredients and bake in a 9×13-inch metal baking pan, adding 2-3 minutes extra baking time.
Email This Recipe
Enter your email, and we’ll send it to your inbox.
Ingredients
For the brownies:
- 10 tablespoons (142 grams) unsalted butter
- 1 cup (200 grams) granulated sugar
- 1/3 cup (67 grams) packed light brown sugar
- 3/4 cup plus 2 tablespoons (88 grams) unsweetened cocoa powder, sifted
- 1/2 teaspoon vanilla extract
- 2 large eggs plus 1 egg yolk
- 1 tablespoon corn syrup
- 2/3 cup (85 grams) all-purpose flour
- 1 tablespoon cornstarch
- 1/4 teaspoon fine sea salt

For the frosting:
- 1/2 cup heavy cream
- 1 1/2 cups (255 grams) semisweet chocolate chips
Rainbow Candy-Coated Chocolate Chips , or mini M&M’s, sprinkles, or other candy, for topping
Instructions
Make the brownies:
- Preheat the oven to 350°F. Line an 8-by-8-inch metal baking pan with parchment or foil and spray with cooking spray.
- In a large microwave-safe bowl, melt the butter for about 90 seconds on high power. Stir in the granulated sugar, brown sugar, and cocoa powder. If still very hot, let cool slightly before adding in the vanilla, eggs, egg yolk, and corn syrup. Stir until very well combined. Add in the flour, cornstarch, and salt and stir until just combined. Batter will be thick. Pour into the prepared pan and bake for 25 minutes. Let cool completely in the pan.
Make the frosting:
- Place the cream in a small microwave-safe bowl and microwave on high for 1 minute. Add in the chocolate chips. Let stand for 3 minutes before stirring until smooth. Pour over the cooled brownies and smooth evenly. Sprinkle with the Rainbow Candy-Coated Chocolate Chips. Refrigerate for 1 to 2 hours, or until the frosting is set, before cutting.
- Brownies can be stored in an airtight container for 3 days at room temperature and for 1 week in the fridge. Brownies are best served chilled.
Notes
Where to Find Rainbow Candy-Coated Chocolate Chips?
I used to use Wilton Rainbow Crunch for topping Cosmic Brownies, but those are increasingly difficult to find. This Baker’s Choice version is available on Amazon, but feel free to use rainbow sprinkles, mini M&Ms, or whatever you like to top these brownies.More Brownie Recipes:
- Best Chewy Brownies – my most popular recipe!
- Nutella Brownies
- Raspberry Brownie Recipe
- Toffee Brownies
- Malted Brownies
This recipe was originally published in 2014 and has been updated with recipe improvements and new photos. Photos by Ashley McLaughlin.


This recipe was good! The batter was so so thick ! It was also very bitter. I would use milk chocolate chips next time when I make the ganache.
I have a 9×9 square pan but not an 8×8. How would you recommend modifying the time for this recipe? Thank you!
Hi Grace! We haven’t tried these in a 9×9 pan ourselves, but I’d start checking for doneness at least 5 minutes sooner.
Thank you for responding! That suggestion sounds good!
I wish I read the reviews before making these brownies – the brownies are cosmically great but the ganache is not. The ganache tastes just like melted chocolate chips and I wish I’d left it off for the nostalgic cosmic brownie experience.
PS – many of the older reviews are for chocolate chip cookies?
Sooo good! I love the icing! I used 60% dark chocolate for the top because it’s what I had and not sure I’ll go back. Definitely will be making these again for my chocolate treat and it’s a browning my husband will eat! He likes them super fudgey and these are perfection! Going to try maple syrup next time instead of the corn syrup
Fudgy perfection! I don’t have a metal 8×8, used my glass pan greased but unlined. I didn’t have corn syrup or heavy cream. I subbed maple syrup and evaporated milk. Baked at 350F for 30 minutes.
Name-brand cosmic brownies always look delicious but leave me disappointed when they just taste overly sweet and artificial. I was happy to find the brownies from this recipe looked and tasted great! I did add 5 min of baking time since all I have is a glass 7×11″ baking pan. The advice for cutting brownies worked wonders as well. Thanks for a fun weekend treat, would happily make again.
I am about to make these brownies but for the frosting I don’t have heavy cream, can I use extra creamy oat milk?
Hi Jane! We haven’t tried that substitution; however, heavy cream typically has a much higher fat content than oat milk so the texture won’t be quite the same. How did your brownies turn out?
Incredible recipe! Easy to follow, easy to double in a 9×13” pan, super yummy, and very nostalgic! I keep coming back to these!
Has anyone else experienced the edges and surface being kind of crunchy? I followed the recipe to a T other than using and glass pan, and when my scale decided to turn itself off part way through measuring in the cocoa powder, so it’s possible there was a little too much or too little cocoa powder. Would a glass pan have caused this? Or a slight difference in the amount of cocoa used?
using *a glass pan
If it is the glass pan, would an 8 or 9 inch round be better than an 8×8 square glass pan?
🤦🏻♀️ 8 or 9 metal* pan