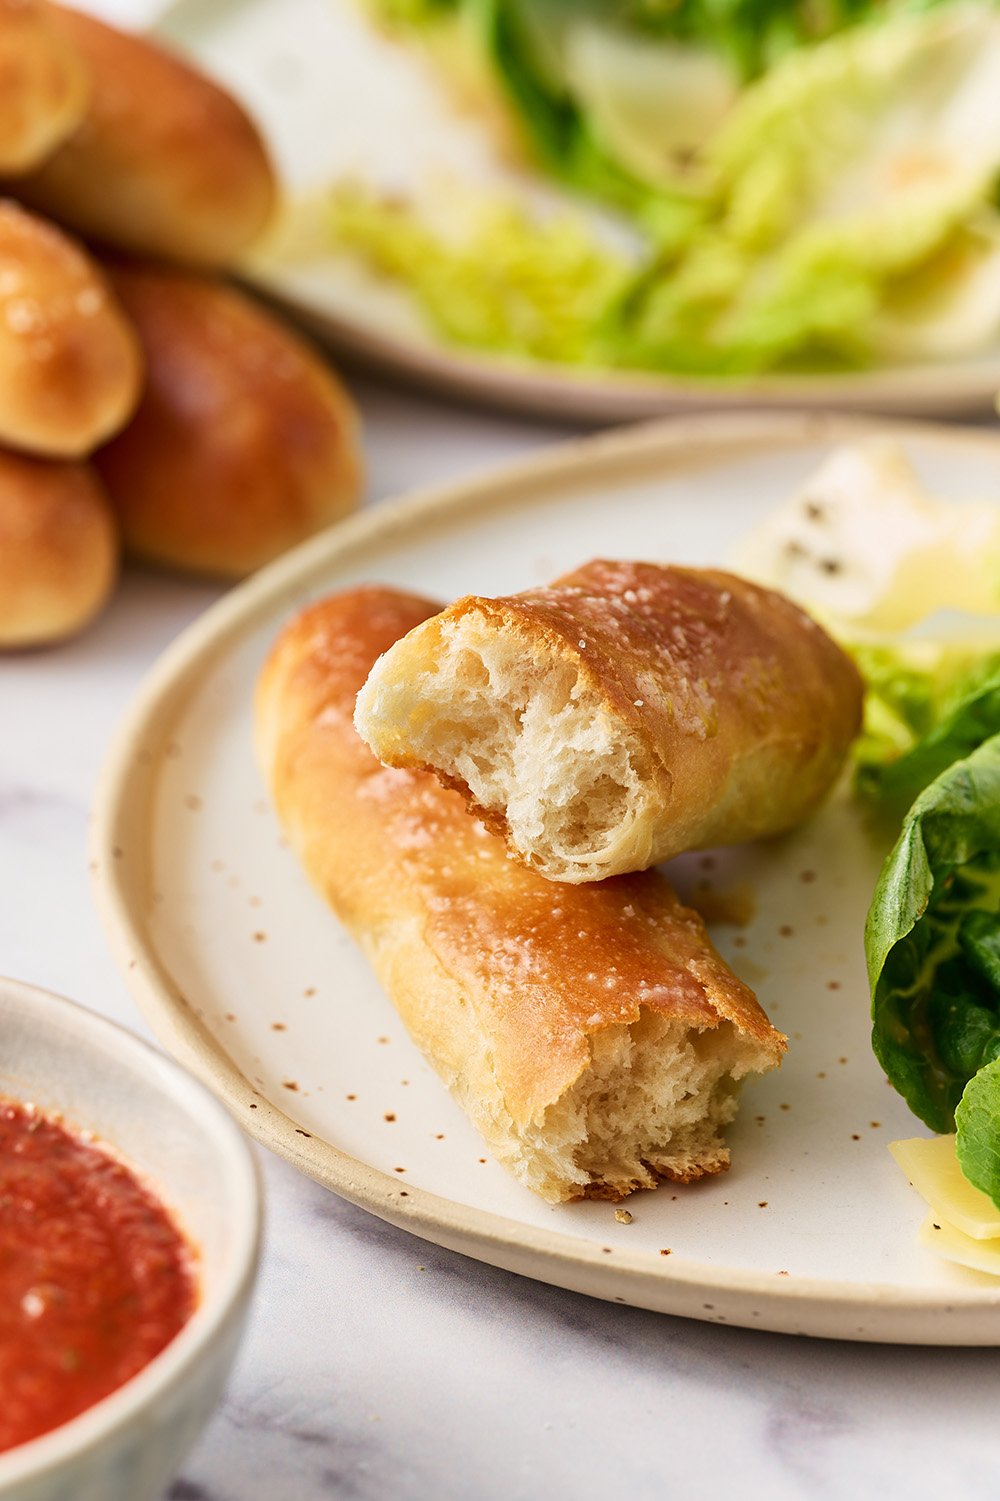
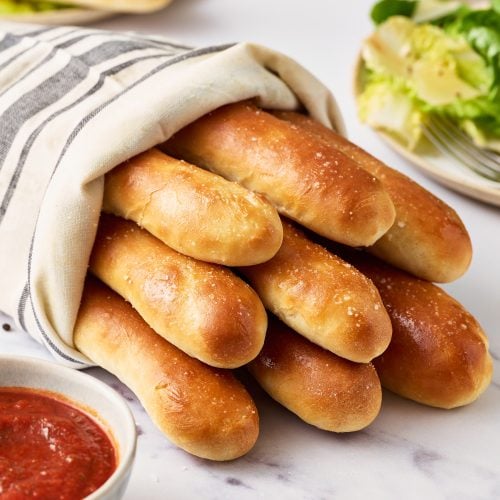
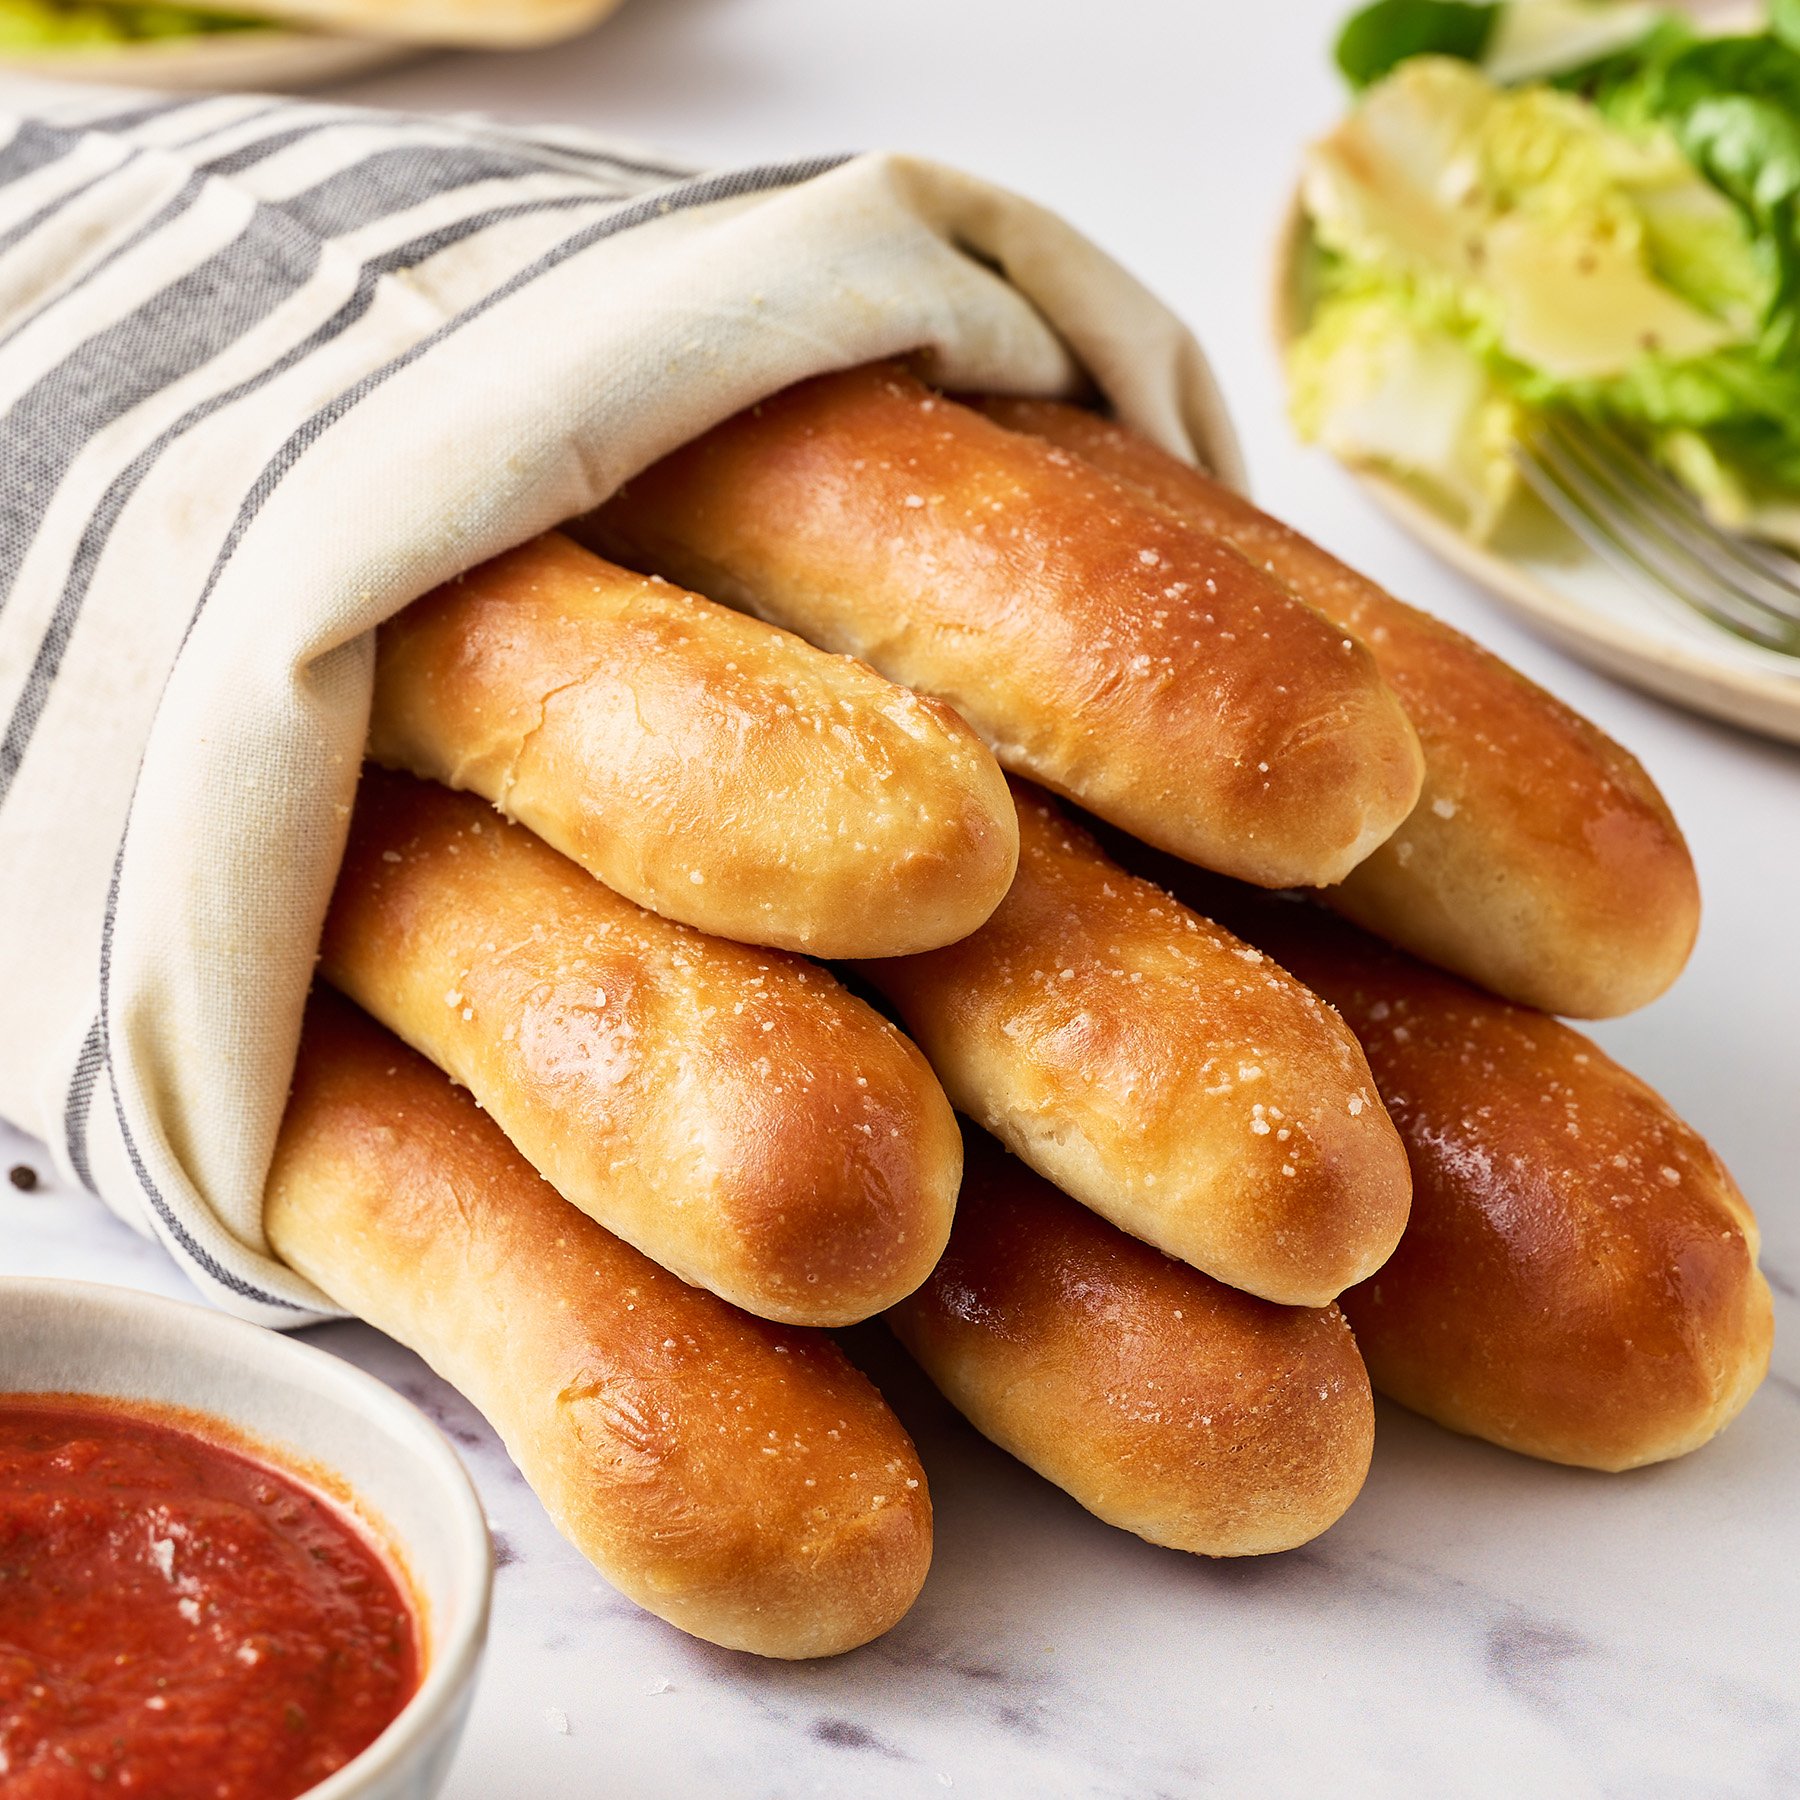
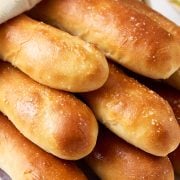
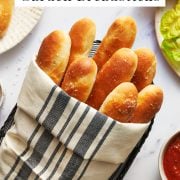
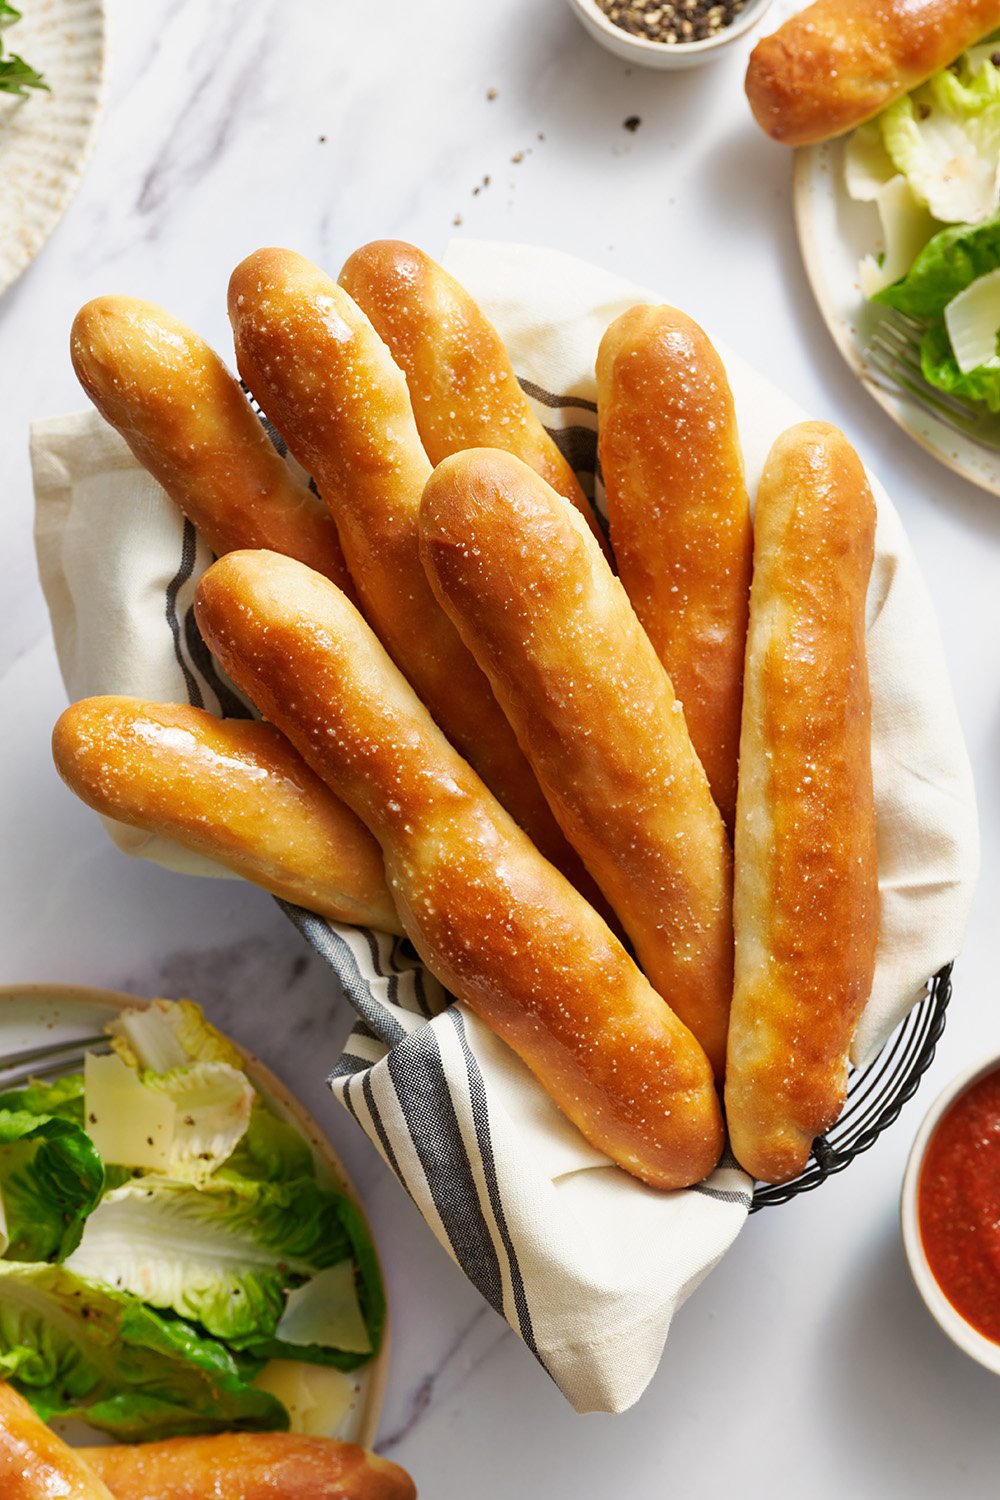
This simple recipe for Copycat Olive Garden Breadsticks makes buttery, garlic-scented, and chewy breadsticks that are utterly addictive! This breadstick recipe is the perfect complement to any meal, or a delicious snack all on its own.
Yield:
12 breadsticks
Prep Time:30minutes
Cook:14minutes
Tessa's Recipe Rundown...
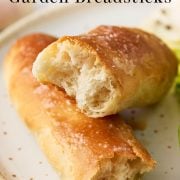
Taste: Buttery and garlicky, AKA amazing! Texture: These breadsticks have a bit of a golden crust but are soft and fluffy inside yet chewy throughout. Ease: Really easy! Homemade breadsticks may sound intimidating but there’s only a handful of ingredients and I’ve included step-by-step photos so you know exactly how to make them. Appearance: Mouthwatering. Pros: Have Olive Garden breadsticks at home whenever you want! Cons: These are dangerously addictive. Would I make this again? Mhmmm.
These Copycat Olive Garden Breadsticks are savory heaven.
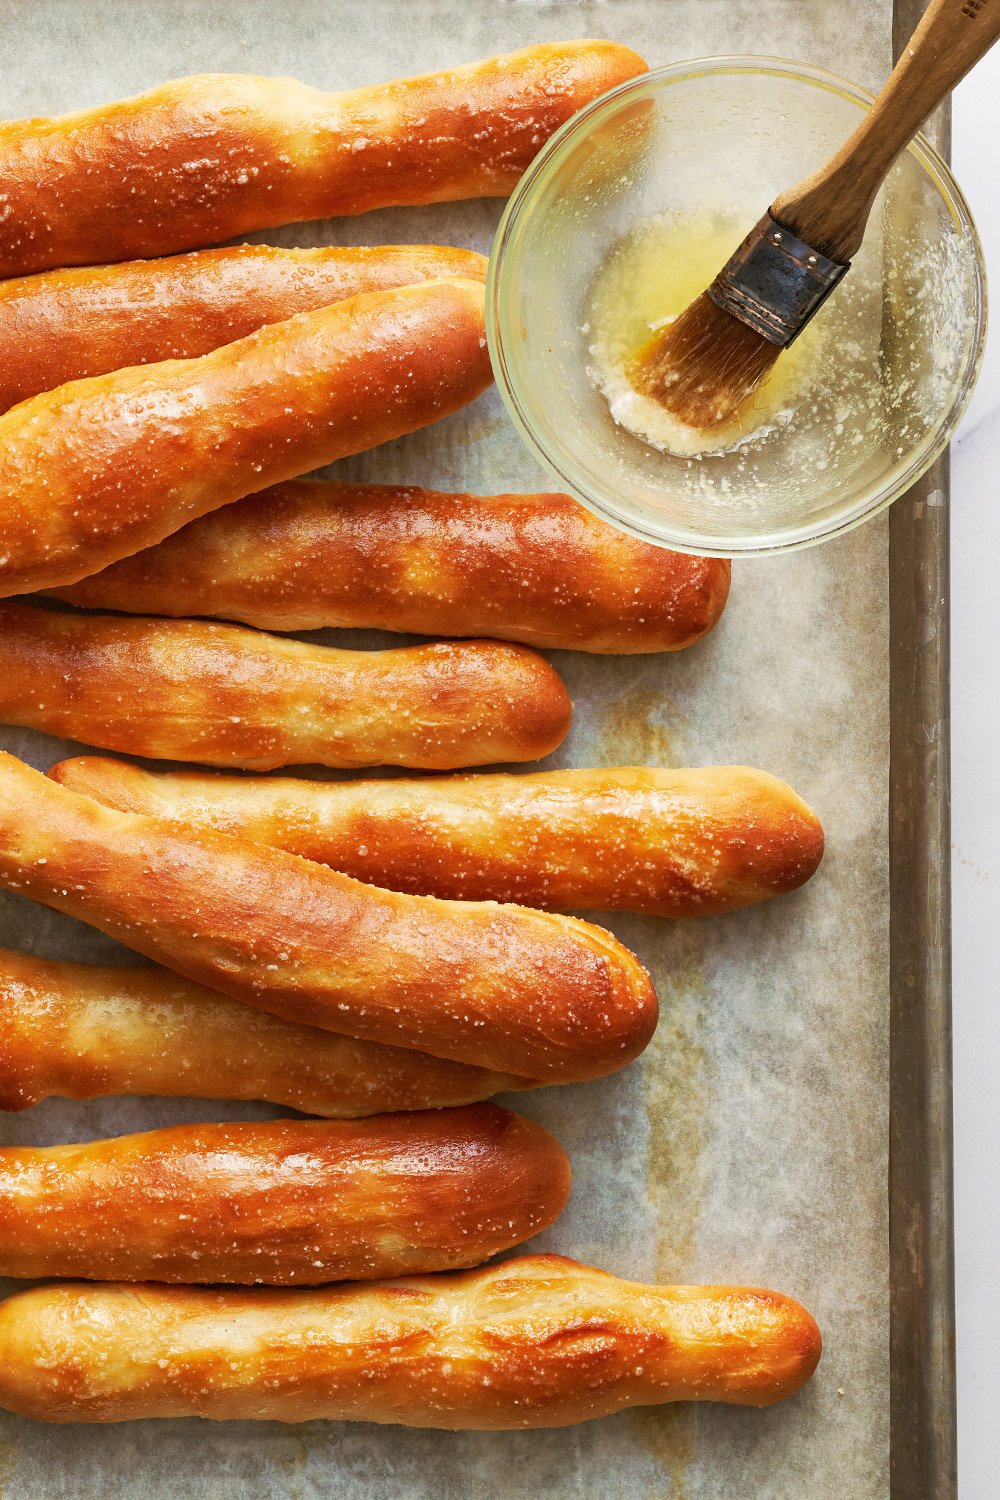
Let’s be honest. The breadsticks are probably the most crave-worthy item on the menu at Olive Garden.
This homemade breadsticks recipe is 1000x better. The whole family will go crazy for this copycat recipe at Sunday night dinner. Especially when paired with a rich soup or sauce for dipping!
The dough recipe only has six ingredients! Get your ingredients and your stand mixer fitted with the dough hook ready to go. You can also make this dough by hand, just be prepared to knead for about 10 minutes.
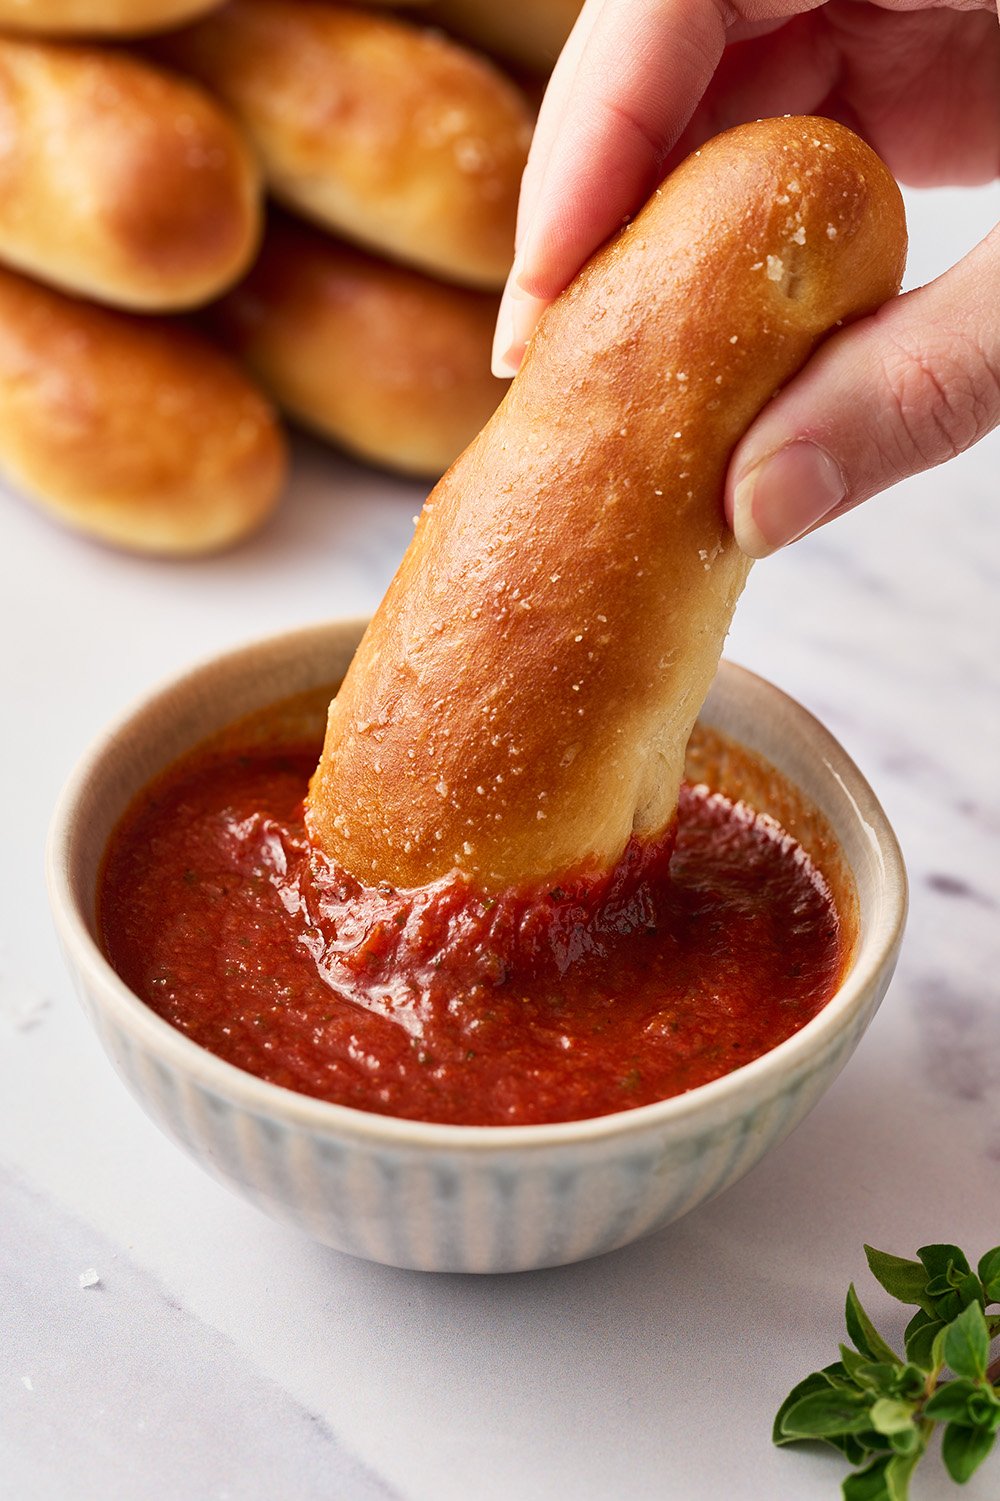
As soon as the breadsticks come out of the oven, brush with the garlic butter. Serve warm. Be careful, this Olive Garden Breadstick recipe is ADDICTIVE!
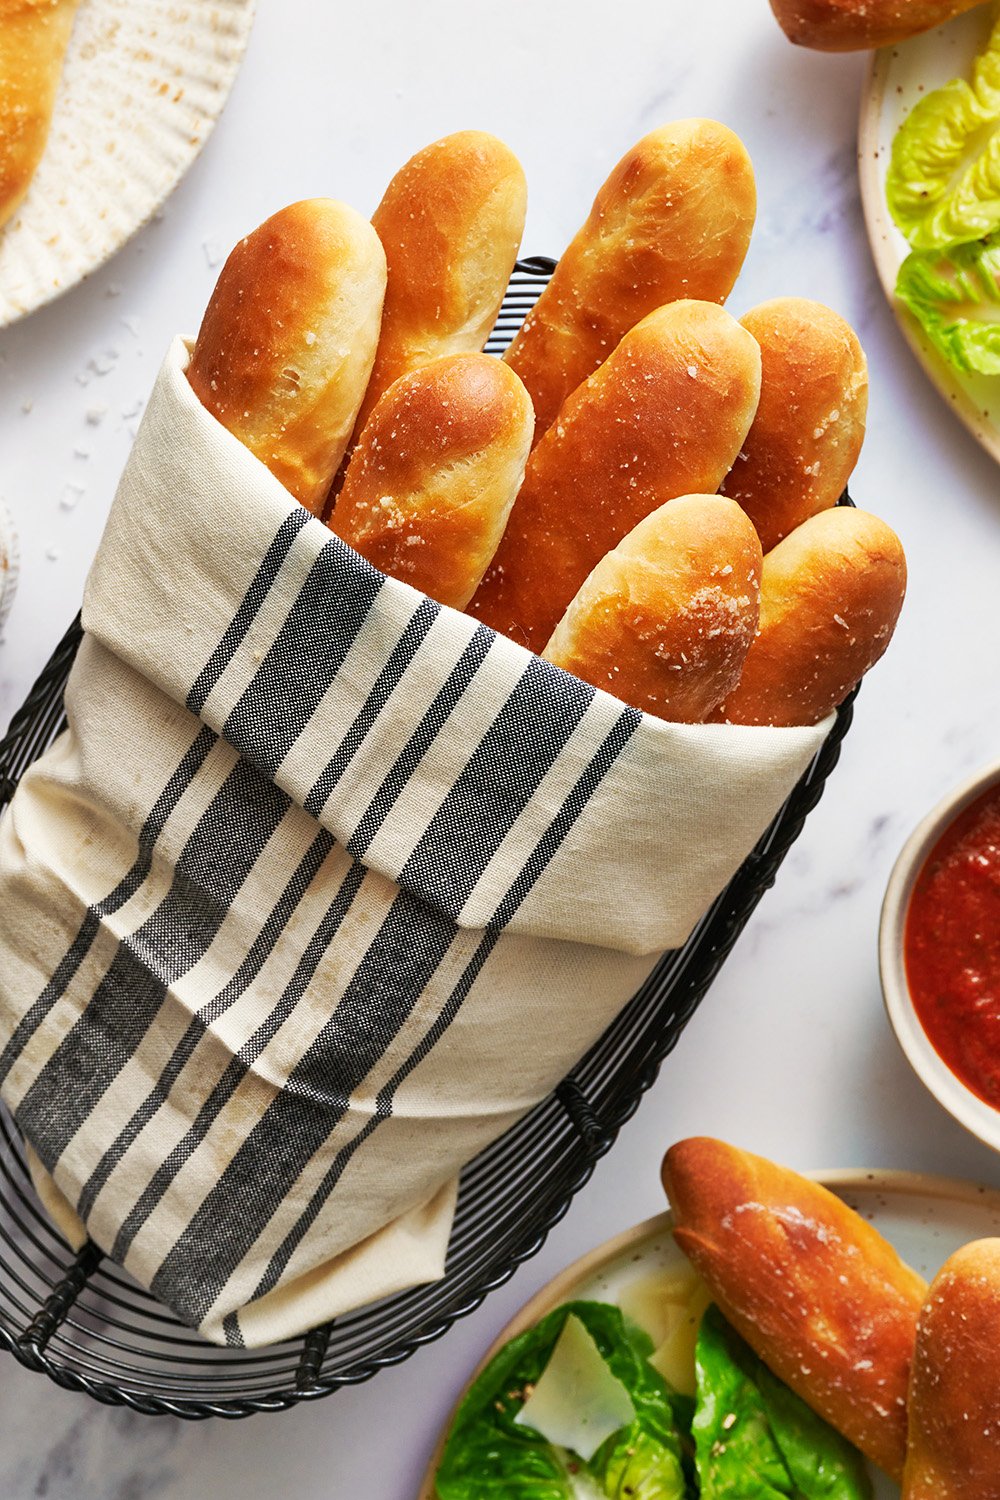
How to Make Copycat Olive Garden Breadsticks
Ingredients for Copycat Olive Garden Breadsticks:
Water – Use warm water to help activate the yeast, but be sure it’s not so hot it kills the yeast. 100-110°F is perfect.
Sugar – Just a little. The sugar helps activate the yeast, tenderize the breadsticks, and makes them a little softer. Don’t skip the sugar! I promise you won’t find the breadsticks sweet.
Butter – Melted and cooled slightly. Always use unsalted butter in baking and especially here because we’re adding salt to the dough and as a topping.
Salt – I prefer to use fine sea salt instead of table salt, simply because I prefer the flavor. Learn more about the differences between types of salt here.
Bread flour –Measured correctly! Bread flour contains a higher percentage of protein, compared to all-purpose flour, so I recommend using bread flour. More on this below.
More butter, plus salt and garlic powder – for the utterly delicious topping, once baked.
Olive Garden Breadsticks Instructions Overview:
Prepare the baking sheets. Prepare two baking sheets lined with parchment paper and set aside.
Begin the dough. In the bowl of a stand mixer fitted with a dough hook attachment, combine the water, yeast, sugar, melted butter, and salt.
Add the flour. Add gradually, while the mixer runs on low speed.
Knead. Increase speed to medium and knead the dough for about 10-15 minutes, or until it is tacky and very elastic.
Proof the dough. Remove the dough and place in a lightly oiled bowl and cover with plastic wrap. Let rest in a warm place until doubled in size, about 1 hour to 1.5 hours.
Portion out the breadsticks. Once doubled in size, divide the dough into 12 portions. Roll each piece of dough into an 8-inch log. Place the dough logs on your parchment-lined baking sheets, about 2 inches apart.
Proof a second time. Cover, and let rise on the prepared baking sheet until doubled in size, about 1 hour to 1.5 hours.
Bake. Bake at 400°F for 12 to 14 minutes, or until golden brown.
Add the toppings. Once removed from the oven, immediately brush each breadstick with melted butter and sprinkle the salt and garlic powder evenly over breadsticks.
Serve warm.
Are Olive Garden Breadsticks Vegan?
These copycat breadsticks are not vegan, and I have not tried using plant-based butter in this recipe. However, several readers have had success with Country Crock plant-based sticks (avocado oil based) or using olive oil in the dough and Earth Balance for the topping. If you give anything else a try, let me know how it goes!
Do I Have to Use Bread Flour? Can I Use All-Purpose Flour Instead?
Bread flour has a higher level of protein content than all-purpose flour, which helps create taller, well-rounded breadsticks with a nice chewy, fluffy texture. If you don’t have bread flour, use the same amount of all-purpose flour, but keep in mind that your breadsticks may turn out super soft.
Which Yeast Should I Use for Breadsticks?
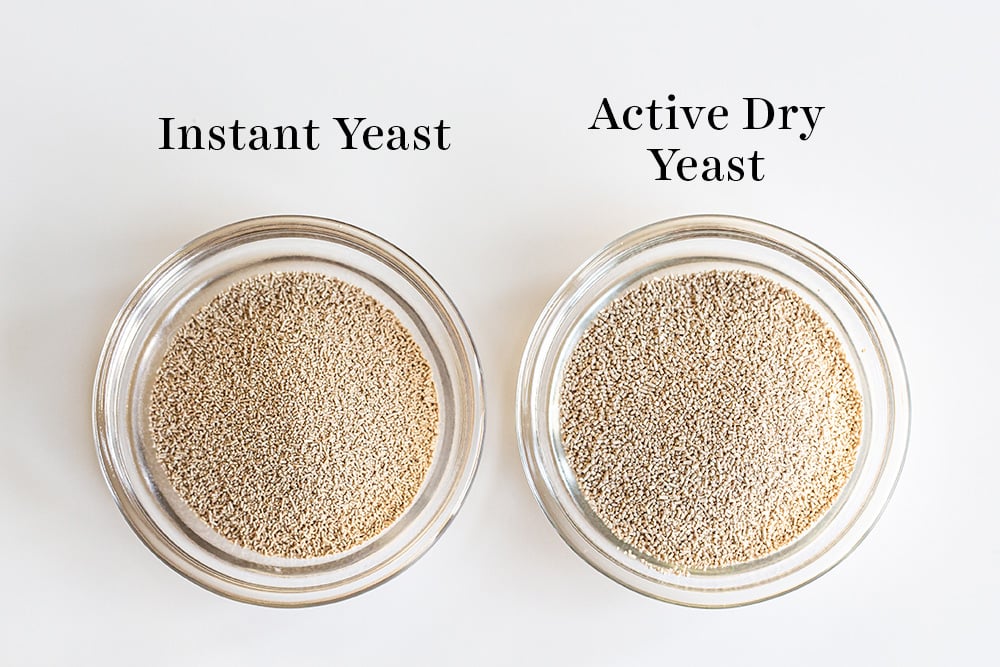
This recipe utilizes a shortcut ingredient: instant yeast, also called rapid rise or quick rise yeast. One of the three should be available at most grocery stores or you can buy my all-time favorite yeast on Amazon. These types of yeast are specifically formulated to allow you to skip proofing (aka the step where you combine the yeast with warm liquid for 5 minutes). You can add instant yeast directly into the mix with all of the ingredients.
If you don’t have or can’t find instant yeast, you can easily use active dry yeast instead. Add it right in with the dry ingredients like instant yeast, but just note that the dough will take about 20% longer to rise. Alternatively, you can speed up that rise time slightly; simply combine it with the warm water and a pinch of the sugar called for in the recipe, and allow it to proof until it becomes bubbly (about 5 minutes) before adding into the bowl with the other ingredients. Learn more about the different types of yeast, and how to substitute yeasts, here.
Can I Knead the Dough By Hand?
Yes! Be sure to knead the dough properly so the breadsticks hold their shape and don’t become sad flat sticks. I call for a stand mixer to make easy work of kneading in this recipe, but you can also knead by hand. You can see my full tutorial on how to knead dough here.
How to Tell When Dough Is Risen
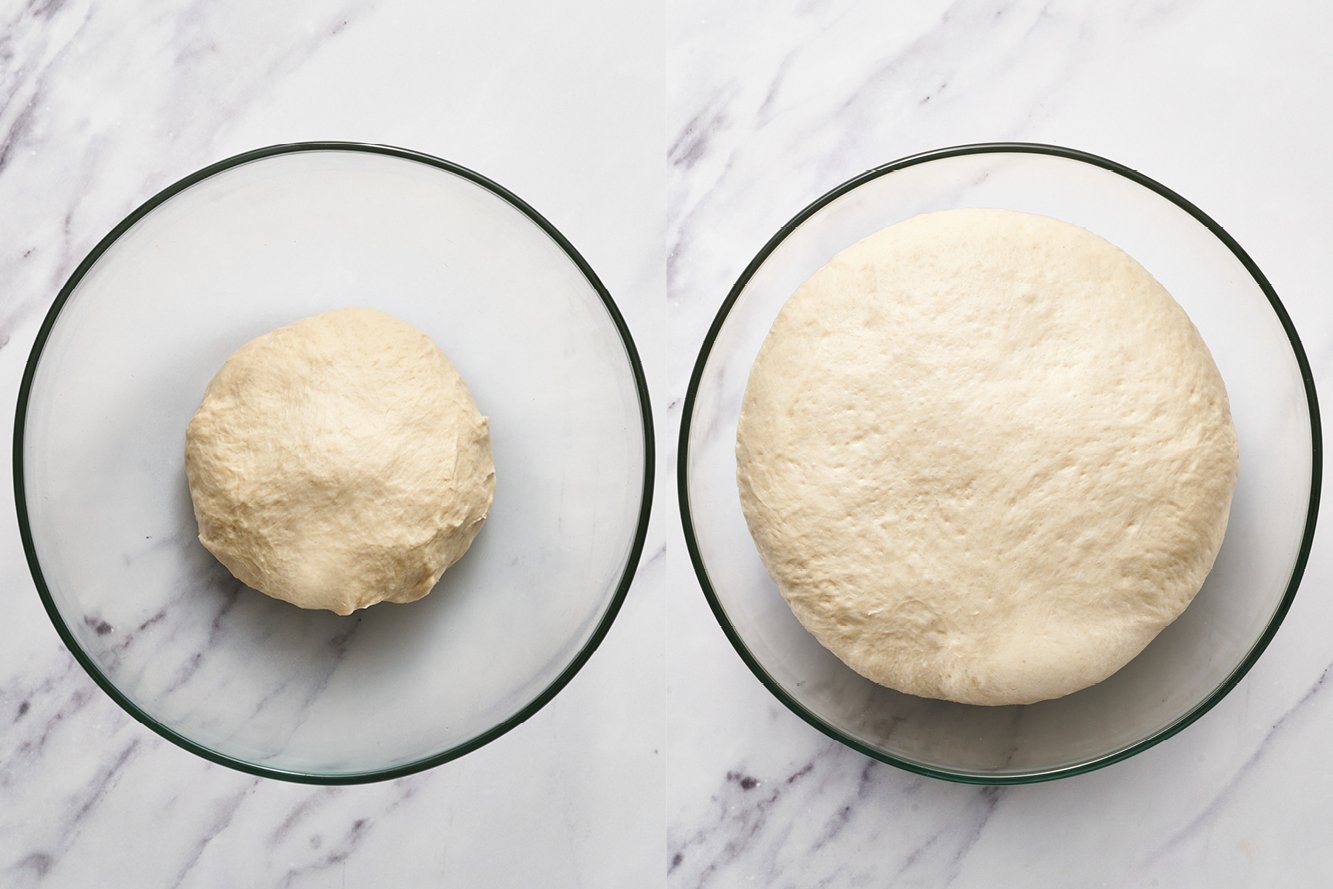
After kneading, shape the dough into a ball. Place in a lightly oiled mixing bowl. I like to use glass so I can see how much it’s rising. I’ll even take a picture of the dough before rising so I can compare later. Cover the bowl with plastic wrap, foil, or a clean kitchen towel. Let the dough rise in a warm, draft-free location. Ideal rise temperatures are between 80°F and 90°F. Lower temperatures will require more rising time.
The dough is done rising when it’s about doubled in volume and passes the “ripe” test. Gently stick two fingers in the risen dough up to the second knuckle and then take them out. If the finger marks remain, the dough is ready for shaping into balls. If not, cover and let the dough rise longer until it is.
How to Shape Breadsticks
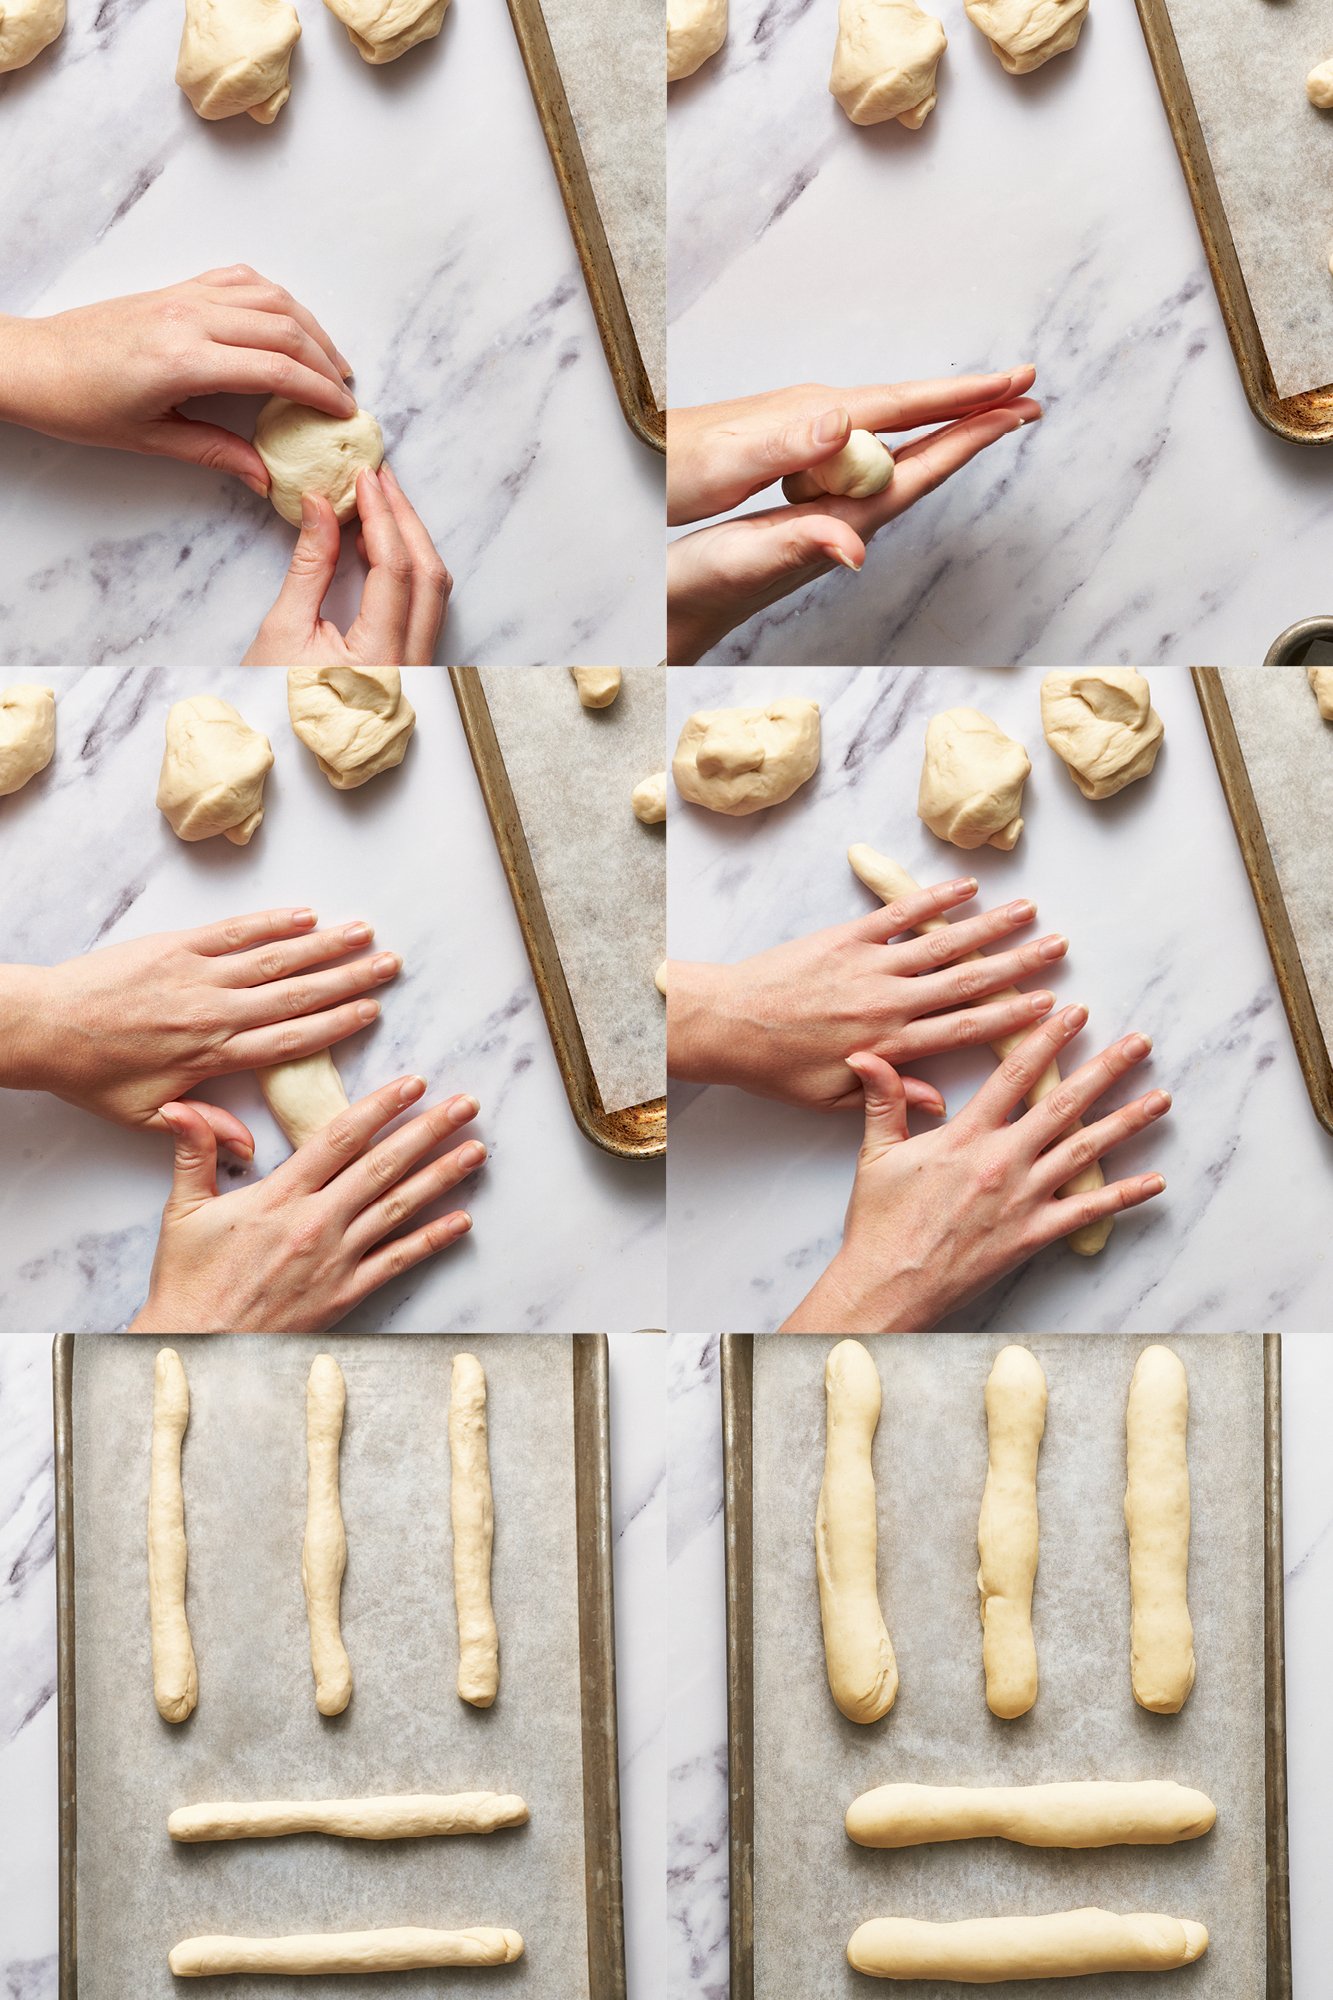
Once the dough is risen, press it down to deflate it slightly.
Place the dough onto a clean surface (not a floured surface).
Use a bench scraper or knife to section the dough into 12 equal pieces. Don’t worry if they’re not perfectly equal in size – but if you prefer, you can weigh the entire mass of dough, divide that number by 12, then portion each piece perfectly by weight.
Roll each piece of dough into a 8-inch log. Don’t worry if they’re not perfectly shaped.
How to Make Breadsticks Ahead of Time
Basically all yeast doughs can be made ahead of time and baked off later. Refrigerating stunts the rise time and can actually allow more flavor to develop!
For this recipe, I like to allow the dough to rise once and shape the breadsticks. Once the breadsticks are shaped, cover them well (so they don’t dry out) and place in the refrigerator for up to 24 hours. Bring to room temperature as the oven preheats before baking as the recipe directs. If the breadsticks haven’t doubled in size yet, allow them to sit at room temperature until doubled.
Alternatively, to make ahead further in advance, you can freeze the dough after it has risen for the first time and been shaped into logs. Place the shaped breadsticks on a baking tray lined with parchment, freezing just until solid, and then transfer to a ziptop bag or airtight container to store in the freezer for up to 2 months. Once ready to bake, place the frozen breadsticks on parchment-lined baking trays and allow to thaw to room temperature. Let rise until an indentation made with your finger into the dough remains. Proceed with the recipe as written.
Can I Double This Recipe?
Yes, if you have a large enough mixer (at least 6 quarts). Most home mixer bowls won’t mix such a big batch of dough well enough. If you’re using a 5-quart tilt head mixer, your mixer may be overwhelmed with that amount of dough and fry itself. If that’s the case, make a single batch of dough twice.
How Long will These Breadsticks Keep?
These breadsticks are best served right out of the oven, but they will keep for 3 days or so in a ziptop bag or an airtight container. To refresh, place the breadsticks on a baking sheet, and reheat in the oven at 425°F for 4-5 minutes, or until warmed through. You can also re-brush with butter and sprinkle with garlic powder and salt at this point, if you wish.
How to Freeze Breadsticks
Place the baked, cooled breadsticks in a ziptop bag or airtight container to store in the freezer for up to 2 months. Thaw at room temperature for a couple of hours, then place the breadsticks on a baking sheet and reheat in the oven at 425°F for 4-5 minutes, or until warmed through. You can also re-brush with butter and sprinkle with garlic powder and salt at this point, if you wish, before serving.
This simple recipe for Copycat Olive Garden Breadsticks makes buttery, garlic-scented, and chewy breadsticks that are utterly addictive! This breadstick recipe is the perfect complement to any meal, or a delicious snack all on its own.
Prepare two baking sheets lined with parchment paper and set aside.
In the bowl of a stand mixer fitted with a dough hook attachment, combine the water, yeast, sugar, melted butter, and salt. Begin to gradually add the flour while the mixer runs on low speed. Increase speed to medium and knead the dough for about 10-15 minutes, or until it is tacky and very elastic. Add more flour, a tablespoon at a time, if the dough is extremely sticky.
Remove the dough and place in a lightly oiled bowl and cover with plastic wrap. Let rest in a warm place until doubled in size, about 1 hour to 1 1/2 hours (the exact proof time will depend on your kitchen environment; the warmer it is, the faster your dough will proof).
Once doubled in size, divide the dough into 12 portions (use your scale for accuracy, but it should be approximately 57 grams per piece). Roll each piece of dough into an 8-inch log. Place the dough logs on your parchment-lined baking sheet, about 2 inches apart. Cover, and let rise until doubled in size, about 1 hour to 1 1/2 hours.
Preheat your oven to 400°F. Bake for 12 to 14 minutes, or until golden brown. Remove from oven and immediately brush with melted butter. Combine the salt and garlic powder and sprinkle evenly over breadsticks. Serve warm.
*To refresh, place the breadsticks on a baking sheet, and reheat in the oven at 425°F for 4-5 minutes, or until warmed through. You can also re-brush with butter and sprinkle again with garlic powder and salt, if you wish.
Recipe Video
Recipe Notes
When it comes to bread baking, the amount of flour you need can vary by the brand used as well as how humid your climate and kitchen environment is! Even the same recipe made in your kitchen during the summer vs. winter may require more or less flour and longer or shorter rising times.
I share trusted baking recipes your friends will LOVE alongside insights into the science of sweets. I'm a professionally trained chef, cookbook author, and cookie queen. I love to write about all things sweet, carb-y, and homemade. I live in Phoenix, Arizona (hence the blog name!)
About Tessa...
I share trusted baking recipes your friends will LOVE alongside insights into the science of sweets. I'm a professionally trained chef, cookbook author, and cookie queen. I love to write about all things sweet, carb-y, and homemade. I live in Phoenix, Arizona (hence the blog name!)
These turned out professional. I used regular yeast so I let it rise a little longer. This was easy. I make bread weekly so I know how to make bread but these were awesome. I actually made the butter garlic and put it on fresh rolls. Mind blown. Great idea.
Hi Janet! We haven’t tried making these with a bread maker, so I can’t say for sure! Please let us know how it goes if you give it a try, we’d love to know!
I made these for the first time this evening and they were perfect! Love how simple the recipe is. I’ll be making these often. ( my husband absolutely loves them)
Hi Michael! To make ahead, bake as the recipe instructs and then let the breadsticks cool completely before freezing. We like to freeze them on a baking sheet until solid before removing to a resealable bag so that they don’t stick together. We suggest reheating in a 300°F oven until warmed through when you’re ready to enjoy
This recipe truly does come out tasting exactly like Olive Garden breadsticks!
The only things I did differently was bloom my yeast in the warm water for 10 minutes before mixing all the ingredients in my bread machine on the dough setting.
Secondly, when they came out of the oven I rubbed/melted a cold stick of butter on the breadsticks and sprinkled with garlic salt.
Like one of the other people who left a review, I had a hard time incorporating the flour into the wet mixture.
It was VERY crumbly. Also, my very old Sunbeam Stand Mixer (and it’s pathetic dough hooks) had a hard time mixing the dough. The dough got caught up in the beaters where they click in. I had to stop using it and mix it in by hand.
Even still, I didn’t like the consistency of the dough….but I went ahead and covered it to see if it would rise.
It did not.
I did level the dough off when measuring but next time, I will weigh it.
And hope that it turns out!!
PS
What temperature do you usually like the water to be at?
On the internet, I read that it was 100°F.
Also, I’m not sure which type of yeast I used – if that might have made a difference in its not rising.
Sorry to hear of your issues, Kelly! Were you able to finish baking them? If so, how did they turn out? It definitely sounds like too much flour was added. Or is it possible you live in a climate where less flour was needed? Warm water is typically 110-115°F. You might be interested in reading our article about the difference in Active Dry Yeast vs Instant Yeast, though you can use either with this recipe. How long did you end up mixing the dough by hand for?
I didn’t end up finishing them since the dough didn’t rise. I searched the internet for the temperature that the water should be (I read: 100°), I used my old Sunbeam mixer, which I’ve never used for bread before (unless there is a hand mix option for the recipe) as I don’t like the dough hooks. I used the least amount of flour that the recipe calls for. When it became too much work for my mixer, I proceeded to mix by hand – I’d say at least 7 minutes total (including the time it was mixed electronically). I’m not sure what type of yeast I used as someone had given me some in a bag. I’ve been keeping it in my freezer. Maybe it needed to come to room temperature?? I want to try this again…but I’m afraid I’ll just be wasting ingredients.
hmmm…I would double check that your yeast is fresh. You can find more details in the article I included in my last comment. I’d increase the water temp to 110-115°F as well. If you’d like to mix by hand next time, I’d suggest mixing for about 10 minutes, until the dough is smooth and elastic. I’d also suggest starting out with 3 cups (381 grams) of bread flour, then slowly adding in the remaining amount so you can keep an eye on it. Tessa lives in Phoenix, AZ, and I live in Michigan, so neither of us bake at high altitude. Reducing the amount of flour may be key for your breadsticks to turn out perfectly. I really hope you give this recipe another try, they are incredible when they turn out! Please let me know how it goes if you do. Good luck!
Hi Brendan! In the first paragraph of instructions, it says “In the bowl of a standing mixer, combine the water, yeast, sugar, and butter. Add in the salt…” Hope that helps!
They came out great. I actually got 13 instead of 12 and they were still a bit big (I think I inadvertently went a little heavy on the flour). Still Delicious!
Absolutely amazing. I made this for a holiday get-together and everyone was wishing I had made a double-recipe. (And I brought 2 other types of bread that they also enjoyed, but this was the one they couldn’t get enough of.)
The recipe is perfect as is. The only thing I changed was I mixed the butter, sea salt, and garlic powder together when I melted the butter to brush on the breadsticks in the final step.
Don’t change a thing about this recipe. Serve it with some dipping sauce if you like, but the recipe itself is perfect as it is!
Put this recipe in your regular rotation, especially if you’re serving pasta or will be going to a potluck that will have pasta. Or: take some sauce and these breadsticks and make everyone wish there was also some pasta!
Hi Chris! To make ahead, bake as the recipe instructs and then let the breadsticks cool completely before freezing. We like to freeze them on a baking sheet until solid before removing to a ziptop bag so that they don’t stick together. We haven’t tried reheating in a microwave, though you’re welcome to try! We suggest reheating in a 300°F oven until warmed through when you’re ready to enjoy 🙂
Super easy and taste just like Olive Garden. I added 1/4 tsp of thyme to the salt-garlic mixture which added a nice touch. Also, in case anyone else runs into this problem, I had only active dry yeast on hand (as opposed to instant) so I just added 1.25x yeast as what the recipe called for and it didn’t seem to change anything. And I recommend kneading by hand! I’m not very strong so it took me about 15 minutes, but it’s oddly cathartic.
I completely agree with you that kneading dough by hand is incredibly relaxing, baking is definitely its own type of therapy! Glad you enjoyed these breadsticks, love your addition of thyme!
I made these today. So delicious!! And easy! I used the no-knead method. (Stretch and fold the dough for 30 sec and then let rest. Do this 3 times during the first rise)
Definitely making these every week. Yum! Thank you!
These were fantastic! I was sure they were going to come out wrong – I didn’t have enough time for both full rises, I only had AP flour, and I had to cook for 5 extra minutes to get them golden brown – but they came out perfectly for dipping in some homemade Zuppa Toscana!
I’ve made another version of this recipe many times before but wasn’t in love with it – made it last night (added a good spoonful of garlic powder to dough when mixing) and they were SO good! The dough was so dense that I thought they’d be tough but they weren’t! They were light and fluffy and so good, we at them all!! I might have to make a double batch next time! Hahah – thanks for the recipe!
Yes it’s me again. As if this recipe needed another review, let alone another review from me but I have made this so many times, and in so many variations and for so many dishes that I kinda consider myself an expert so here are all the things I have done with very little difference in the final delicious results!
1 or 2 tablespoons of sugar (great either way)
Substitute olive oil or canola oil for the butter (some or all, dough seems less sticky with oil)
Add garlic, and\or onion powder and other seasoning to the recipe (awesome)
Let the dough rise longer (accidentally found this out) both times, for extra fluffy bread sticks! Cooking time may need a little less 10 minutes seems to be my magic number.
Hamburger buns, pigs in a blanket, rolls, and my favorite pizza crust! Ok I promise this is my last entry on this recipe!
You are definitely our expert on this recipe! It’s so much fun reading through all the different ways you’ve experimented with this dough, and we are THRILLED at how much you love it! Thanks so much for all of your comments, Jay 🙂
Hi Lexi! The bread flour helps make these breadsticks nice and chewy, though you can use all-purpose flour, the texture will just be a little different.
Turned out extremely well. When you think of a breadstick that you would get at a expensive restaurant, this is what you would expect. I won’t ever be using a different recipe for breadsticks.
Alright I made this into 3 pizza crusts tonight! And this has been my BEST crust to date! I put the water, yeast, sugar, salt and butter into my bread machine. Stir and let sit while I sift and weigh the flour. Add flour, set to dough and in 1 hour and 20 minutes it’s ready to turn out and divide into your crusts (I did 3). I shaped my 3 balls and then let rise for another hour. Then I floured a piece of parchment paper (for each crust) and shaped the crust. Then topped and put it on my preheated pizza stone (460) for 12 minutes! Just in case anyone is looking to try it .. It seems I prefer the ease of the bread machine over doing it by hand! Thanks again for this amazing multifunctional recipe! Have a great night! And don’t forget… Under his eye!
i’ve made it like a million time and my family and i are obsessed with it.I’m twelve and i just love baking and cooking.I also wanted to ask if i could double the recipe to yield 24 bread sticks instead of 12??
I haven’t had Olive Garden in a long time, so I can’t compare, but these came out awesome and super soft. Be sure to not under-knead the dough. I put them relatively close on the pan, so they ended up being super soft pull-apart sticks. I suspect these will also make a good Texas Roadhouse style rolls if you shape them into squares and add a little more sugar. Next time I will do an overnight fridge rise for the first proofing since it builds more flavor.
Hi there! As this is one of our older recipes on the site, it actually is listed in cups (did you mean to post on a different recipe?). We are slowly updating our recipes to include weight measurements though as it ensures accuracy for everyone.
Hi Lisa! Thanks for asking, I just added that to the Recipe Notes! Check out our free Make Ahead Baking Guide and follow the directions on yeast-based doughs 🙂
I did not believe these would taste EXACTLY like OG breadsticks but they DO!!!! And the recipe is so easy…the dough is perfect after the 7 mins in the mixer…not sticky…rolls easy. The only thing we did differently is to use regular salt because the kosher salt was a little too chunky for us. These things are amazing! I never post online but had to let you and your readers know these truly taste exactly like them and I have my OG dressing to dip them in too! Thanks so much!
Well done with this recipe! I have made this 5 times in the last few weeks with the same consistent results each time. This is because I have weighed each time. Actually I am sifting the flour into my bowl on the scale (don’t ask, because I don’t know why). In any case this bread comes out amazing every time. I am doing home made hamburger buns, and pigs in blankets tonight with the dough. I’m sure it’s gonna be great!
Just an update on the pigs in a blanket. I will never buy another hotdog or hamburger bun again! Thank for such an amazing bread recipe! I’m just sorry I was so late to the party!
Emily @ Handle the Heat
— July 23, 2021 at 2:13 pm
We always suggest using unsalted butter vs. salted as written in this article: Salted Vs. Unsalted Butter. It’s not ideal to use salted butter, but it should turn out ok as long as you substitute correctly. To substitute, a general rule is to reduce 1/4 tsp of salt per 1/2 cup (115g) of butter. Hope that helps!
I’m baking it right now for the second time. But both times my dough is always so dry and crumbly looking. Is it because I used measuring cups and not a scale?
Using a digital scale for recipes is a game changer for sure! If your dough is turning out dry and crumbly, that does sound like you might be using too much flour. I’d suggest at least trying the Spoon & Level Method I discuss in my article How to Measure Flour if you can’t get a digital scale. Hope that helps!
My 5 year old made these with a little assistance. Her first bread recipe that she made almost by herself. I helped by demo how to do it. They were amazing.
I’ve never made bread flour! The bread flour helps make these breadsticks nice and chewy, although you can use all-purpose flour instead. The texture will just be a little different. Enjoy your breadsticks!
Thank you for answering last question so promplty! I did double mixture, it worked but a bit tough on my old Kitchen aid……I had to stop a few times as I was smelling possible smoke , lol. Anyway resorted to a bit of hand kneeding, all good. Next question (sorry just not much of a baker)…….can I let rolls rise longer then the one hour? Perhaps two? Will it affect anything?
I wouldn’t go for much longer than what the recipe calls for. If dough rises for too long, it affects the taste and texture of the finished product, and they might even collapse in the oven.
I made these and they were great…..so I am going to make them for a dinner party. But I need to make two batches. Can I double recipe or is that too much to knead in the mixer ?
All depends on how hot your kitchen is, but the last rise time states about 1 hour until doubled in size. Honestly, these reheat pretty well in the oven! To make ahead, bake as the recipe instructs but shave a few minutes off the baking time and then let the breadsticks cool completely before freezing. I like to freeze them on a baking sheet until solid before removing to a ziptop bag so that they don’t stick together. Reheat in a 300°F oven until warmed through when you’re ready to enjoy!
This recipe is very good and easy for my lazy arse. The first time the dough didn’t rise enough when resting so the dough was kind of flat, the next few times I’ve made it though were very good. My siblings eat it up every time I make it.
Oh wow, I didn’t quite believe when people said these were addictive but my girls and I couldn’t stop eating them! I had to use all purpose flour as that is all I had otherwise I followed the recipe exactly. Thank you 🙂
YAY! I’m so glad you and your girls loved this recipe, Zuhal! Next time, try it with bread flour and see if you can tell the difference texture-wise! I really think it makes these breadsticks nice and chewy! 🙂
What I’d recommend doing is freezing them, although you do still have to bake them for a bit-shave off a few minutes off the baking time, then let them cool completely before freezing (freeze on a baking sheet until solid, then remove to a ziptop bag so they don’t stick together). Reheat in an oven until warmed through! It might be a great option for you to make these on a weekend and freeze to easily have them during the week!
These are great! I’ve made them twice now and they’ve been a big hit. My partner asked why I hadn’t been making them all along, haha. Something about my oven means they don’t get golden on the top, just the bottom, so it can be hard for me to tell when they’re done. I’m not sure if it’s user error or what, but I’ve managed to get them out of the oven at the right time so far! Thanks so much for sharing this, I didn’t realize how easy it would be to make such great breadsticks!
Hi Lindsay! So glad you both love this recipe! As for your oven, what type of sheet pan are you using? Is it light or dark colored? I highly recommend avoiding any dark colored or coated pans. Here’s a link to an article I wrote about it! https://www.handletheheat.com/best-baking-pans/ I’d also recommend getting an oven thermometer if you don’t have one-maybe your oven isn’t holding the correct temperature or your top heating element isn’t working? Hopefully this helps! Definitely reach out with any more questions!
Really good. I maybe should have pulled them from the oven about 2/3 minutes earlier? Made a olive oil based dipping sauce to go with it. Yummy Wish I could post a pic here.
I never ever leave comments, so this is a big deal. These are hands down the best breadsticks I have ever eaten, let alone the best breadsticks I have ever made. I measured the flour in the scale, and followed recipe exactly. These are the softest breadsticks I have ever had. Perfect texture. Perfect flavor. Their softness makes them even better than Olive Gardens. I had a very very hard time limiting the amount I ate. Thanks for this recipe! It is my favorite!
Delicious! I made these with half all purpose flour and half whole wheat/spelt blend and they turned out fantastic . Tasted exactly like the real thing!
I made these yesterday for the first time and was pleasantly surprised by just how tasty they turned out! And not only that, but they were super easy to make and work with. They actually taste like those heavenly Olive Garden breadsticks we all know and love, and the texture is spot-on too! They’re light and fluffy with a slight crisp on the top and bottom. The dough felt AMAZING and you don’t have to be a bread expert to make and shape it.
I highly recommend baking them all together pull-apart style. I baked the whole dozen on one large sheet pan so they were touching each other and this kept the sides really soft. Other than that, just follow the recipe exactly! I did use a kitchen scale to measure the flour as this is really crucial when making any type of bread, so definitely use one if you have it. My husband added grated parmesan to his breadsticks because he loves parmesan and this was obviously delicious as well. But with just the butter, garlic, and salt, these were a dead ringer for Olive Garden’s. Adding this to my recipe box!
As a trained chef and cookbook author, I share trusted baking recipes your friends & family will love alongside insights into the science of sweets. I help take the luck out of baking so you *always* have delicious results! Learn more here.
Over 200 pages with 50+ cookie recipes that'll make
you a COOKIE PRO. Discover how to turn your biggest cookie flops into WINS by mastering the
sweet science of baking. Even learn how to customize your own recipes! Beautiful, hardcopy,
full color, photos of every recipe so you know EXACTLY how your cookies should look. Order
now to have the book delivered to your doorstep!
Do you want a more delicious life?
Instead of digging through cookbooks and magazines and searching the internet for amazing
recipes, subscribe to Handle the Heat to receive new recipe posts delivered straight to your
email inbox. You’ll get all the latest recipes, videos, kitchen tips and tricks AND my
*free* Cookie Customization Guide (because I am the Cookie Queen)!
These turned out professional. I used regular yeast so I let it rise a little longer. This was easy. I make bread weekly so I know how to make bread but these were awesome. I actually made the butter garlic and put it on fresh rolls. Mind blown. Great idea.
Sounds incredible!! So happy you loved this recipe, thanks for sharing!
EXCELLENT!!!! Turned out perfect 🙂
I would like to make these using a bread maker.
I will use the dough setting. What tips do you suggest?
Thank you, Janet Howe
Hi Janet! We haven’t tried making these with a bread maker, so I can’t say for sure! Please let us know how it goes if you give it a try, we’d love to know!
I made these for the first time this evening and they were perfect! Love how simple the recipe is. I’ll be making these often. ( my husband absolutely loves them)
At what stage may I freeze for later baking?
Hi Michael! To make ahead, bake as the recipe instructs and then let the breadsticks cool completely before freezing. We like to freeze them on a baking sheet until solid before removing to a resealable bag so that they don’t stick together. We suggest reheating in a 300°F oven until warmed through when you’re ready to enjoy
This recipe truly does come out tasting exactly like Olive Garden breadsticks!
The only things I did differently was bloom my yeast in the warm water for 10 minutes before mixing all the ingredients in my bread machine on the dough setting.
Secondly, when they came out of the oven I rubbed/melted a cold stick of butter on the breadsticks and sprinkled with garlic salt.
Perfection! Thanks for the recipe!
Thanks for letting us know how it went using your bread machine! So happy to hear how much you enjoyed this recipe 🙂
Taste exactly like the restaurant’s!!!
So happy you loved this recipe!
This recipe is so good!!! And is so easy to follow and make
Like one of the other people who left a review, I had a hard time incorporating the flour into the wet mixture.
It was VERY crumbly. Also, my very old Sunbeam Stand Mixer (and it’s pathetic dough hooks) had a hard time mixing the dough. The dough got caught up in the beaters where they click in. I had to stop using it and mix it in by hand.
Even still, I didn’t like the consistency of the dough….but I went ahead and covered it to see if it would rise.
It did not.
I did level the dough off when measuring but next time, I will weigh it.
And hope that it turns out!!
PS
What temperature do you usually like the water to be at?
On the internet, I read that it was 100°F.
Also, I’m not sure which type of yeast I used – if that might have made a difference in its not rising.
Sorry to hear of your issues, Kelly! Were you able to finish baking them? If so, how did they turn out? It definitely sounds like too much flour was added. Or is it possible you live in a climate where less flour was needed? Warm water is typically 110-115°F. You might be interested in reading our article about the difference in Active Dry Yeast vs Instant Yeast, though you can use either with this recipe. How long did you end up mixing the dough by hand for?
I didn’t end up finishing them since the dough didn’t rise. I searched the internet for the temperature that the water should be (I read: 100°), I used my old Sunbeam mixer, which I’ve never used for bread before (unless there is a hand mix option for the recipe) as I don’t like the dough hooks. I used the least amount of flour that the recipe calls for. When it became too much work for my mixer, I proceeded to mix by hand – I’d say at least 7 minutes total (including the time it was mixed electronically). I’m not sure what type of yeast I used as someone had given me some in a bag. I’ve been keeping it in my freezer. Maybe it needed to come to room temperature?? I want to try this again…but I’m afraid I’ll just be wasting ingredients.
PS I live in Vancouver Canada.
hmmm…I would double check that your yeast is fresh. You can find more details in the article I included in my last comment. I’d increase the water temp to 110-115°F as well. If you’d like to mix by hand next time, I’d suggest mixing for about 10 minutes, until the dough is smooth and elastic. I’d also suggest starting out with 3 cups (381 grams) of bread flour, then slowly adding in the remaining amount so you can keep an eye on it. Tessa lives in Phoenix, AZ, and I live in Michigan, so neither of us bake at high altitude. Reducing the amount of flour may be key for your breadsticks to turn out perfectly. I really hope you give this recipe another try, they are incredible when they turn out! Please let me know how it goes if you do. Good luck!
You might have accidentally killed your yeast if you added the melted butter while it was still too hot.
It never mentioned anything about salt or yeast in the instructions.
Hi Brendan! In the first paragraph of instructions, it says “In the bowl of a standing mixer, combine the water, yeast, sugar, and butter. Add in the salt…” Hope that helps!
They came out great. I actually got 13 instead of 12 and they were still a bit big (I think I inadvertently went a little heavy on the flour). Still Delicious!
I think that extra breadstick is just one for the chef to taste-test 🙂 Glad you loved this recipe!
Absolutely amazing. I made this for a holiday get-together and everyone was wishing I had made a double-recipe. (And I brought 2 other types of bread that they also enjoyed, but this was the one they couldn’t get enough of.)
The recipe is perfect as is. The only thing I changed was I mixed the butter, sea salt, and garlic powder together when I melted the butter to brush on the breadsticks in the final step.
Don’t change a thing about this recipe. Serve it with some dipping sauce if you like, but the recipe itself is perfect as it is!
Put this recipe in your regular rotation, especially if you’re serving pasta or will be going to a potluck that will have pasta. Or: take some sauce and these breadsticks and make everyone wish there was also some pasta!
Yay! So happy these were such a hit. Thanks so much for the rave review!
These are so good! Thank you!
Can you make this ahead of time and freeze them? If so, can they be warmed up in microwave or still need to be baked to reheat? Please advise.
Hi Chris! To make ahead, bake as the recipe instructs and then let the breadsticks cool completely before freezing. We like to freeze them on a baking sheet until solid before removing to a ziptop bag so that they don’t stick together. We haven’t tried reheating in a microwave, though you’re welcome to try! We suggest reheating in a 300°F oven until warmed through when you’re ready to enjoy 🙂
Super easy and taste just like Olive Garden. I added 1/4 tsp of thyme to the salt-garlic mixture which added a nice touch. Also, in case anyone else runs into this problem, I had only active dry yeast on hand (as opposed to instant) so I just added 1.25x yeast as what the recipe called for and it didn’t seem to change anything. And I recommend kneading by hand! I’m not very strong so it took me about 15 minutes, but it’s oddly cathartic.
I completely agree with you that kneading dough by hand is incredibly relaxing, baking is definitely its own type of therapy! Glad you enjoyed these breadsticks, love your addition of thyme!
I made these today. So delicious!! And easy! I used the no-knead method. (Stretch and fold the dough for 30 sec and then let rest. Do this 3 times during the first rise)
Definitely making these every week. Yum! Thank you!
Easy to make and very tasty
These are great. Exactly like olive garden’s. I plan on keeping this recipe forever. Nice job!
This is wonderful to hear!
These were fantastic! I was sure they were going to come out wrong – I didn’t have enough time for both full rises, I only had AP flour, and I had to cook for 5 extra minutes to get them golden brown – but they came out perfectly for dipping in some homemade Zuppa Toscana!
Ooo sounds absolutely delicious, Kate! So happy you enjoyed this recipe 🙂
Still not quite doughy enough. I’m not sure if I’m doing it exactly right or not. What can I do to make them more smooth and doughy?
Hi Mark! What do you mean by not doughy enough? Do you weigh your ingredients with a digital scale?
used active dry yeast instead of instant and they were still incredible.
Wonderful! So happy you enjoyed them 🙂
I’ve made another version of this recipe many times before but wasn’t in love with it – made it last night (added a good spoonful of garlic powder to dough when mixing) and they were SO good! The dough was so dense that I thought they’d be tough but they weren’t! They were light and fluffy and so good, we at them all!! I might have to make a double batch next time! Hahah – thanks for the recipe!
Wonderful! So happy you finally found a breadstick recipe you love 🙂 Double batch is a great idea!
Yes it’s me again. As if this recipe needed another review, let alone another review from me but I have made this so many times, and in so many variations and for so many dishes that I kinda consider myself an expert so here are all the things I have done with very little difference in the final delicious results!
1 or 2 tablespoons of sugar (great either way)
Substitute olive oil or canola oil for the butter (some or all, dough seems less sticky with oil)
Add garlic, and\or onion powder and other seasoning to the recipe (awesome)
Let the dough rise longer (accidentally found this out) both times, for extra fluffy bread sticks! Cooking time may need a little less 10 minutes seems to be my magic number.
Hamburger buns, pigs in a blanket, rolls, and my favorite pizza crust! Ok I promise this is my last entry on this recipe!
You are definitely our expert on this recipe! It’s so much fun reading through all the different ways you’ve experimented with this dough, and we are THRILLED at how much you love it! Thanks so much for all of your comments, Jay 🙂
Can all purpose flour work too, or do I specifically need bread flour?
Hi Lexi! The bread flour helps make these breadsticks nice and chewy, though you can use all-purpose flour, the texture will just be a little different.
Turned out extremely well. When you think of a breadstick that you would get at a expensive restaurant, this is what you would expect. I won’t ever be using a different recipe for breadsticks.
Amazing to hear this! Thanks so much for letting us know, Henry!
Alright I made this into 3 pizza crusts tonight! And this has been my BEST crust to date! I put the water, yeast, sugar, salt and butter into my bread machine. Stir and let sit while I sift and weigh the flour. Add flour, set to dough and in 1 hour and 20 minutes it’s ready to turn out and divide into your crusts (I did 3). I shaped my 3 balls and then let rise for another hour. Then I floured a piece of parchment paper (for each crust) and shaped the crust. Then topped and put it on my preheated pizza stone (460) for 12 minutes! Just in case anyone is looking to try it .. It seems I prefer the ease of the bread machine over doing it by hand! Thanks again for this amazing multifunctional recipe! Have a great night! And don’t forget… Under his eye!
Love hearing about all of your experiments, Jay! That sounds absolutely delicious!
i’ve made it like a million time and my family and i are obsessed with it.I’m twelve and i just love baking and cooking.I also wanted to ask if i could double the recipe to yield 24 bread sticks instead of 12??
So awesome to hear you’re making these breadsticks for your family! Absolutely, you can double this recipe 🙂 Enjoy!
I haven’t had Olive Garden in a long time, so I can’t compare, but these came out awesome and super soft. Be sure to not under-knead the dough. I put them relatively close on the pan, so they ended up being super soft pull-apart sticks. I suspect these will also make a good Texas Roadhouse style rolls if you shape them into squares and add a little more sugar. Next time I will do an overnight fridge rise for the first proofing since it builds more flavor.
So glad you enjoyed this recipe, Matt!
I wish you would of posted the correct measurements in cups not weight. I’m an experienced baker and never use a scale.
Hi there! As this is one of our older recipes on the site, it actually is listed in cups (did you mean to post on a different recipe?). We are slowly updating our recipes to include weight measurements though as it ensures accuracy for everyone.
Can you make dough ahead of time and bake later
Hi Lisa! Thanks for asking, I just added that to the Recipe Notes! Check out our free Make Ahead Baking Guide and follow the directions on yeast-based doughs 🙂
I did not believe these would taste EXACTLY like OG breadsticks but they DO!!!! And the recipe is so easy…the dough is perfect after the 7 mins in the mixer…not sticky…rolls easy. The only thing we did differently is to use regular salt because the kosher salt was a little too chunky for us. These things are amazing! I never post online but had to let you and your readers know these truly taste exactly like them and I have my OG dressing to dip them in too! Thanks so much!
Gotta have the OG dressing, yum! So glad you loved this recipe, Kim!
Well done with this recipe! I have made this 5 times in the last few weeks with the same consistent results each time. This is because I have weighed each time. Actually I am sifting the flour into my bowl on the scale (don’t ask, because I don’t know why). In any case this bread comes out amazing every time. I am doing home made hamburger buns, and pigs in blankets tonight with the dough. I’m sure it’s gonna be great!
We’ve done plenty of breadstick testing as well and aren’t made about it! So happy you love this recipe and are using it for other meal ideas!
Just an update on the pigs in a blanket. I will never buy another hotdog or hamburger bun again! Thank for such an amazing bread recipe! I’m just sorry I was so late to the party!
LOVE to hear that! Thank you so much for the positive feedback, we appreciate it!
Can you use salted butter instead of unsalted that’s all they had at the store across the street from me
We always suggest using unsalted butter vs. salted as written in this article: Salted Vs. Unsalted Butter. It’s not ideal to use salted butter, but it should turn out ok as long as you substitute correctly. To substitute, a general rule is to reduce 1/4 tsp of salt per 1/2 cup (115g) of butter. Hope that helps!
I’m baking it right now for the second time. But both times my dough is always so dry and crumbly looking. Is it because I used measuring cups and not a scale?
Using a digital scale for recipes is a game changer for sure! If your dough is turning out dry and crumbly, that does sound like you might be using too much flour. I’d suggest at least trying the Spoon & Level Method I discuss in my article How to Measure Flour if you can’t get a digital scale. Hope that helps!
My 5 year old made these with a little assistance. Her first bread recipe that she made almost by herself. I helped by demo how to do it. They were amazing.
I’m so excited to hear that! How fun 🙂
How can I make bread flour? Or how can I replace it? We only get all purpose flour here.
I’ve never made bread flour! The bread flour helps make these breadsticks nice and chewy, although you can use all-purpose flour instead. The texture will just be a little different. Enjoy your breadsticks!
Thank you for answering last question so promplty! I did double mixture, it worked but a bit tough on my old Kitchen aid……I had to stop a few times as I was smelling possible smoke , lol. Anyway resorted to a bit of hand kneeding, all good. Next question (sorry just not much of a baker)…….can I let rolls rise longer then the one hour? Perhaps two? Will it affect anything?
Thank you again! These are addictive!
I wouldn’t go for much longer than what the recipe calls for. If dough rises for too long, it affects the taste and texture of the finished product, and they might even collapse in the oven.
I made these and they were great…..so I am going to make them for a dinner party. But I need to make two batches. Can I double recipe or is that too much to knead in the mixer ?
Thank you
That should be fine 🙂
This recipe is a fan favorite for my family, its a great side dish for dinner, and heck! even a amazing snack.
haha! I’m so happy to hear these breadsticks are a hit with your family! 🙂
How long can I leave the sticks out before putting in oven? I am having a dinner party and trying to figure out timming . Thank you.
All depends on how hot your kitchen is, but the last rise time states about 1 hour until doubled in size. Honestly, these reheat pretty well in the oven! To make ahead, bake as the recipe instructs but shave a few minutes off the baking time and then let the breadsticks cool completely before freezing. I like to freeze them on a baking sheet until solid before removing to a ziptop bag so that they don’t stick together. Reheat in a 300°F oven until warmed through when you’re ready to enjoy!
This recipe is very good and easy for my lazy arse. The first time the dough didn’t rise enough when resting so the dough was kind of flat, the next few times I’ve made it though were very good. My siblings eat it up every time I make it.
Happy to hear this recipe is a hit!
It’s better togive mesurments in grams and ml
Exactly like the real deal! So yummy
But how do I shape them like Olive Garden?
How can we do this recipe if we don’t have a mixer? Thanks!
You can make this dough by hand, just get ready to knead for about 10 minutes! Good luck!
Oh wow, I didn’t quite believe when people said these were addictive but my girls and I couldn’t stop eating them! I had to use all purpose flour as that is all I had otherwise I followed the recipe exactly. Thank you 🙂
YAY! I’m so glad you and your girls loved this recipe, Zuhal! Next time, try it with bread flour and see if you can tell the difference texture-wise! I really think it makes these breadsticks nice and chewy! 🙂
Quick question: If the dough has already finished rising, but I don’t want to bake these for another few hours (or the next day) what can I do?
I now have made these 3 times in 3 weeks because the kids can’t get enough!
What I’d recommend doing is freezing them, although you do still have to bake them for a bit-shave off a few minutes off the baking time, then let them cool completely before freezing (freeze on a baking sheet until solid, then remove to a ziptop bag so they don’t stick together). Reheat in an oven until warmed through! It might be a great option for you to make these on a weekend and freeze to easily have them during the week!
I made these with ham , pepperoni, cheese, stuffed inside, really awesome, thanks
Oh yum, that sounds incredible!!!
These are great! I’ve made them twice now and they’ve been a big hit. My partner asked why I hadn’t been making them all along, haha. Something about my oven means they don’t get golden on the top, just the bottom, so it can be hard for me to tell when they’re done. I’m not sure if it’s user error or what, but I’ve managed to get them out of the oven at the right time so far! Thanks so much for sharing this, I didn’t realize how easy it would be to make such great breadsticks!
Hi Lindsay! So glad you both love this recipe! As for your oven, what type of sheet pan are you using? Is it light or dark colored? I highly recommend avoiding any dark colored or coated pans. Here’s a link to an article I wrote about it! https://www.handletheheat.com/best-baking-pans/ I’d also recommend getting an oven thermometer if you don’t have one-maybe your oven isn’t holding the correct temperature or your top heating element isn’t working? Hopefully this helps! Definitely reach out with any more questions!
Really good. I maybe should have pulled them from the oven about 2/3 minutes earlier? Made a olive oil based dipping sauce to go with it. Yummy Wish I could post a pic here.
So happy you tried this recipe!
Made these several times, they are amazing! I put cinnamon/ brown sugar on half for dessert
Ooh love your dessert variation! I’ll have to try that sometime!
Love this
Made this recipe tonight to go with OG Toscana soup…..As good… even better than the real ones at Olive Garden (soup too by the way).
My family loved these! Thank you, best breadsticks recipe i have made!
This is amazing to hear! Yay!
Very delicious bread sticks.
These are the best breadsticks I have ever made!!
Made these twice this week. Sooo good! And quite easy. It does consume some time but it’s well worth it. So much better than frozen breadsticks
SO glad you enjoyed these breadsticks!
Thank you for the breadstick recipe, so easy to make and so soft and yummy. I will definately make again and again and again
I never ever leave comments, so this is a big deal. These are hands down the best breadsticks I have ever eaten, let alone the best breadsticks I have ever made. I measured the flour in the scale, and followed recipe exactly. These are the softest breadsticks I have ever had. Perfect texture. Perfect flavor. Their softness makes them even better than Olive Gardens. I had a very very hard time limiting the amount I ate. Thanks for this recipe! It is my favorite!
I’m so thrilled! So glad you enjoyed these breadsticks.
Delicious! I made these with half all purpose flour and half whole wheat/spelt blend and they turned out fantastic . Tasted exactly like the real thing!
So glad to hear that!
I made these yesterday for the first time and was pleasantly surprised by just how tasty they turned out! And not only that, but they were super easy to make and work with. They actually taste like those heavenly Olive Garden breadsticks we all know and love, and the texture is spot-on too! They’re light and fluffy with a slight crisp on the top and bottom. The dough felt AMAZING and you don’t have to be a bread expert to make and shape it.
I highly recommend baking them all together pull-apart style. I baked the whole dozen on one large sheet pan so they were touching each other and this kept the sides really soft. Other than that, just follow the recipe exactly! I did use a kitchen scale to measure the flour as this is really crucial when making any type of bread, so definitely use one if you have it. My husband added grated parmesan to his breadsticks because he loves parmesan and this was obviously delicious as well. But with just the butter, garlic, and salt, these were a dead ringer for Olive Garden’s. Adding this to my recipe box!
Thanks so much for the kind comment – so glad you enjoyed these breadsticks!