


This post may contain affiliate links. Read our disclosure policy.


Tessa’s Recipe Rundown
Taste: So much better than the shockingly sweet yet bland taste of store-bought pop tarts.
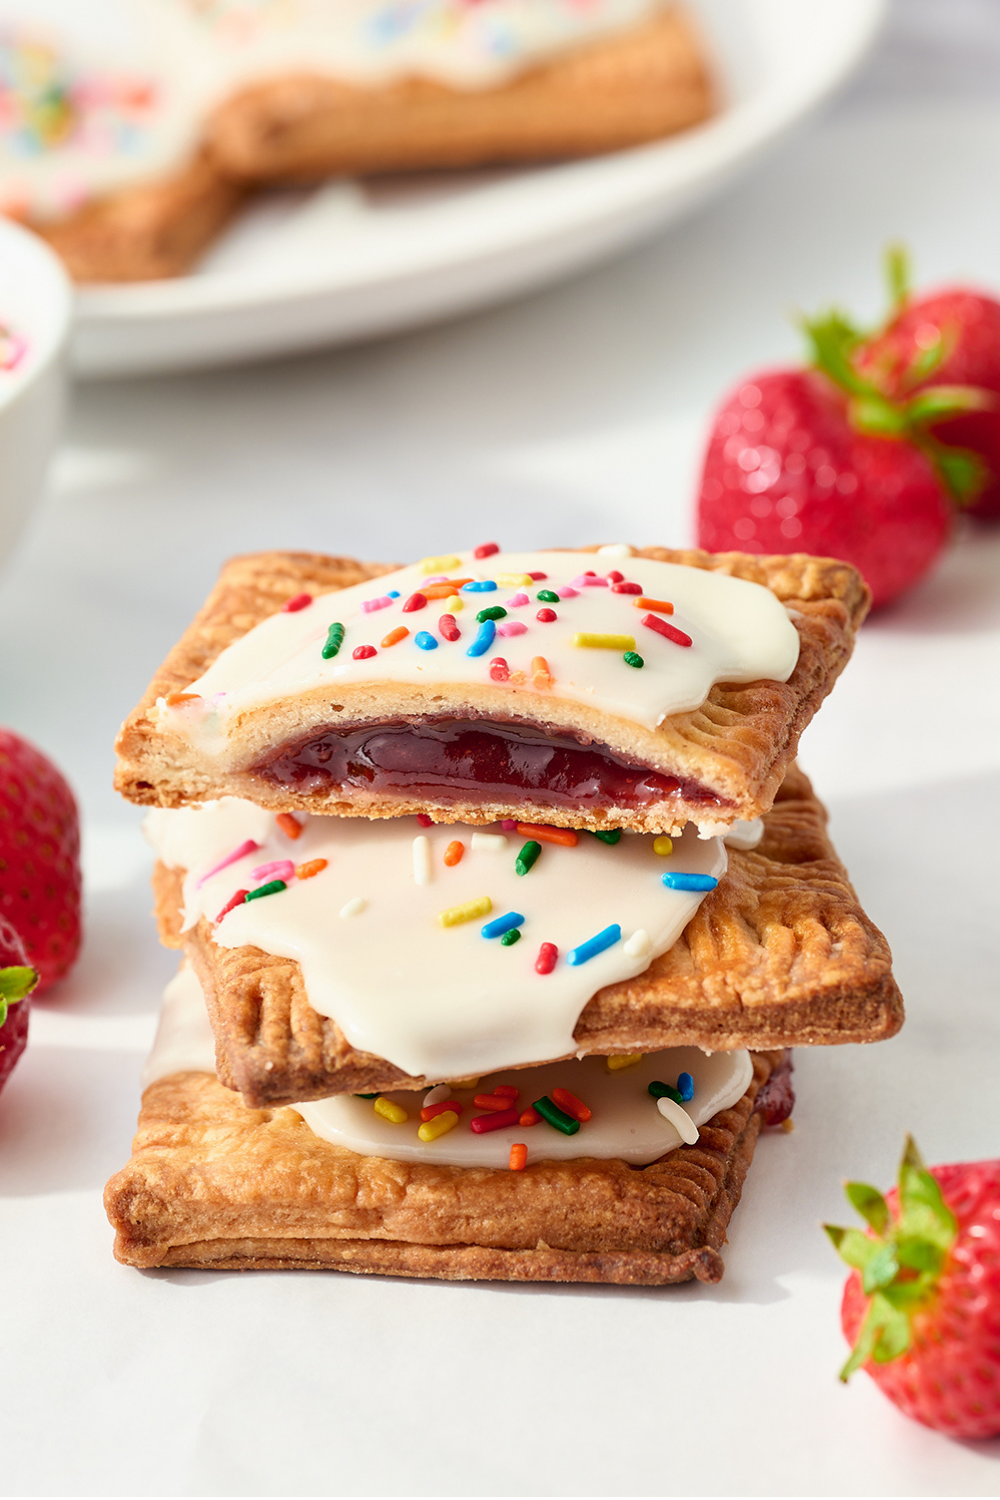
Texture: The dough for these pop tarts is made with cold butter so the tarts are flaky, buttery, and slightly crisp at the edges.
Ease: Rolling out the dough and forming the pop tarts takes a little time, but it could actually be a fun activity to do with kids!
Why You’ll Love This Recipe: It’s like a time portal back to childhood, but BETTER!
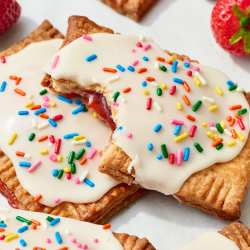
Homemade Strawberry Pop Tarts are like biting into sweet childhood nostalgia.
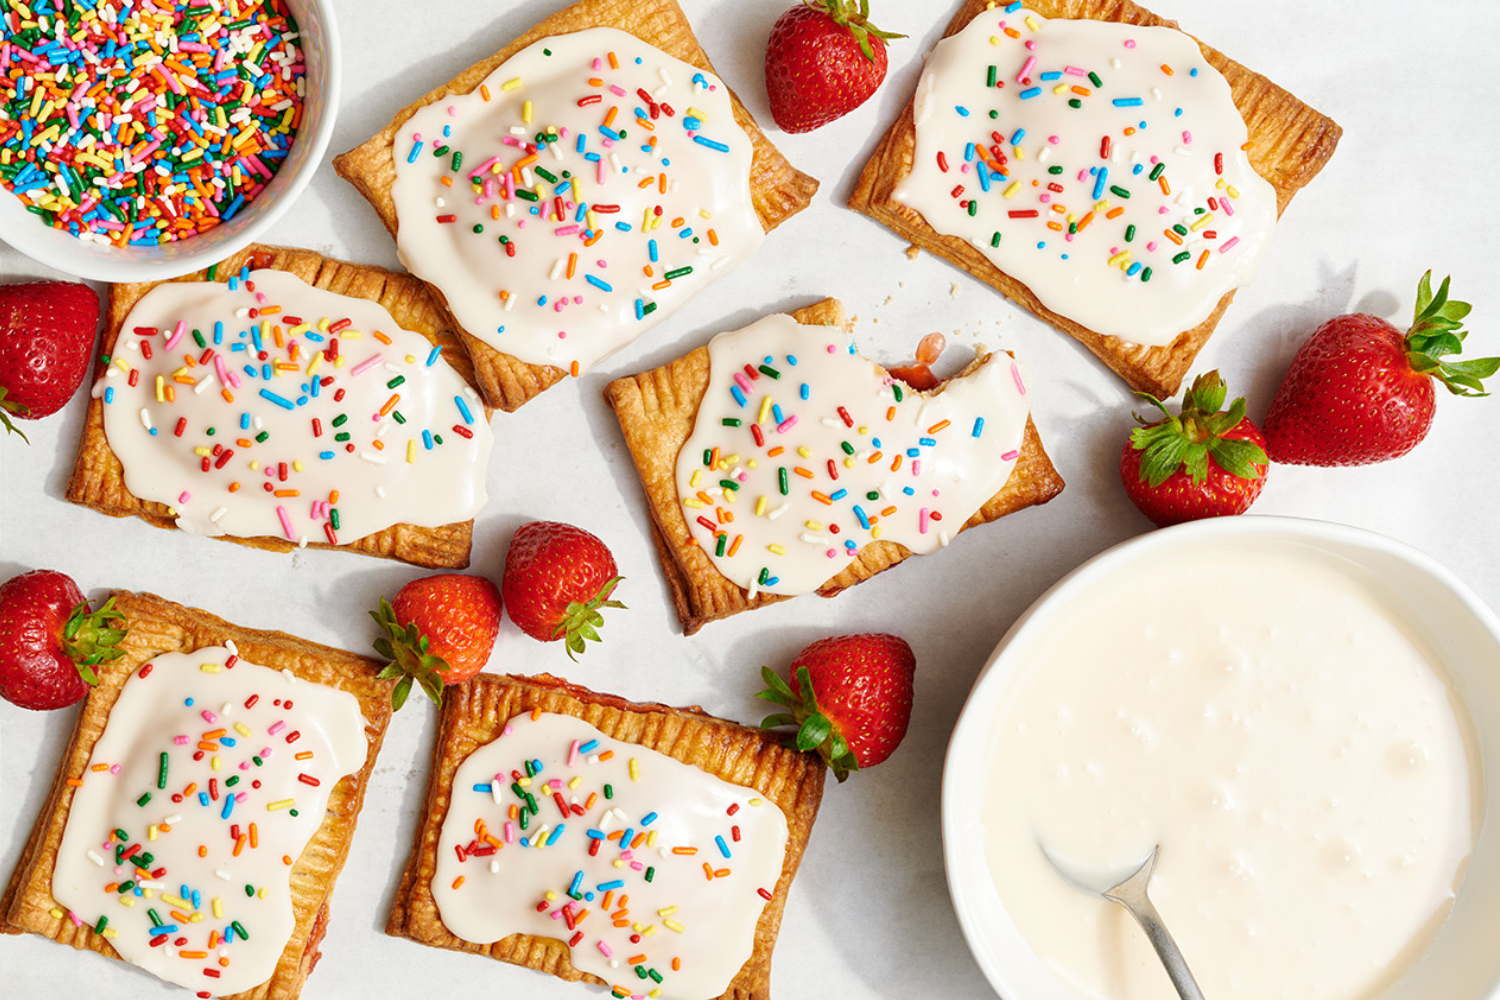
Despite finding store-bought Pop Tarts way too sweet in adulthood, I still find myself craving them every once in a while. There’s something to be said about a portable treat that simply includes a sweet filling, wrapped in buttery pastry and topped with a smooth icing.
These require some assembly (and therefore patience), but the fun part is in the fact that you can fill them with whatever you like.
Store-Bought vs. Homemade Pop Tarts
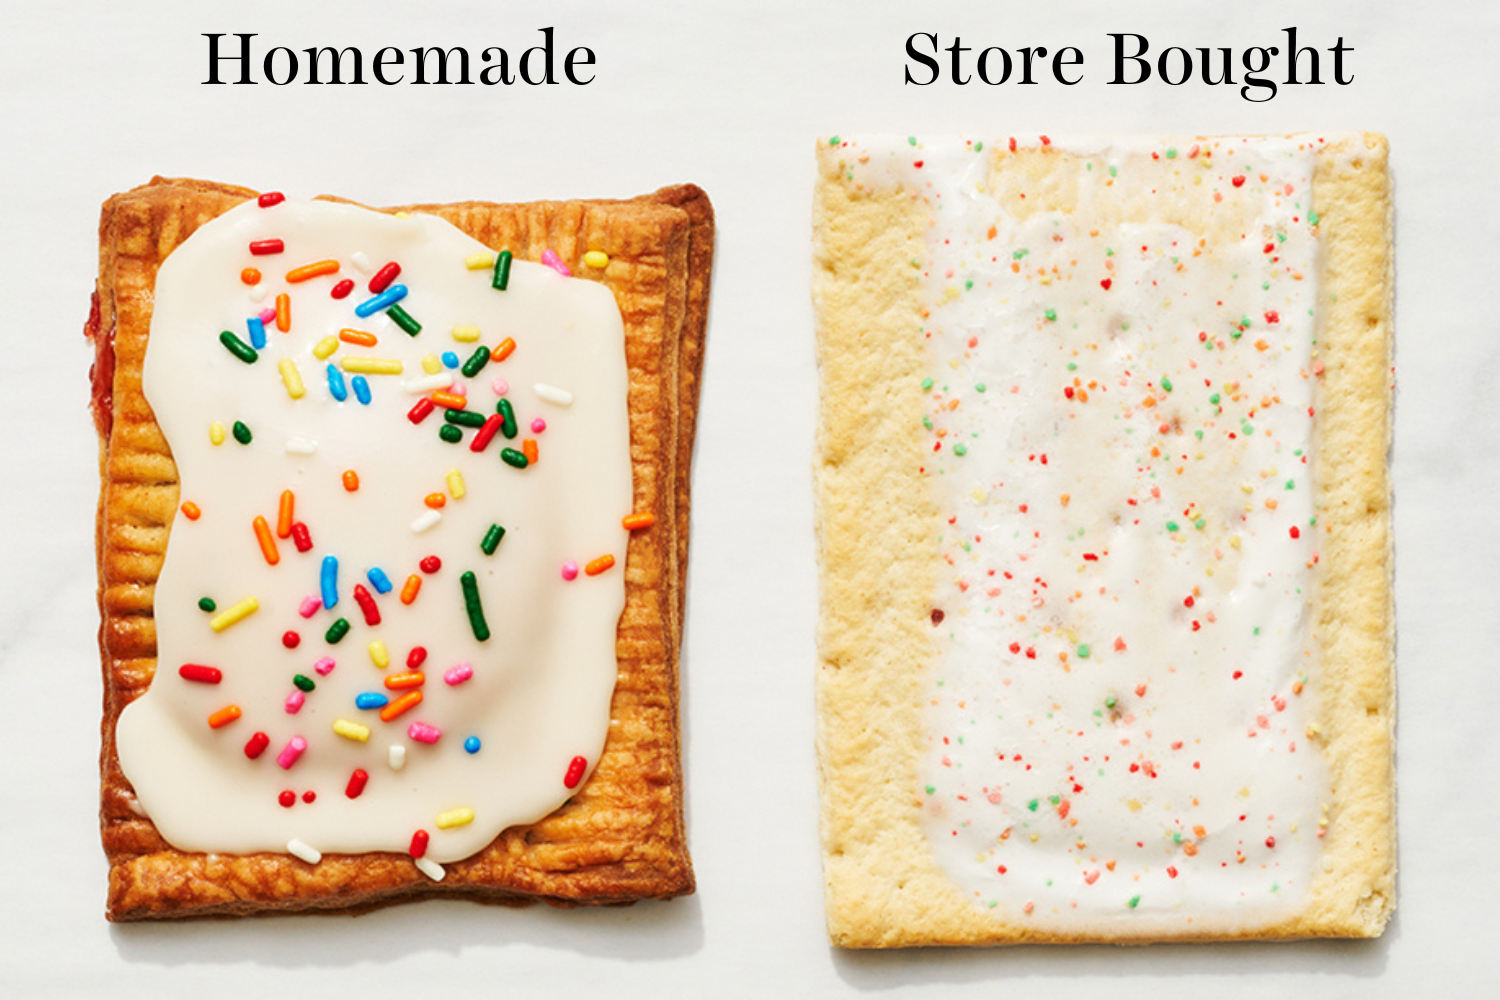
If you’re used to the store-bought ones, then you are in for a TREAT with homemade. They taste so much more flavorful and balanced. The crust is so much flakier and you can really get generous with that icing on top!
Tips for Homemade Pop Tart Pastry
- Keep Pastry Ingredients Cold: Just like most typical pie or pastry dough recipes, temperature is important here. Keeping the butter and water nice and cold prevents the butter from melting, and ensures your dough is nice and flaky once baked.
- Don’t Overmix the Pastry: As with any pastry, be careful not to overmix or overhandle, so your pastry doesn’t end up rubbery!
- Measure Your Flour Correctly: Use a digital kitchen scale, or the spoon and level method. If you add too much flour, you may end up with rubbery pastry that doesn’t get a crisp and flaky texture in the oven. Learn more about measuring ingredients correctly here.
Storage & Make ahead
Make Ahead Options:
- Prep the dough: You can make the pastry dough up to a day in advance – just store it in the fridge, wrapped well in plastic wrap.
- Fully assemble: Cover the assembled, unbaked pop tarts with plastic wrap, and store in the fridge for up to one day before baking. Unbaked, assembled pop tarts can also be frozen on a baking tray until solid, then transferred to a ziptop bag or airtight container for up to a month. Thaw in the fridge for an hour or so before baking, cooling and glazing.
To Store: Use an airtight container for up to three days. They will keep a day or two past that, but they won’t be as flaky and delicious past three days.
To Freeze: Baked, cooled and unglazed pop tarts can be frozen in an airtight container or ziptop bag for up to a month. Simply thaw at room temperature for an hour, then reheat in the oven for a few minutes or until crisp again, then cool, glaze and serve. They will lose some crispness with this method.

FAQs
Pop Tarts are sweet pastries, made from two rectangular pastry crusts, sandwiched together and filled with something sweet. They’re often glazed with a sweet icing. Pop Tarts are a typical childhood favorite, and can be found in any American supermarket.
The little bit of honey in the dough improves its strength, helps the pastry retain moisture as it bakes, and gives the finished product a richer color and fuller flavor. It also assists in preventing staling, meaning your Pop Tarts will stay delicious and fresh longer! Don’t worry if you don’t have any honey in the pantry, you can safely leave it out.
No. Store-bought Pop-Tarts contain a bunch of artificial ingredients that are designed to keep intact and not melt their way into your toaster; these homemade ones don’t contain those same ingredients. The glaze would definitely make a big mess and probably ruin your toaster!
If you wish to eat these Pop Tarts warm, I would recommend reheating on a baking tray for a few minutes in a 350°F oven.
Yes, you can use any type of jam or preserves you like to fill these Pop Tarts! Everything else can stay the same, but just swap out the same quantity of jam filling for any other flavor you prefer. Remember when filling these that less is more.
No, you can omit it. It helps the glaze set so it’s not wet to the touch. If you skip it, just note you may not be able to store or stack your pop tarts without the glaze smearing.
Corn syrup gets a bad reputation, and sure, it’s not exactly a health food, but it’s really just an invert sugar (meaning that it’s a sugar that’s liquid at room temperature). It’s NOT the same as high-fructose corn syrup.
PS: Did you know that agave syrup contains more fructose than high fructose corn syrup? (not that it’s used in this recipe, but interesting nonetheless)
Email This Recipe
Enter your email, and we’ll send it to your inbox.
Ingredients
For the dough:
- 2 ¼ cups (290 grams) all-purpose flour
- ¼ cup + 1 tablespoon (65 grams) granulated sugar
- ½ teaspoon cinnamon
- 1 teaspoon fine sea salt
- 2 sticks (227 grams) unsalted butter, cold and cubed
- ¼ cup + 3 tablespoons (100 grams) cold water
- ½ teaspoon honey

For the filling:
- Strawberry Preserves
For the egg wash:
- 1 egg
- 2 teaspoons water
For the glaze:
- 1 ½ cups (188 grams) powdered sugar, sifted
- ½ teaspoon vanilla extract
- 2 tablespoons milk
- 1 tablespoon (22 grams) corn syrup*
- Sprinkles (optional)
Instructions
Make the dough:
- Adjust the oven rack to the center position and preheat the oven to 375°F. Line two baking trays with parchment and set aside.
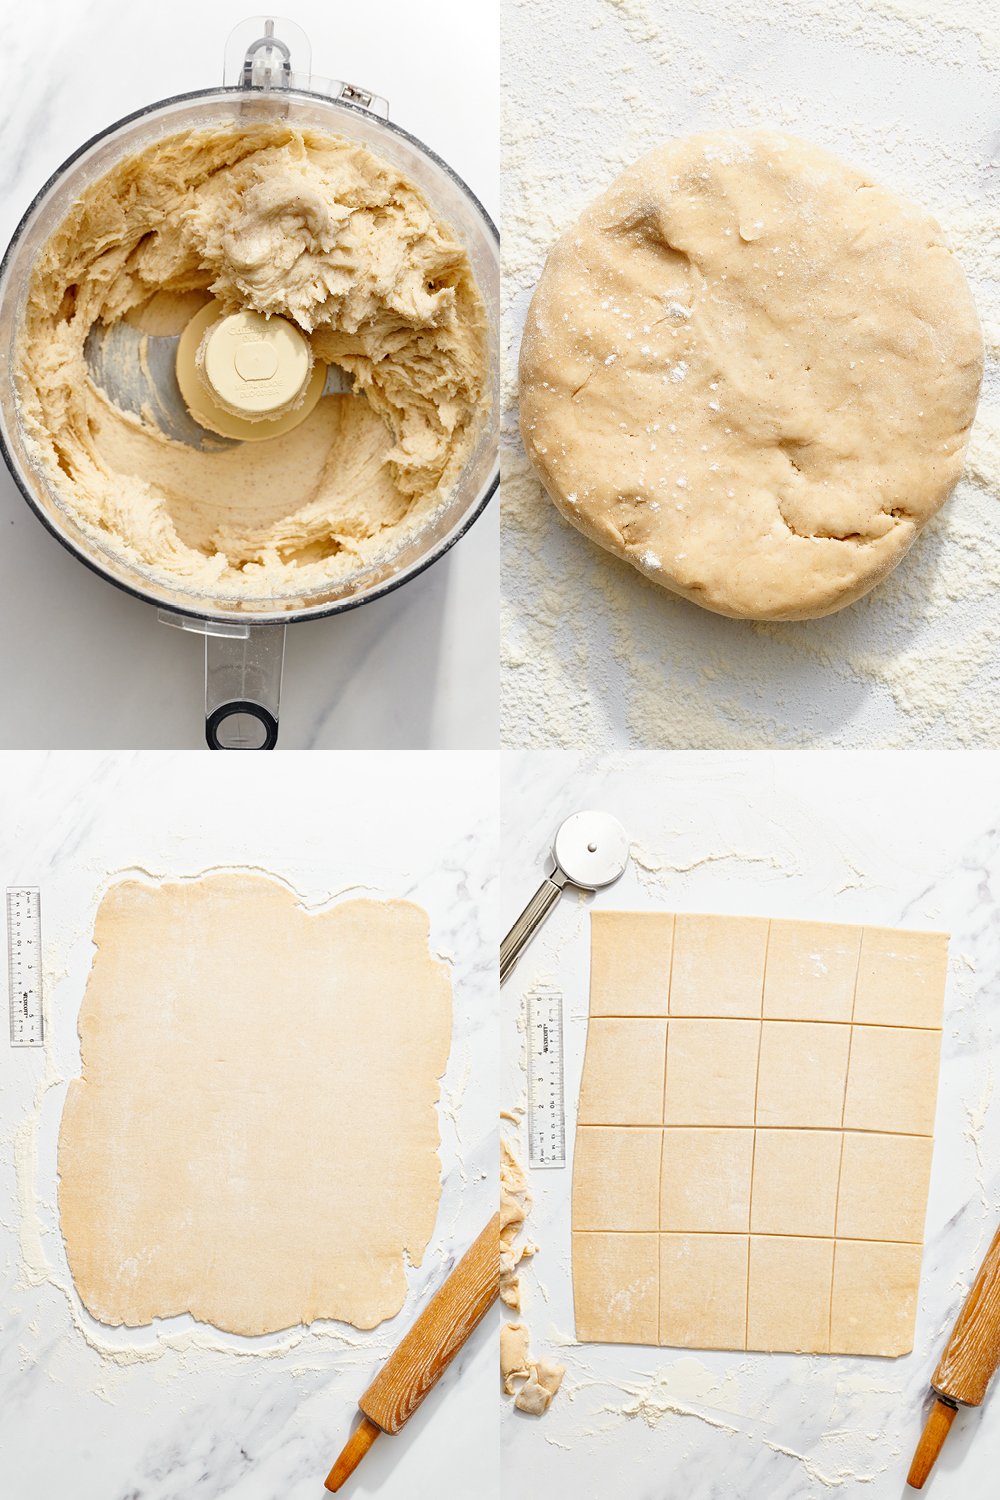
- In a food processor or large mixing bowl, add the flour, sugar, cinnamon, and salt. Pulse lightly, or mix with a whisk, to combine. Add the cubed butter all at once and pulse for 10-20 seconds, or if mixing by hand, cut the butter into the dry mixture with a pastry cutter for 5-6 minutes, or until the mixture looks sandy and no large clumps remain. Be careful not to overmix as the butter will get too warm.
- Pour in the cold water and honey in a steady stream while pulsing the dough mixture in the food processor, or if mixing by hand, pour cold water and honey into the dough mixture and mix until the mixture comes together and a dough ball has formed. Check the dough to make sure that there are no visible flour or sugar patches, but don’t overmix.
- Remove the dough from the food processor or bowl and place on a lightly floured surface. Fold the dough 2-3 times and shape into a 1-inch thick, 7-inch diameter circle. Wrap the dough in plastic wrap and let it rest in the refrigerator for 30 minutes to 1 hour.
- Once the dough has cooled and rested, flour your work surface to roll out the dough. Roll the dough into a rectangle, about 3 feet in length, 8 inches in width, and about ⅛ of an inch thick. Using a pastry cutter, pizza cutter, knife or bench scraper, cut the dough into rectangles 3 inches wide x 4 inches in height. You should be able to cut between 18-20 rectangles depending on how thick the dough has been rolled.
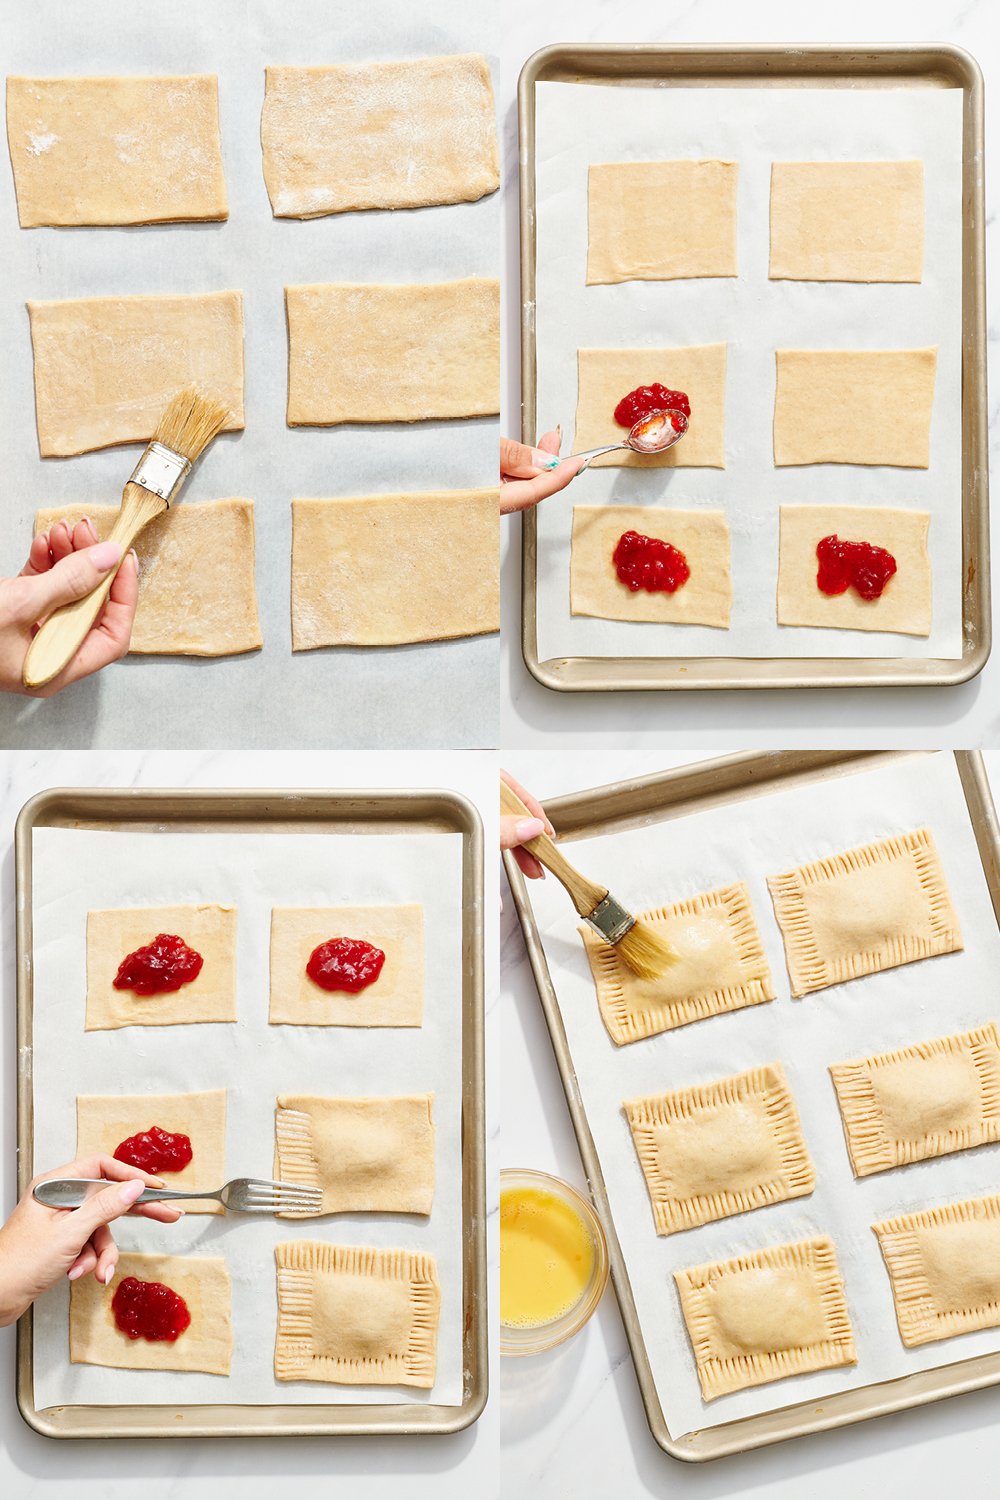
- Lift 8 of the cut rectangles off your work surface with a spatula or bench scraper and place them onto one of the prepared baking sheets. These will be the bottoms of your pop tarts. Brush the dough lightly with water, ensuring that the edges get wet; otherwise the top and bottom dough won’t stick together completely when crimped and the filling will leak out. Fill each center with 1 heaping teaspoon of strawberry preserves, leaving about ¼-inch border from filling to the edge of the dough. Cover each filled pastry with a second dough rectangle and crimp the edges together with a fork. Repeat process with any remaining cut rectangles onto second prepared baking sheet.
Make the egg wash:
- In a small bowl, mix together the egg and water.
- Brush each filled rectangle with egg wash and bake for 25-30 minutes, or until golden brown and the pastry is fully baked. Let cool completely before glazing, about 30-45 minutes.
Make the glaze:
- While the pop tarts are baking, in a small bowl, whisk together the sifted powdered sugar, vanilla, milk, and corn syrup, mixing until smooth. The glaze should be thick, but not too thick to spread.
- Use a spoon or offset spatula to glaze each cooled Pop Tart. Top with sprinkles of your choice.
- Leave to set for 30 minutes to 1 hour before eating, or at least 3 hours (or until they are dry to the touch – this will depend on your kitchen environment) before stacking on top of each other, to prevent the glaze from getting messed up and smearing, or sticking to the bottom of the Pop Tart placed on top of it.
Notes
More Copycat Recipes You’ll Love:
This post was originally published in 2013 and has been updated with new photos and recipe improvements. Photos by Joanie Simon.


Can you freeze these they would be perfect for my brother who doesn’t always have time to cook
Yep! See storage and freezing instructions above the recipe here 🙂
Thank you but I thought they would heat better in the air fryer
These look delicious! Such fond memories as a kid! I’m not a big fan of corn syrup, though…. I assume it keeps the icing more pliable? Any ideas for substitutes that would work as well or would it be ok to just leave it out altogether? Thx.
Came out stunning…I did omit the cinnamon and added a little food coloring to the glaze and used home made apricot preserves made from fruit in the garden……a new standard for our work baking club!
They look perfect! Also… a work baking club? How fun!
Can these be toasted or warmed? Will the icing melt?
Hi Gabe! No, we don’t recommend that. More on this in the Tip Box above the recipe, under the header, “Can I reheat these Strawberry Pop Tarts in a toaster?”
Wow these were amazing! I did 4 strawberry, and 5 with a cinnamon brown sugar filling and glaze. They turned out so good. Thank you for sharing this recipe my family loved it!
They look amazing, Audra! So happy to hear they were such a hit!