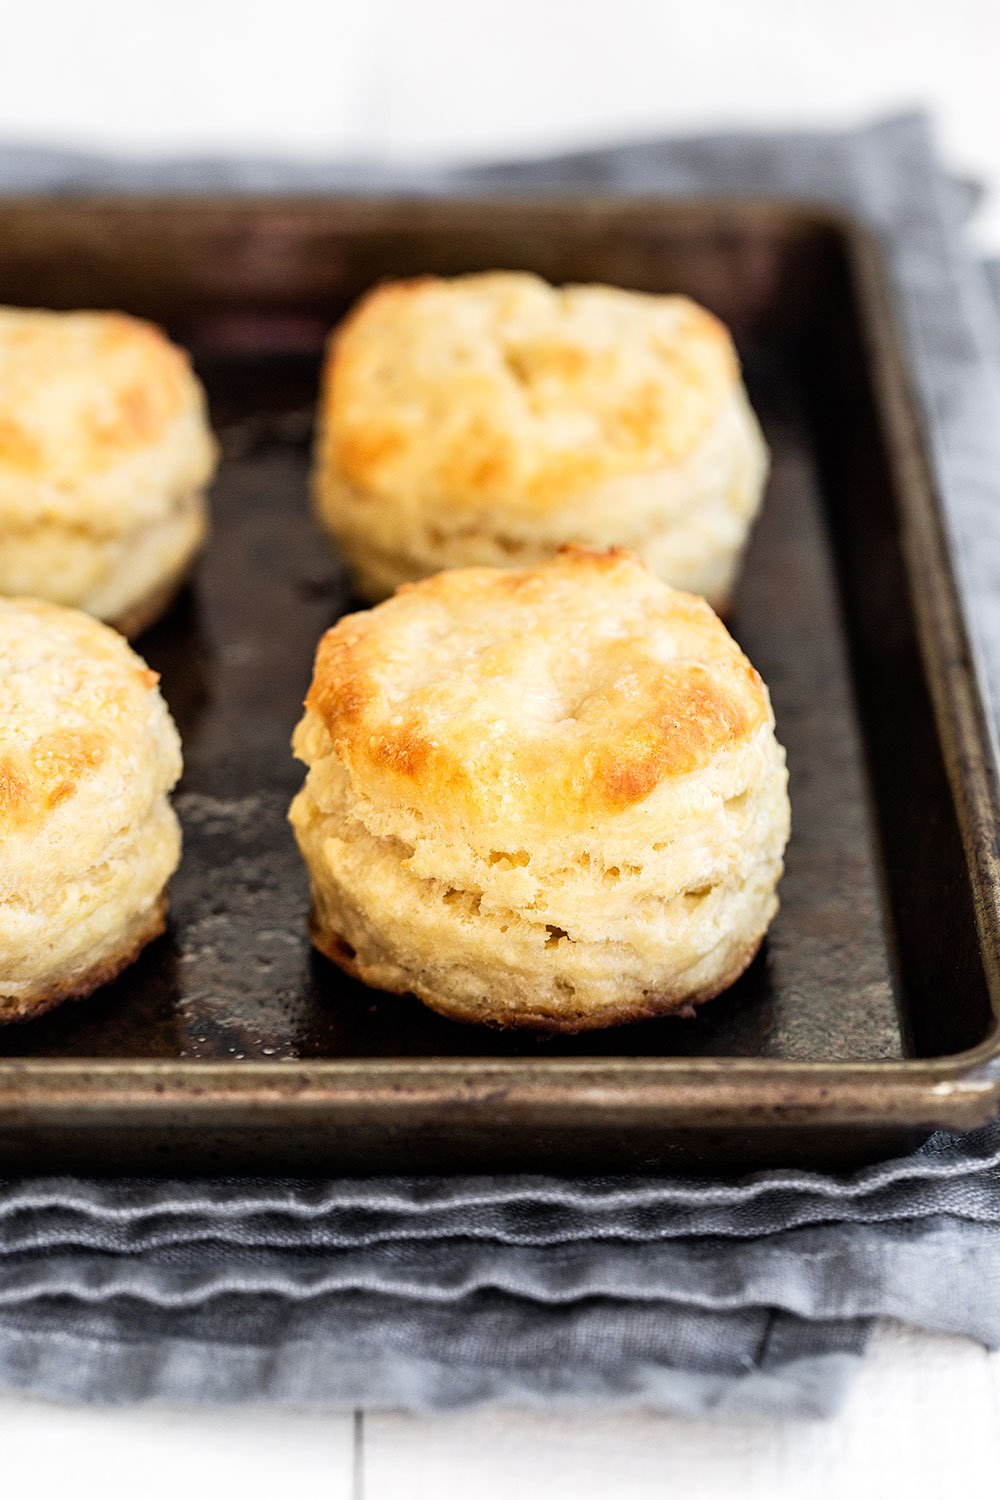
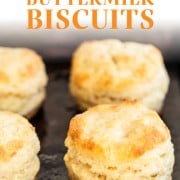
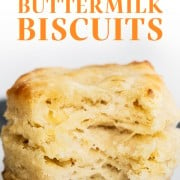
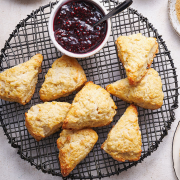
A step-by-step photo tutorial on How to Make Biscuits with make ahead baking advice and customization ideas with flavorful add-ins.
Yield:
10 -12 biscuits
Prep Time:10minutes
Cook:15minutes
This post is sponsored by Clabber Girl. All opinions provided are my own.
Recently Clabber Girl challenged me to use their baking powder in a series of posts all about biscuits (I have the best job ever). So I kicked off the series testing out butter vs. shortening biscuits, be sure to check out that post to see which is the best!
Now I’m moving on to showing you exactly how to make perfect biscuits with step-by-step photos and ALL of my favorite tips, tricks, and advice to ensure flavorful, buttery, flaky, and tender biscuits. There’s nothing as comforting as a batch of warm homemade biscuits fresh from the oven.
Warning: this post is chock-full of helpful and mouthwatering photos! So if you’d like to learn how to make glorious, heavenly, scrumptious biscuits, keep reading.
Also be sure to follow Clabber Girl on Facebook for tons of baking recipes and tips and stay tuned for another post all about biscuits coming soon!
Biscuits require just a few simple ingredients, most of which you probably already have on hand! I like to add a touch of sugar to my biscuits for a lovely well-rounded flavor, but feel free to leave it out if you prefer.
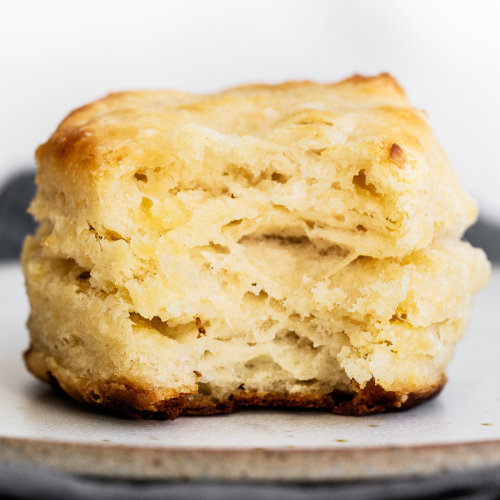
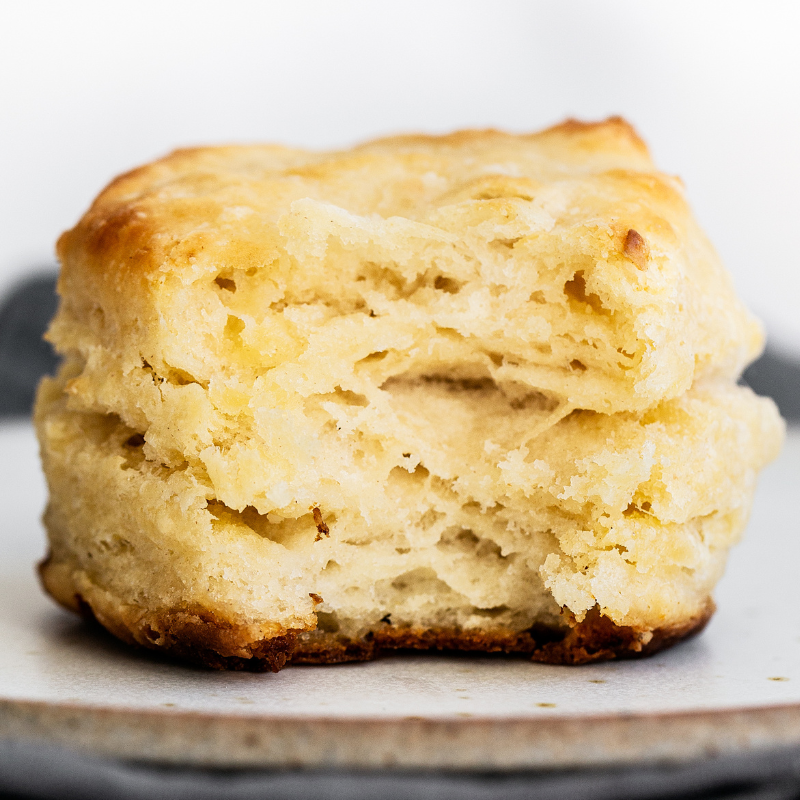
In a large bowl combine the flour, sugar, Clabber Girl baking powder, baking soda, and fine salt. Next add in 6 tablespoons of chilled and cubed butter. I like to cut my butter into little cubes and pop them in the freezer while I gather the other ingredients and preheat the oven. The key to flaky biscuits is ultra cold chunks of butter that melt while the biscuits bake and create tiny pockets of steam to lift the dough into flaky layers. Yum!
Use a pastry blender to cut the butter into the flour until the mixture resembles coarse meal (I love this sturdy pastry blender from OXO). You want some larger chunks of butter to remain. The faster you do this, the better, because remember the butter must keep cold!
Next pour in the buttermilk and stir until JUST combined, until the flour is just incorporated and then whatever you do, stop mixing. The key to tender biscuits is a light hand; if you overmix the biscuits will end up dry, tough, and dense. No one wants that!
TIP: Use real buttermilk if possible, not a DIY substitute, because it is a crucial part of the biscuits.
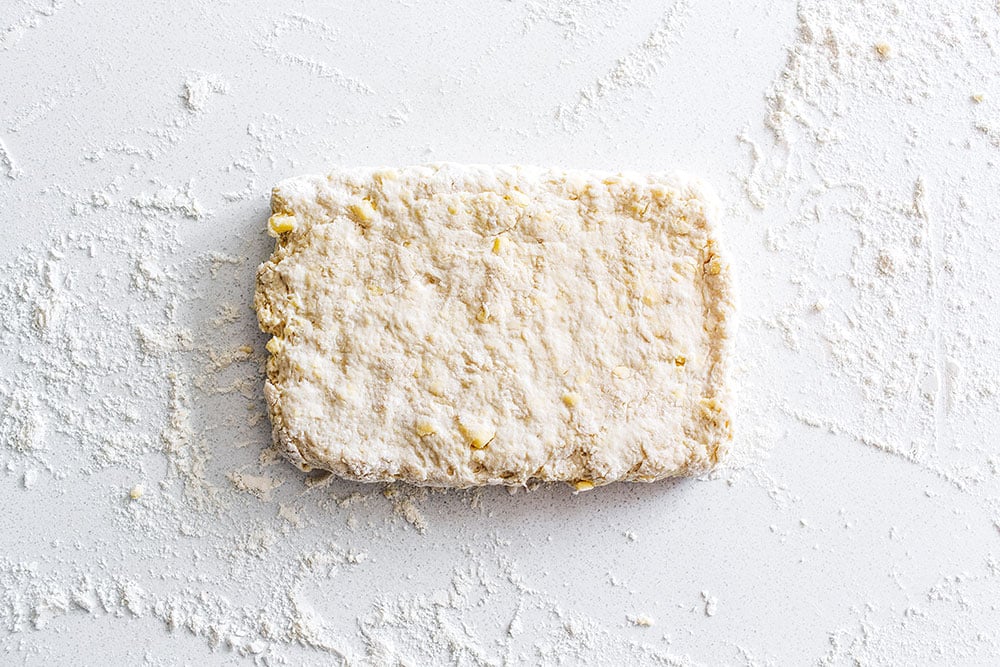
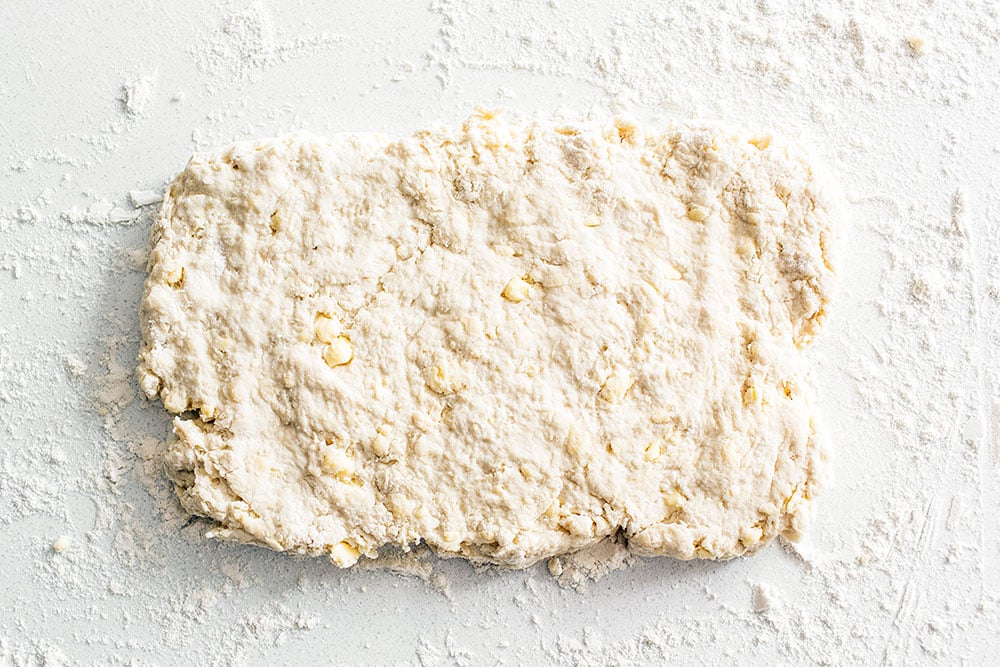
As you can see, the dough will be quite loose and sticky which is just what we want.
All these steps can also be done in the food processor, which is actually my preferred method of biscuit making. It’s quick and easy and best of all, the food processor works fast enough to keep the butter perfectly cold.
Just make sure you do not over-process the dough, it will only take a few pulses to bring all the ingredients together.
Turn the dough out onto a well-floured work surface and sprinkle with more flour. Gently pat the dough out into a 1/2-inch thick round, rotating often to ensure the dough isn’t sticking. If you want REALLY tall biscuits, feel free to shape the dough to 3/4-inch or even 1-inch thickness instead. Use a 2-inch round biscuit cutter to push straight down through the dough to cut out circles (or a round cookie cutter, like to ones in my Perfect Cookie Kit, are perfectly fine, too!). Do not twist the biscuit cutter; doing so may prevent the biscuits from rising. Straight up and down! Place the biscuits on parchment lined baking sheets.
TIP: If you want to skip rolling out and cutting the dough, simply drop the biscuit dough by scant 1/4-cup portions onto the baking sheet.
Bake the biscuits at 450°F until golden brown, about 12 to 15 minutes.
TIP: Make sure your oven is at the right temperature as it needs to be nice and hot! I like to use an oven thermometer to make sure, my oven will often say it’s preheated when it’s really 15 to 20°F cooler.
The best part about making homemade biscuits is that the options for flavor customization are virtually limitless! I LOVE to add cheese to my biscuits, especially sharp cheddar!
Simply add in any extra flavorings and ingredients as the dough comes together, again being careful not to mix too much.
Who could say no to these golden brown cheesy, buttery, flaky, tender biscuits?! Here are some more scrumptious add-in ideas, feel free to get creative and mix-and-match.
Biscuit Add-Ins:
Cheese – 1 cup shredded or crumbled cheese such as cheddar, Gruyere, Parmesan, Asiago, goat cheese, feta Bacon – 4 to 5 slices crisp cooked bacon, crumbled Green Onions – 1/4 cup sliced green onions Fresh herbs – 1 tablespoon chopped rosemary, thyme, chives, sage, parsley Garlic – 1/2 teaspoon garlic powder Jalapeno – 1 jalalpeno, seeded and diced Chipotle – 1 tablespoon finely minced canned chipotle chiles in adobo Black Pepper – 1 teaspoon coarsely ground black pepper and more for sprinkling on top before baking
Biscuits also taste great with gravy, of course, or a smear of jam or a spoonful of honey. They make fabulous breakfast sandwiches.
Make Ahead and Storage:
To make the biscuits ahead of time, simply place the unbaked rounds of biscuit dough on a parchment lined baking sheet and freeze until solid. Remove them to an airtight container and freeze for up to 2 months. Bake as directed, adding an additional 5 minutes to the baking time, or until golden brown. This is also perfect if you don’t want to bake the entire batch or want biscuits ready on demand.
4.89 from 9 votes
How to make
Biscuits
Yield:10-12 biscuits
Prep Time:10 minutesminutes
Cook Time:15 minutesminutes
Total Time:25 minutesminutes
A step-by-step photo tutorial on How to Make Biscuits with make ahead baking advice and customization ideas with flavorful add-ins.
Ingredients
2cups(254 grams) all-purpose flour, plus more for dusting
2teaspoonsgranulated sugar
1tablespoonClabber Girl baking powder
1/4teaspoonbaking soda
1teaspoonfine salt
6tablespoons(85 grams) unsalted butter, very cold
1cupbuttermilk, chilled
Directions
Preheat the oven to 450°F.
In the bowl of a food processor, combine the flour, sugar, baking powder, baking soda and salt. Add the butter or the shortening and pulse the food processor several times to cut the butter into the flour until the mixture resembles coarse meal. You can also do this by hand with a pastry blender. The faster you do this the better, you want the fat to remain cold. Stir in the buttermilk until just combined. DO NOT overmix, the dough will be slightly sticky.
Turn the dough out onto a floured surface and dust the dough with flour. Gently pat the dough out until it’s a 1/2-inch in thickness. Use a 2-inch round biscuit cutter to push straight down through the dough to cut out circles, try not to twist the cutter. Place the biscuits on the baking sheet, spacing 2-inches apart. Reform the scrap dough into 1/2-inch thickness, being sure to work with it as little as possible, before cutting out more circles.
Bake the biscuits until golden brown, about 12 to 15 minutes.
Course :
Breakfast
Cuisine :
American
This post is sponsored by Clabber Girl. All opinions provided are my own.
I share trusted baking recipes your friends will LOVE alongside insights into the science of sweets. I'm a professionally trained chef, cookbook author, and cookie queen. I love to write about all things sweet, carb-y, and homemade. I live in Phoenix, Arizona (hence the blog name!)
About Tessa...
I share trusted baking recipes your friends will LOVE alongside insights into the science of sweets. I'm a professionally trained chef, cookbook author, and cookie queen. I love to write about all things sweet, carb-y, and homemade. I live in Phoenix, Arizona (hence the blog name!)
At the top of the recipe the cook time is listed at 30 minutes, but at the end of the recipe the cook time is listed as 10-12 minutes. Could you please clarify which is itself best cook time for these biscuits?
Thanks for bringing this to our attention, Lavonna! I’ve updated the cook time listed. This recipe makes 10-12 biscuits, and the bake time is 12-15 minutes. I hope that helps!
I’ve had a hard time duplicating my mom’s amazing fluffy biscuits. These are outstanding. Thank you so much for the recipe!!! Do you think they would perform as well if I pre-made a bunch and froze them?
Hi Andrea! So happy you love this recipe 🙂 We recommend freezing these biscuits unbaked instead, more details can be found in the text above the recipe. I hope that helps!
Ok here I am on another HTH recipe. Funny I always thought biscuits were hard to make, as pretty much everything grandma used to make looked that way! Well she isn’t here to make biscuits for us any more so thank goodness I found your website! Only thing I did different was omit the baking soda (didn’t have any) and used a box grater to grate the butter! Yay! Now I can make biscuits almost as good as grandma! Thanks for another great lesson and recipe! Lessipe!
I always use cram of tartar instead of baking soda. They rise fantastically with it. Folding by hand for about a minute is better than the food processor because they will be less dry and rise better. Just my 2 cents.
Do you bake the biscuits right after you cut them, or do they need to go in the fridge first? Also, can these be refrigerated overnight? When do you add the cheese (before or after buttermilk)?
I learn something every day! Thank you for your reply. I just opened a new bag of floor and scooped it out with my measuring cup. Watching your video make my mistake obvious.
I can never use that little milk and get my dough to stay soft. I can hardly get all of the floor mix all incorporated, let alone “sticky.” I’ve tried almost doubling the milk and my last batch rose double.
They were almost perfect. Mine didn’t rise much but I think it’s my baking powder – getting new and trying again when family is here. I’ll also try your freezer idea They were pretty and delicious. Thank you.
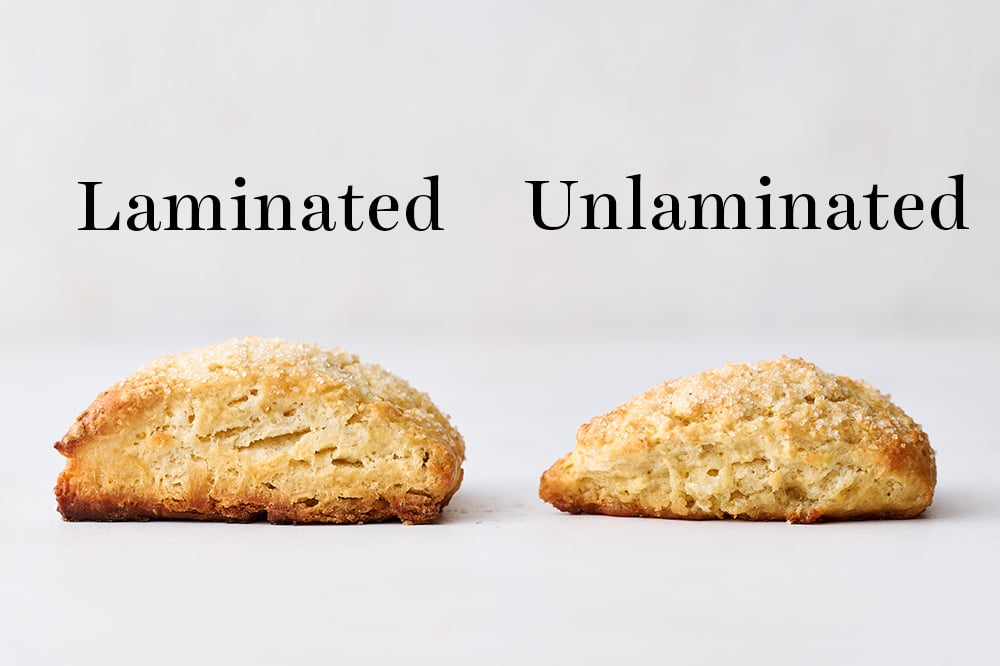
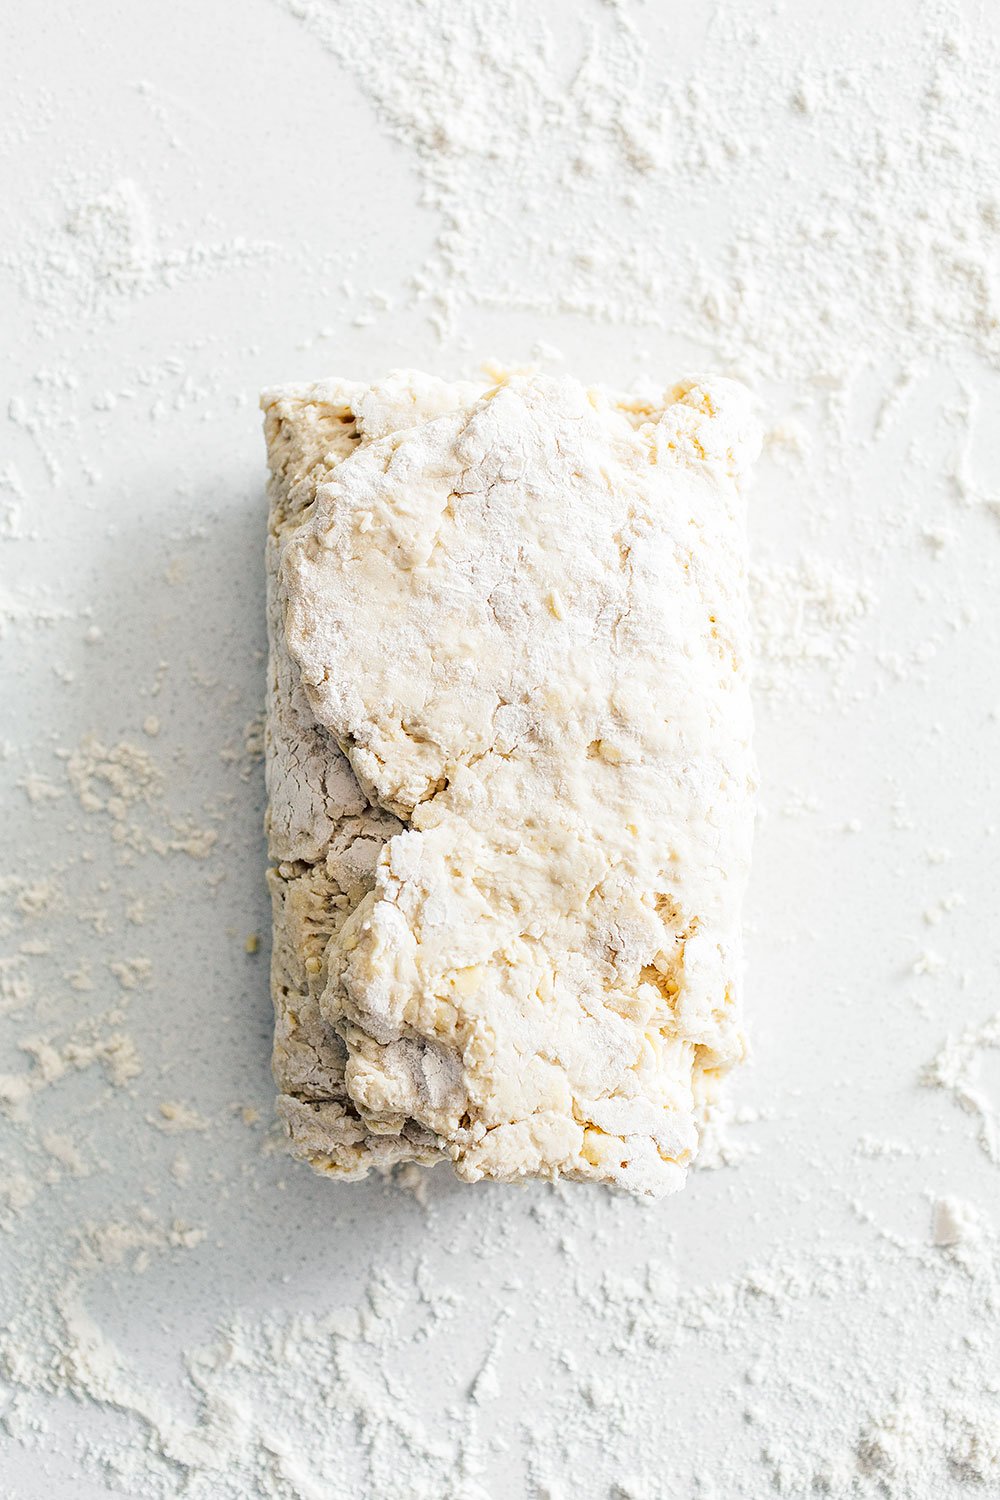
I realize this is an old thread, from 2016? So long ago!!! I have read that rolling the dough out thin, then flouring and folding, repeating several times creates the layers that make biscuits so wonderful. Of course the problem is the more you handle the dough the tougher the biscuits get.
Any suggestions on a compromise would be really really helpful!!!
I just made the biscuits. The first attorney did not turn out very good so I tried again. The second batch was better but they turned brown on the bottom before the top. Do you know what caused this issue? It may be thst my oven is too hot?
If it wasn’t your oven (I suggest getting an oven thermometer to be sure it’s accurate), it could have been the pan or the positioning in the oven. Dark colored pans or pans that are still hot from the previous batch can burn the bottoms of your baked goods. If your oven rack is too close to the bottom of the oven, that can also lead to the same problem.
I just finished doing this recipe for dinner. I had fun doing this delicious recipe with my 8 year old child, she had a lot of fun. It came out super good!!! Thank you for this delicious recipe.
Tessa, you make the point about butter vs. shortening. But, have you ever compared flour? Living in the North Carolina, I guess I’m lucky. But, I’ve had much better luck with my biscuits using either White Lily Self-Rising (a soft, winter wheat with a lower protein content than others which used to be milled in Knoxville TN – but now milled elsewhere after being purchased by Smuckers) or Southern Biscuit Self-Rising (also a soft, winter wheat milled in Newton NC). Even when I’ve used all-purpose flour and triple sifted the dry ingredients, the self-rising still beats the outcome.
And, to Judy. Don’t’ worry about the buttermilk. I’ve actually had a better outcome with buttermilk which is past the ‘Use By’ date. And, buttermilk can vary a lot. I’ve lucked up on a local dairy (Maple View Farm in Hillsborough, NC) which sells their buttermilk in real glass bottles. Even when I use it fresh, it’s nice and clumpy from the cultures they use. Wonderful stuff.
I don’t use liquid buttermilk because it would go bad before I used it all. So I use the powdered buttermilk that’s for cooking. You mix the powder in with the other dry ingredients,,,I sift everything together…..then add water and prepare as usual. The biscuits come out just as pretty and delicious.
I use Clabber Girl baking powder as well when I bake. I love freshly made biscuits, especially biscuits and gravy. Love the tips and tricks in this post.
Melissa: I would think it is just the flavour of the buttermilk. I’m sure you can do the DIY buttermilk with lactose free milk but they would have a somewhat different flavour.
There is nothing better than a buttermilk biscuit. My recipe is almost the same as yours. The only difference I pat mine out then fold over like a letter and fold over agin. Then pat out again and do the same thing. I do this 3 times then cut them out on the last patting put. They will rise even taller because it builds layers. I just learned this trick a year or so ago. I tested one without folding and then folded the rest of the dough. They were twice as tall as the one I didn’t fold.
Tessa, I’m curious about your comment regarding the buttermilk. What does it do that makes it so integral to the recipe, i.e. should not be substituted? I only ask as I am lactose intolerant and, obviously, can’t have buttermilk. (Oddly, butter’s fine because there’s no lactose enzyme in the cream made to make butter). Anyway, I was hoping you could clear that up. I love biscuits – I usually use the recipe from the old betty crocker cookbook – but would love to try yours. They look much more golden brown than my recipe. Thanks for the post!
Good question! The buttermilk is such a huge flavor component of classic-style Southern biscuits and I’ve tested both biscuits and even muffins with buttermilk vs. regular milk vs. almond milk and it truly does make a difference in flavor. I am so not an advocate of asking people to buy extra ingredients at the store, but real buttermilk is worth it in this case. HOWEVER, since you can’t have buttermilk or milk feel free to use your favorite lactose-free alternative. Sadly there’s nothing I know of that can really compete, but it’s better than having a stomach ache!
Hi Melissa, I use either almond or soy milk to make the buttermilk. It may not be the same but it works for lactose intolerance. Almond or soy milk are the best ones to get curdled milk. Hope this helps you.
Taylor @ Food Faith Fitness
— December 8, 2014 at 5:51 am
My husband LOVES biscuits, and is always going on about how his dad makes the best. So, I just never bothered to try to compete…mostly, because I had no idea how.
Now, the competition is ON! Love this! Pinned 🙂
As a trained chef and cookbook author, I share trusted baking recipes your friends & family will love alongside insights into the science of sweets. I help take the luck out of baking so you *always* have delicious results! Learn more here.
Over 200 pages with 50+ cookie recipes that'll make
you a COOKIE PRO. Discover how to turn your biggest cookie flops into WINS by mastering the
sweet science of baking. Even learn how to customize your own recipes! Beautiful, hardcopy,
full color, photos of every recipe so you know EXACTLY how your cookies should look. Order
now to have the book delivered to your doorstep!
Do you want a more delicious life?
Instead of digging through cookbooks and magazines and searching the internet for amazing
recipes, subscribe to Handle the Heat to receive new recipe posts delivered straight to your
email inbox. You’ll get all the latest recipes, videos, kitchen tips and tricks AND my
*free* Cookie Customization Guide (because I am the Cookie Queen)!
oven was hotter than needed in this recipe. I have always cooked biscuits on about 350* or 400* tops.
At the top of the recipe the cook time is listed at 30 minutes, but at the end of the recipe the cook time is listed as 10-12 minutes. Could you please clarify which is itself best cook time for these biscuits?
Thanks for bringing this to our attention, Lavonna! I’ve updated the cook time listed. This recipe makes 10-12 biscuits, and the bake time is 12-15 minutes. I hope that helps!
I’ve had a hard time duplicating my mom’s amazing fluffy biscuits. These are outstanding. Thank you so much for the recipe!!! Do you think they would perform as well if I pre-made a bunch and froze them?
Hi Andrea! So happy you love this recipe 🙂 We recommend freezing these biscuits unbaked instead, more details can be found in the text above the recipe. I hope that helps!
Ok here I am on another HTH recipe. Funny I always thought biscuits were hard to make, as pretty much everything grandma used to make looked that way! Well she isn’t here to make biscuits for us any more so thank goodness I found your website! Only thing I did different was omit the baking soda (didn’t have any) and used a box grater to grate the butter! Yay! Now I can make biscuits almost as good as grandma! Thanks for another great lesson and recipe! Lessipe!
haha, welcome to a new recipe, Jay! This is a fantastic recipe, I’m so happy you enjoyed it!
Easy -Fast-DELICIOUS!!!!
I finally learned how to make tender flakey biscuits.
Before, my biscuits were always too tuff
HOORAY!! So happy this helped!
Is there any oil, olive oil on the biscuit pan?
I didn’t see it on the recipe!
I always use cram of tartar instead of baking soda. They rise fantastically with it. Folding by hand for about a minute is better than the food processor because they will be less dry and rise better. Just my 2 cents.
How much cream of tartar? Does it add any flavor to the bisquits?
Do you bake the biscuits right after you cut them, or do they need to go in the fridge first? Also, can these be refrigerated overnight? When do you add the cheese (before or after buttermilk)?
I will try these biscuits at home
I froze the cut biscuits for 30 minutes and put them on a preheated baking pan. 15 minutes later…perfection!
I learn something every day! Thank you for your reply. I just opened a new bag of floor and scooped it out with my measuring cup. Watching your video make my mistake obvious.
Thank You.
I can never use that little milk and get my dough to stay soft. I can hardly get all of the floor mix all incorporated, let alone “sticky.” I’ve tried almost doubling the milk and my last batch rose double.
Any comments? Any one else run into this?
Try measuring your flour with a digital kitchen scale! See more here: https://handletheheat.com/how-to-measure-flour/
Thank you. It was easy to follow the steps of your recipe.
They were almost perfect. Mine didn’t rise much but I think it’s my baking powder – getting new and trying again when family is here. I’ll also try your freezer idea They were pretty and delicious. Thank you.
I always wondered how biscuits were made…..but now……am becoming a proffesional………
I realize this is an old thread, from 2016? So long ago!!! I have read that rolling the dough out thin, then flouring and folding, repeating several times creates the layers that make biscuits so wonderful. Of course the problem is the more you handle the dough the tougher the biscuits get.
Any suggestions on a compromise would be really really helpful!!!
Jibsman
Says 2 cups (9 ounces) flour
Please clarify.
Making these now. Thank you!
I just made the biscuits. The first attorney did not turn out very good so I tried again. The second batch was better but they turned brown on the bottom before the top. Do you know what caused this issue? It may be thst my oven is too hot?
If it wasn’t your oven (I suggest getting an oven thermometer to be sure it’s accurate), it could have been the pan or the positioning in the oven. Dark colored pans or pans that are still hot from the previous batch can burn the bottoms of your baked goods. If your oven rack is too close to the bottom of the oven, that can also lead to the same problem.
I just finished doing this recipe for dinner. I had fun doing this delicious recipe with my 8 year old child, she had a lot of fun. It came out super good!!! Thank you for this delicious recipe.
Tessa, you make the point about butter vs. shortening. But, have you ever compared flour? Living in the North Carolina, I guess I’m lucky. But, I’ve had much better luck with my biscuits using either White Lily Self-Rising (a soft, winter wheat with a lower protein content than others which used to be milled in Knoxville TN – but now milled elsewhere after being purchased by Smuckers) or Southern Biscuit Self-Rising (also a soft, winter wheat milled in Newton NC). Even when I’ve used all-purpose flour and triple sifted the dry ingredients, the self-rising still beats the outcome.
And, to Judy. Don’t’ worry about the buttermilk. I’ve actually had a better outcome with buttermilk which is past the ‘Use By’ date. And, buttermilk can vary a lot. I’ve lucked up on a local dairy (Maple View Farm in Hillsborough, NC) which sells their buttermilk in real glass bottles. Even when I use it fresh, it’s nice and clumpy from the cultures they use. Wonderful stuff.
I don’t use liquid buttermilk because it would go bad before I used it all. So I use the powdered buttermilk that’s for cooking. You mix the powder in with the other dry ingredients,,,I sift everything together…..then add water and prepare as usual. The biscuits come out just as pretty and delicious.
I use Clabber Girl baking powder as well when I bake. I love freshly made biscuits, especially biscuits and gravy. Love the tips and tricks in this post.
There is nothing better than a buttermilk biscuit!!!!
These look awesome Tessa! Great tutorial!!
Great guide, the cheesy ones look fantastic!
You are amazing- this is such a perfect, comprehensive guide to follow. Love!
Thanks so much Lori!
Whoa, do your biscuits look perfect! And the options are all magnificent…I’ll start by adding cheese and work my way through the list 🙂
Thank you and good plan 🙂
Melissa: I would think it is just the flavour of the buttermilk. I’m sure you can do the DIY buttermilk with lactose free milk but they would have a somewhat different flavour.
I would have loved one of those with my egg this morning!! I love Clabber Girl – it’s the only brand of baking powder I buy!
Those really are remarkably perfect biscuits!
There is nothing better than a buttermilk biscuit. My recipe is almost the same as yours. The only difference I pat mine out then fold over like a letter and fold over agin. Then pat out again and do the same thing. I do this 3 times then cut them out on the last patting put. They will rise even taller because it builds layers. I just learned this trick a year or so ago. I tested one without folding and then folded the rest of the dough. They were twice as tall as the one I didn’t fold.
Excellent tip!!
Tessa, I’m curious about your comment regarding the buttermilk. What does it do that makes it so integral to the recipe, i.e. should not be substituted? I only ask as I am lactose intolerant and, obviously, can’t have buttermilk. (Oddly, butter’s fine because there’s no lactose enzyme in the cream made to make butter). Anyway, I was hoping you could clear that up. I love biscuits – I usually use the recipe from the old betty crocker cookbook – but would love to try yours. They look much more golden brown than my recipe. Thanks for the post!
Good question! The buttermilk is such a huge flavor component of classic-style Southern biscuits and I’ve tested both biscuits and even muffins with buttermilk vs. regular milk vs. almond milk and it truly does make a difference in flavor. I am so not an advocate of asking people to buy extra ingredients at the store, but real buttermilk is worth it in this case. HOWEVER, since you can’t have buttermilk or milk feel free to use your favorite lactose-free alternative. Sadly there’s nothing I know of that can really compete, but it’s better than having a stomach ache!
Hi Melissa, I use either almond or soy milk to make the buttermilk. It may not be the same but it works for lactose intolerance. Almond or soy milk are the best ones to get curdled milk. Hope this helps you.
My husband LOVES biscuits, and is always going on about how his dad makes the best. So, I just never bothered to try to compete…mostly, because I had no idea how.
Now, the competition is ON! Love this! Pinned 🙂