


Tessa's Recipe Rundown
Taste: The little bit of nutmeg combined with the sour cream and sweet glaze makes these doughnuts taste just like the ones at your favorite bakery, if not better!
Texture: Slightly crunchy on the outside, cakey and soft on the inside. All the little cracks in these doughnuts just soak up the shiny, crackled glaze.
Ease: There’s no yeast in this recipe so you can have these doughnuts IN YOUR MOUTH in a little more than an hour from start to finish.
Pros: I think the pros are inherently implied, they’re doughnuts!
Cons: Deep fried sugary goodness ain’t too good for your diet.
Would I make this again? Yes, whenever I’m craving these old-fashioned cake doughnuts I’ll whip this recipe out.
This post may contain affiliate links. Read our disclosure policy.


I have huge sweet tooth cravings on the regular. Can you relate?
When I get a doughnut craving, it’s intense.
In my experience, a lot of doughnut shops make pretty bland and greasy doughnuts that leave a weird residue on your tongue.
There are a few local shops that I LOVE, but I rarely have an excuse to make a trip to one of them.
This recipe honestly takes about the same amount of time that it takes to drive across town to my favorite bakery, so it’s kind of perfect. Plus, if you only eat doughnuts when you make them from scratch, you can’t really go overboard, right? That’s my logic at least.
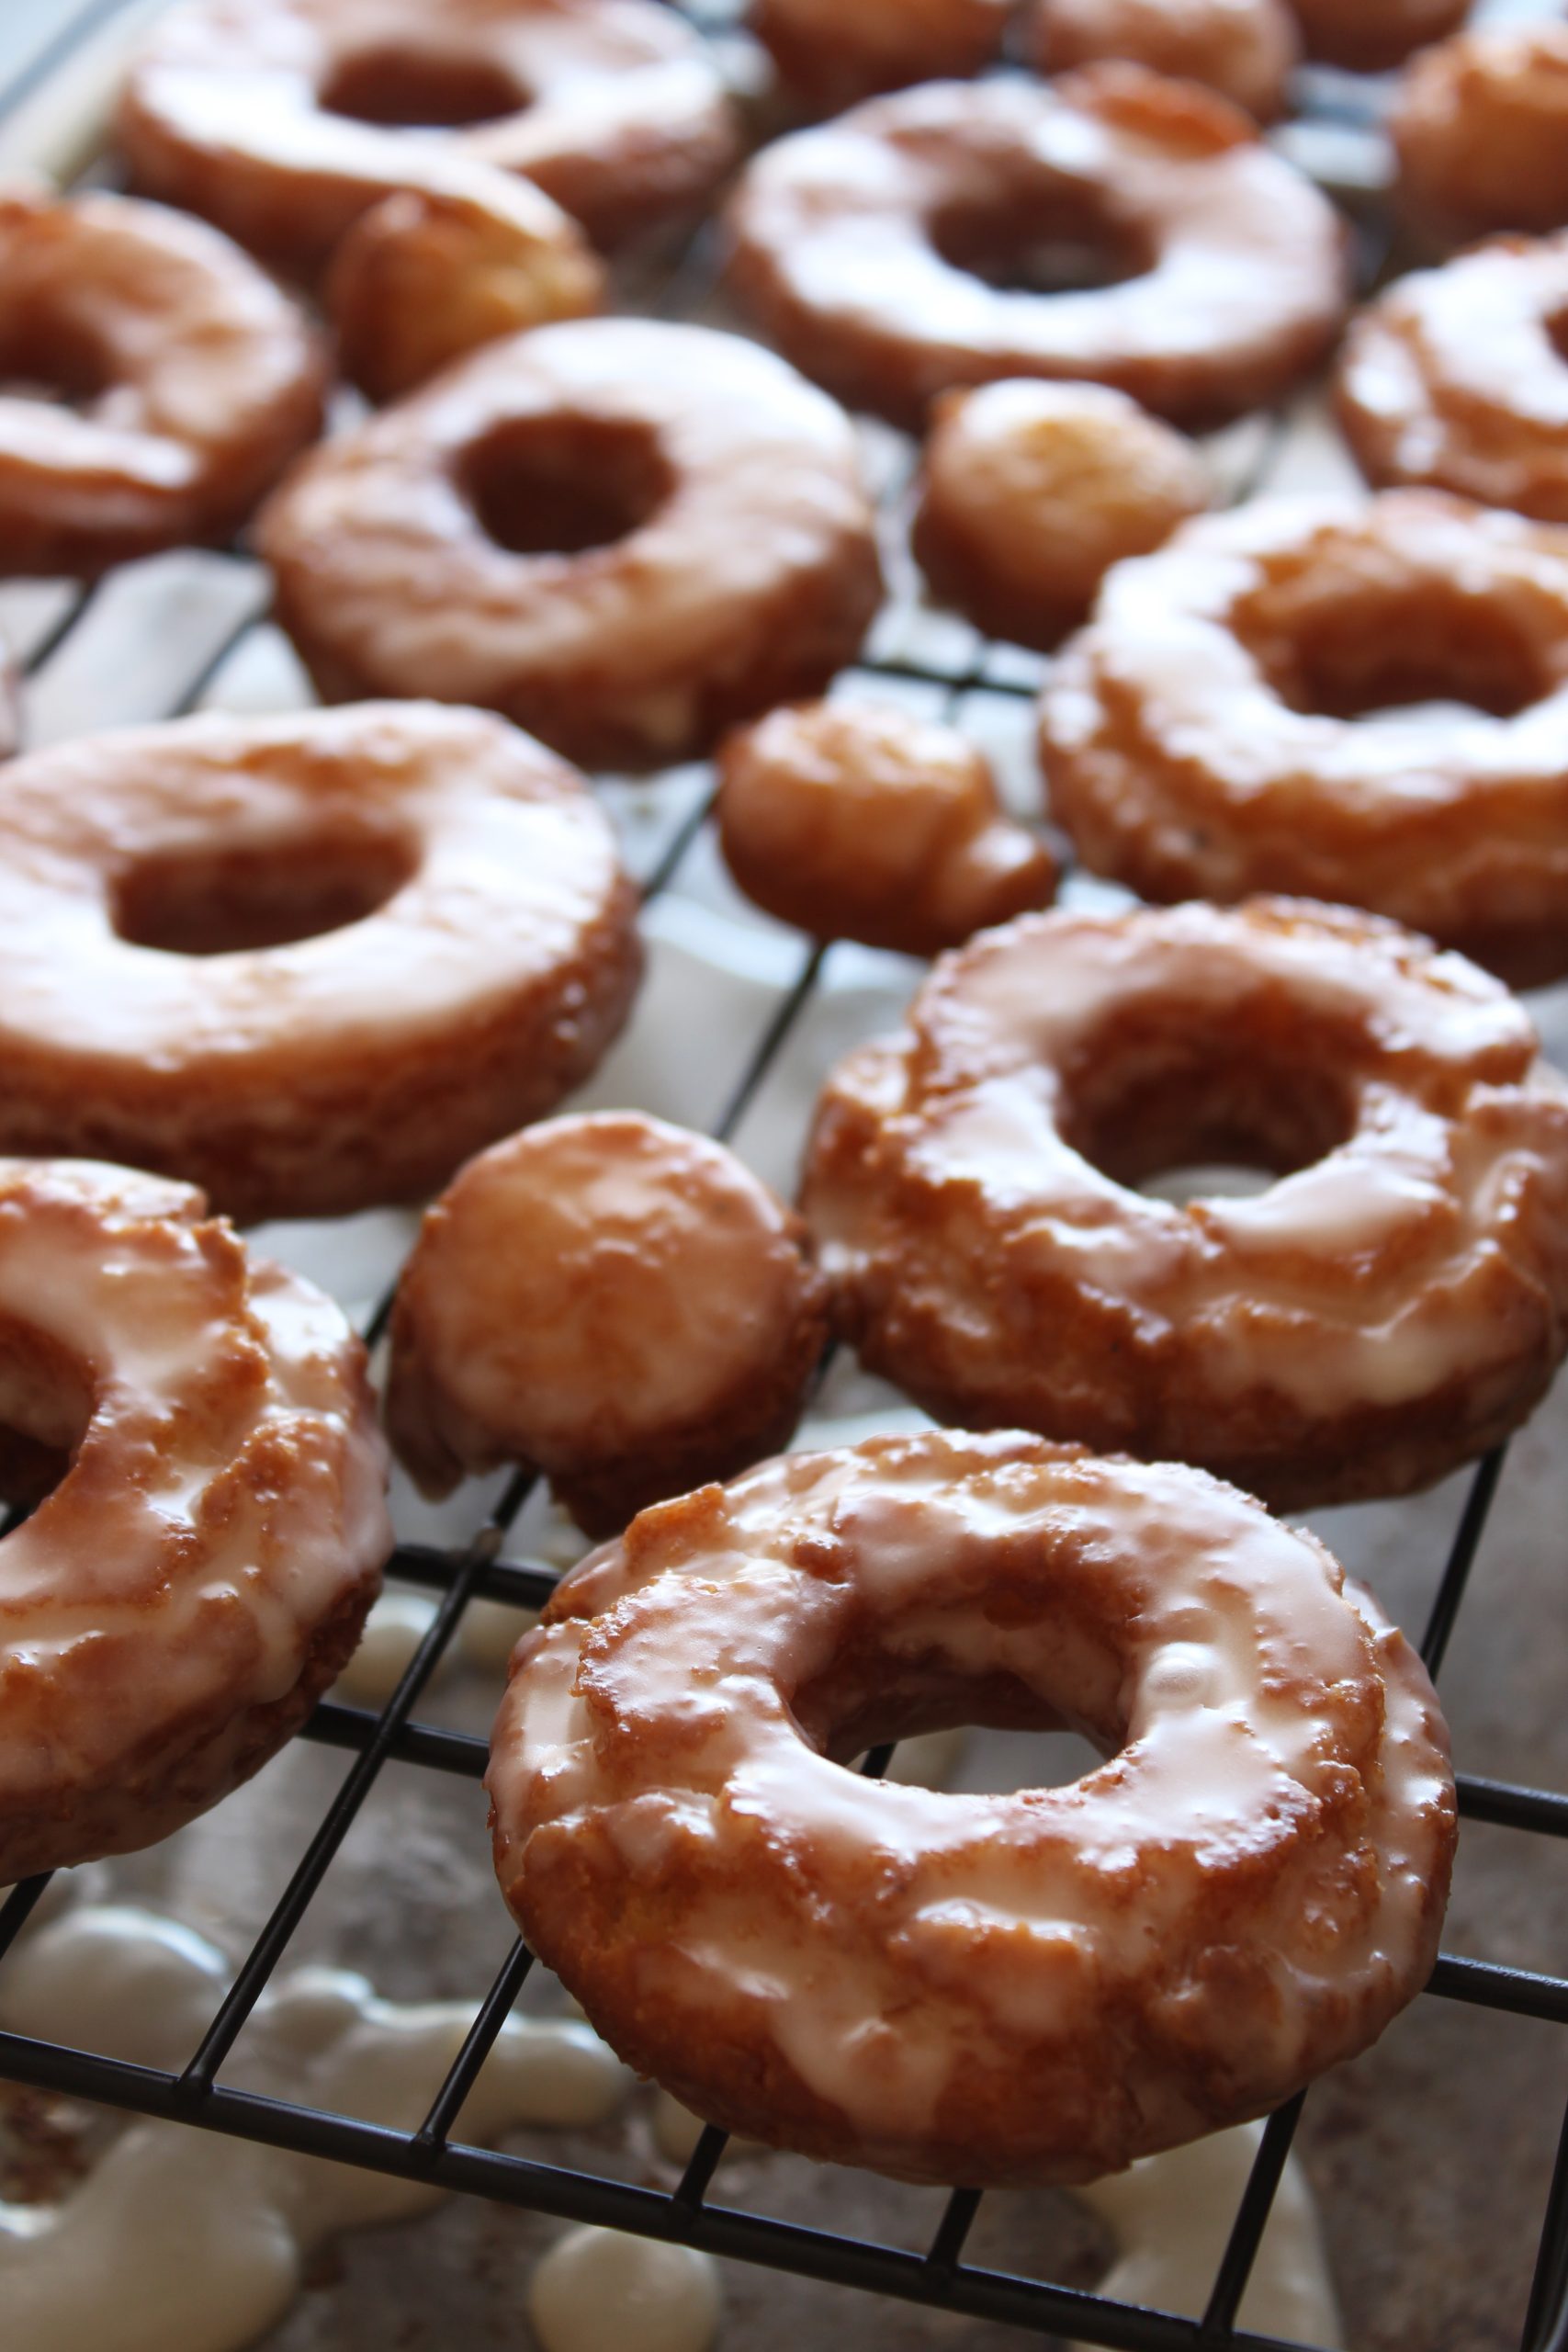
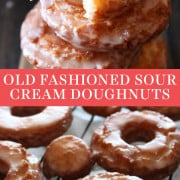
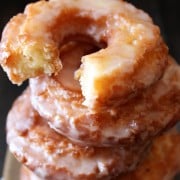
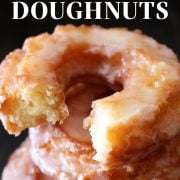
These Old-Fashioned Sour Cream Doughnuts are just like the old-fashioned cake doughnuts from the bakery. They’re kind of crunchy and cracked on the outside, making those nooks just perfect for soaking up the thick, shiny, crackled glaze.
We completely dunk the doughnuts in that glaze in the recipe, and it’s amazing. The inside is soft and cakey with a more firm bite than yeast doughnuts. Plus you can’t beat sour cream – it’s good with just about everything.
I don’t always prefer old-fashioned cake doughnuts to yeast doughnuts, but when I do this is absolutely the recipe I use. You can’t beat how much less time these take than yeast doughnuts, too.

Sprinkle of Science
Old-Fashioned Sour Cream Doughnuts Recipe Tips
1. Use a Scale to Weigh Your Ingredients
Using a scale is a smart idea for these sour cream doughnuts. Any issues I hear about the dough being too dry or sticky are likely due to inaccurate measuring! If your doughnuts aren’t as fluffy and light as you’d like, it’s due to compacting too much flour into your measuring cup. You can learn more about how to measure flour the RIGHT way here.
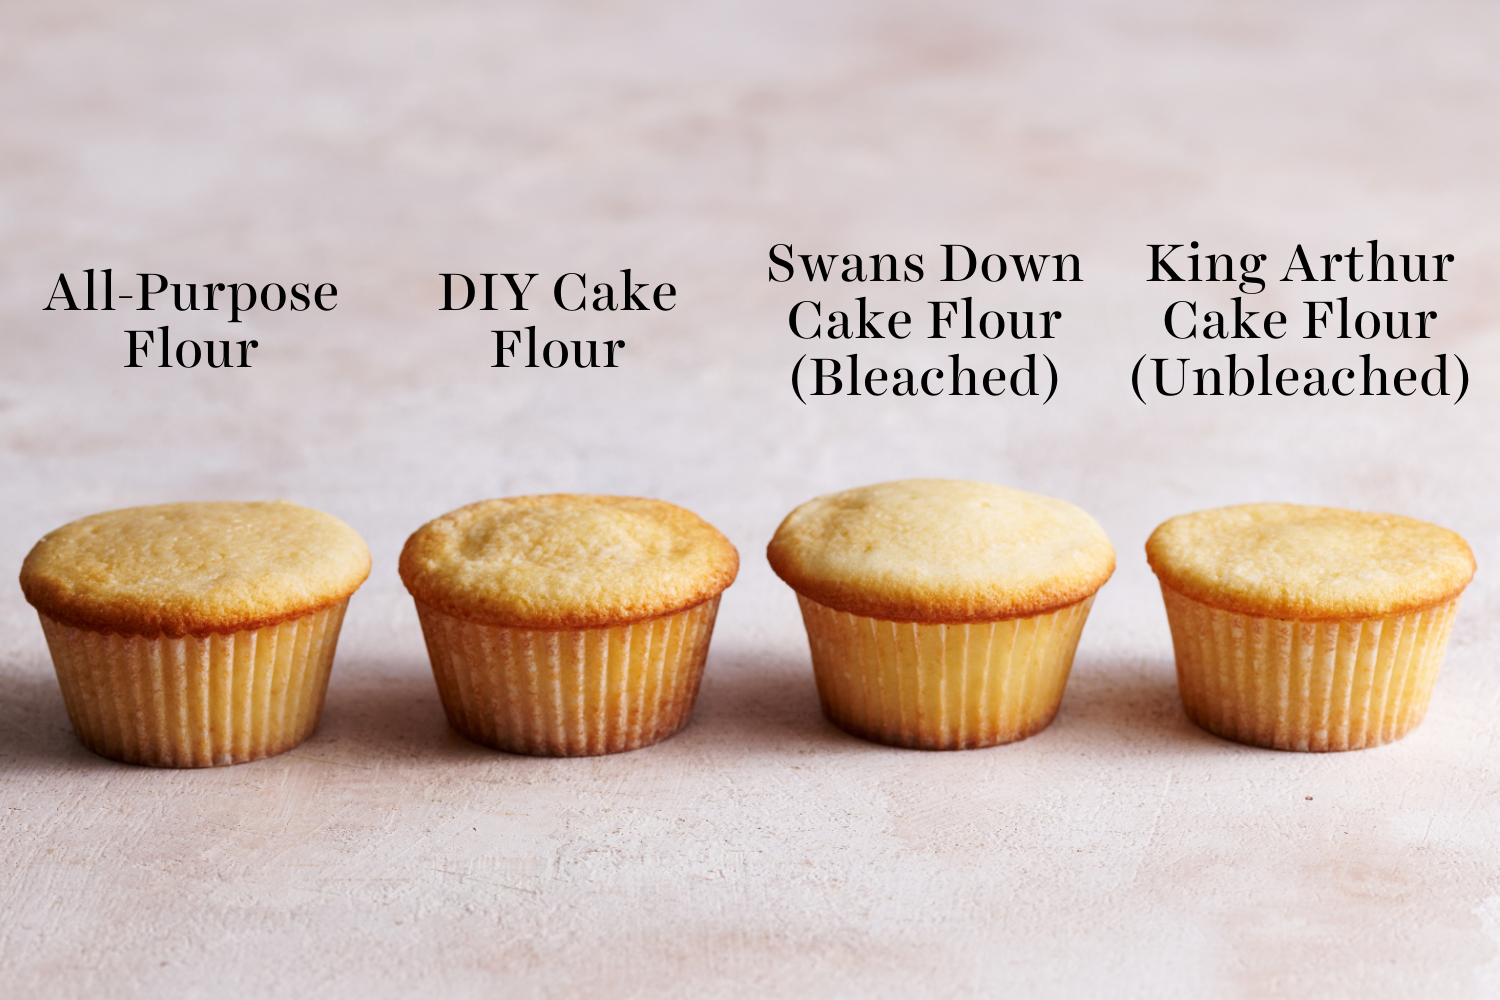
2. Use REAL Bleached Cake Flour
- This is a must for these sour cream doughnuts.
- Purchased cake flour will yield light and delicate doughnuts, just like the ones from a good bakery.
- DIY substitutions don’t really cut it.
- AP flour will not create doughnuts with that same soft texture.
- Bleached cake flour will work best. Unbleached (like King Arthur Flour) won’t absorb as much moisture and you may end up with doughnuts that crumble while frying.
- You can learn more about cake flour here.
3. This Recipe is FRIED
- Yes, you must fry these sour cream doughnuts
- This recipe was specifically designed to be fried and not baked.
- USE FRESH OIL. Oil goes rancid quickly, often before the date on the bottle.
- If it has *any* unpleasant smell, don’t use it, as that flavor will transfer to your doughnuts.
Can I Air Fry These Doughnuts?
I don’t personally own an air fryer, but a reader recently messaged me, letting me know that she had success air frying this recipe. Let us know in the comments below if you have success air frying these doughnuts, too!
My Favorite Doughnut Tools:
- Digital Scale – to ensure your ingredients are measured correctly
- Doughnut Cutter – for perfectly uniform doughnuts
- Deep Fry Thermometer – to ensure your oil maintains the correct temperature
- Dutch Oven – perfect for frying!
More Recipes You’ll Love:
- Krispy Kreme Copycat Glazed Doughnuts
- Baked Strawberry Lemon Doughnuts
- Chocolate Old-Fashioned Doughnuts
- Pumpkin Old Fashioned Doughnuts
- Classic Cake Doughnuts
Email This Recipe
Enter your email, and we’ll send it to your inbox.
Ingredients
For the donuts:
- 2 1/4 cup (255 grams) cake flour
- 1 1/2 teaspoons baking powder
- 1 teaspoon fine sea salt
- 1/2 teaspoon ground nutmeg
- 1/2 cup (100 grams) sugar
- 2 tablespoons (29 grams) butter, at COOL room temperature
- 2 large egg yolks
- 1/2 cup (113 grams) sour cream
- Canola oil, for frying


For the glaze:
- 3 1/2 cup (350 grams) powdered sugar, sifted
- 1 1/2 teaspoons corn syrup
- 1/4 teaspoon fine sea salt
- 1/2 teaspoon vanilla extract
- 1/3 cup hot water
Instructions
For the donuts:
- In a bowl, sift together the cake flour, baking powder, salt, and nutmeg.
- In the bowl of a stand mixer fitted with a paddle attachment, beat the butter and sugar together until sandy. Add the egg yolks and mix until light and thick. Add the dry ingredients to the mixing bowl in 3 additions, alternating with the sour cream, ending with the flour.
- Mix for 30 seconds on low speed or until the dough is smooth but slightly sticky. You want to mix enough that the dough doesn't fall apart in the oil, but not so much that it becomes tough. If the dough is unbearably sticky, add extra flour one tablespoon at a time (especially if you live in a warm & humid climate).
- Cover with plastic wrap and chill for 1 hour, or until firm.
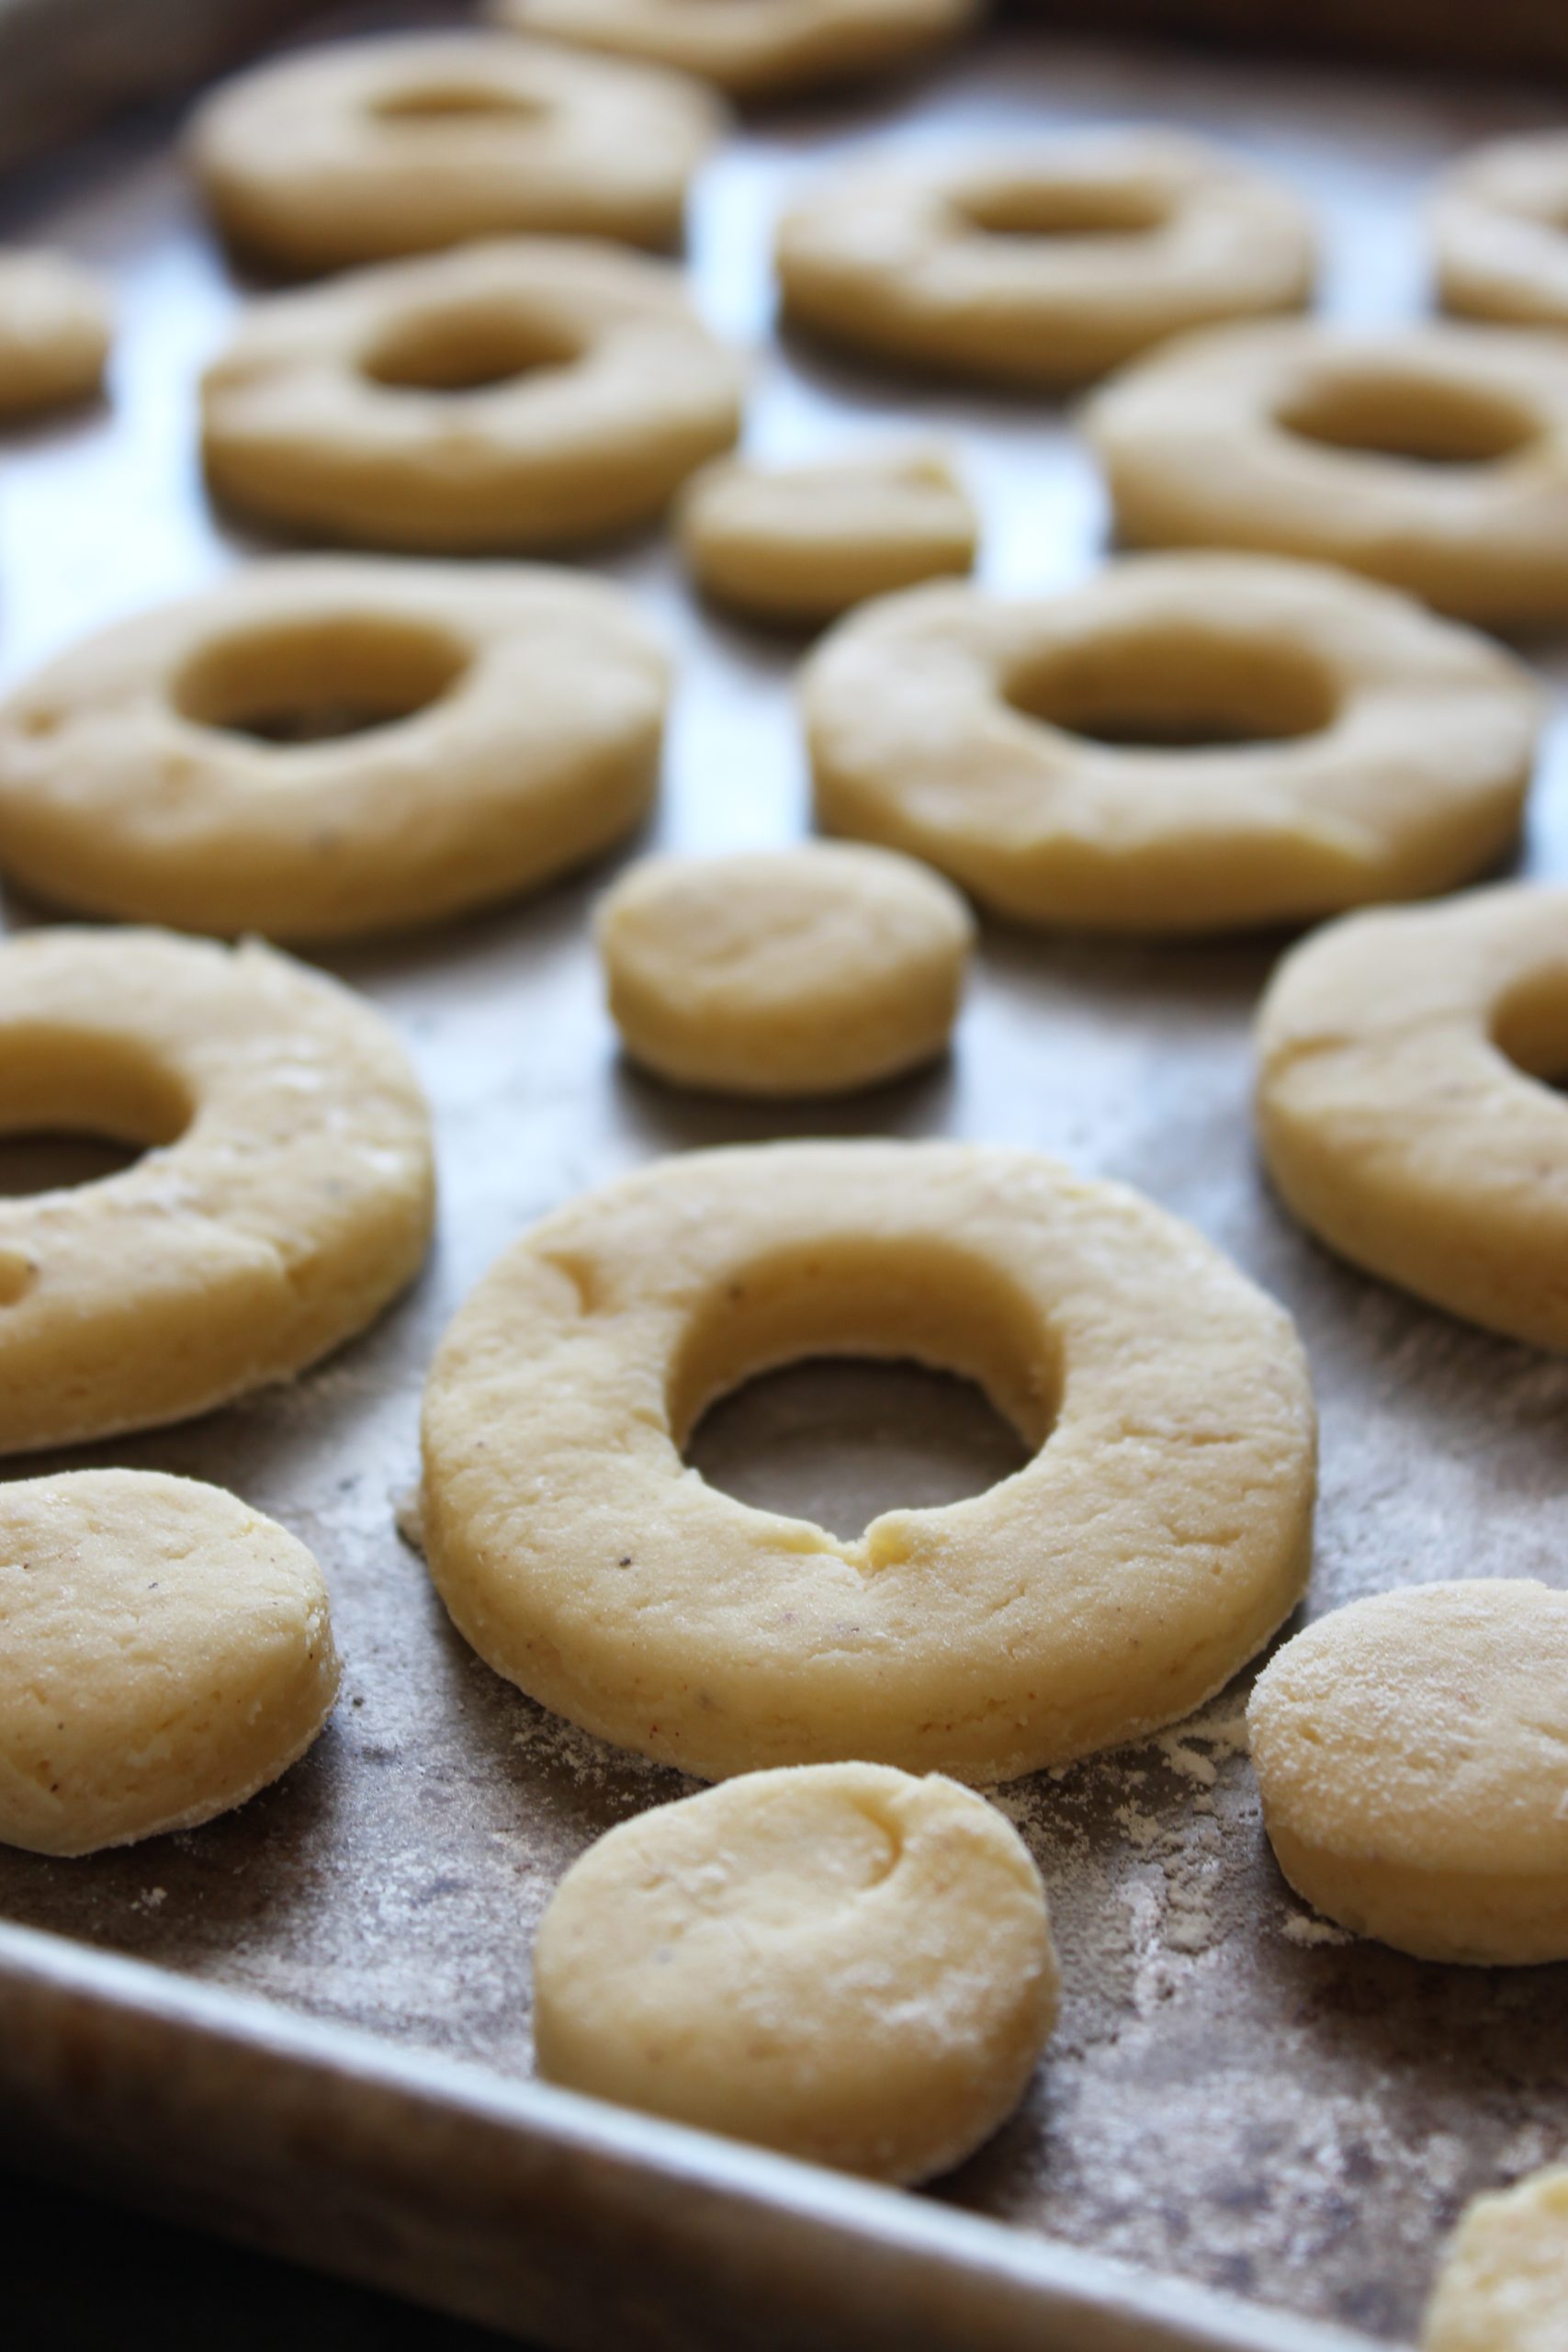
- On a floured surface, roll out the dough to about 1/2 inch thickness. Use a doughnut cutter or two differently sized biscuit cutters to cut out as many donuts as possible, dipping the cutters into flour as necessary to prevent sticking. You should get about 12 doughnuts and holes. If the dough gets too loose, sticky, or greasy at any point, return to the fridge to firm it back up before continuing. Refrigerate while you heat the oil so the dough is slightly cold when it fries.
- Pour 2 inches of canola oil into a heavy-bottomed pot with a deep-fry thermometer attached. Heat to 325°F. Fry the doughnuts a few at a time, being careful not to overcrowd the pot. Fry on each side about 2 minutes, being careful not to let them burn. Keep an eye on the thermometer and adjust your stove heat to maintain the correct oil temperature. Let drain on a paper bag to soak up the excess grease.
For the glaze:
- Mix all ingredients in a bowl with a whisk until smooth. Immerse each doughnut into the glaze. Place on a wire rack above a sheet pan to catch any excess glaze. Let sit for 20 minutes until glaze is set. Doughnuts are best served the day they are made but may be store in an air tight container at room temperature for a few days.


Thus was a good recipe, easy to follow. Only thing I has to do was add a little more hot water to the glaze as it was too thick. I only got 10 donuts and 6 were a little on the thin side. Next time, I will probably double the recipe. But overall a win!
i burnt the donuts
Sorry to hear that, Hunter! Perhaps try lowering the temperature of the oil next time for a better result! Please let us know if you have any further questions or need any help troubleshooting at all – we are always happy to help! 🙂
Ty for making me The baker I am today
Aww, what a sweet comment!! All of us at Team Handle the Heat are so happy to have helped 🙂
Do you glaze the doughnuts once they have cooled or still warm? Thanks!
Hi Shannon! It’s fine to glaze while they’re warm or once they have cooled – either way will work fine! I personally prefer to glaze while they’re still a little warm, as that’s when it’s most fun to eat them 😉 You just want to make sure they aren’t still super hot, as the glaze will soak in too much then. I hope this helps! Happy baking!!
I rolled the dough out to 1/2” thick and used a 3 inch circle cutter to cut out the donuts, but only ended up with 5 donuts instead of 12. Am I doing something wrong?
Hi Grace! Hmm, that definitely sounds like something went wrong along the way! Did you possibly mis-read or mis-measure one of the ingredients such as flour?
Tastes very good! Dough came together easily, but it was very sticky and i had to add 5 Tbsp of flour – it was still sticky. I did make this in Ontario Canada in the summer, so humidity is high.
The first four donuts fried up flat and didn’t puff and crack like the pictures, but as the rest of the donuts puffed up and cracked across the circle perfectly. I guess the cut dough warmed up while waiting for their turn in the fryer, which was just the ticket…?
I used a small electric deep fryer and cooked two at a time.
Hi Kristine! I’m so happy to hear that you enjoyed these doughnuts!! I’m glad you were able to get them picture-perfect once they warmed up a touch 🙂 Happy baking!
I made these this morning! So easy! And I Loved them!
IMO they were as good as the one I had at the bakery last weekend!
My husband ate 3 with his coffee!
No issues with thickness or the number I cut out.
I think I got 11 donuts, I cut extra holes and the tail end of the dough is just cut strips and called them rag tag donuts.
I fried them in a cast iron skillet could of used a little more oil!
I do not use canola oil much, but I had enough for frying.
So good, I will make these again!
Hi Jill! I’m so thrilled you and your husband loved these doughnuts to much! I’m so glad you thought they were as good as the ones from a bakery 🙂
For a first try, I think mine came out pretty well. The glaze was the perfect consistency and the doughnuts were crispy on the outside, just like I like them. I did have some issues keeping my oil at a constant 325 degrees (using an electric skillet with a thermometer to monitor. Biggest issues were the instructions to “roll the dough to 1/2” thickness”. Had I done this I would have only ended up with about 6-7 doughnuts along with the holes. I rolled to about 1/4” and I got 14 doughnuts along with holes.
So happy you enjoyed these doughnuts, Mary!!
Not much sour cream flavour… not much flavour at all actually. I followed the dough recipe to a T. Came out bland.
Hi Olivia! I’m sorry to hear you didn’t love these doughnuts! These doughnuts typically have a light, soft middle, with a crispy exterior, and a perfectly fresh old fashioned sour cream doughnut flavor. I’d love to try to help you troubleshoot and figure out what went wrong! Feel free to reach out to us here, or at [email protected] for further troubleshooting assistance!
Have you ever had a old fashioned doughnut? Theres no sour cream flavor. Its an ingredient used for moistness and tender texture. The subtle flavor comes from a touch of nutmeg and the canilla and butter in the glaze. Bland, crunchy, sugar glazey deliciousness
Super crumbly and perfect doughnuts. The ingredients are measured to perfection.
So happy to hear that you love these doughnuts, Mel!! Thanks for the comment 🙂
Hi there! Can I make these in something other than a dees oil? Like coconut oil?
Hi Melissa! I’m sorry, I can’t say for sure, because we have only tried frying these in canola oil! You could try any oil with a higher smoke point, but it might alter the flavor. Alternatively, Tessa has created countless baked doughnuts, available on the Doughnut Category Page! I hope that helps! Happy baking 🙂
I tried doubling the recipe and swapped out the butter for room temp crisco. It was extremely firmed. The only thing I could think of was maybe I didn’t whip the butter mixture with the egg long enough. Any advice??
Hi Tori! There are so many things that could have gone wrong, and it’s hard for me to pinpoint exactly the issue without having baked alongside you. Firstly, swapping the butter for Crisco could very likely be the culprit. Crisco doesn’t behave the exact same way as butter (shortenings are 100% fat; butter is only about 80% fat and 20% water), and therefore the two can’t always be swapped out for one another, without other adjustments. You could also be right; it could be that the butter (or Crisco?) mixture was not whipped long enough with the eggs, to form a light and airy base. Another issue could be your flour; do you measure by volume, or by weight? It’s so easy to add too much flour if measuring by volume. Tessa talks about that, and how to most accurately measure, in this article here. Another issue could be your cake flour. Did you use bleached cake flour, or a DIY substitute? In this article, Tessa demonstrates the differences between flours and the DIY cake flour substitutes, and how they work in baking! It could also be that when you added your flour, you mixed for too long, which creates a heavy base and a tough end result. Lastly, your leavener could be a little old and therefore it may have lost its leavening abilities. You can test it for freshness to ensure a successful result; Tessa explains how here! I hope that helps! Feel free to reach out to us if you need any further assistance troubleshooting! Happy baking 🙂