


Tessa’s Recipe Rundown
Taste: Sweet pumpkin cinnamon goodness with the perfect contrast of cozy fall spices.
Texture: Perfectly moist and tender crumb with a crisp outside. Pretty much everything you want a scone to be!
Ease: Quick and super easy.
Pros: The easy pumpkin glaze takes these scones to a whole new level of pumpkin spice goodness.
Cons: Nada!
Would I Make this Again? Absolutely!
This post may contain affiliate links. Read our disclosure policy.


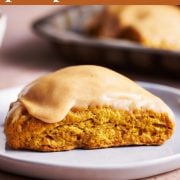


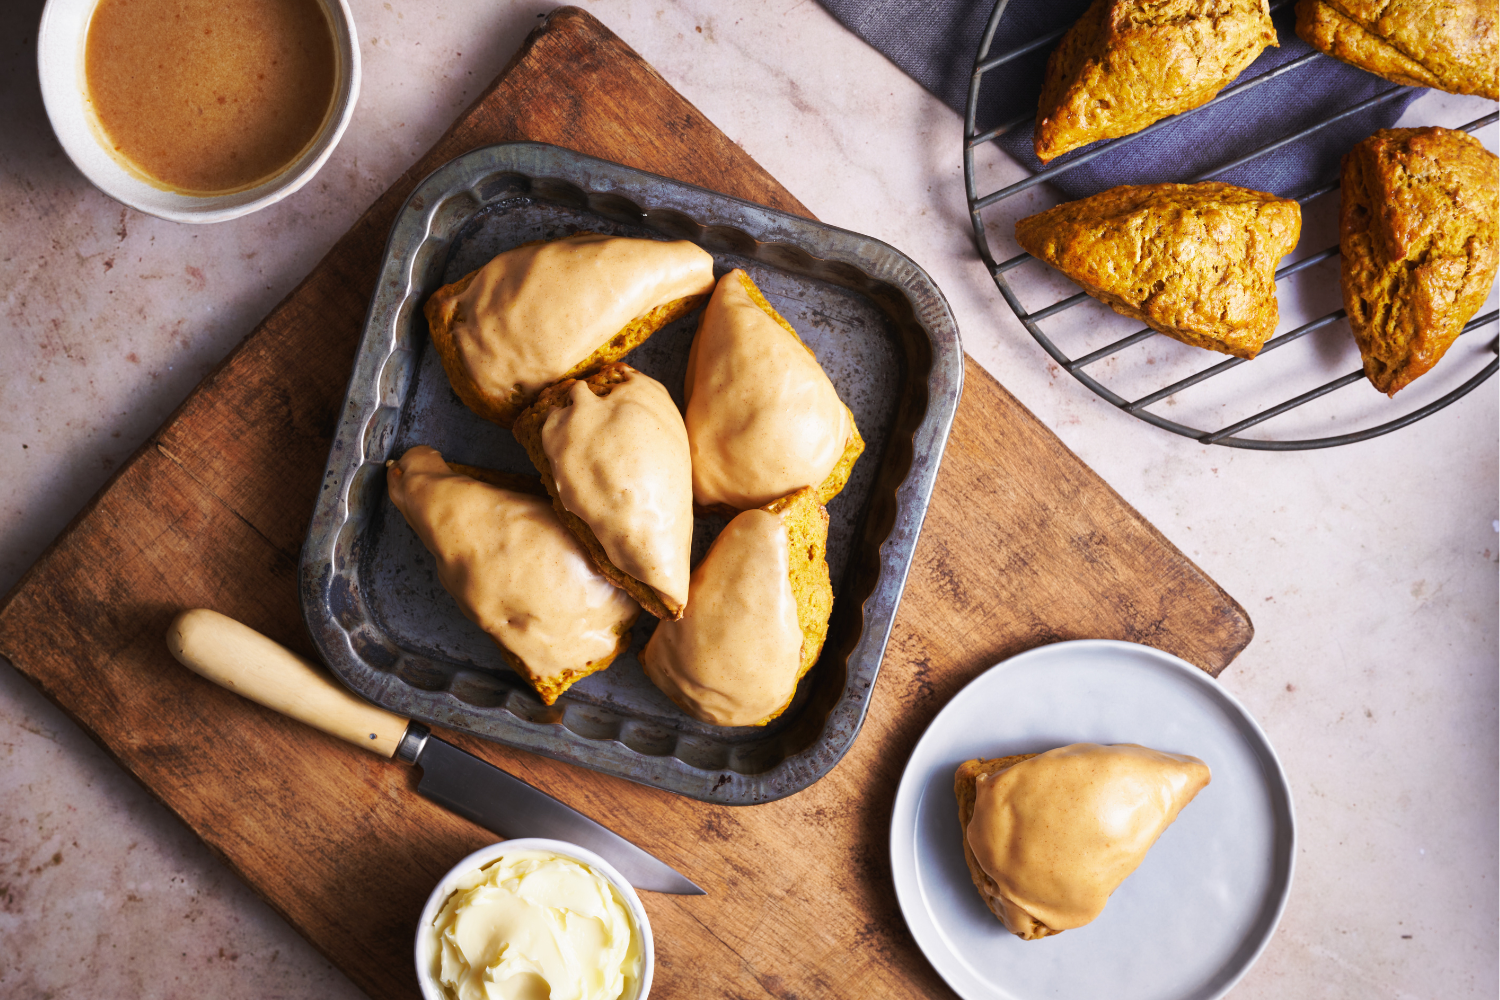
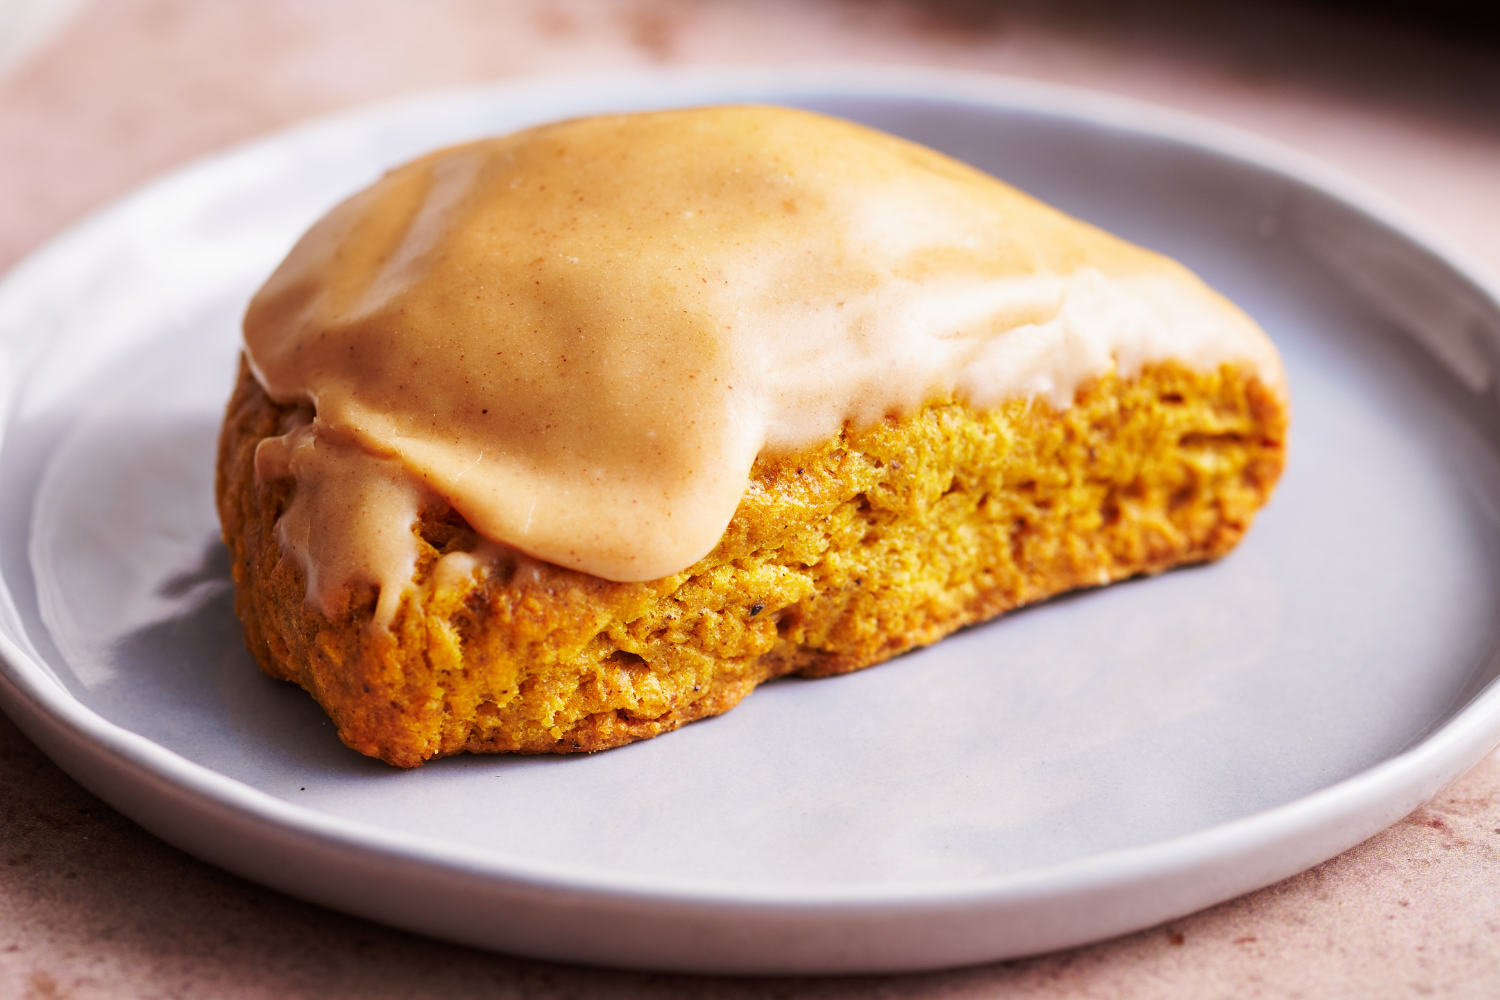
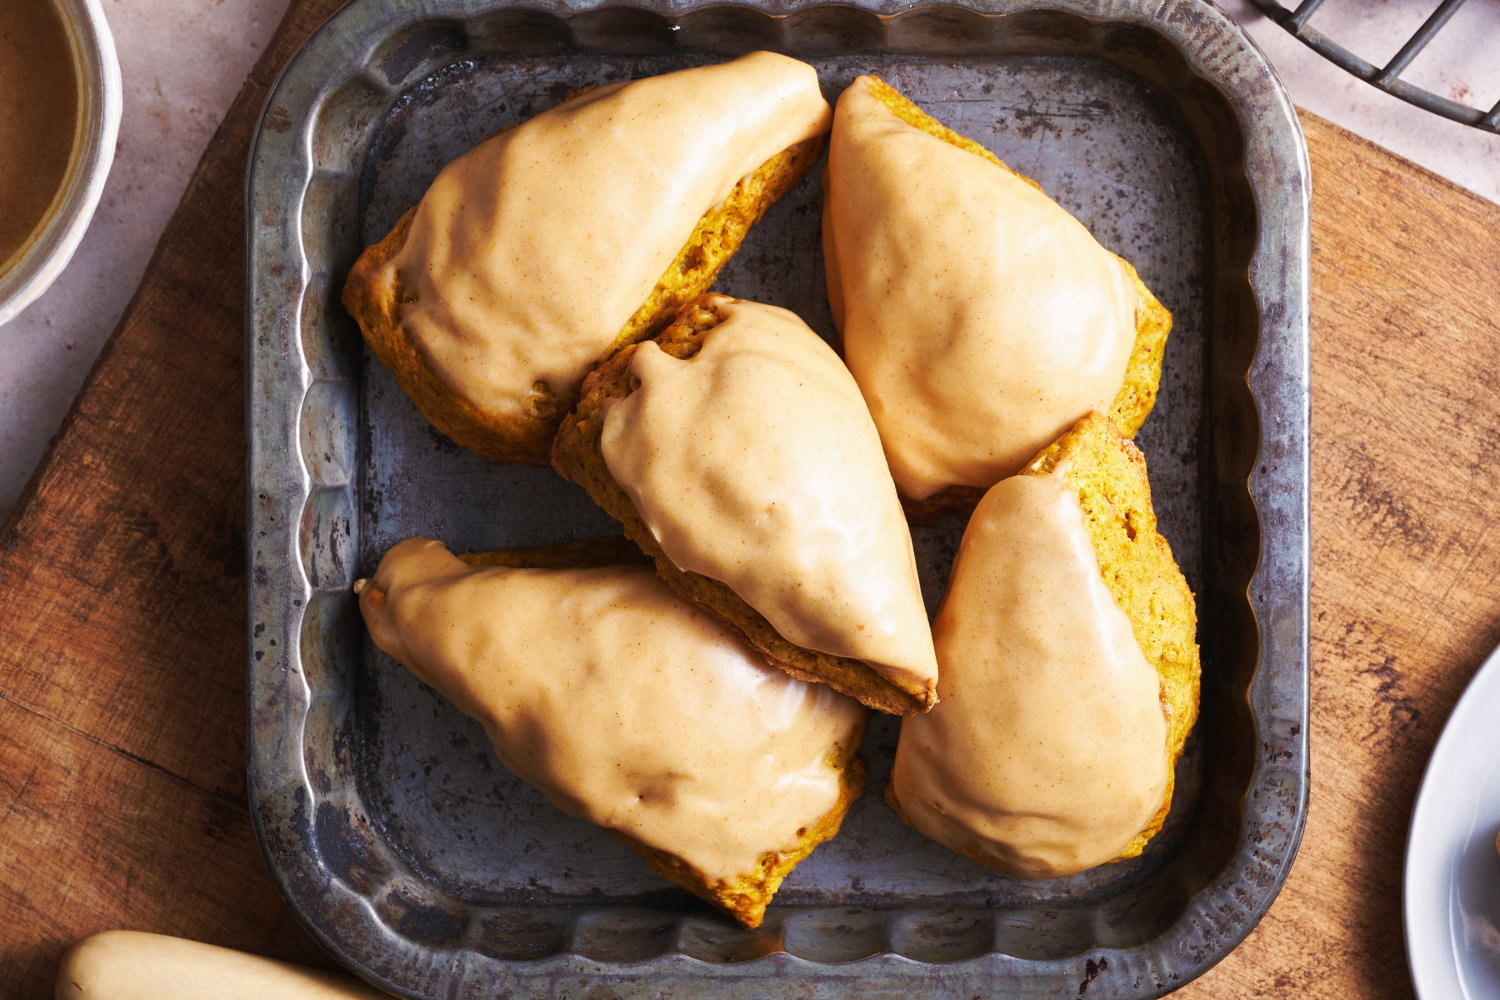
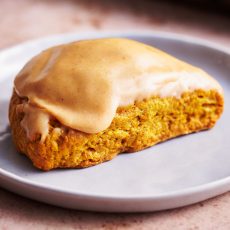
These Pumpkin Scones are flaky but soft and tender, and covered in the most delicious and flavorful cinnamon pumpkin glaze.
Perfect with a hot cup of coffee, tea, or chai, these scones will become a tradition in your family. You may just end up eating them year-round!
If you’re looking to capture Autumn in a single dessert, look no further!
I dare you to bake these Pumpkin Scones and not immediately enjoy one fresh from the oven! They’re absolutely full of the best cozy pumpkin flavors that we all love. They truly are the epitome of Autumn in every bite.
Reader Love
These are so yummy! Recipe is easy to follow and clearly written! My family loved these!
–
While these scones can easily be eaten on their own, I highly recommend dipping them in the glaze. Besides making them look so pretty, it also adds an extra oomph of pumpkin spice, plus a bit of sweetness that just perfects these scones without making them too sweet.
Pumpkin Scones can easily be prepared the night before (or longer if stored in the freezer – see below for more details), then baked in the morning to make for an easy and elegant addition to a holiday breakfast, brunch, or just as a special weekend treat.

Sprinkle of Science
How to Make Pumpkin Scones
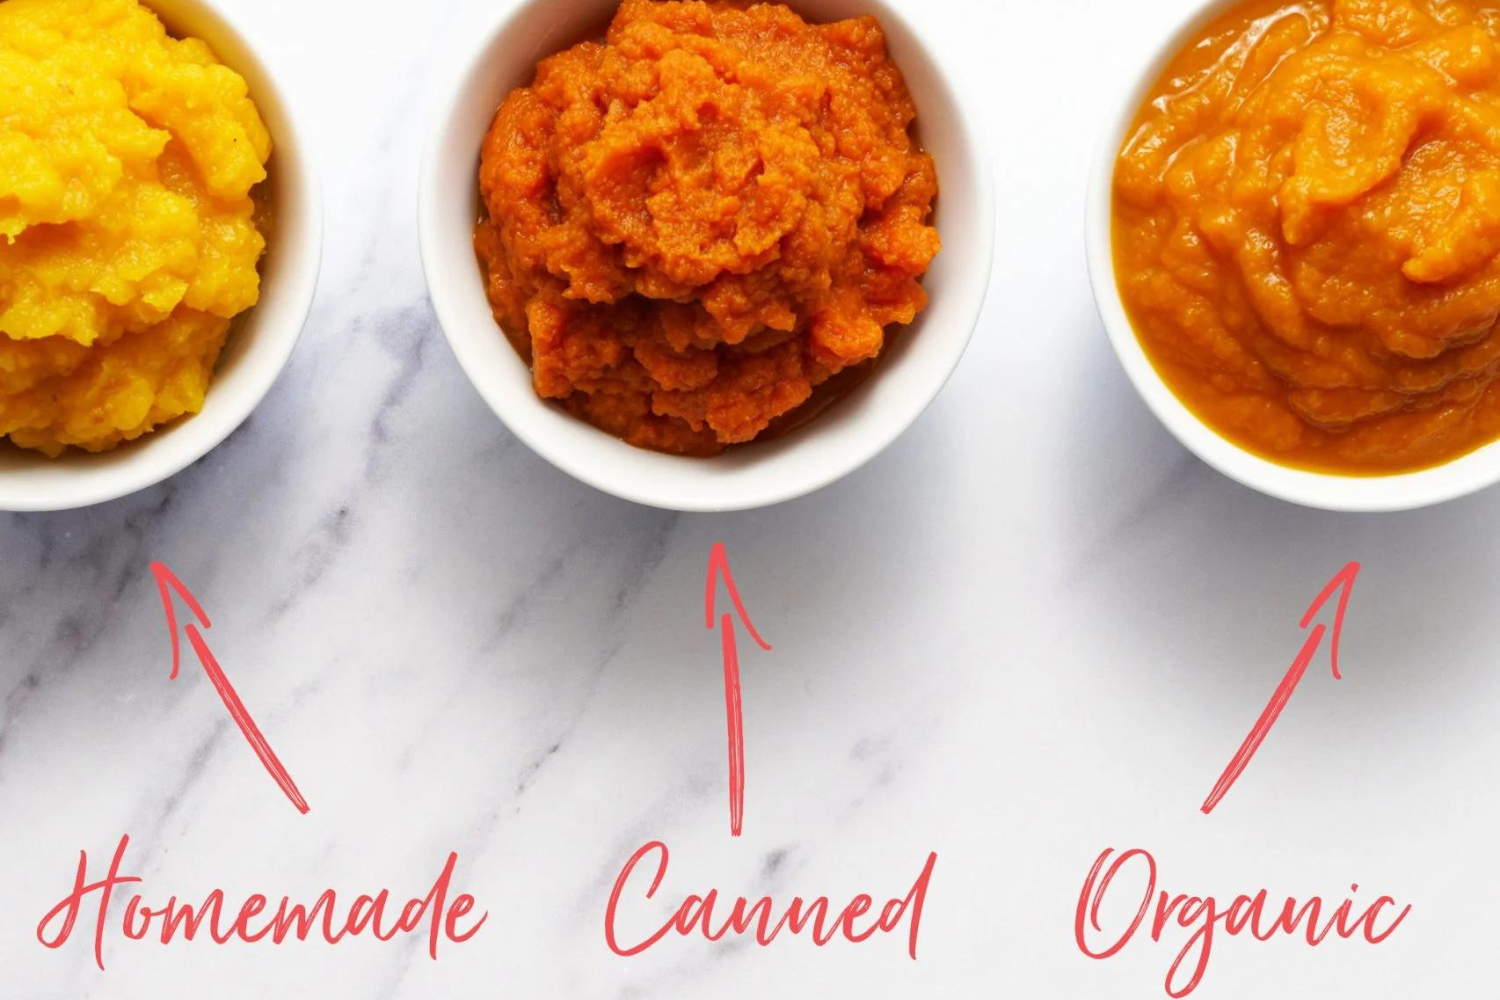
What Type of Pumpkin for Pumpkin Scones?
- I used store-bought canned pumpkin puree for this Pumpkin Scones recipe.
- Note: Be sure NOT to use canned pumpkin pie filling for this recipe – it is not the same thing as pumpkin puree.
- I don’t recommend using homemade pumpkin puree for this recipe, as it may add too much excess liquid and change the consistency of your scones.
- Check out my Fresh vs. Canned Pumpkin article for the differences between using fresh pumpkin puree, regular canned pumpkin, and organic canned pumpkin, and learn how to make your own pumpkin puree!
How to Get FLAKY Pumpkin Scones
The key is using COLD butter and keeping it cold! The cold butter takes a moment to melt once it hits the heat of the oven. As it melts, it releases pockets of steam that create those tall flaky layers. I like to cube and freeze my butter before using it whenever I make scones.
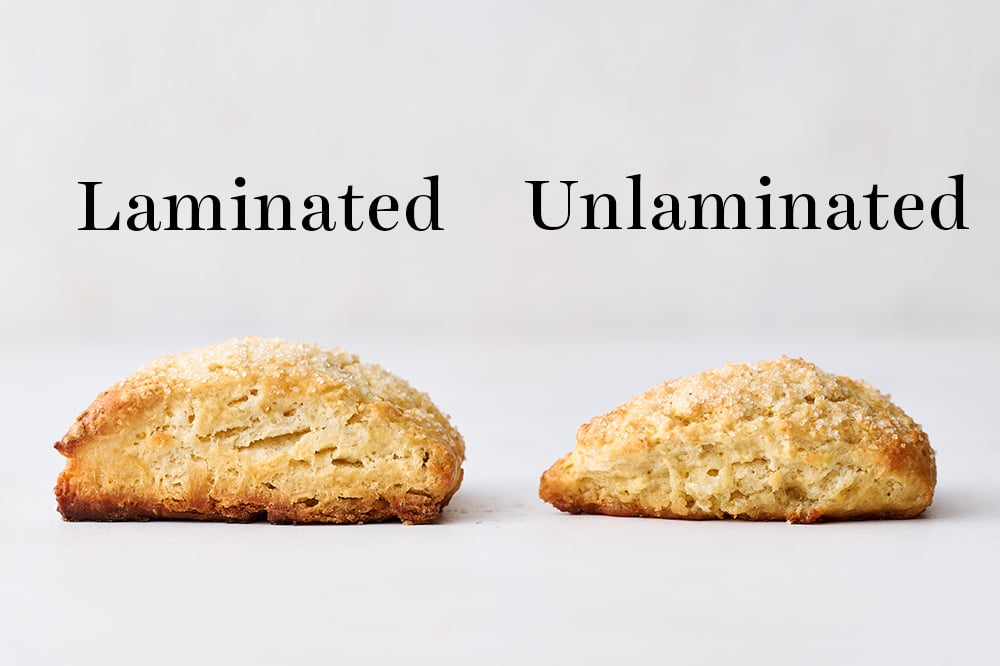
How to Make TALL Pumpkin Scones
My #1 top tip for baking tall scones that rise higher is to laminate your scone dough. A little bit of lamination gets the Pumpkin Scones to shoot up sky-high with those beautiful layers. Don’t worry, this step sounds more complicated than it actually is!
Check out my How to Make Tall Scones & Biscuits article for step-by-step instructions. Just take a look at what a difference this step makes:
Why Are My Scones Tough?
Avoid over-mixing the Pumpkin Scone dough or allowing it to get too warm. Doing so will result in flatter, tougher, and less flaky scones.
Also, avoid adding too much flour. I highly recommend using a digital kitchen scale to ensure precision when measuring – but the spoon and level method will work too.
My favorite tool for making biscuit or scone dough quickly and easily by hand (so I don’t have to lug out my food processor) is this OXO bladed pastry blender.
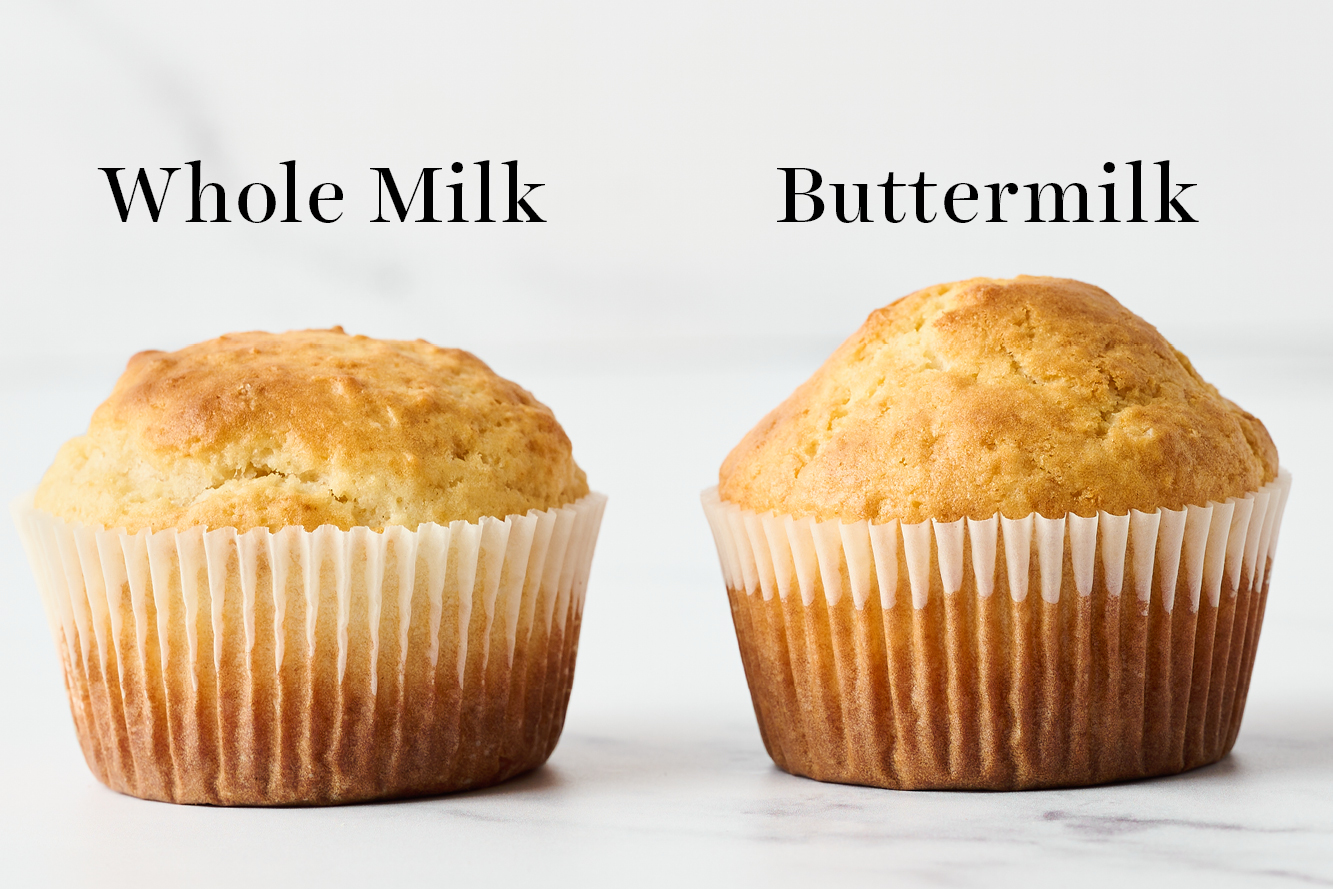
Do I Have to Use Buttermilk in Pumpkin Scones?
- Buttermilk makes insanely tender, tall, and flavorful scones.
- I highly recommend using real buttermilk because it does make a difference.
- Check out my side-by-side comparison of real buttermilk vs. DIY buttermilk here to see just what I mean!
- If you don’t have access to buttermilk, heavy cream will work instead – but note that using heavy cream will affect the texture and flavor of your Pumpkin Scones.
How to Make Scones Ahead of Time
The shaped, unbaked Pumpkin Scones can be covered and refrigerated overnight if you’d like to make these ahead of time. Simply bake straight from the fridge. No need to adjust the baking time.
Can you Freeze Pumpkin Scones?
Yes! Place Pumpkin Scones in an airtight container and freeze for up to 1 month. If baking from frozen, add about 2 minutes to the baking time.
More Pumpkin Recipes You’ll Love:
More Delicious Scone Recipes:
Email This Recipe
Enter your email, and we’ll send it to your inbox.
Ingredients
For the scones:
- 2 1/4 cups (286 grams) all-purpose flour
- 2 1/2 teaspoons baking powder
- 1 teaspoon fine sea salt
- 1/2 teaspoon baking soda
- 1 teaspoon ground cinnamon
- 3/4 teaspoon ground ginger
- 1/2 teaspoon ground nutmeg
- 1/2 teaspoon ground cloves
- 1/3 cup (66 grams) light brown sugar
- 1 stick (113 grams) unsalted butter, cold and cubed
- 1/2 cup (122 grams) canned pure pumpkin puree
- 1/4 cup buttermilk or heavy cream
- 2 large eggs, divided


For the glaze:
- 1 cup (125 grams) powdered sugar
- 1 tablespoon (15 grams) canned pure pumpkin puree
- 1 tablespoon milk
- 1/4 teaspoon cinnamon
Instructions
Make the scones:
- In a large bowl, whisk flour, baking powder, salt, baking soda, spices, and sugar until well combined. Be sure to break up any clumps of brown sugar.
- Using a pastry blender, cut the butter into the flour mixture until it’s the size of large peas.
- In a measuring glass, whisk together pumpkin puree, cream, and 1 egg.
- Make a well in the middle of the dry ingredients, and add the liquid mixture. Mix until partially combined but still shaggy.
- Transfer the dough to a floured surface and pat into a rough rectangle. Fold the rectangle three times like a letter. Don’t worry if it’s not perfect. Pat the rectangle out again going the opposite direction and fold three times like a letter once more.
- Cut in half. Gently press each half into 3/4-inch thick, 6-inch diameter rounds. Cut each round into 8 wedges and place on your prepared baking pans. Space them out about 2 inches apart. Place the unbaked scones in the freezer while you heat the oven.
- Make ahead: At this point, the unbaked scones can be refrigerated overnight, or sealed and frozen for up to 1 month. If baking from frozen, add about 2 minutes to the baking time.
- Adjust the oven rack to the center position and preheat to 400°F. Line two baking pans with parchment paper.
- In a small bowl, combine the remaining egg with 1 teaspoon water. Brush over the chilled scones.
- Bake for 12 to 15 minutes or until golden brown. Remove pan to a cooling rack and let cool while making the glaze.
Make the glaze:
- In a small bowl, combine all glaze ingredients with a fork until a smooth and thick glaze forms. Drizzle each scone with the glaze. If dipping scones, add an extra splash of milk to thin out slightly before dipping in glaze. Let set before serving, if desired.
- The scones are best served the day they’re baked.
More Recipes to try:
This post was originally published in 2015 and updated with recipe improvements, more baking tips, and new photos. Photos by Joanie Simon | The Bite Shot


was tasteless and not very sweet and it took longer to bake then the recipe said it would. It took at least 20 minutes to bake instead of 15.
Hi Zoey, thanks for your feedback! If you skipped the glaze, the scones will taste much more pumpkin-forward and less sweet, but they definitely shouldn’t be tasteless. If you added the glaze and the flavors still felt bland, it’s worth double-checking your spices, since older or expired spices can really dull the flavor.
As for bake time, that can vary by oven. Many ovens run a bit cooler than they indicate, which can easily add a few extra minutes to the bake time. When my oven beeps that it’s ready, it’s actually about 20°F cooler and needs extra time to fully preheat, so I fully rely on my oven thermometer! If you don’t have one, it’s a helpful tool for understanding how your oven really runs.
Can I use a food processor to make these
We haven’t tried that, but you should be able to! Be careful to not overmix — you’ll process just until it starts to form a dough, then continue with step #5. Let us know how it goes!
These turned out so good! Light and fluffy yet still slightly crispy. Not overly sweet. Easy to make too. Will definitely be making these again!
Delicious!! I subbed about 2 1/2 teaspoons of pumpkin spice for the spices (trying to get rid of it) and they are divine! Not too pumpkin-y for the pumpkin naysayers, but warm and rich for a cool fall morning. Will definitely be making these again!
I’m planning to make these this week. Has anyone ever pat the dough into just one circle and cut larger scones? Any advice as to what the baking time would then be?
Hi Deb, that’ll work just fine! It’ll depend on your oven, but I’d add about five more minutes to the bake time and check to see how they look before possibly adding a few additional minutes. Let us know how it goes!
I am going to try these today – think I can sub almond flour for all-purpose?
Did you end up giving that a try? I personally don’t find that to be a good substitution most of the time, nuts are so different than wheat. Especially considering the expense of almond flour!
Nutrition info?
Great scone recipe! These are fabulous and people just keep asking for more.
Happy to hear they were such a hit, Clint!