This post may contain affiliate links. Read our disclosure policy.
Find The Ultimate Guide to Chocolate Chip Cookies here!

If you follow my blog or explore baking topics on online, you’ve probably seen one of the above Ultimate Guide to Chocolate Chip Cookie comparison photos. In those posts I took one standard chocolate chip cookie recipe and made experiments on batches, changing only one key ingredient or technique at a time to really learn what makes a chocolate chip cookie thick, thin, chewy, crisp, or soft. The posts illustrated the science behind cookie baking and proved to be extremely helpful to you guys, so I thought I’d pull together everything I’ve learned from doing them into one Ultimate Cookie Troubleshooting Guide. Be sure to check out the full Ultimate Guide posts by clicking the links above so you can see exactly how changing elements like baking soda, baking powder, flours, fats, and baking techniques affect your cookies.
Below you’ll find EVERY tip, trick, and tidbit of cookie baking information so you can make perfect cookies each time. Although many of the photos within this post are of chocolate chip cookies, the information goes beyond just chocolate chip and should apply to most drop-style cookies (not cookies which require you to roll out and cut the dough). I’ve included my favorite cookie tools, baking tips, ingredient tips, how to create your ideal cookie texture, and a list of common cookie issues (which I am asked about frequently) and possible solutions.
Note: this is a long and image heavy post!

Free Cookie Customization Guide!
The science-based guide so you can bake perfect cookies every time!
Favorite Cookie Tools
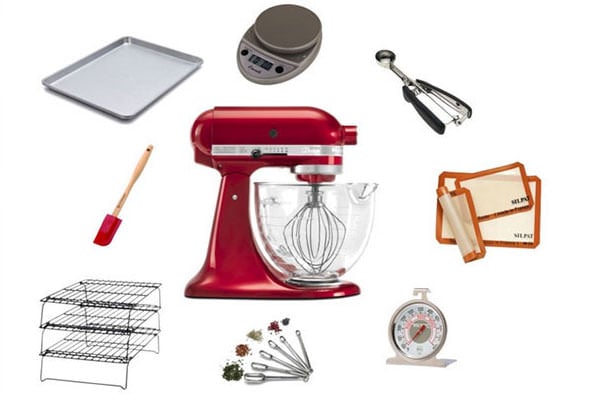
Although cookie baking doesn’t require many speciality tools, there are a few favorites that I find can make a big difference. Basically, you want quality kitchen equipment and measuring tools to ensure accuracy in ingredient volumes and baking temperatures.
KitchenAid Stand Mixer
Although you can use a hand-held electric mixer, the stand mixer is really the king of cookie doughs. It allows you to whip up a beautifully even and cohesive doughs while you’re able to walk about the kitchen and accomplish other small tasks. I love my Beater Blade which scrapes down the the bowl as it’s beating so you don’t have to. Be sure to always set a timer when creaming the butter and sugar as you don’t want to accidentally over-beat, which can cause negative results (discussed below). Whatever you use, just be sure it’s electric. Unless you have the upper arm strength of a body builder, you need that power to properly cream the butter and sugar for cookies unless you’re using melted butter.
Using a stainless steel spring-loaded cookie scoop when portioning out cookie dough is one of the KEYS to beautiful, uniform, evenly-shaped and evenly-baked cookies. My cookie scoop is one of my most frequently used kitchen gadgets. A spring-loaded scoop saves you *so much time* in forming the balls of dough. When using a scoop, you ensure each ball is evenly sized so the cookies bake evenly, meaning you don’t have any small overbaked cookies or large underbaked cookies. Learn more about Cookie Scoops and how to use them here!
Nordic Ware Baking Sheets
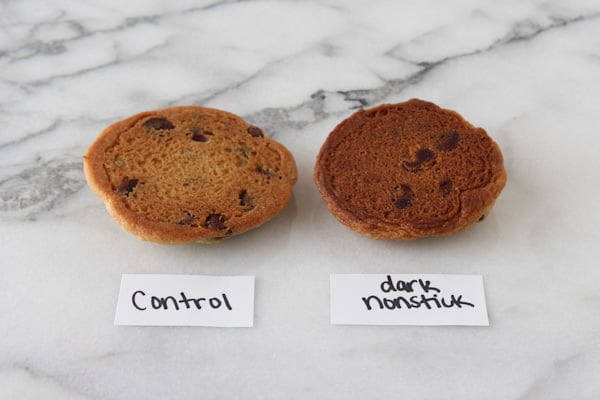
In my Best (and WORST) Baking Pans article, I experimented with baking pans and techniques and found that what you bake your cookies on definitely makes a big difference. I avoid baking cookies on anything nonstick as it tends to darken the bottom of the cookies too much. I *love* my Nordic Ware Baking Sheets because they’re sturdy and bake evenly, and they are so versatile in the kitchen.
Measuring Spoons
These are my favorite measuring spoons because they are long and narrow and fit inside just about any jar!
Escali Digital Scale
I’ve mentioned this many times, especially in my Ultimate Measuring Guide, but baking requires accuracy and volume measurements (measuring cups) aren’t always accurate. Especially when it comes to flour. Many of the questions I get about cookie baking issues stem from incorrectly measuring flour and the best way to avoid that is to weigh your flour. It’s super easy and will forever improve your baking. Check out that measuring guide post for more information.
Le Creuset Spatulas
A spatula is a spatula, but these Le Creuset ones make me happy. They’re perfectly shaped and sized for cookie dough and the top silicone part actually comes off the wooden handle for easy cleaning.
Oven thermometer
Another problem that can plague many home bakers is inaccurate oven temperatures. What your oven says it’s heated to isn’t always true. If you have issues with your cookies while baking, make the small investment in an oven thermometer. You’ll likely be surprised that your oven is off by a significant amount or that it isn’t actually preheated when it says it is. Right next to a food scale, an oven thermometer will seriously up your baking game.
Cooling Racks
Cookies keep cooling on the hot baking sheets even when removed from the oven, so it’s important to place them on a cooling rack within a few minutes so they will stop cooking and start cooling so you can eat or store them.
Baking
Oven Temperature
As mentioned above, ovens can be off in temperature by 25°F or more! Or they say they’re preheated when they’re really not. Always let the oven preheat for at least 10 minutes. For best results, use an oven thermometer to get an accurate reading of the temperature. This may change your baking. My oven takes 15 minutes to preheat fully, and once I learned that and started waiting before putting anything in it my baking improved dramatically. If you find your cookies to be usually pale and soft or your cookies seem to brown too quickly, it’s likely the fault of your oven.
Baking Time
Listen to your intuition when baking. Start checking on your cookies at the minimum baking time to ensure you don’t overcook or even burn them. If you prefer soft cookies, cook only to the minimum time. If you prefer your cookies to be browned with slightly crisp edges, cook a little longer.
Ingredients
Flour
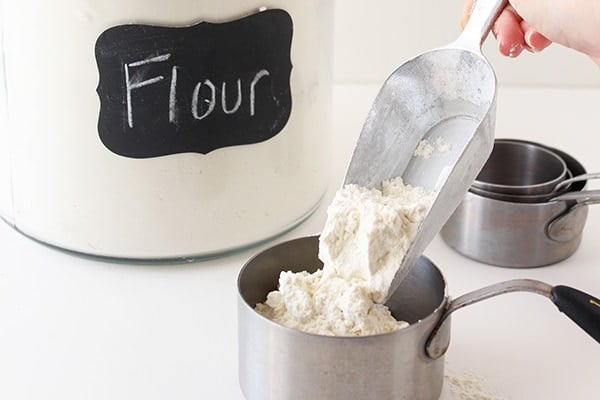
Aside from correctly measuring your flour, the type of flour you use and even the brand you use can significantly impact your cookies. Check out my Ultimate Guide comparison photos and posts above to see how various flours affect cookies. The tips on cookie textures below also let you know which flour to use to make cookies softer, cakey, chewy, thick, etc. Different types of flours have different protein percentages. The more protein, the more gluten will form and the better the dough will hold together and create a chewy, firm texture. The less protein, the more light and tender the cookie will be.
- Cake flour: 6-8% protein
- Pastry flour: 7-9.5% protein
- All-purpose flour: 9.5-12% protein
- Bread flour: 11.5-14% protein
- Whole-wheat flour: 13-14% protein
Various flour brands have differing protein contents for the same types of flours, which is why the above percentages are ranges.
- Pillsbury & Gold Medal all-purpose flour: 10.5%
- King Arthur all-purpose flour: 11.7%
Baking Soda
Baking soda, or sodium bicarbonate, is a natural alkaline ingredient activated by liquid and acid, such as buttermilk, sour cream, yogurt, lemon juice or even honey, natural cocoa powder, or brown sugar. Baking soda is four times stronger than baking powder. In addition to providing lift and structure to cookies, baking soda also promotes browning. See Ultimate Guide to Chocolate Chip Cookies Part 1 for a direct comparison between baking soda and baking powder in cookies.
Freshness
Place 1/4 teaspoon in a bowl and pour 1 teaspoon distilled vinegar on top. If it bubbles up, it is fresh. If nothing happens, throw away.
Baking Powder
Baking powder is a combination of baking soda, acid, and cornstarch and just needs moisture to activate. Cookies made with only baking powder will generally be slightly taller and lighter.
Freshness
Place 1 teaspoon in a bowl with 1 cup hot tap water. If it bubbles up, it is fresh. If nothing happens, throw away.
Eggs
Always use the size of egg called for in the recipe as the ratio of liquid to dry ingredients has a significant impact on your cookies. Beat eggs into your cookie dough one at a time to allow them to fully incorporate.
Freshness
Place an egg in a deep bowl or measuring cup of cool water. If the egg lies on its side at the bottom of the bowl, it’s nice and fresh. If the egg lays upright on the bottom like in the photo above, it’s fine to eat but should be consumed soon. If the egg floats to the top, do not eat and throw away. Since eggshells are porous, air that passes through the shell will make the egg go bad. This test works because the more air that’s entered the shell, the more the egg will float.
Temperature
When it comes to baking eggs should usually be at a cool room temperature. This helps the eggs combine more easily and evenly into the dough, producing a better and airier cookie. However, I will say that egg temperature is not as critical to cookie success as butter temperature, you can usually get away with using cold eggs in cookies.
To quickly bring eggs to room temperature, place eggs in a bowl of warm tap water for 10 to 15 minutes. Dry off before using.
Butter
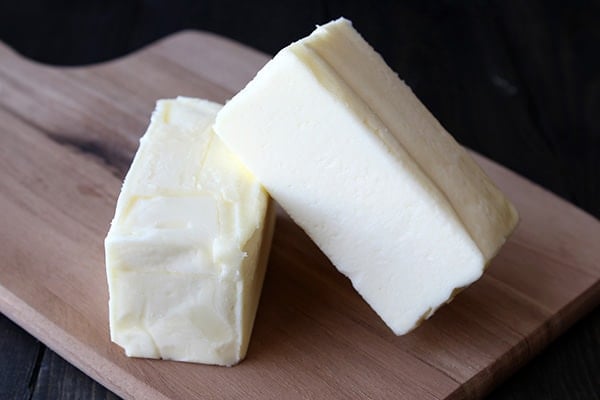
Most cookie recipes call for unsalted butter. This is because salt is usually an ingredient that is added to the dough as it enhances the sweetness and rounds out the overall flavor. If you use salted butter, you can’t control the salt content of your dough as well because there is no industry standard about of salt in 1 stick across butter brands. Some salted butters are saltier than others, and you won’t know how it’ll affect the taste of a recipe until it’s too late to change anything. In fact, some brands have TWICE the amount of salt than other brands which is why using unsalted is the best option. If you do need to use salted butter in a baking recipe, omit half or all of the salt the recipe calls for.
Freshness
Unsalted butter has a smaller window of freshness because there is not salt to preserve it and must be replenished at the grocery store more frequently. I like to store unsalted butter in the freezer so I always have some on hand. Just defrost overnight in the fridge or at room temperature for a few hours.
Temperature
Butter should be at a cool room temperature (unless otherwise specified). You should be able to push your finger gently into the butter to make a slight indentation. If your finger easily slides through the entire stick, it’s too soft and may cause your cookies to spread too much while baking. To be precise, about 67°F is perfect.
To quickly bring butter to room temperature, cut it into small pieces and let sit on a plate for 30 minutes. This allows the butter to come to a cool room temperature evenly, unlike microwaving which tends to warm butter unevenly. You may need to let the butter sit for more or less time depending on the temperature of your kitchen. Some recipes may call for cool room temperature butter (like my Bakery Style Chocolate Chip Cookies), or browned butter (like my Browned Butter Toffee Chocolate Chip Cookies), which lets you skip through the bringing to room temperature step.
Salt
Always use whatever salt the recipe calls for. Most of the time it’ll be fine salt, I prefer to use fine sea salt. Fine salt will combine better with the dough than kosher salt will. Try sprinkling your balls of dough with sea salt (fleur de sel is perfect here) for a beautiful balance of sweet and salty. Learn more about different salts in baking in my Kosher Salt vs. Sea Salt vs. Table Salt article here.
Chips, Nuts, and Mix-Ins
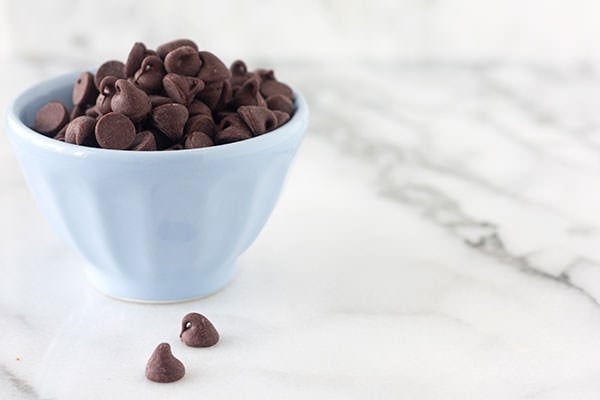
I get a lot of questions about switching up the mix-ins called for in a cookie recipe. Whether it’s chocolate chips, chocolate chunks, peanut butter chips, butterscotch chips, white, milk, semisweet, or dark chocolate, nuts, or whatever else, this part of a cookie recipe is usually totally easy to customize. As long as you’re usually about the same amount of mix-ins and they are roughly the same size as the original item, you should be fine! The more mix-ins you add, and the bigger chunks you add, the more your dough will become less cohesive and more crumbly. There is a limit as to how much you can add.
This is where you can have fun and get creative. Sometimes I like to stuff my cookies with a caramel square or a Rolo. To make picture-perfect cookies, top the balls of dough with a few chips before baking.
Measuring
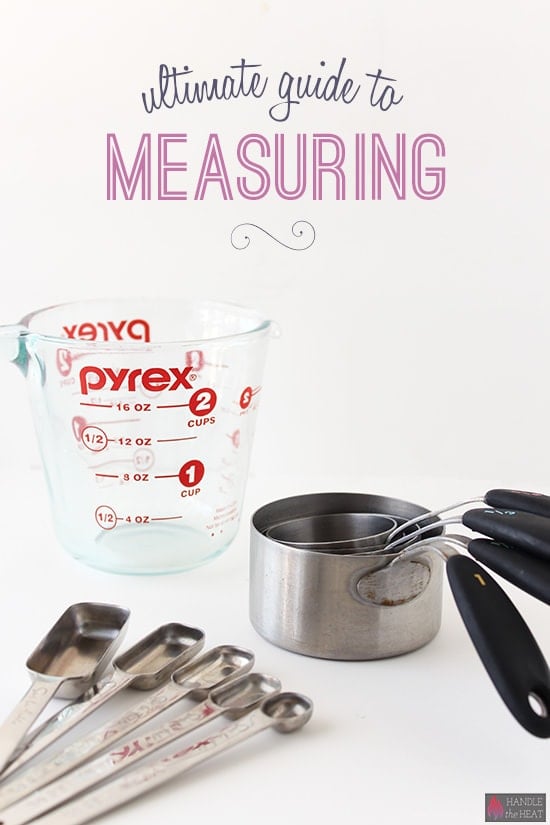
As mentioned above, accuracy is critical for baking. It’s truly a science! Inaccurate measurements, especially when it comes to the ratio of liquid to dry ingredients, cause many baking issues. Learning how to accurately measure will make you a baking boss, and your cookies will start to turn out better more consistently. In my Ultimate Guide to Measuring I detail how to measure the most common baking ingredients, using weight (preferred) and also volume if you don’t have access to a kitchen scale. I also include the weights of various baking ingredients so that you can convert just about any baking recipe into weight measurements for best results.
Storing
In general, cooled cookies can be stored in an airtight container at room temperature for about 5 days. To keep the cookies soft, add an apple wedge or piece of bread to the container. I prefer to refrigerate or freeze my dough and bake cookies off as I want them because nothing beats fresh still-warm cookies.
Cookie dough can be stored in the fridge, covered, for up to 3 days. Let sit at room temperature until warm enough to scoop.
Scoops of cookie dough can be place on a cookie sheet and placed in the freezer until frozen. Remove the frozen balls to an airtight container and store in the freezer for up to 6 weeks. Bake from frozen, adding an additional minute or two to the cooking time or bring to cool room temperature and bake as directed by the recipe. The colder the dough, the thicker the cookies.
If you want chewier cookies (my favorite!):
-Use more brown sugar
-Add an egg yolk to the dough
-Use bread flour
-Chill the dough
-Add a tablespoon of corn syrup
If you want softer cookies:
-Use more brown sugar
-Add in a teaspoon of cornstarch
-Use half pastry or cake flour
-Bake the cookies at 325°F
-Use shortening
If you want cakey cookies:
-Use cake flour
-Add in 1 tablespoon of cornstarch
-Substitute a part of the sugar with liquid sweetener such as maple syrup or honey
-Use baking powder (add about 1 teaspoon if baking powder isn’t in the recipe already)
If you want thick cookies:
-Chill the dough
-Use cold butter
-Scoop tall mounds of dough instead of balls or discs
-Add an extra few tablespoons of flour
-Use more brown sugar
-Use shortening
-Add in a teaspoon of cornstarch
If you want thin and crisp cookies:
-Use only granulated sugar, no brown sugar
-Add in a tablespoon or two of milk
-Use slightly less flour
-Use a greased baking pan
-Use melted butter
-Bake the cookies at 375°F
-Flatten the dough before baking
-Add an egg white for more crunch
To make healthier or dietary restriction-friendly cookies:
Use coconut oil instead of butter
Use whole-wheat flour instead of all-purpose
Use gluten-free flour mix (such as Cup 4 Cup) instead of all-purpose flour
Use maple syrup, honey, or agave nectar for part of the processed sugar (will make the cookies cakey)
Troubleshooting:
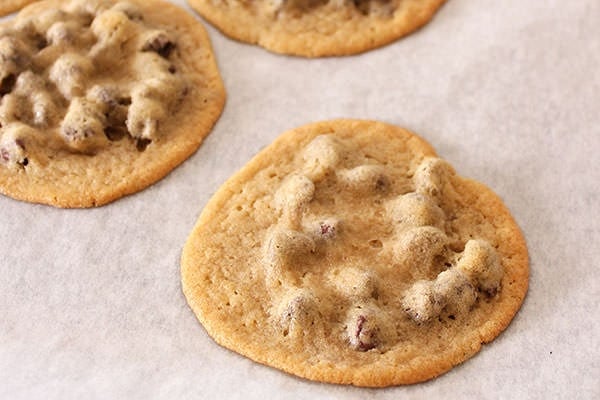
My cookies spread into flat puddles in the oven.
The dough may have been too “wet.” Make sure you are correctly measuring your flour (see above) or try adding in an additional tablespoon or two of flour.
Were the butter and sugar overbeaten? Remember you only need to beat for 1 to 2 minutes on medium-high speed. Overbeating can cause the butter to warm too much and weaken its ability to hold air and therefore hold its shape. Learn more about How to Cream Butter and Sugar here.
Did you add too much baking powder and/or baking soda? Too much chemical leavener can cause the cookies to deflate.
Was the baking pan coated in too much nonstick cooking spray? This can cause the cookies to spread in the oven.
Was the baking pan hot from baking a previous batch of cookies? Be sure to use room temperature baking pans. Bring pans to room temperature quickly by carefully running the bottom of the pan under cool water.
Try using half bread flour in your dough, which has a higher protein content and will absorb more moisture.
Was the butter too warm? If the butter is too warm and soft it can cause the cookies to spread too much in the oven. Remember to use cool room temperature butter. Try chilling the balls of dough before baking.
Is your baking soda or baking powder expired? See above for how to test the freshness of your leaveners.
Scoop tall mounds of dough instead of balls or disks before baking.
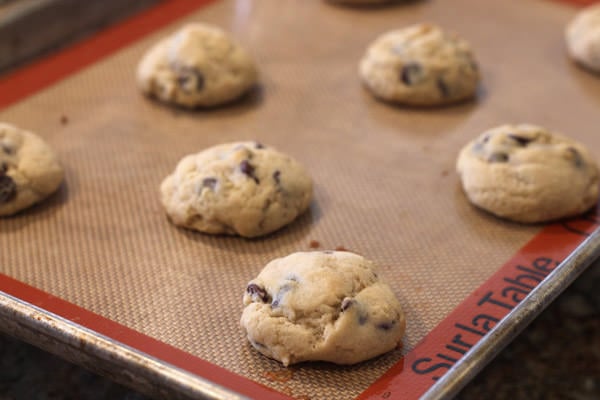
My cookies didn’t spread at all.
Was too much flour accidentally added? When measuring by volume (cups), it’s so easy to accidentally compact too much flour into your cups. Learn more about measuring dry ingredients here.
Was the amount of butter or other fat in the recipe reduced? Avoid changing the amount of fat in cookie recipes.
Is the oven too cold? Be sure to thoroughly preheat the oven for at least 10 minutes before baking. Also, check the oven temperature with an oven thermometer to ensure it is correct.
Was a dark nonstick baking pan used? This can prevent the cookies from spreading.
Was the dough at a cool room temperature? Sometimes if the dough is too cold the cookies won’t spread.
My cookies are hard and tough.
Was the dough overmixed? Remember to mix in the dry ingredients until just incorporated then stop mixing.
Was too much flour added? See above for how to measure flour correctly.
Was a high-protein flour used? Try using all-purpose or pastry flour, or some ratio of the two.
Was the fat reduced? Was the sugar reduced? Avoid making these changes.
Were the cookies over-baked? Ensure accurate oven temperature with a thermometer and remove from oven after the minimum baking time.
My cookies are crumbly.
Try mixing for longer to make a more cohesive dough to create more gluten development (gluten is like glue in doughs).
Use bread flour instead of all-purpose flour which promotes gluten development.
Add an additional egg or egg yolk.
My cookies didn’t bake evenly.
Your oven may have hot spots. Be sure to rotate your pans halfway through baking and to drop balls of dough that are evenly sized.
Your pan may not conduct heat evenly, use a high-quality thick and heavy aluminum pan like the one listed above.
Try baking only one sheet at a time in the center of your oven.
Make sure you are scooping balls of dough that are as similar in shape and thickness as possible. Use a cookie scoop to do so.
The bottoms of my cookies are burnt.
Avoid using dark nonstick baking sheets, which promote browning and can lead to burning, and never grease your baking sheets.
Only use the middle oven-rack, anything too close to the heat source may cause burning.
Start checking on your cookies at the minimum baking time, and use an oven thermometer to ensure accurate cooking temperature.
Remove the cookies from the cookie sheet and onto a wire rack 2 minutes after baking, the cookies will continue to cook on the hot pan.
My cookies are too pale.
Use fresh baking soda which promotes browning (make sure there’s some sort of acid in the dough, see above).
Don’t use an insulated baking sheet.
Increase baking temperature and time slightly.
Add a 1/4 cup additional sugar to the dough.
My cookies fall completely flat after they cool.
Most cookie recipes will puff up in the oven then fall slightly once cool, but if you feel it is a serious problem make sure you are not over-beating your butter and sugar. Try beating for only 2 minutes.
My cookies don’t have much flavor.
Make sure to use the best quality ingredients possible.
Add an extra teaspoon of pure vanilla extract.
Use dark brown sugar for a more complex sweet flavor.
Chill the cookie dough for at least 24 hours to intensify the flavors.
Sprinkle the cookie dough balls with some sea salt before baking.
My cookies become hard after storing.
See the tips above for storing.
[simple-recipe]








I tried to bake a really cool choclate chip , cranberry cookie with vegan ingredients and it failed miserably, I have a whole pan of crumbly crumbs. Can I rework this with additional butter (giving up on vegan) and a real egg and rebake it? would that work?
I’m not sure, we haven’t tried that!
If youheat golden syrup before adding to the mix will it liquidise the mixture with its warnth