

This post may contain affiliate links. Read our disclosure policy.
The most foolproof path to baking success is to measure accurately – so I wanted to create The Ultimate Guide to Measuring as an easy way to teach bakers the best way to measure any ingredient!
I get dozens of comments every week asking why a baking recipe didn’t turn out properly, and most of the time, it’s likely due to inaccurate measuring.
Baking is a science where precision is rewarded in perfectly delicious treats. I’m very passionate about the simple Science of Baking, and I love to conduct fun experiments (like my Cheap vs Expensive Ingredients in Brownies and my Reducing Sugar in Cupcakes articles!) so I can teach bakers like you the best possible ways to ensure perfect baked goods each and every time.
I’ve laid out ALL the tips, tricks, and methods you need to know to measure accurately so everything you bake will be delightful.
I hope you find The Ultimate Guide to Measuring helpful!

Sprinkle of Science
The Ultimate Guide to Measuring
My #1 Tip: Weigh Your Ingredients
The most accurate way to measure is by weight, so I HIGHLY suggest you invest in a digital food scale if you don’t already have one. It’s a small investment to ensure baking success, especially because baking ingredients can get pretty pricey. Weighing your ingredients is easy, fast, and clean. Plus, it’s how the pros do it. I’ve been using this Escali scale for years with absolutely no issues. I’ve also used and enjoyed this OXO Scale. Everything just goes directly into the bowl, no measuring cups to clean!
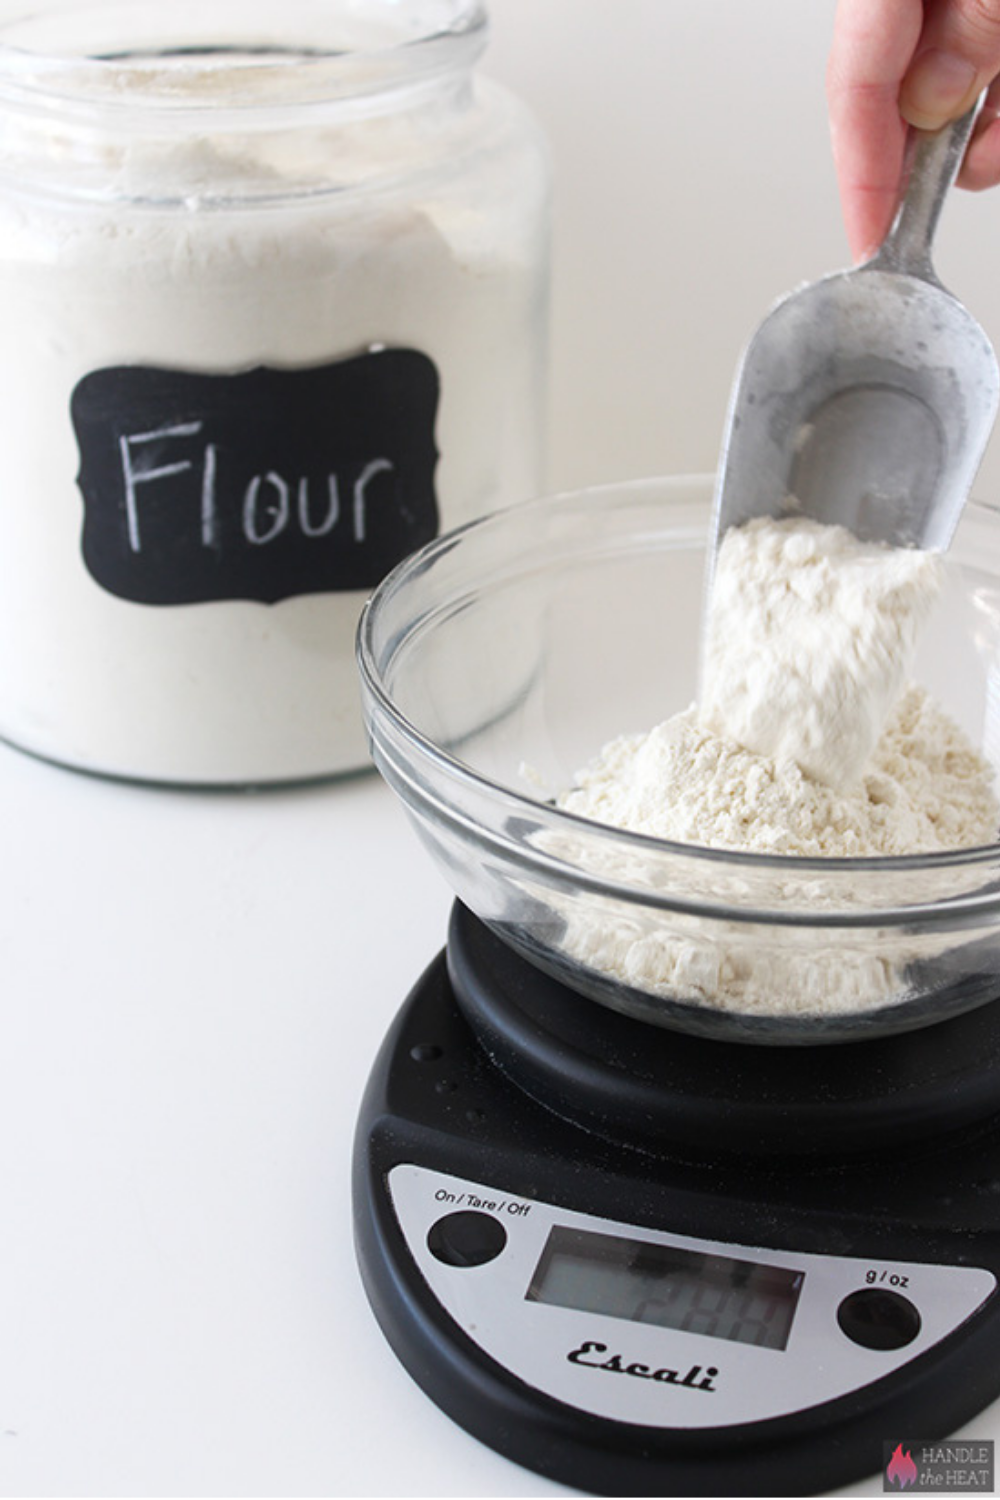
How to Use a Digital Scale
- To use a digital kitchen scale, place your mixing bowl on the scale.
- Press the “zero” or “tare” button to take away the weight of the bowl.
- Add your ingredients until you achieve the weight called for in the recipe. You may need to give or take a few tablespoons to land directly on that number.
- Hit the tare button again to reset the weight to 0 before moving on to the next ingredient.
Ingredient Weight Tips
- Please note that different ingredients have different densities, meaning 1 cup of every ingredient will not weigh the same. Think about it, 1 cup of feathers would not weigh the same as 1 cup of lead, right? The same goes for baking and cooking.
- Also, note that some brands of the same product can have slightly different weights.
- If you are following a recipe from a baking cookbook, follow the ingredient weights provided either in the ingredient list or in a conversion appendix in the book.
If you don’t have a scale and don’t wish to purchase one, see the tips below for measuring by volume with dry and liquid measuring cups below.
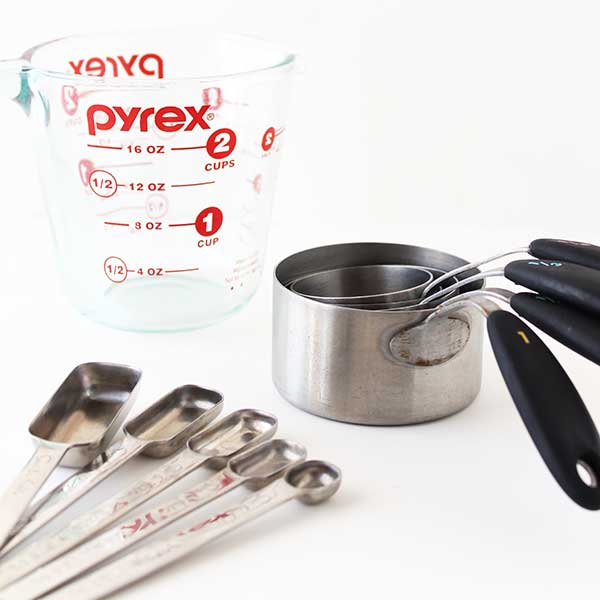
Liquid vs. Dry Measuring Cups
- If you can pour it, use a liquid measuring cup (oil, honey, maple syrup, etc.). If you can smooth the top, use a dry measuring cup (peanut butter, sour cream, etc.).
- Always measure at eye level with liquid measuring cups.
- Always fill dry measuring cups to the brim then scrape off any excess.
- Make sure to use quality measuring cups and spoons – they do make a difference! I like these measuring spoons because they fit wonderfully inside small jars and these stainless steal dry measuring cups because they’re super durable.
- Also, avoid 2-cup dry measurements because they tend to compact the food, giving you an inaccurate measurement.
- Most liquid measuring cups should work just fine, but I do love my Pyrex measuring cups.
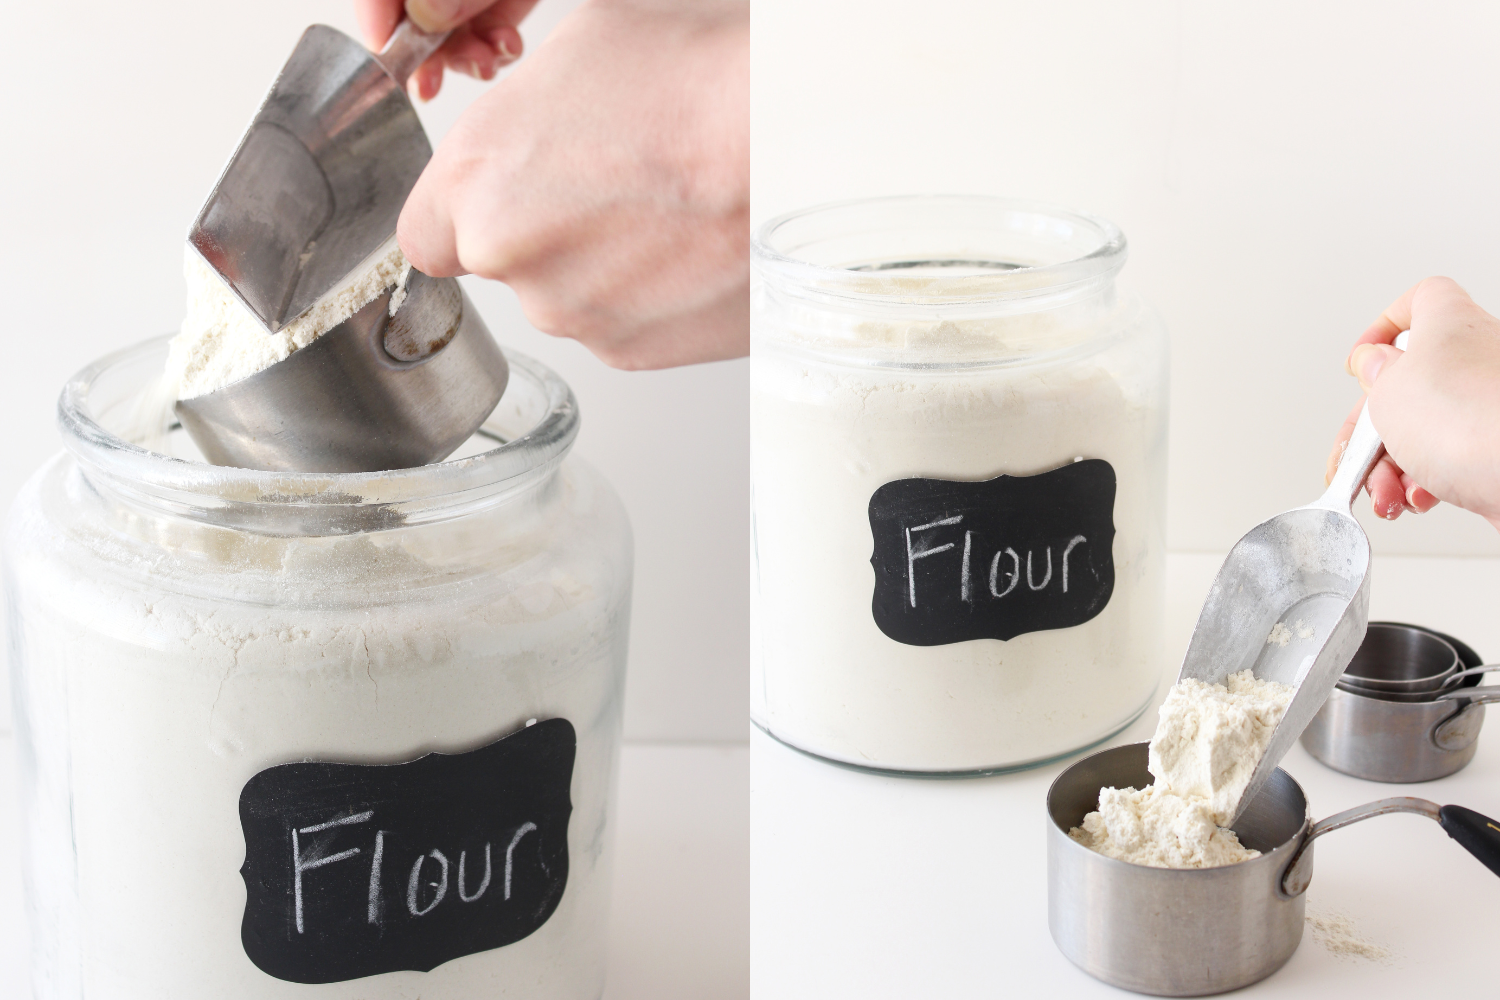
Measuring Flour
This is arguably the most important ingredient to accurately measure. A mis-measured cup of flour can ruin your baking project. Unfortunately, flour can be very difficult to measure by volume (using measuring cups).
Scooping your measuring cup directly into your container of flour to measure can pack the flour in, causing your measurement to be much more dense. In fact, this method of scooping can lead a cup of flour to weigh almost 2 ounces more than the spoon and level method! This can make a HUGE difference in the composition of your baked goods. If you’ve ever had cookies not spread in the oven or turn crumbly or heavy or had homemade bread turn out dense, those are just two examples of what too much flour can do in baking.
Use the “Spoon and Level” Method
Fluff up your container of flour. Spoon the flour into your measuring cup, then scrape off the excess with a straight edge. A flour scoop is the best tool for this. Learn more about how to best measure flour here.
Flour Weight Guide:
- All-purpose flour: 1 cup = 4.5 ounces = 127 grams
- Bread flour: 1 cup = 4.5 ounces = 127 grams
- Cake flour: 1 cup = 4 ounces = 113 grams
- Whole Wheat Flour: 1 cup = 4.5 ounces = 127 grams
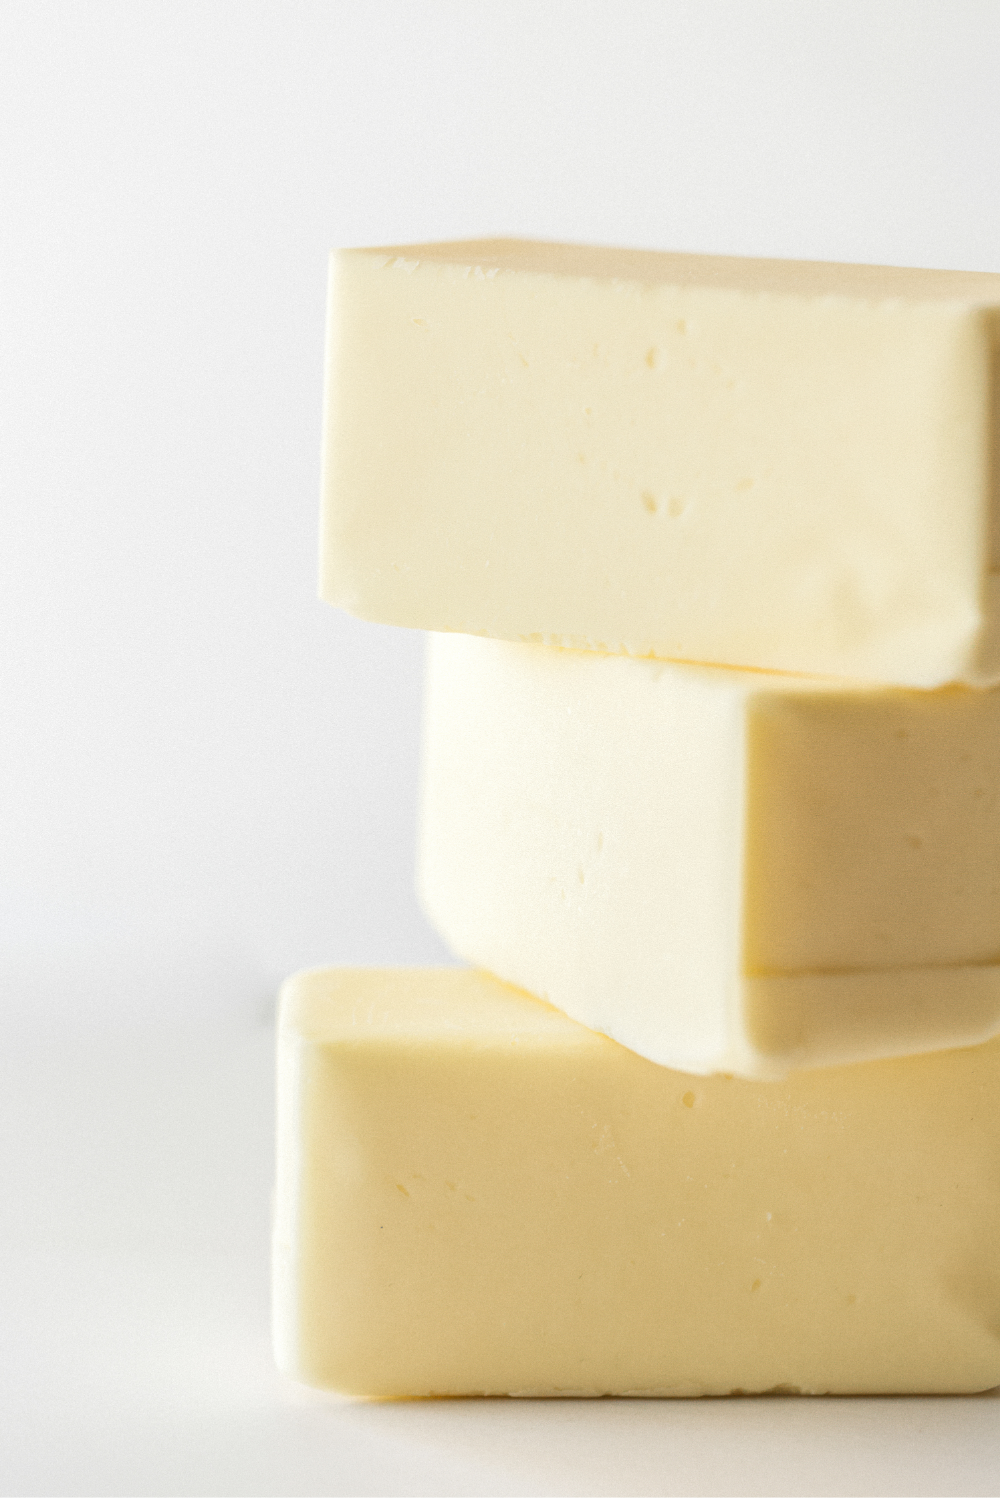
How to Measure Butter
There are SO many methods of measuring butter in recipes and I know it can be confusing. I try to call for both sticks and at least one other measurement – tablespoons if it’s a small amount, and grams if it’s a larger amount. I know this is still confusing if you aren’t in America, so here is a super useful equivalent for butter measurements you may want to put into your phone or print out for your kitchen.
Butter Weight Guide:
1 stick = 1/2 cup = 8 tablespoons = 4 ounces = 113 grams
How to Measure Baking Powder and Baking Soda
Shake the leavener container slightly, then use a measuring spoon to lightly scoop a mound. Scrape off the excess with a flat edge.
Please note that baking soda and baking powder can expire before the stamped expiration date. Expired leavening agents can cause your baked goods to sink, collapse, or fail completely. Learn more about Baking Soda vs. Baking Powder and how to test both for freshness here.
How to Measure Active Dry or Instant Yeast
Shake the yeast container slightly, then use a measuring spoon to scoop a mound lightly. Scrape off the excess with a flat edge.
Yeast can also lose its effectiveness before its expiration date. Learn more about Active Dry Yeast vs. Instant Yeast and how to test for freshness here.
Yeast Weight Guide:
1 packet of yeast = 2 1/4 teaspoons = .25 ounces = 7 grams
How to Measure Sugar
- Granulated Sugar: Measuring granulated sugar is a little more simple than flour. Use your measuring cup as a scoop to dip into the container then use a flat edge to scrape off any excess.
- Brown Sugar: Pay attention to the measurement direction written in the recipe – it will usually say “brown sugar, lightly packed.” This is basically the opposite of flour measuring and means you pack the brown sugar into the measuring cup until it reaches the brim. Make sure to break any large clumps before measuring.
- Powdered Sugar: Also called confectioners’ sugar, this stuff can make a huge mess when measuring. Spoon the sugar into your measuring cup then use a straight edge to scrape off any excess. It often needs to be sifted before being added to recipes since it is usually lumpy. Make sure you understand the order of sifting before measuring: 1 cup powdered sugar, sifted = sift AFTER measuring, whereas 1 cup sifted powdered sugar = sifted BEFORE measuring.
Sugar Measuring Guide:
- Granulated Sugar: 1 cup = 7.05 ounces = 200 grams
- Light Brown Sugar: 1 cup packed = 7.05 ounces = 200 grams
- Dark Brown Sugar: 1 cup packed = 7.05 ounces = 200 grams
- Unsifted Powdered Sugar: 1 cup = 4.7 ounces = 125 grams
- Sifted Powdered Sugar: 1 cup = 3.6 ounces = 102 grams
How to Measure Cocoa Powder
Spoon the cocoa powder into the measuring cup, then scrape off the excess with a straight edge. As with powdered sugar above, sift before or after measuring as instructed by the recipe. Sifting cocoa powder is always a good idea because it is naturally very lumpy.
Cocoa Powder Measuring Guide:
1 cup cocoa powder = 3 ounces = 85 grams
Liquid Sweeteners
If a recipe calls for oil and a liquid sweetener, measure the oil first to grease the measuring cup. You can also spray nonstick cooking spray inside the measuring cup before measuring sticky ingredients.
Liquid Sweetener Measuring Guide:
1 cup honey = 11.6 ounces = 336 grams
1 cup molasses = 11.6 ounces = 336 grams
1 cup maple or corn syrup = 11 ounces = 312 grams
Helpful Dry Ingredient Equivalents:
Dash or pinch = 1/8 teaspoon
1 tablespoon = 3 teaspoons
1/8 cup = 2 tablespoons
1/4 cup = 4 tablespoons
Helpful Liquid Ingredient Equivalents:
1 cup = 8 fluid ounces = 1/2 pint = 237 milliliters
2 cups = 16 fluid ounces = 1 pint = 473 milliliters
4 cups = 32 fluid ounces = 2 pints = 946 milliliters
8 cups = 64 fluid ounces = 2 quarts = 1892 milliliters
For more helpful ingredient weights, sign up for my FREE Ingredient Measuring Guide here.
More Baking Science Articles You’ll Love:
- How to Measure Flour
- Everything You Need to Know About Sugar in Baking
- Oven 101: What You NEED to Know
- Glass vs. Metal Baking Pans
- Cheap vs. Expensive Ingredients in Chocolate Chip Cookies
This post was originally published in 2014 and has been updated with additional tips.
Become a Baking Genius!
Sign up for our free email newsletter for NEW recipes & baking science secrets.


Thanks for the post! It’s so useful. I’ve been a big fan of yours for years and I love all of your dessert recipes.:)
Thank you so much!
I’m stunned that using a kitchen scale really seems to be something odd for some people… in Germany NOT using a kitchen scale would earn you odd looks 😀 And I’m really glad to have those conversion tables at hand now, even though I have measuring cups at hand. I now use the cups and then verifiy my measurements on the kitchen scale 😉 So thanks a lot, Tessa! 🙂
Haha isn’t it strange!? I don’t know why it’s so unpopular in the US. I’m so glad the conversions are helpful!
I can’t believe I missed that…thanks again! Your information has been very helpful!
Glad to hear it!
Hi, I have a question about using a kitchen scale. If you put the ingredients in a bowl on the kitchen scale, do you subtract the weight of the bowl when measuring the ingredients from the total weight that shows up? Sorry I realize this is very confusing but I was thinking of buying a scale. Thank you for these tips!
Yep! I actually mention this in the post, “To use a digital kitchen scale, place your mixing bowl on the scale. Press the “zero” or “tare” button to take away the weight of the bowl. Add your ingredients until you achieve the weight called for in the recipe. You may need to give or take a few tablespoons to land directly on that number. Hit the tare button again to reset the weight to 0 before moving on to the next ingredient. It’s that easy!”
Great tips! I couldn’t do without my scale!
Thanks so much for this!! I prefer using my kitchen scale rather than measuring cups (which you don’t use at all in my country, bought them when being on a holiday in the UK, ust so that I will be able to try out English-speaking recipes), this makes life so much easier for me!!
I’m so happy to hear that!
What a great guide. I love my kitchen scale, most used item ever 🙂
Right?! Thanks Amanda 🙂
I’m gonna print and laminate this to leave it in my kitchen!
Thanks, Tessa! It’s really helpful!
Awesome idea!!
8 Cups = 64 fluid oz. = 2 Quarts (not 1)
Thanks for catching that 🙂
ps: I just got your ebook and it looks absolutely gorgeous! Everything sounds aaahhhmazing. Congrats! x
I agree with Taylor – you post the best ultimate guides. They’re super helpful and this one is no exception! Thank you so much for sharing Tessa!
I hope you had a great long-weekend! <3
Awh thanks so much!
I love the spoon and level method for flour (although I own a scale for the purpose of weighing it!) You always have the BEST ultimate guides…I love them all! This is so helpful, thanks! Pinned 🙂
Thanks Taylor!