


Tessa's Recipe Rundown
Taste: Tons of sweet vanilla and butterscotch flavor with the right amount of chocolate chips.
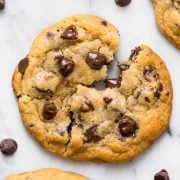
Texture: Thick and chewy, with slightly crisp edges, and plenty of gooey chocolate chips.
Ease: Simple 30-minute recipe.
Why You’ll Love This Recipe: These are my go-to Chocolate Chip Cookies — I’ve made this recipe hundreds of times! I always have this dough in my freezer, ready to bake off whenever the craving strikes.
This post may contain affiliate links. Read our disclosure policy.


My Bakery Style Chocolate Chip Cookies are thick, chewy, and gooey. If there’s one thing I’m passionate about, it’s chocolate chip cookies.

You might think me a little unhinged, but I’ve tested this particular recipe over 20 times, with nearly every variation you could think of, to deliver you the superlative chocolate chip cookie!
All that hard work paid off because this is now one of the MOST popular recipes on my site, with over seven million visitors and 1,000 5-star reviews.
Reader Love
I’ve been baking for 50 years and this is the best chocolate chip cookie ever. I love it so much I always have dough balls in freezer ready to bake. Thank you so much for sharing!
–
Reader Love
Everyone’s favorite cookie recipe! Everytime I make this recipe it’s guaranteed everyone will ask for it. Easy and great to keep in the freezer!
–
Why is this the BEST Chocolate Chip Cookie Recipe?
My recipe is simple enough to make on a weeknight, with no fancy ingredients. It’s been meticulously tested and the result is beautiful golden brown cookies, crisp at the edges and a little gooey at the center.
I’ve even made these cookies on The Today Show!
Important Ingredient Notes
Understanding how and why basic baking ingredients work can make you feel like a pro in the kitchen. I chose each ingredient only after careful testing so each one truly does matter.

All-Purpose Flour (measured correctly): I highly recommend using a digital kitchen scale to weigh your flour, or using the spoon-and-level method. It’s shockingly easy to accidentally add too much flour when measuring with cups, which can result in cookies that won’t spread, turn cakey, or go dry.
Baking Soda: After intensive testing, I chose to use only baking soda for leavening in this recipe, which resulted in perfectly golden brown cookies with just enough spread to bake evenly.
Salt: Don’t skip this! Once, my husband forgot the salt in this recipe and I realized it immediately after the first bland, underwhelming bite. I prefer fine sea salt for the taste, but you can also use table salt. Avoid Kosher salt, which doesn’t disperse evenly into the dough. I’ll even sprinkle these cookies with flaky sea salt when they come out of the oven for a salty-sweet bite.

Butter: I prefer to use unsalted butter in my baking because it’s typically fresher than salted butter (salt is a preservative) and it gives me full control of the salt content. If all you have is salted, no worries. Simply cut the salt in half (½ teaspoon) in this recipe.
White Sugar: Also called granulated sugar, this encourages more spread so I only use a small amount.
Brown Sugar: Brown sugar contains molasses, which helps contribute that beloved butterscotch flavor associated with chocolate chip cookies. That molasses draws in more moisture, making for thicker, softer, and chewier cookies that stay good for longer.
Eggs: Essential for binding together the cookie dough, eggs also add extra protein and fat for added richness and structure. Substitute the eggs with 50 grams of plain, unflavored, unsweetened yogurt if needed.
Vanilla: Again, don’t skip this ingredient! It imparts a sweet aroma that tells our brain something amazing is about to happen. Cookies without vanilla can fall flat.
Chocolate Chips: I prefer semisweet chocolate chips (Ghirardelli or Guittard are my favorite) because they have the perfect sweetness to balance out the other flavors of the cookies. If you prefer milk or bittersweet chocolate instead, feel free to use either.
- If you prefer fewer chocolate chips, decrease the amount to 1 ½ cups, just note your cookies may turn out slightly thinner. If you prefer chocolate chunks, swap in the same amount!
How to Make Chocolate Chip Cookies (Step-by-Step)
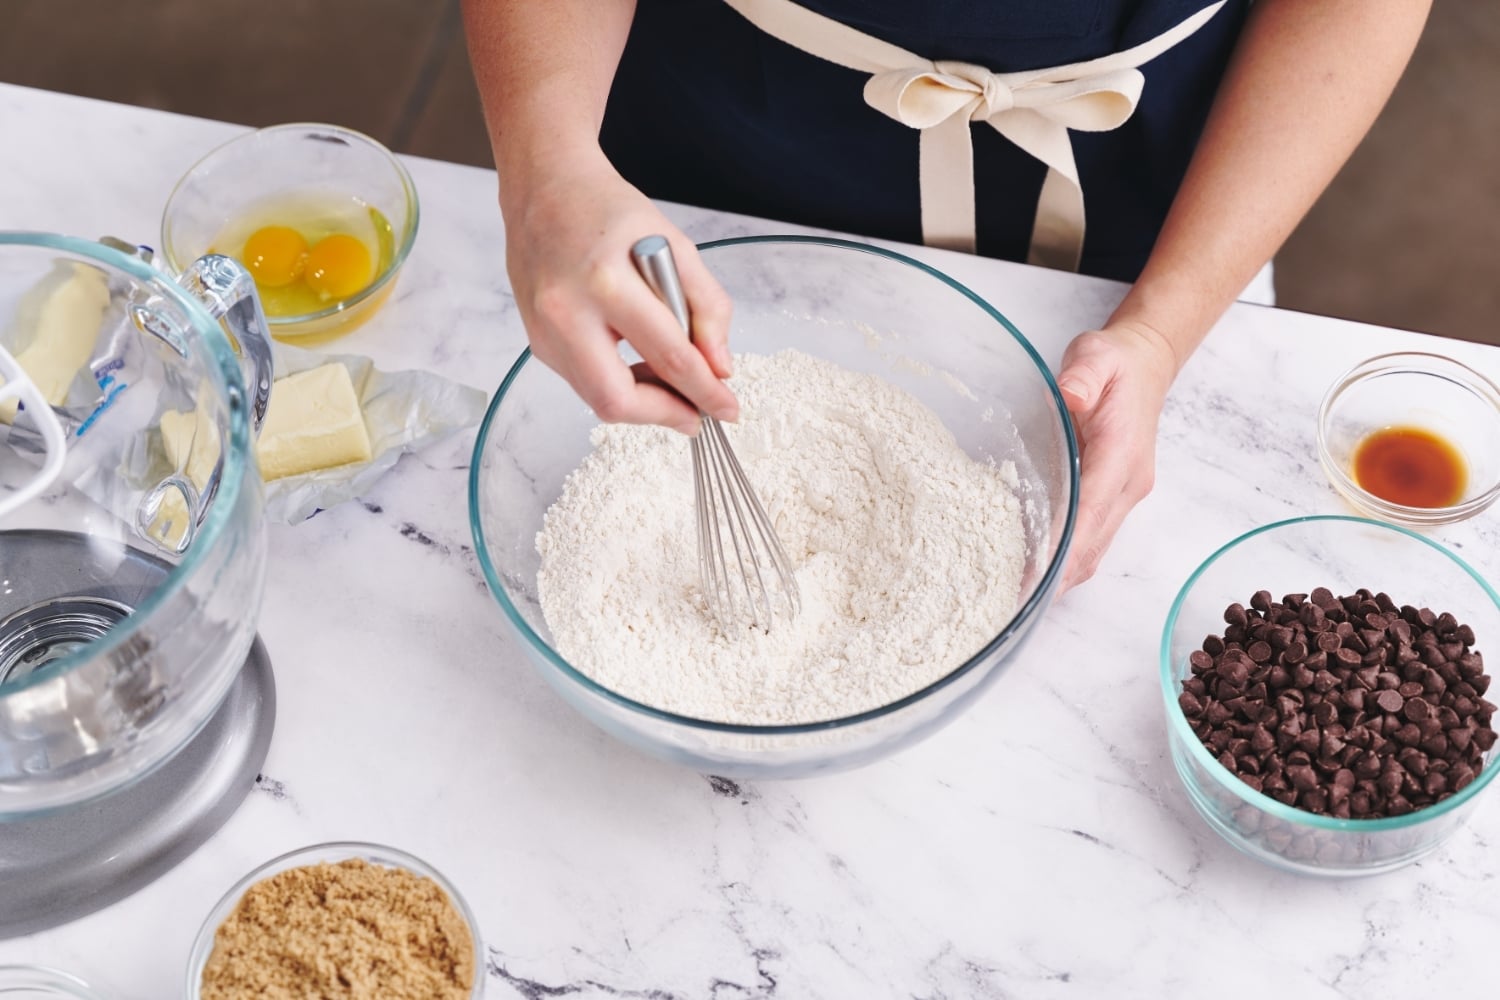
Whisk together the dry ingredients. This helps to evenly disperse the salt and baking soda.
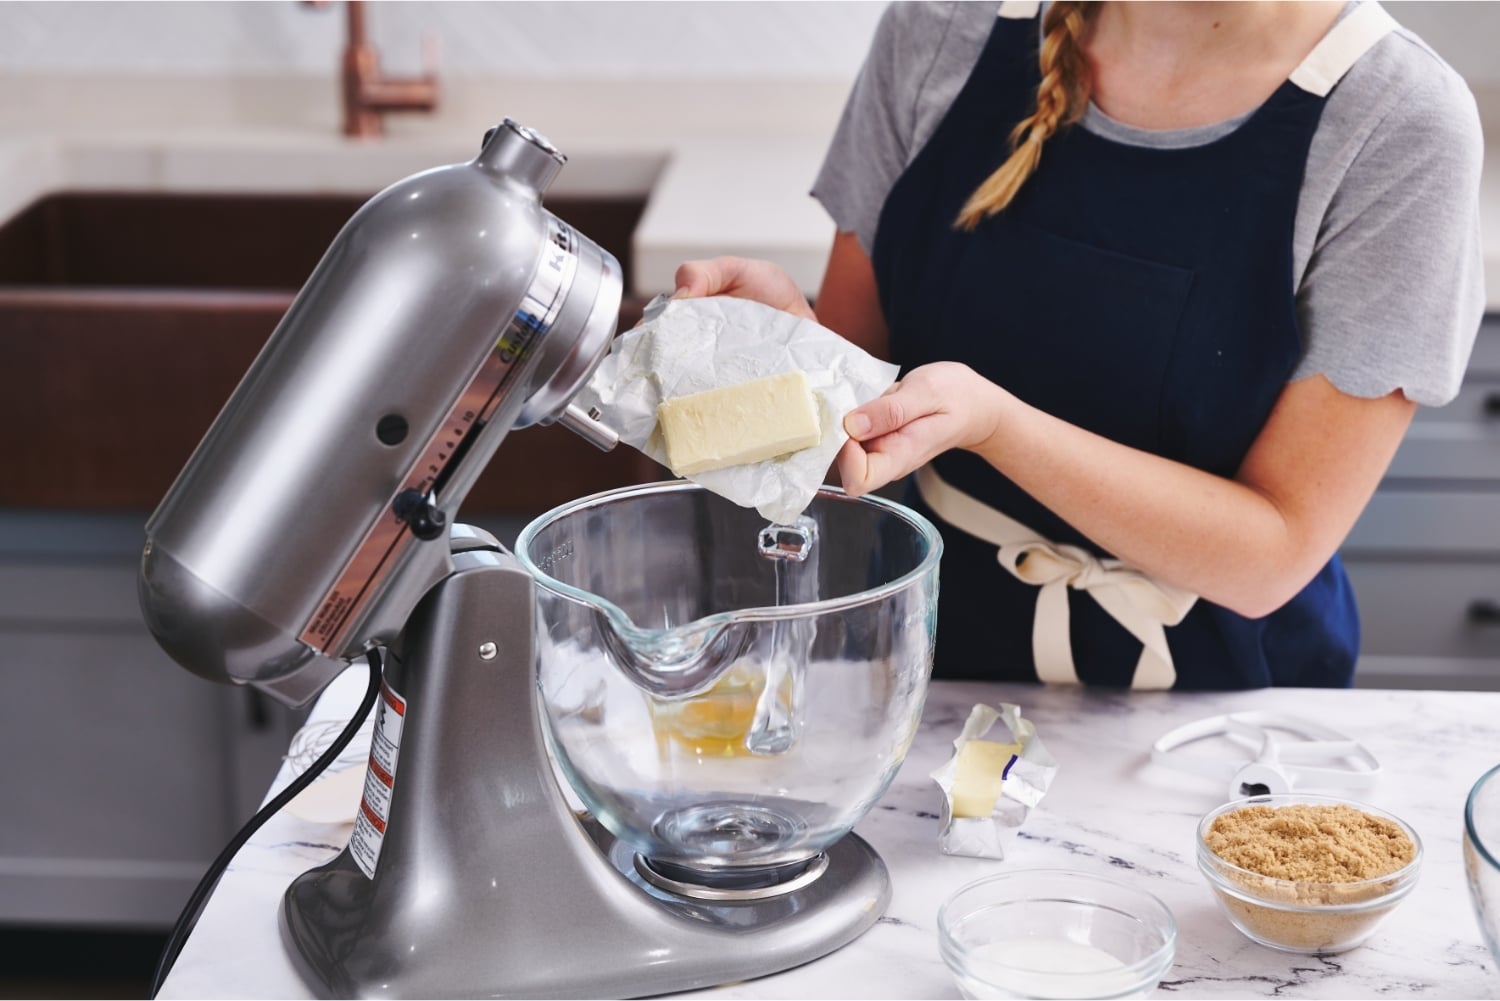
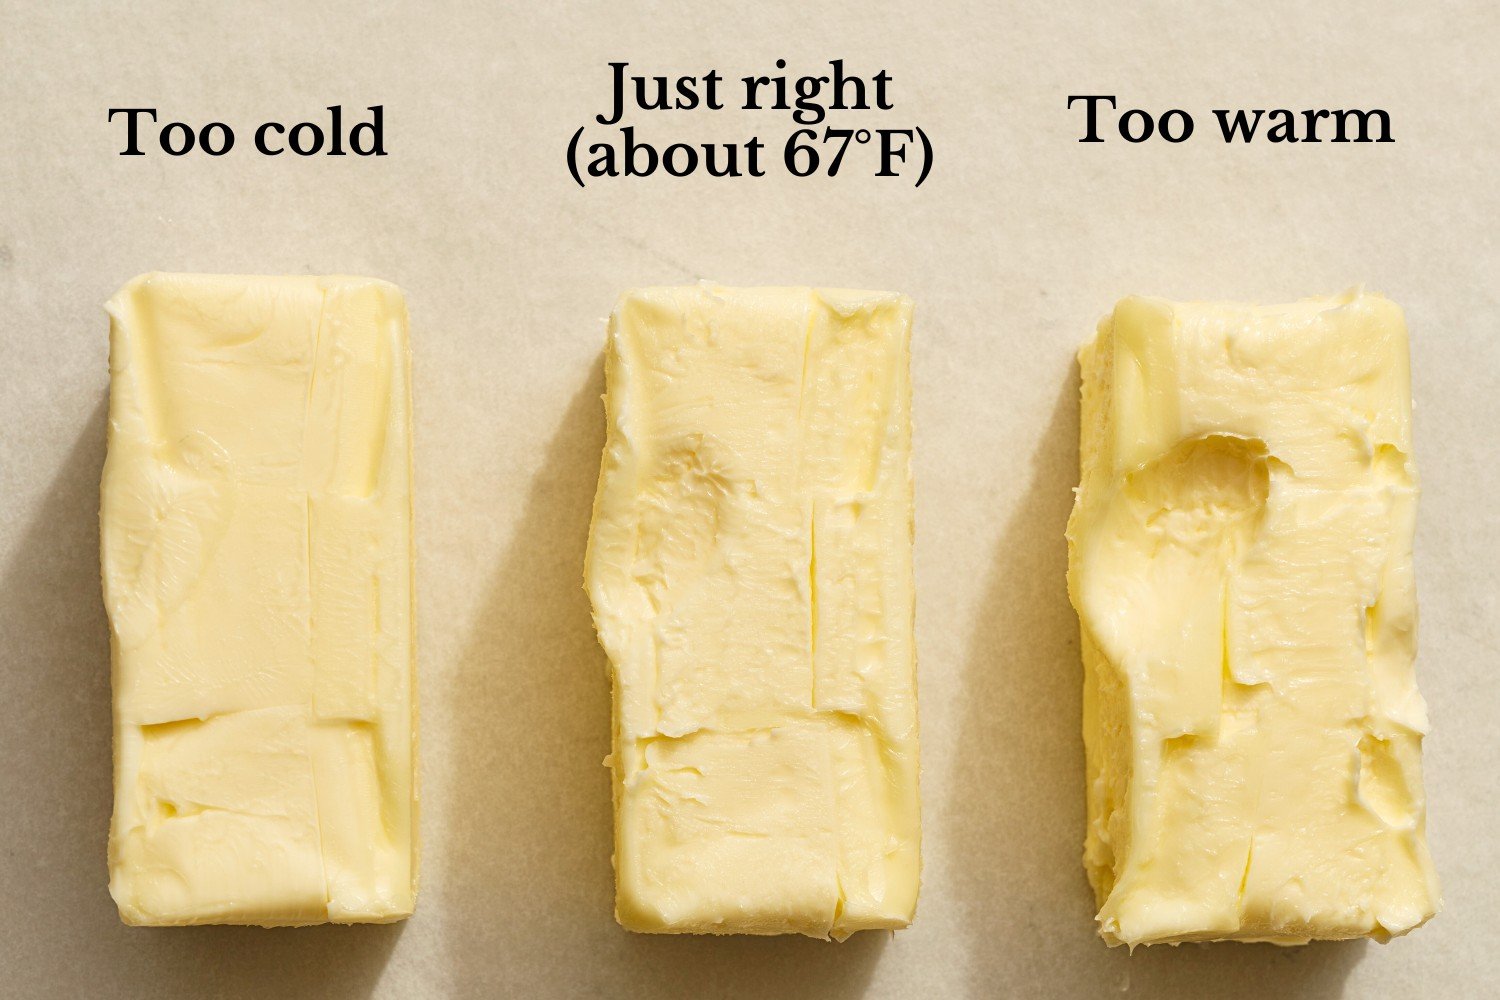
Add the butter. Make sure it’s at a cool room temperature (about 67°F) to avoid flat cookies. You can use an electric either hand held or a stand mixer.
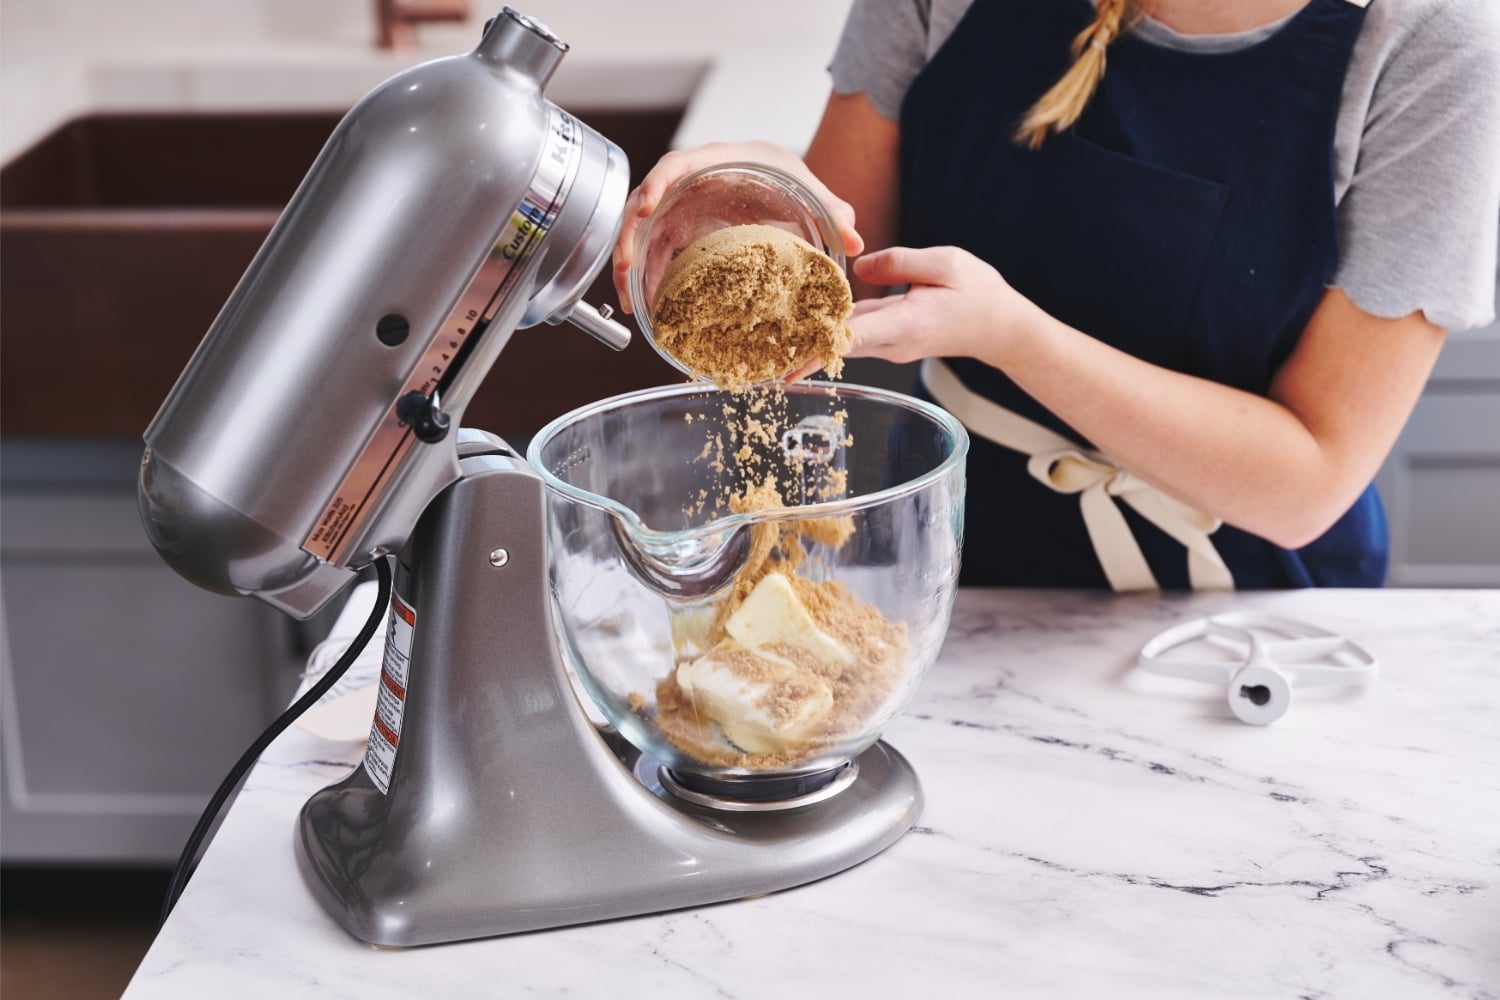
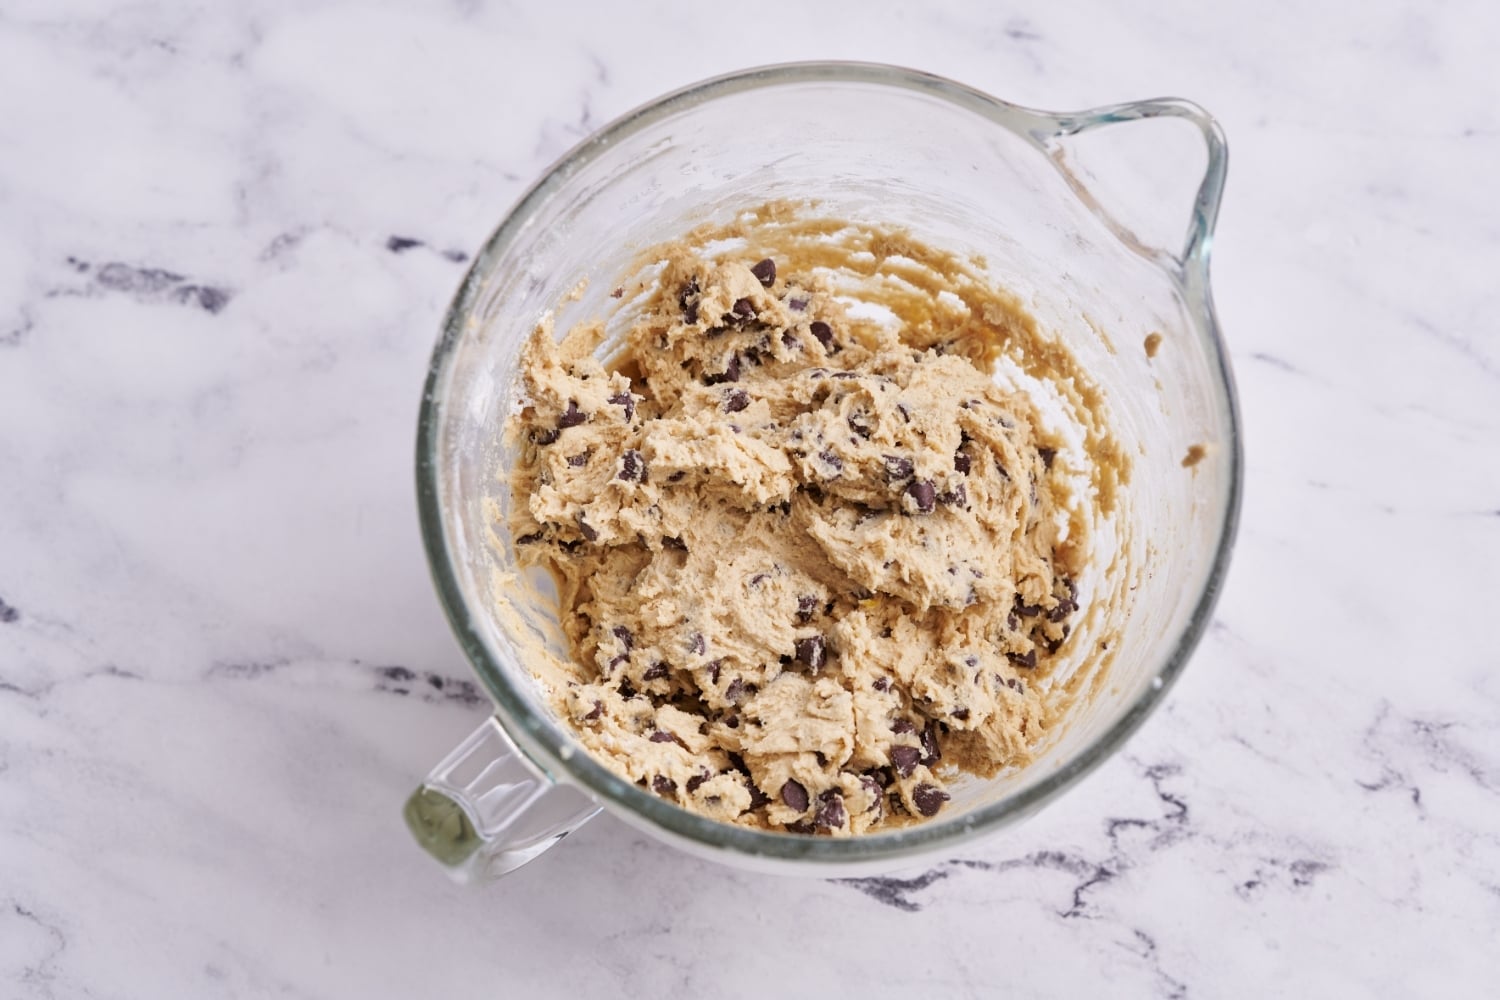
Cream the butter & sugars. This will take about 2-3 minutes on medium-high speed.
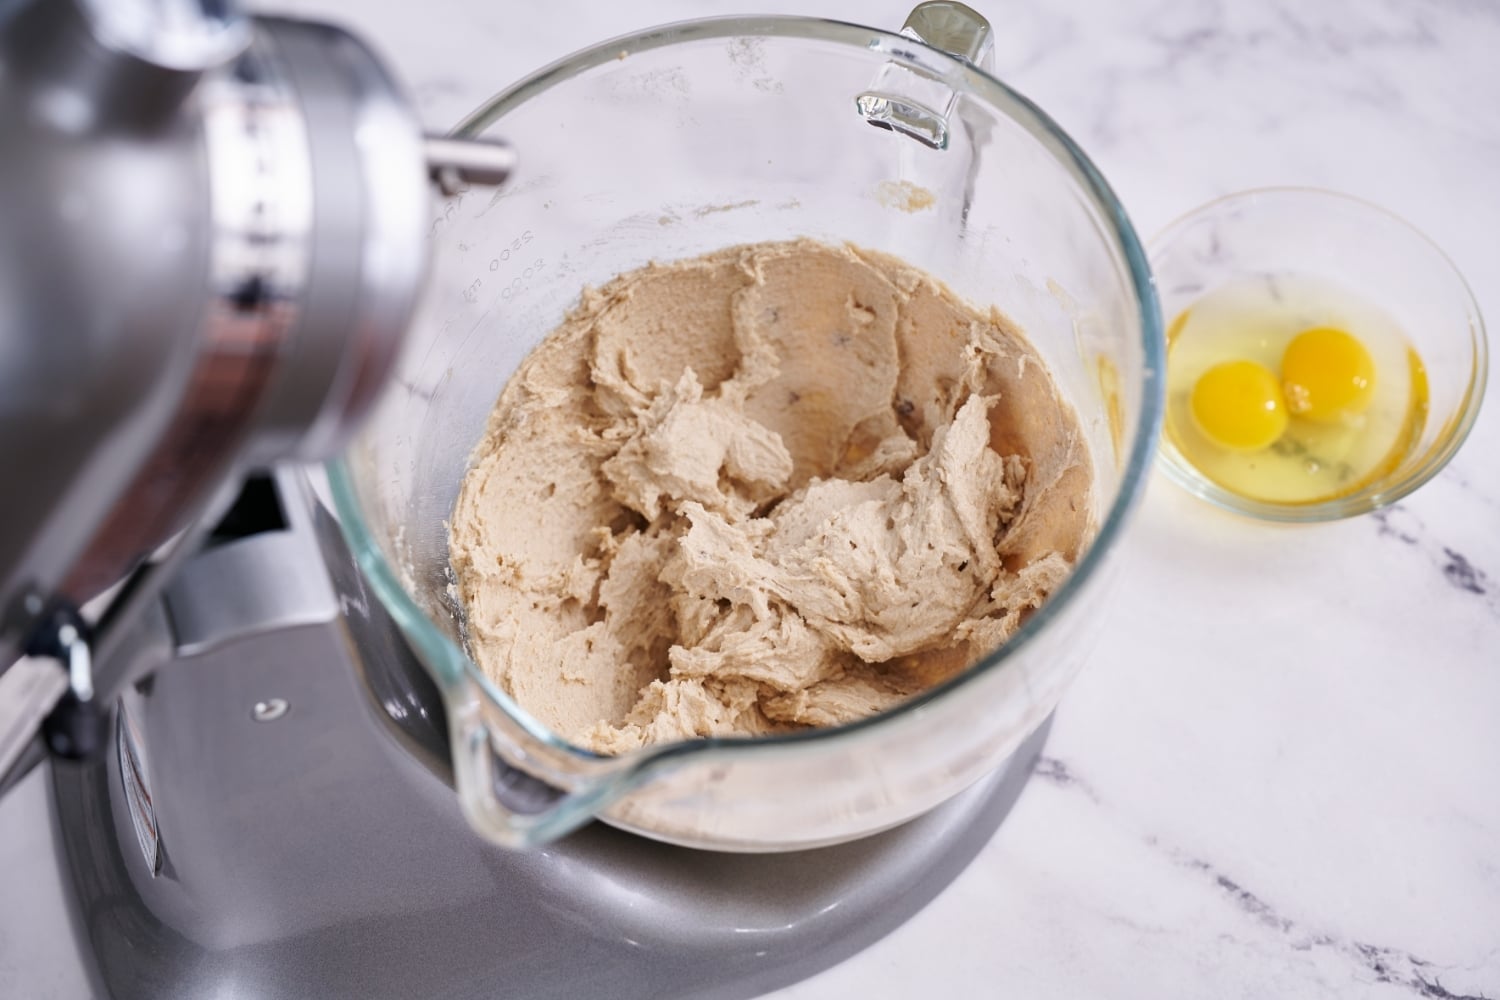
Mixture should be light and fluffy. Meaning, it’s lightened in color and looks more voluminous in texture. Scrape down the bowl at least once.
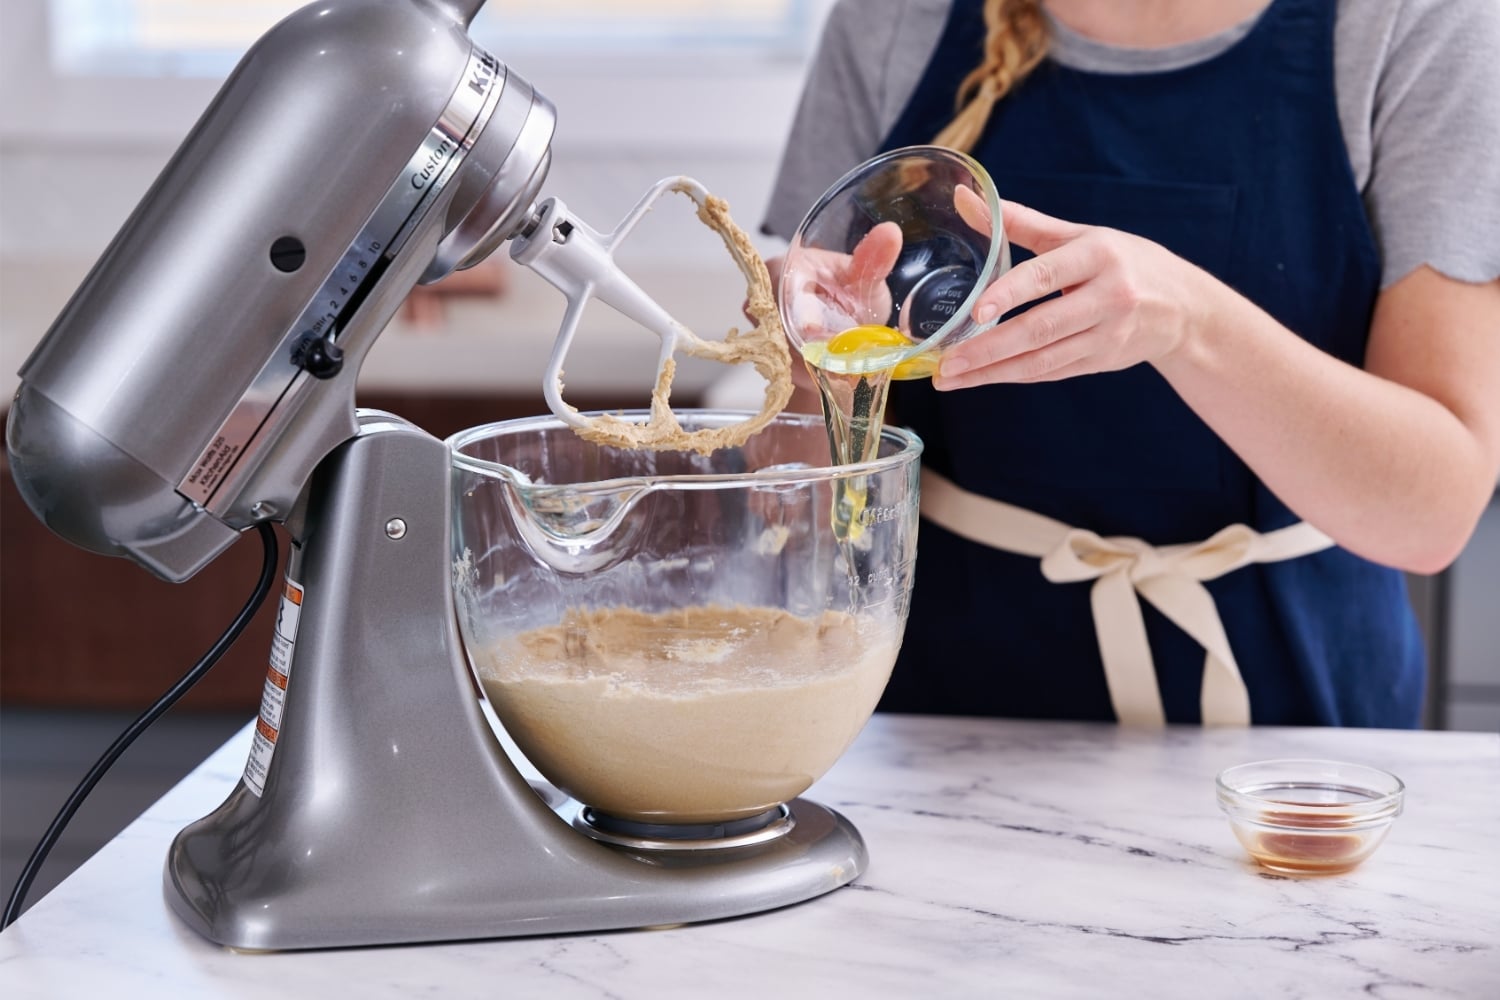
Add eggs & vanilla. Make sure the eggs are at room temperature so they mix evenly. Scrape down the bowl again.
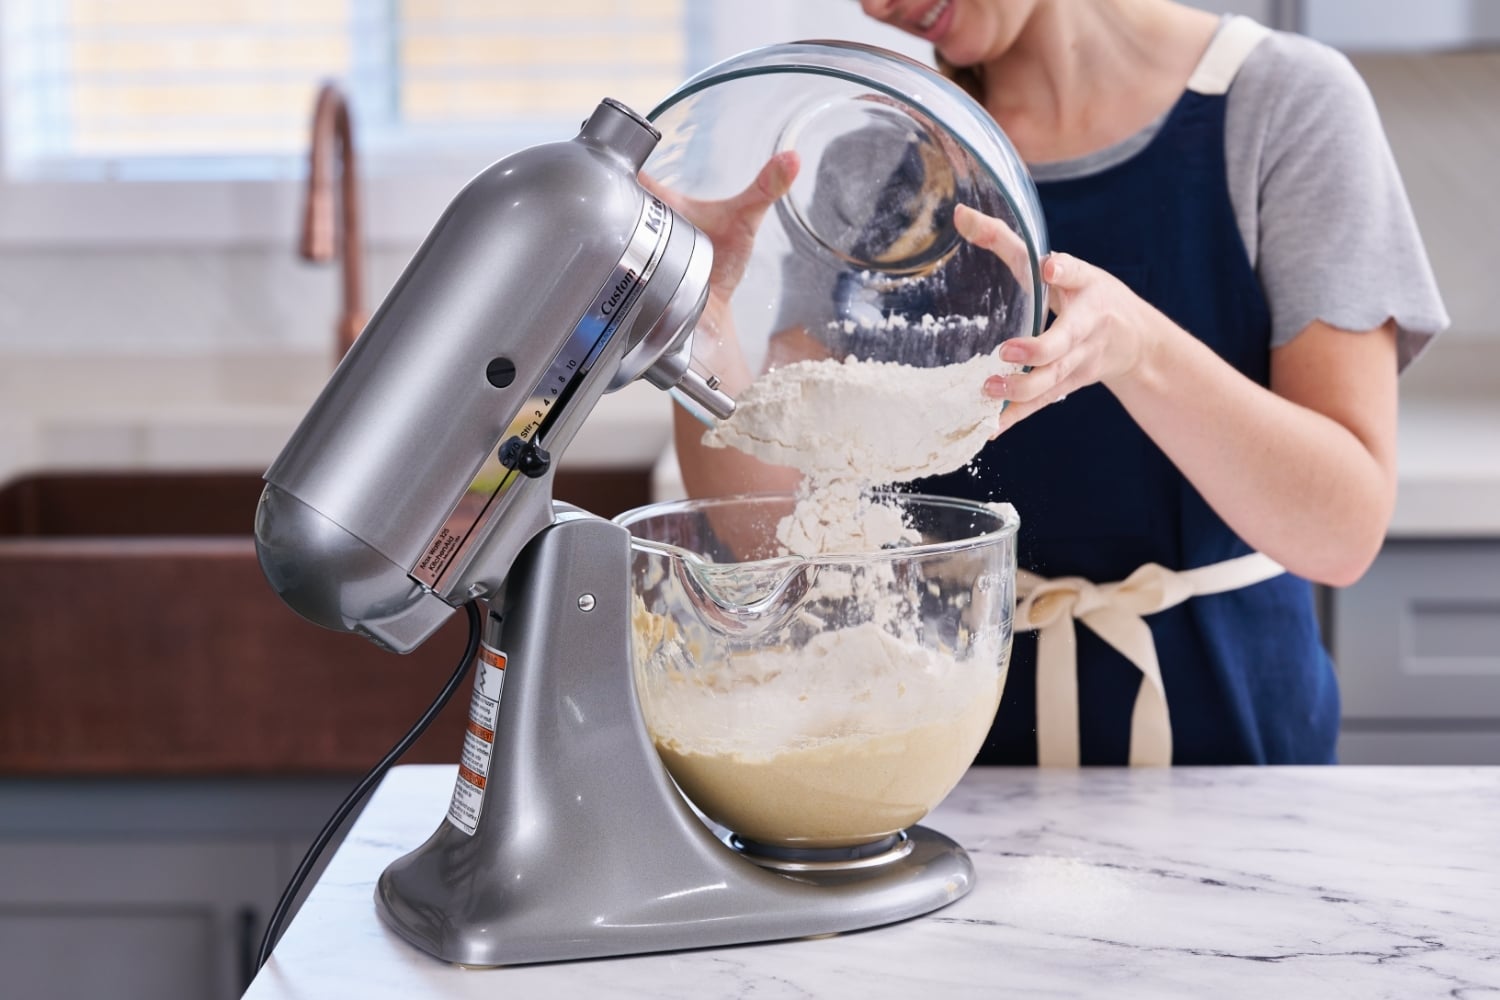
Add dry ingredients. Begin mixing on low speed to avoid a flour cloud!
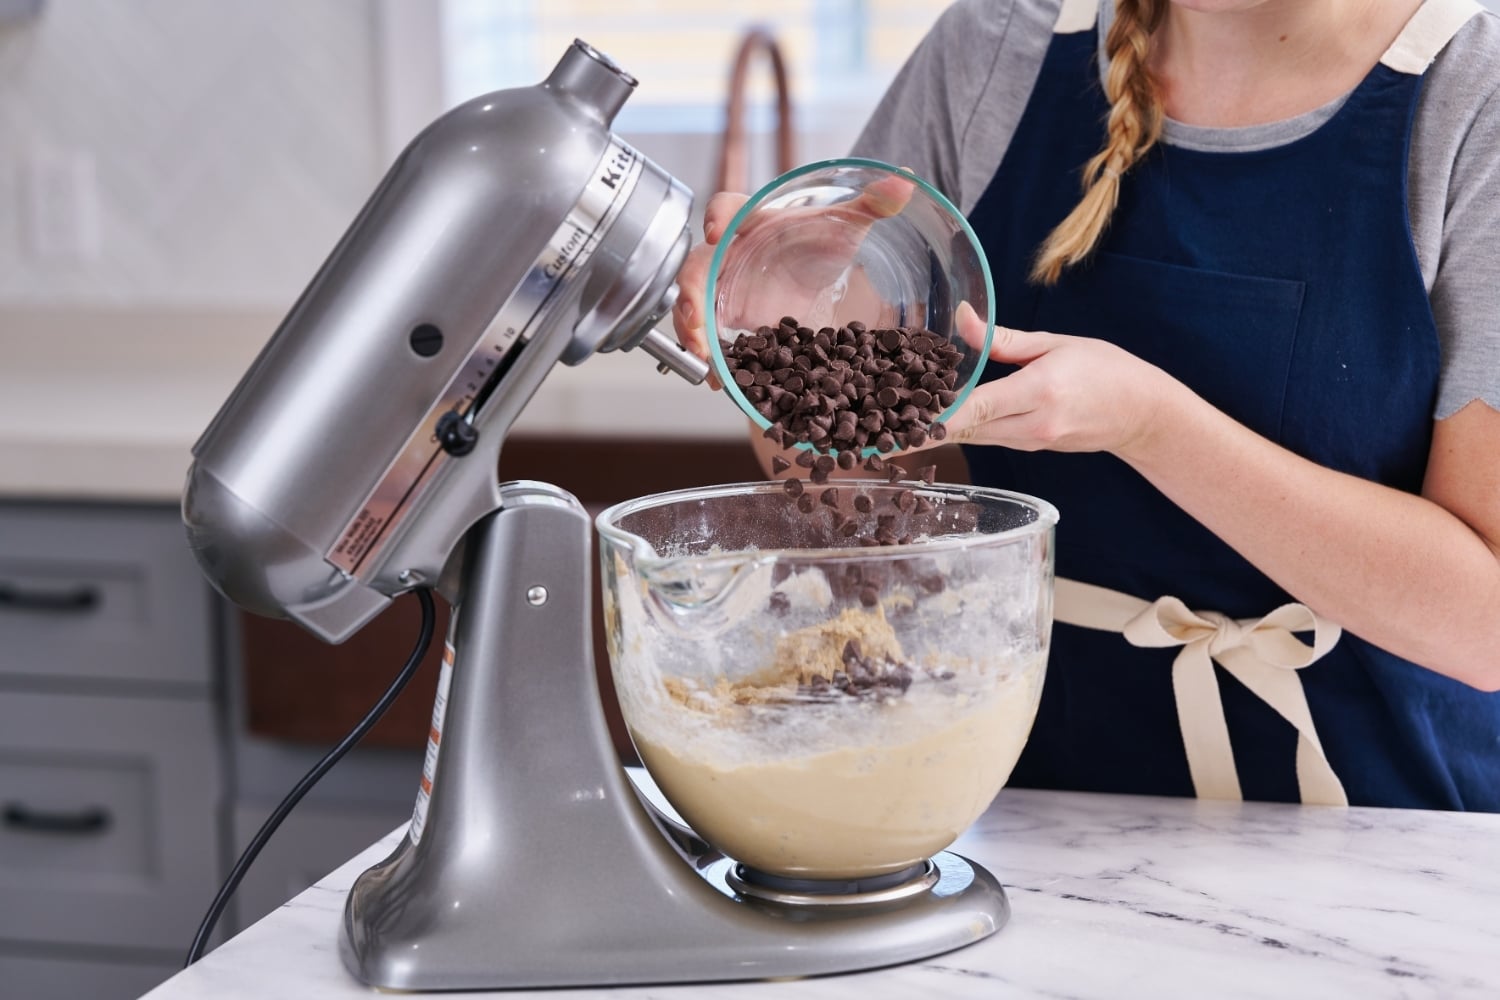
Add chocolate chips. To avoid overworking your mixer or the dough, stir them in by hand with a stiff rubber spatula.
Bake or chill. If time permits, wrap the entire mass of dough or scoop into balls and cover tightly in plastic before refrigerating for up to 72 hours to improve flavor and texture.
Sprinkle of Science
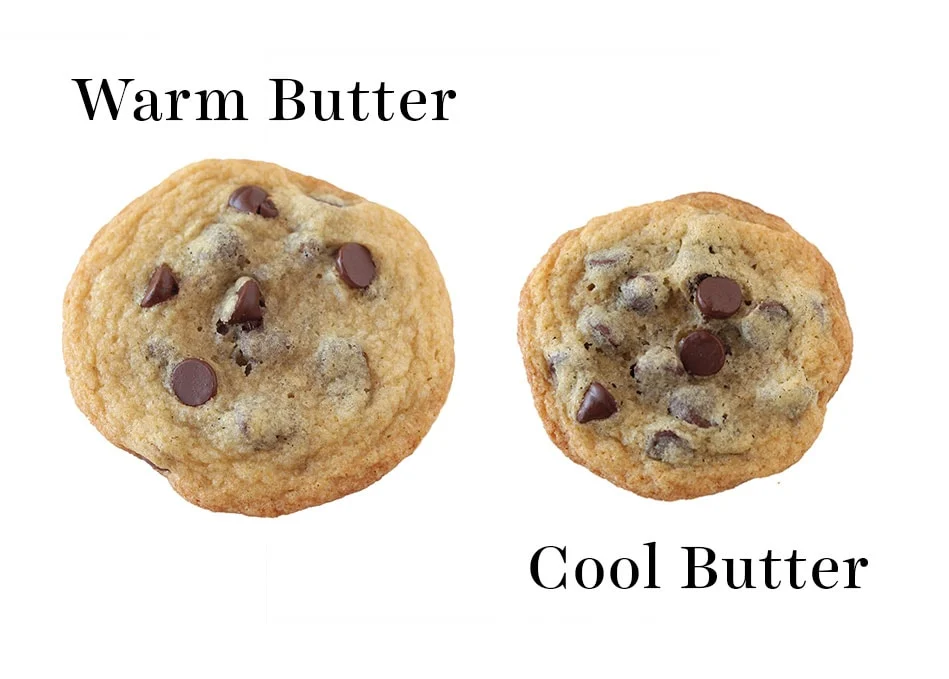
If your cookies end up flat, butter that was too warm is likely the culprit. When creaming butter and sugar, your butter should be at a COOL room temperature. 67°F is perfect – or even a couple degrees cooler if your kitchen is very warm. If your butter is too warm, your cookies will spread into flat puddles.
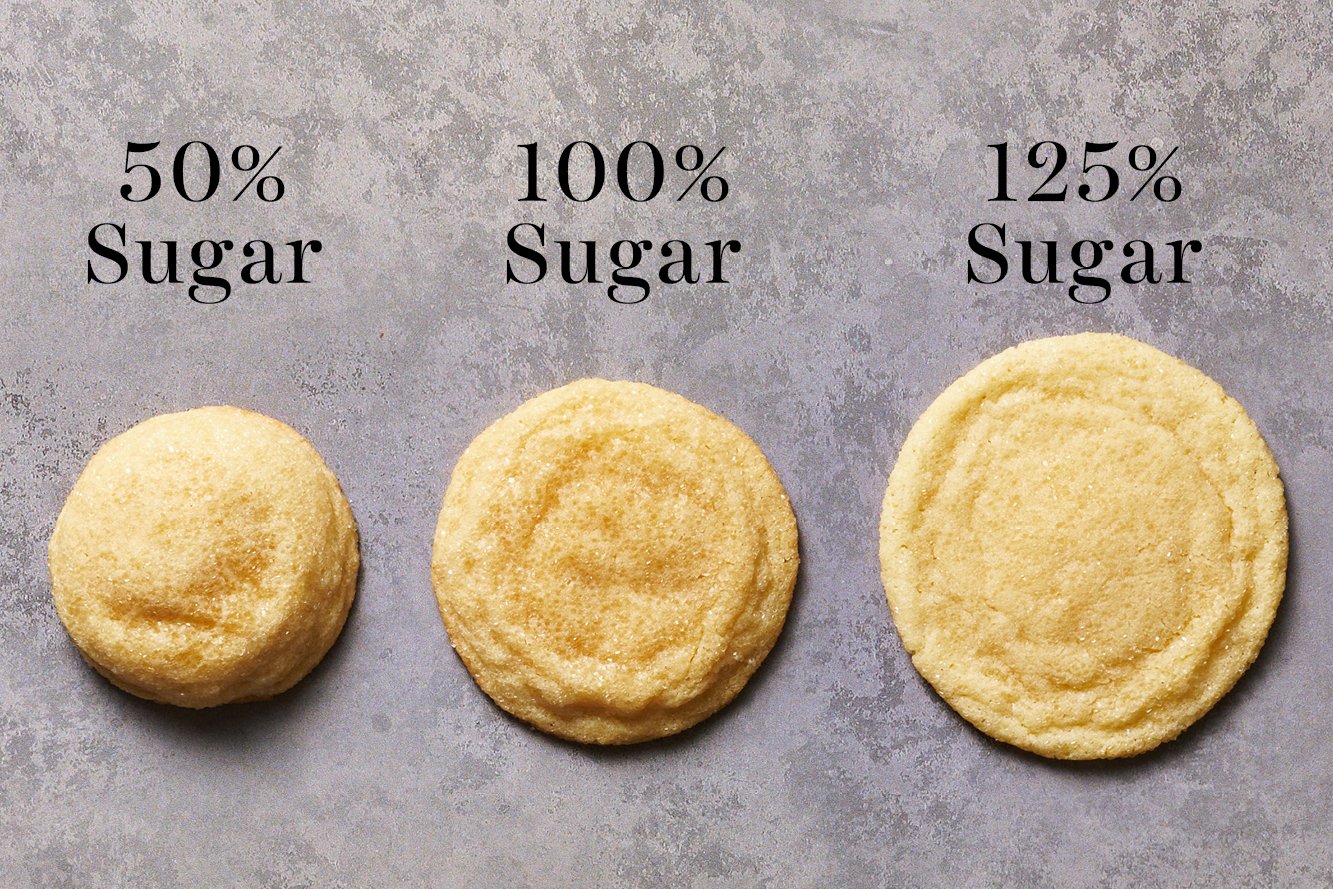
Doing so will create dry, crumbly, hockey puck cookies that don’t spread (left). I promise, sugar does MUCH more than simply sweeten. You can learn more about how sugar functions in baking here.
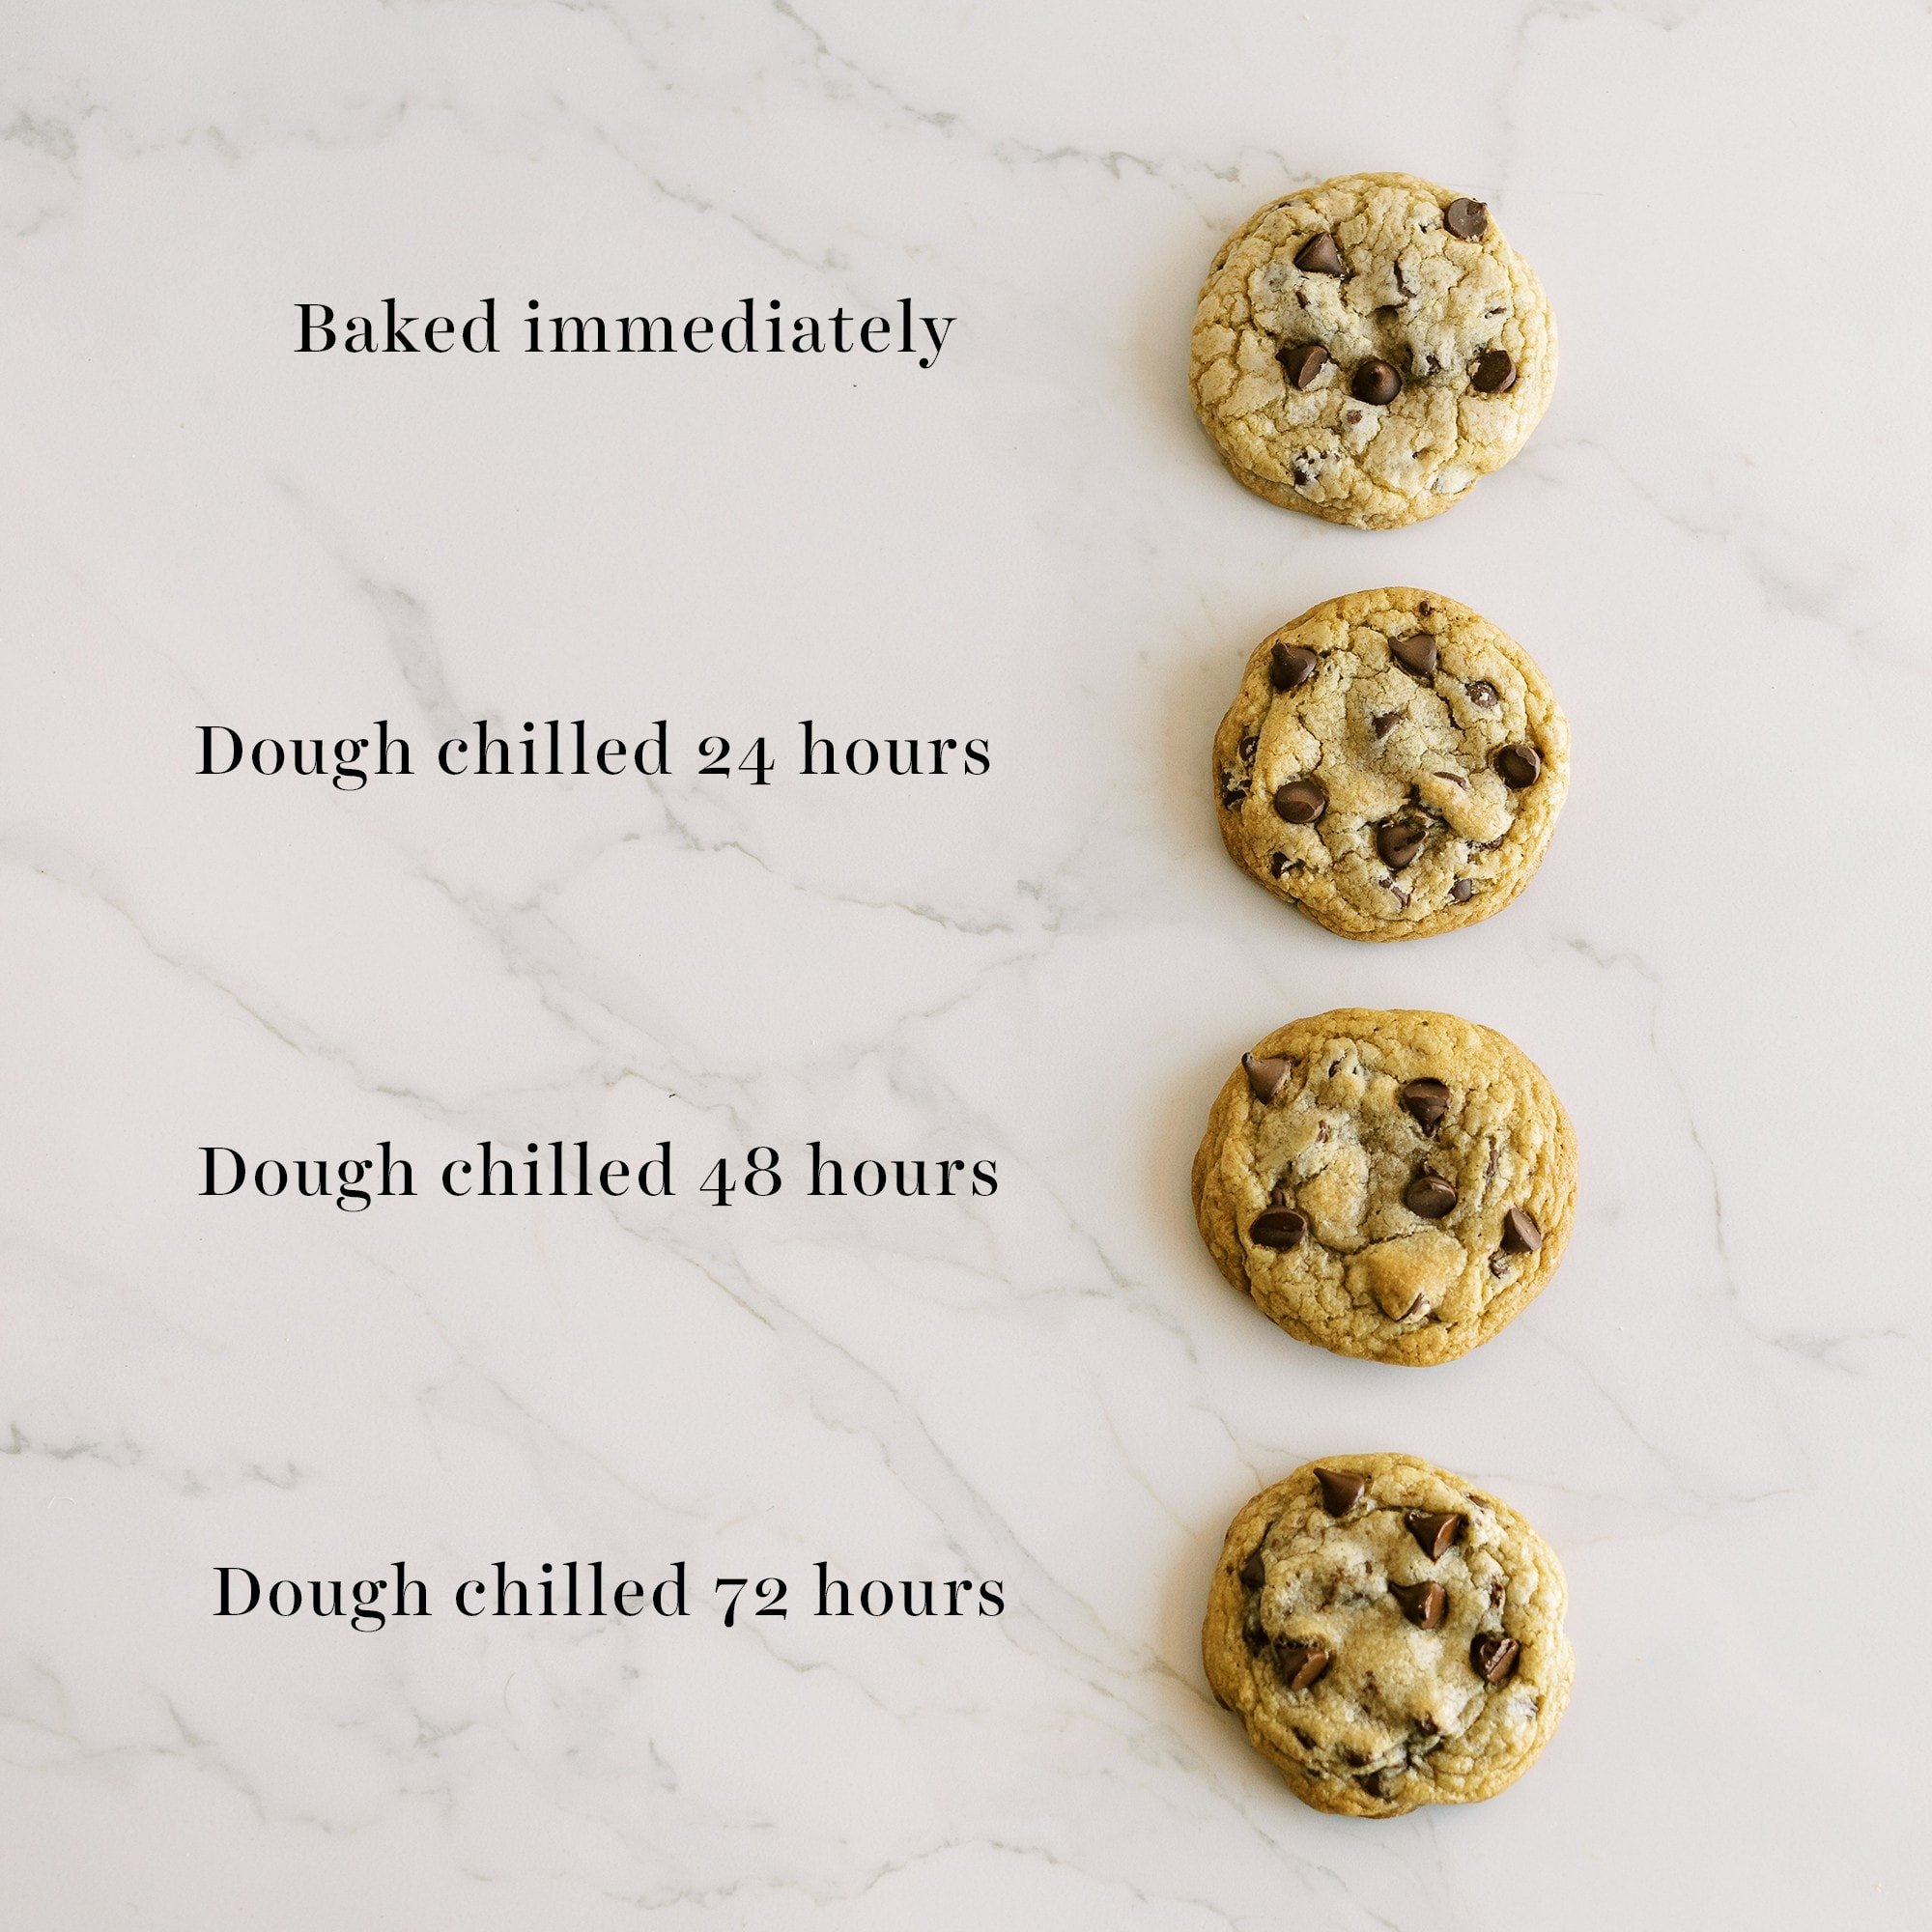
Although not required for this recipe, I highly recommend chilling the cookie dough for 24-72 hours before baking. You can always bake off a few cookies immediately and chill the rest.
Chilling cookie dough improves your cookies in every way! It allows the moisture in the dough to be better absorbed by the flour, creating a thicker, chewier texture. It enhances the flavor and creates a richer, deeply butterscotch-y cookie. And it improves the golden brown exterior as the cookies bake, for crisp edges.
You can either scoop first and chill (make sure to wrap tightly in plastic), or chill the entire mass of dough, let it come to room temperature, then scoop.
Learn more about why chilling cookie dough matters here.
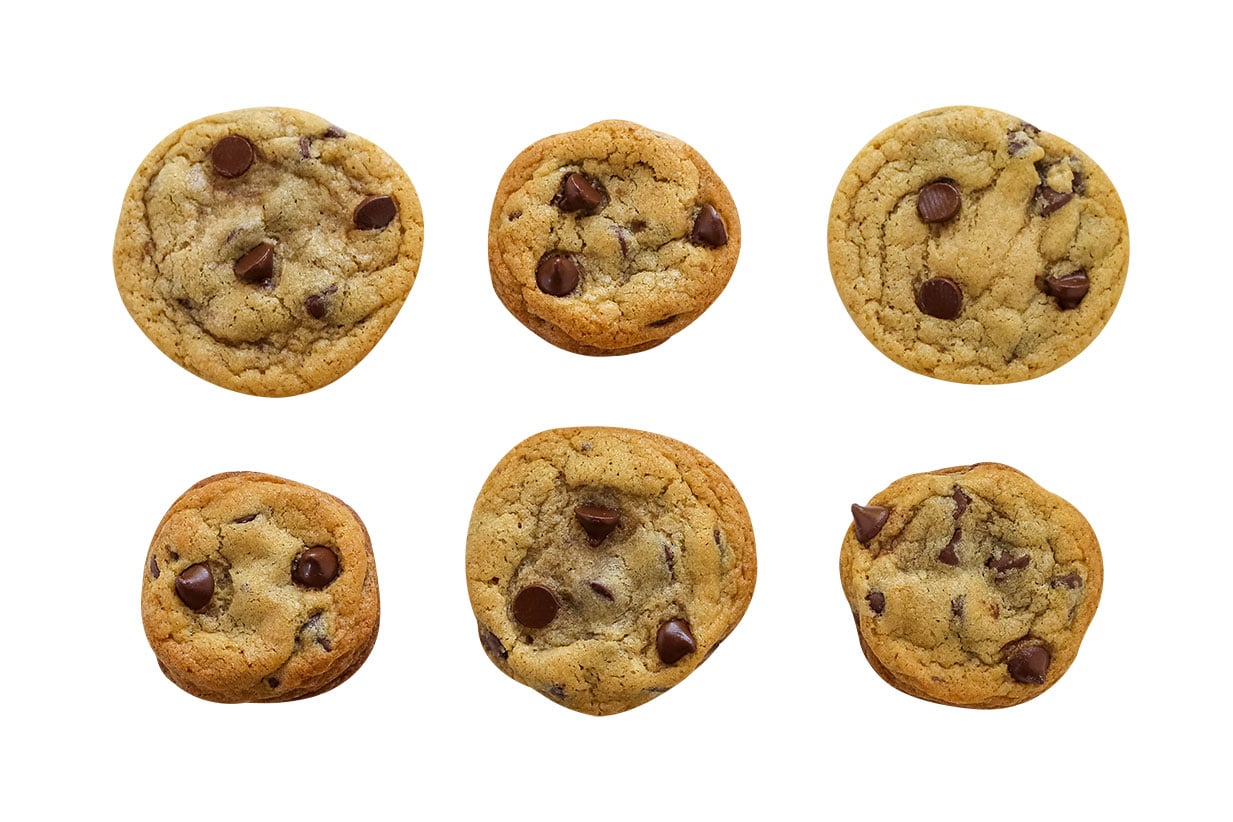
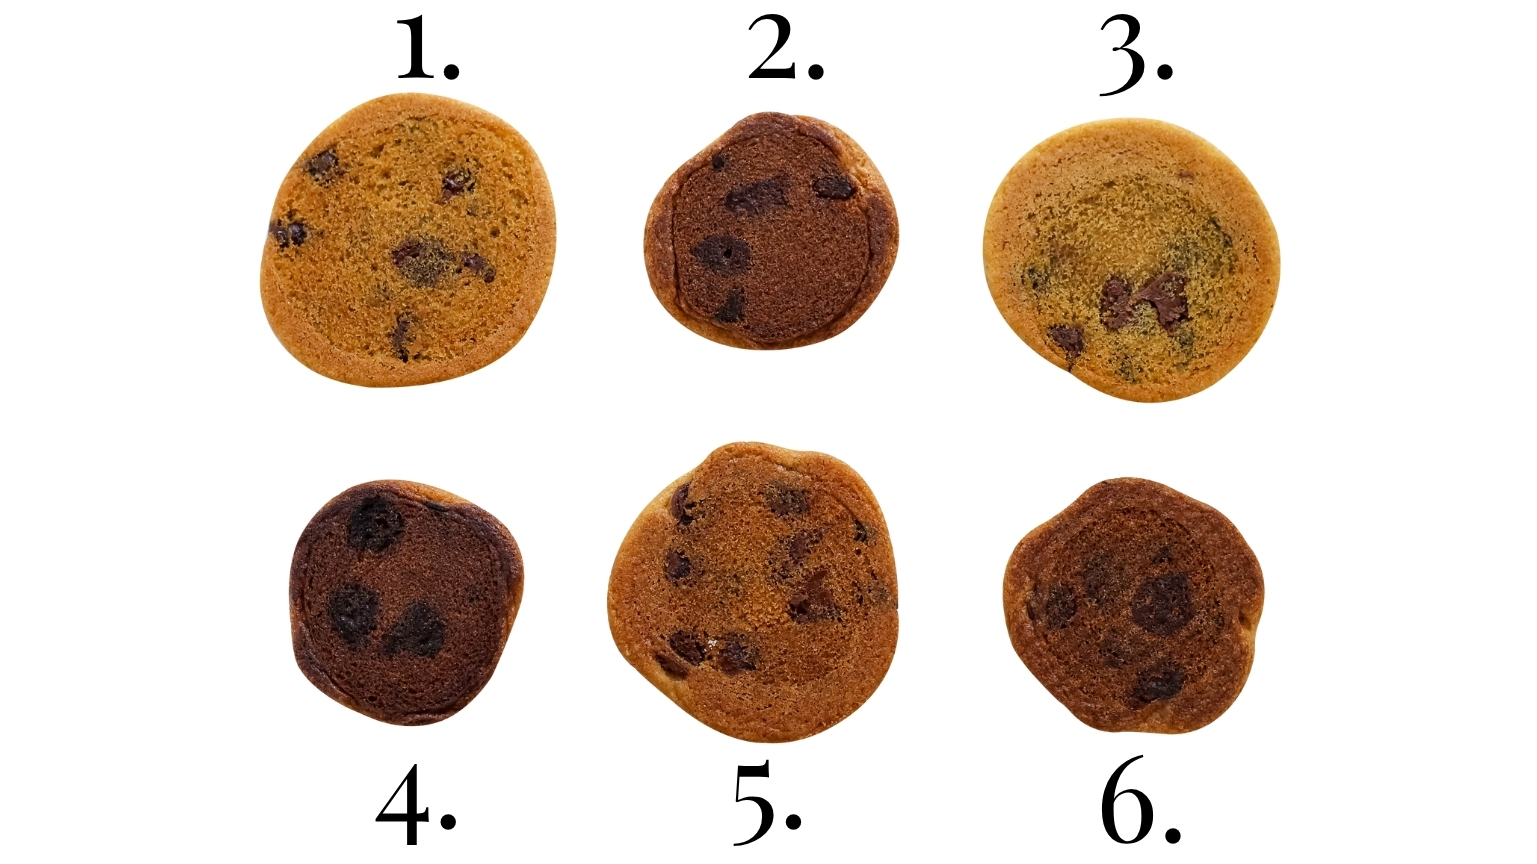
Each of the pictured cookies was from the same batch of cookie dough, baked at the same temperature of 350°F, and baked for 12 minutes. The only difference? The type of baking pan used!
Key takeaway: If you’re using a nonstick pan, you’ll likely need to decrease the baking time, possibly even the baking temperature. Check out my Best (and WORST) Baking Pans article here for more details on the science of baking pans.
- T-Fal Air Pan: pale cookies that spread more
- Wilton Non-Stick: browned heavily with less spread
- Walmart Mainstays: pale cookies, pan warped and rusted
- Viking Ceramic Lined: cookies burnt on the bottom
- Nordicware Unlined Aluminum: my favorite Goldilocks pan, I own 10 of these!
- OXO Gold Nonstick: browned heavily with less spread
Baking powder and baking soda are not interchangeable. Baking soda reacts with acidic ingredients in your dough or batter. In this recipe, it’s the brown sugar. It elevated the pH, leading to more browning and even spread. It’s my preferred choice for chocolate chip cookies!

Tessa’s Tip for Soft Cookies
Carry-Over Cooking: After ensuring you’ve measured your flour correctly, the trick to soft cookies is to take them out of the oven just before they look like they’re done baking. They should still appear slightly wet in the very center. The residual heat of the oven and pan will finish baking the cookies through to soft perfection once you allow them to cool completely.
My Favorite Cookie Tool: A Scoop
Using a stainless steel spring-loaded cookie scoop when portioning cookie dough is one of the secrets to beautifully uniform, evenly shaped, evenly baked cookies, and quickly. My cookie scoop is one of my most frequently used kitchen gadgets. Learn more about cookie scoops and how to use them here!

Storage
Store in an airtight container at room temperature for up to 3 days.
To Keep Cookies Soft: add a piece of bread or a flour tortilla to your container of cookies about a day or two after baking them, or whenever you find the texture starting to harden. The moisture from the bread or tortilla will migrate to your cookies, making them soft and chewy again.
Freezing Instructions
I love the taste of cookies straight from the oven the best. I always keep cookie dough in my freezer so I can bake a few cookies off at a time in just minutes. If chilling your cookie dough to enhance the flavor and texture, do this FIRST. This magic only happens in the fridge, not the freezer.
- Portion your cookie dough into scoops. Place on a rimmed baking sheet.
- Place the sheet in your freezer for 1 hour, or until the dough balls are hardened.
- Remove to an airtight container and freezer for up to 2 months.
- Bake directly from the freezer at 325°F for 13 to 15 minutes.
Here are more tips for freezing cookie dough.

Troubleshooting & FAQs
If your cookies spread into sad, flat cookie puddles, it probably means that your butter was too warm when creaming. Your butter should be at a COOL room temperature; about 67°F is perfect. Butter that’s too warm can’t cream properly and will cause your cookies to overspread.
If your cookies didn’t spread and look like domes, taste bland, and feel dry and tough, it’s most likely that you accidentally added too much flour. I highly recommend using a digital kitchen scale to measure your ingredients, especially flour. It truly will improve your baking forever!
If you don’t have a scale, use the spoon and level method to measure your flour. Do NOT compact the flour into the measuring cup.
Also, check that your baking soda is fresh and still active. Baking soda helps promote spread and browning, for perfectly spread cookies with a golden brown edge.
Sure! Simply double all ingredients to make approximately 52 large cookies – no other modifications needed. Note: be sure to double-check every ingredient as you double it, so you don’t accidentally mis-measure something!
Yes, a hand mixer will work just as well as a stand mixer here.
Sure! I recommend 1 cup of chocolate chips and 1 cup of nuts.
Yes. Simply cut the salt in half (½ teaspoon) in the recipe.
As soon as the cookies come out of the oven, swirl a round cookie cutter (a little larger than the size of the cookies) around the edges. This pulls the edges of the cookies in for a perfectly round cookie – and, bonus, it also makes them even thicker!
You can also dot the tops of the cookie dough balls with a few extra chocolate chips before placing them in the oven, for extra pretty cookies.
I’ve had good results using Bob’s Red Mill oat flour in place of the all-purpose flour at a 1:1 ratio. The resulting cookies will taste a little nuttier, and will soften more and become chewier as they sit. See my full oat flour experiment on Instagram here!
Yes, replace the eggs with 50 grams of plain, unflavored, unsweetened yogurt. See my full egg substitute experiment on Instagram here.
No. Oatmeal zaps moisture, so recipes must be specifically engineered to include it. Luckily, I already have an Oatmeal Chocolate Chip Cookie recipe here!
Yes, just note that they won’t be as soft and chewy in the center. Use a medium 1.5-tablespoon-size cookie scoop and bake only for about 10-12 minutes instead. You will get about 50 cookies.
Yes, simply halve all ingredients and use a hand mixer instead of a stand mixer to achieve a uniform dough.

Email This Recipe
Enter your email, and we’ll send it to your inbox.
Ingredients
- 3 cups (380 grams) all-purpose flour**
- 1 teaspoon baking soda
- 1 teaspoon fine sea salt
- 2 sticks (227 grams) unsalted butter, at cool room temperature (67°F)
- 1/2 cup (100 grams) granulated sugar
- 1 1/4 cups (247 grams) lightly packed light brown sugar
- 2 teaspoons vanilla
- 2 large eggs, at room temperature
- 2 cups (340 grams) semisweet chocolate chips
Instructions
- Preheat oven to 350ºF. Line baking sheets with parchment paper.
- In a medium bowl, combine the flour, baking soda, and salt.
- In the bowl of an electric mixer, beat the butter, granulated sugar, and brown sugar until creamy, about 2 minutes. Scrape down the sides and bottom of the mixing bowl. Add the vanilla and eggs and beat until combined, scraping the bowl down as needed. Gradually beat in the flour mixture. Stir in the chocolate chips.
- Divide the dough into 3-tablespoon sized balls using a large cookie scoop and drop onto prepared baking sheets.
- If time permits, place the dough scoops into an airtight container and refrigerate for at least 24 hours but no more than 72 hours. This allows the dough to “marinate” and makes the cookies thicker, chewier, and more flavorful. Bake from the fridge.
- Bake for 11-13 minutes, or until golden brown. Cool for 5 minutes before removing to wire racks to cool completely.
- Although I prefer cookies fresh from the oven, these can be stored in an airtight container for up to 3 days. See post for storage tips.
Notes
More Chocolate Chip Cookie Recipes:
- Browned Butter Toffee Chocolate Chip Cookies (ultra flavorful!)
- Marbled Chocolate Chip Cookies (classic and double chocolate chip cookie dough in one cookie!)
- Peanut Butter Chocolate Chip Cookies (for serious PB lovers only!)
- Brown Butter Chocolate Chip Cookies
- Oatmeal Chocolate Chip Cookies
- Hot Cocoa Cookies
See ALL of my types of cookie recipes & cookie baking tips here!


How in the heavens are you getting 26 cookies out of this?? I used everything recommended in the recipe and I’m getting about 16 cookies. Is it the large scoop?? Ps – these are DELICIOUS just not enough lol
I found this recipe some time ago and have been using this as my go to ever since. I’ve made this recipe a number of times even adding other chocolates and I must say, by far, this is the best recipe I have found!
These cookies came out perfect! Letting the dough set overnight made a big difference also!
Is there a certain brand of all purpose flour that works best for these cookies or will any brand of all purpose flour work?
Hi Rainna! Tessa and our team use Gold Medal bleached all-purpose flour for all of our recipe testing. I’ve also successfully made these cookies with King Arthur Baking unbleached flour. If you live in a humid climate like I do, either flour should work well. However, if you’re in a dry climate and using King Arthur flour, try reducing the amount by 1-2 tablespoons for the best results. If you’d like to learn more, we recently tested these two flours in our Peanut Butter & Jelly Cookies recipe. Hope that helps!
I made the 1.5 TB scoop version, no chilling ahead of time, a weeks ago for a going away party for some friends. I’ve made many cookies in my time and never ever have I had so many compliments on how over-the-top-good these cookies are. I could hear people asking across the room… “WHO made the cookies?!?” People are still talking about them. Definitely a keeper recipe, thanks for sharing!!
I baked cookies today using this recipe and I have found my go-to cookie recipe from now on!! They turned out absolutely perfect and my little taste tester agrees!! Thank you so much!!
I just made this recipe with my daughters – hands down the best chocolate chip cookie recipe. Definitely saving this one!!!🤍
I haven’t tried these yet but I plan to! I have trouble getting anything but flat cookies with recipes I’ve tried so far so I’m hopeful these will be better, especially with the tips you gave.
Question about the butter temperature. You and other recipes have said it should be cool room temperature. But if I’m chilling the dough overnight anyway, does it really matter what temp the butter was when I made the dough?
Thanks!
Hi Sarah, great question! Yes, if your butter is too warm before mixing it with other ingredients, it can affect your cookies, even if you chill the dough. Butter is an emulsion of fat and water, and when it gets too warm, that emulsion breaks. It can’t be restored unless the butter is churned again. This often leads to flat, spread-out cookies during baking. When a recipe says ‘room temperature,’ it means around 67°F. Warmer than that, and the butter starts to break down, which can’t be fixed by chilling or baking. All of us here at Handle the Heat use an instant-read thermometer to ensure that our butter is the correct temp before baking. I hope that helps! Please let me know if you have any other questions. I can’t wait to hear what you think of this recipe 🙂
Can I use fine granulated sugar in this recipe?
We haven’t tested fine sugar in this recipe, so I can’t say for sure how they’ll turn out. You can typically use a 1:1 substitute — just know they might be slightly different in texture as fine sugar melts more quickly than granulated, and the weights of the two sugars are different, which may result in slightly sweeter cookies. Let us know how it goes if you give it a try!
Perfectly delicious!
Absolutely perfect! I do cook mine for a bit longer, I’ve a gas oven. I keep it on Gas Mark 4, for around 25 minutes. The cookies have a slightly crisp exterior and the centre is yummy, chewy & gooey. Though I’ve never ended up with more than 12 cookies with this recipe! However I couldn’t recommend this recipe enough!
This is by far the best chocolate chip cookie recipe I’ve ever tried!! Mt neighbor made these for me and I had to get the recipe. I’ve made these so many times now and have had others asking for the recipe! The perfect chocolate chip cookie!