Tessa’s Recipe Rundown
Taste: The perfect balance of chocolate sweetness.
Texture: CHEWY, of course 🙂
Ease: Super easy. One bowl, no electric mixer needed.
Why You’ll Love This Recipe: This Brownie Recipe is WAY better than a box mix and almost as easy. It’s my go-to recipe!
This post may contain affiliate links. Read our disclosure policy.
These Chewy Brownies are my go-to recipe when I need a quick, easy, crowd-pleasing dessert. I’m not exaggerating when I say I’ve made it over 200 times. It’s truly the best!
There’s even a secret ingredient that helps to mimic that box-mix texture (but with way better flavor!).
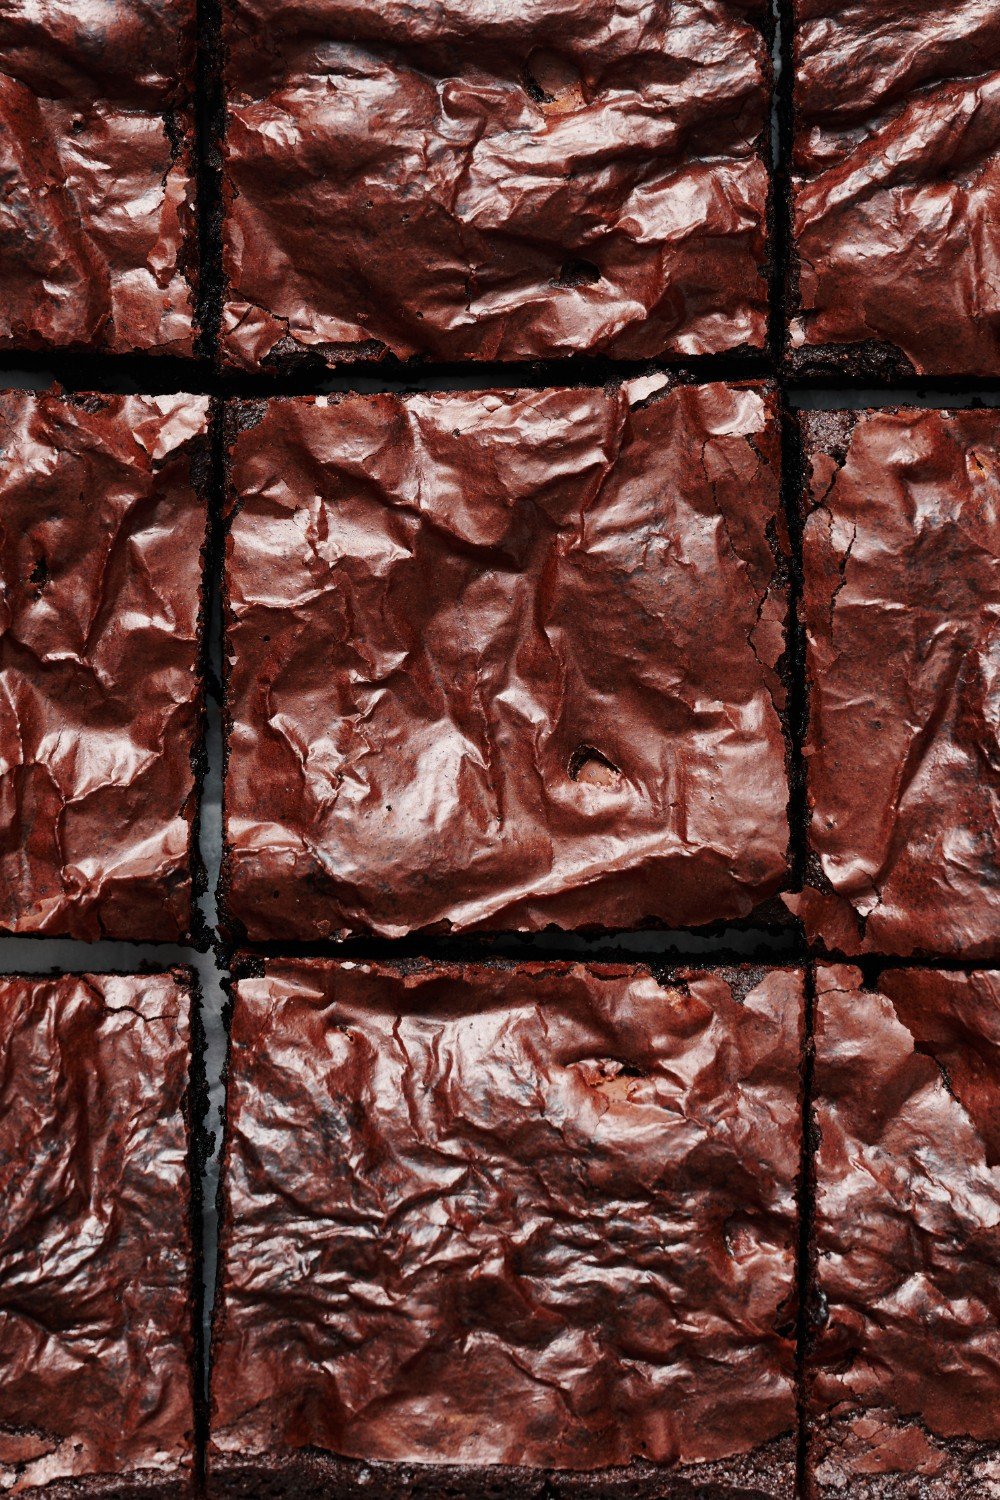
These brownies are my everyday go-to recipe. Check out just one of the 1,000+ 5-star reviews for these best homemade brownies:
Reader Love
I have been using this recipe for about a year now! It is the easiest recipe I have ever used, I get so many compliments on these brownies!! Thank you thank you thank you!!! ❤️
–
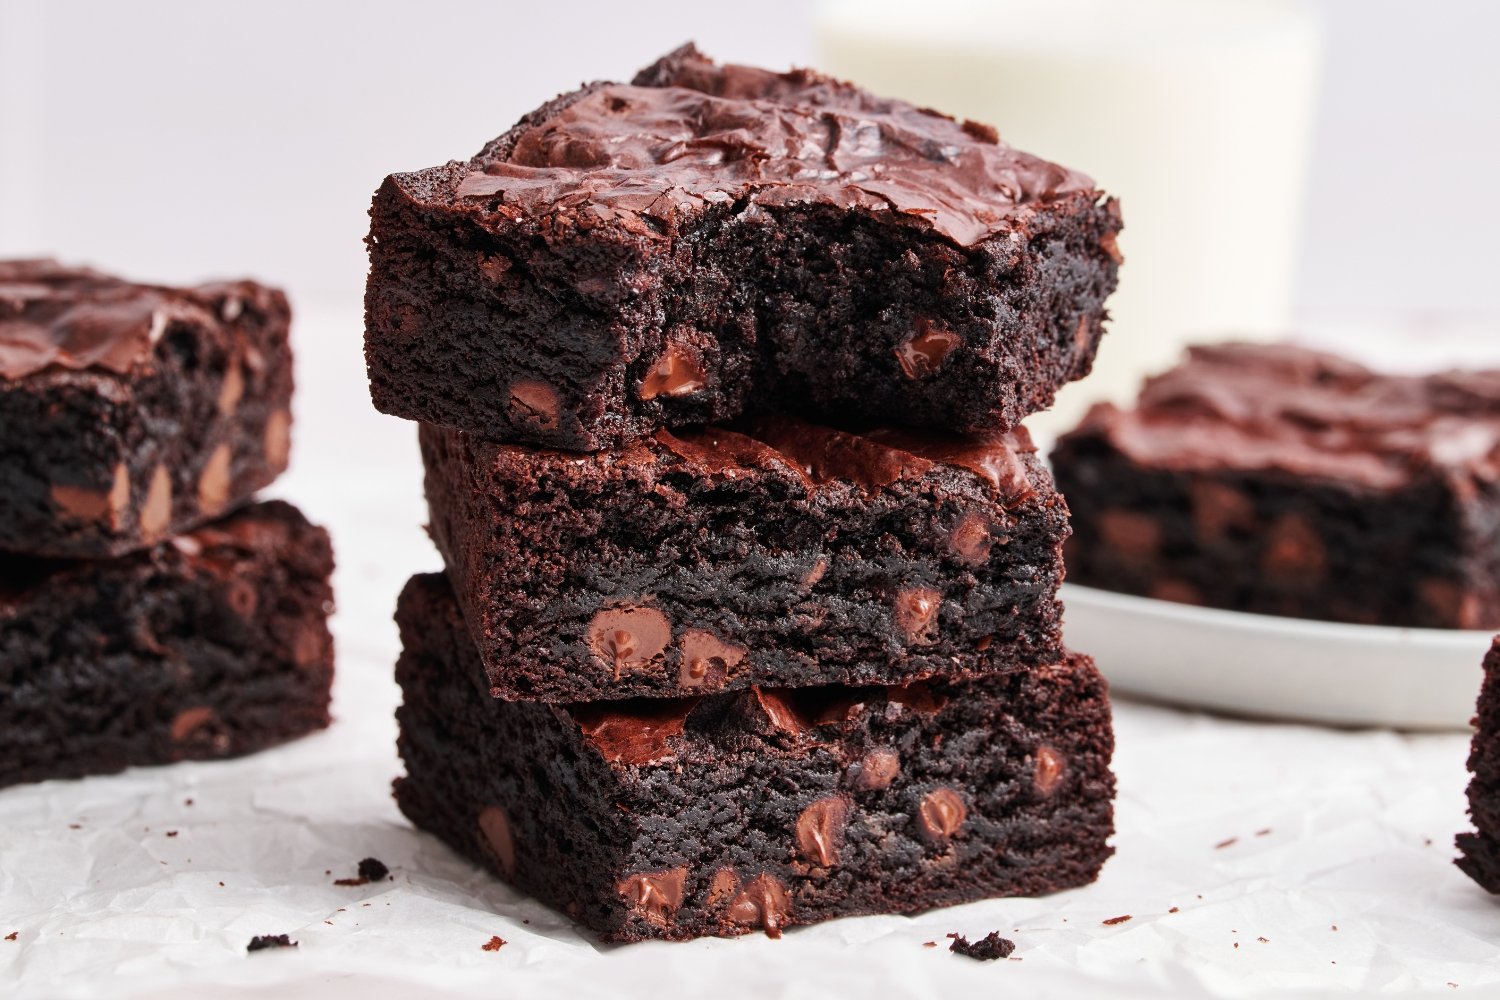
The Kitchn tested this recipe, raving about how quick and easy it is! Even Bon Appétit used the recipe as part of their research in their quest to create a perfect chocolate brownie.

Sprinkle of Science
Ingredient Notes for Success
The Cocoa Powder
I recommend using Dutch-processed cocoa powder for a deeper flavor and fudgier texture. Natural unsweetened cocoa will offer a more nostalgic chocolate flavor and a slightly drier but chewier texture.
My favorite Dutch cocoa powder for brownies is Penzey’s or Guittard. Ghirardelli is also great in a pinch. Learn more about how Natural and Dutch-process cocoas affect your baking here.
The Chocolate Chips
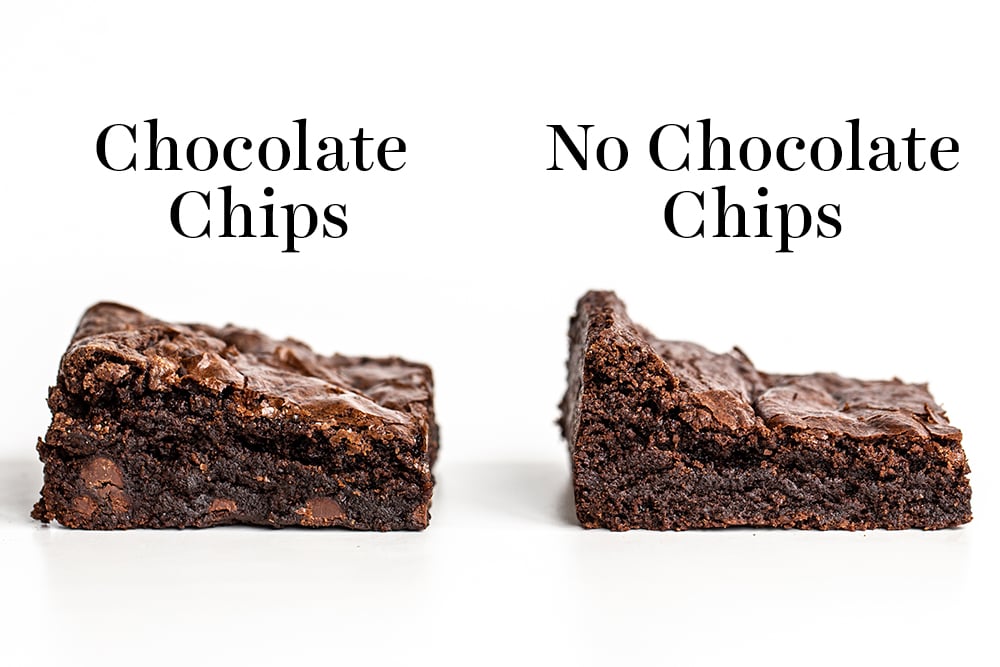
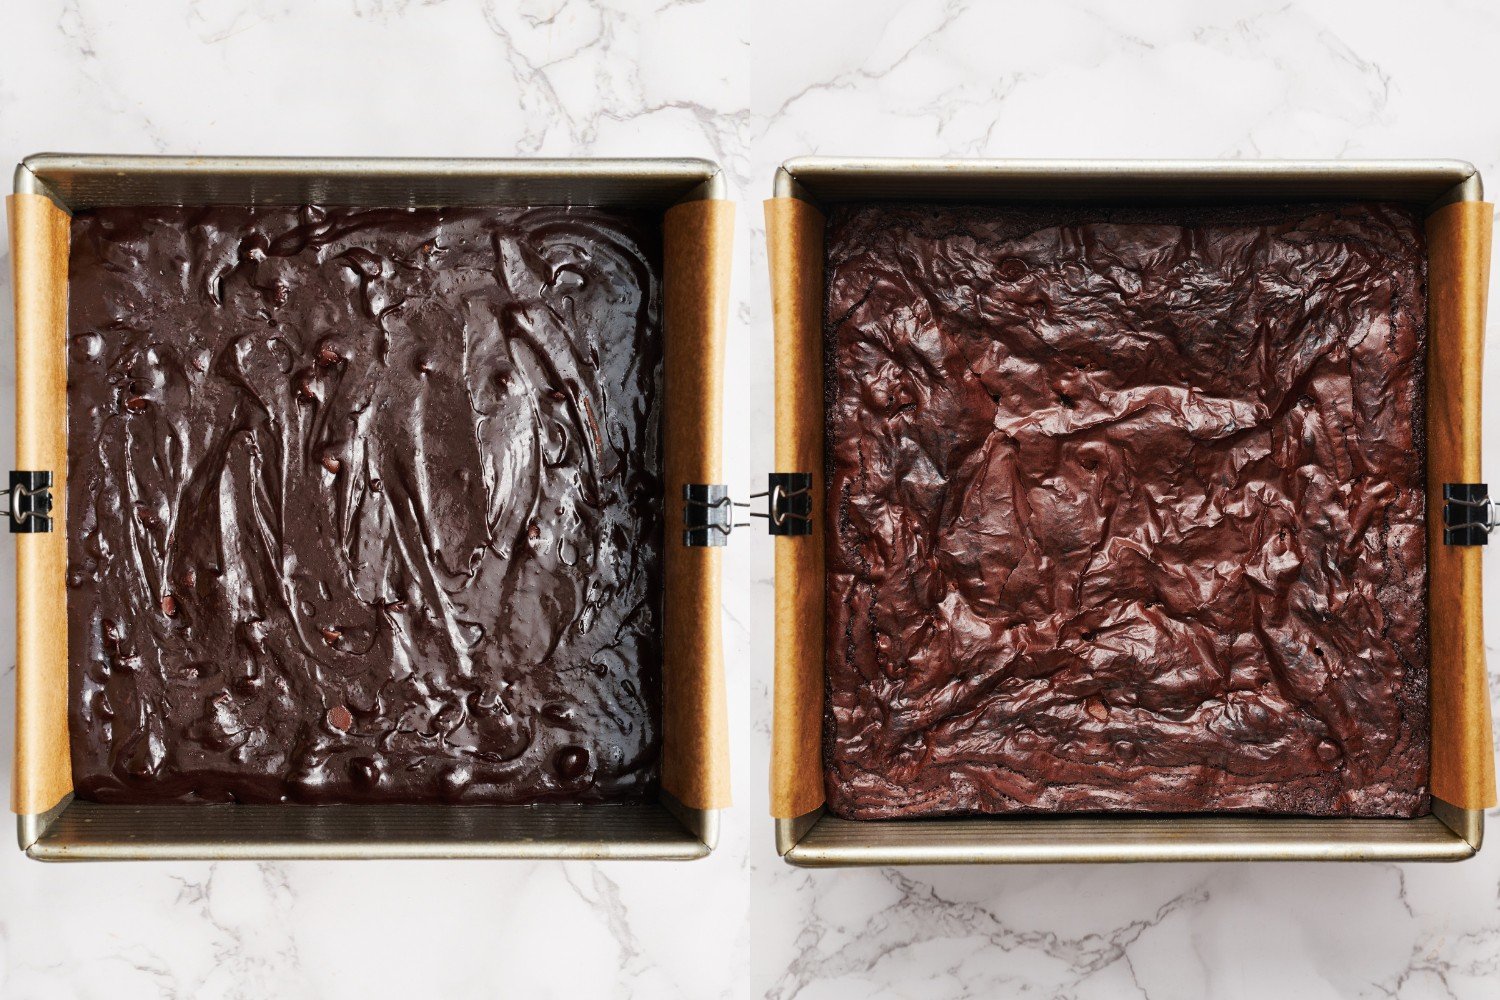
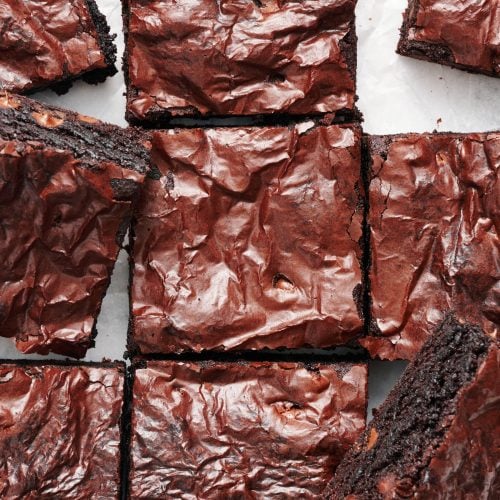
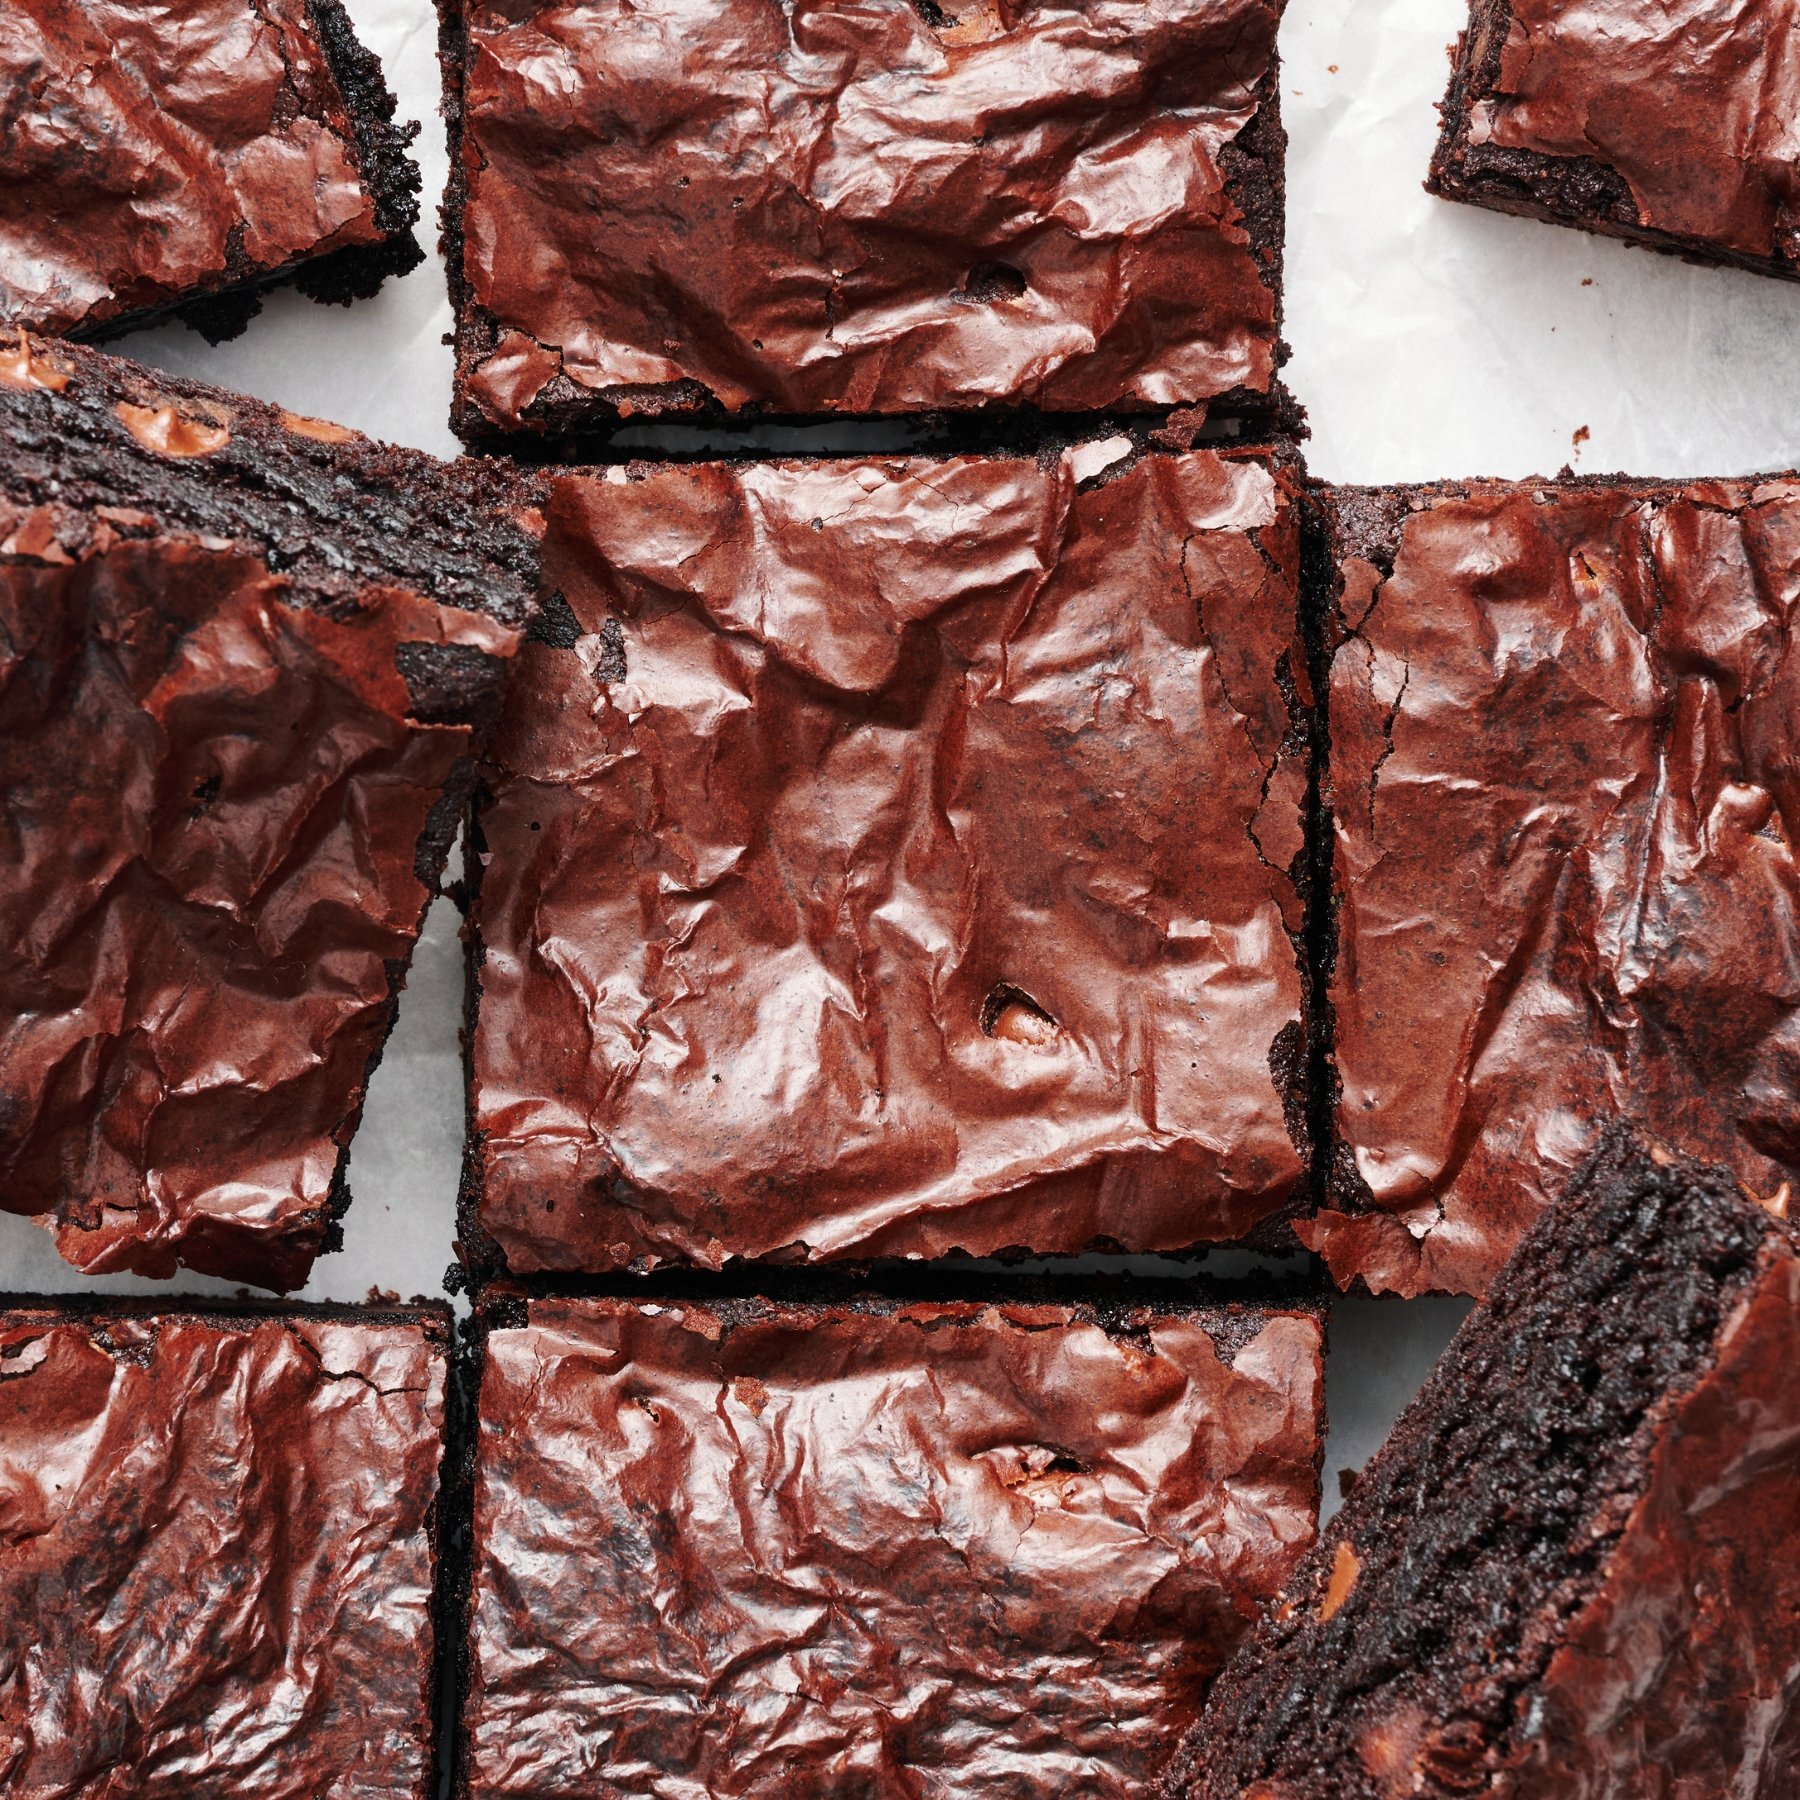
I prefer semisweet chocolate chips, but you can use any kind you like. They strengthen the chocolate flavor, thicken the texture, and help develop that shiny, crinkly crust on top.
You can also add 3/4 cup chopped walnuts or pecans in addition to the chocolate chips.
Learn my top FOUR methods for achieving a shiny thin brownie crust here.
The Fat
- Melted butter plus vegetable oil provides the best taste and texture.
- You can use avocado oil or any other neutral-flavored oil instead of vegetable oil.
- Make sure your oil is fresh to avoid any off flavors.
- Check out my side-by-side baking experiments with Butter vs Oil here.
The Sugar
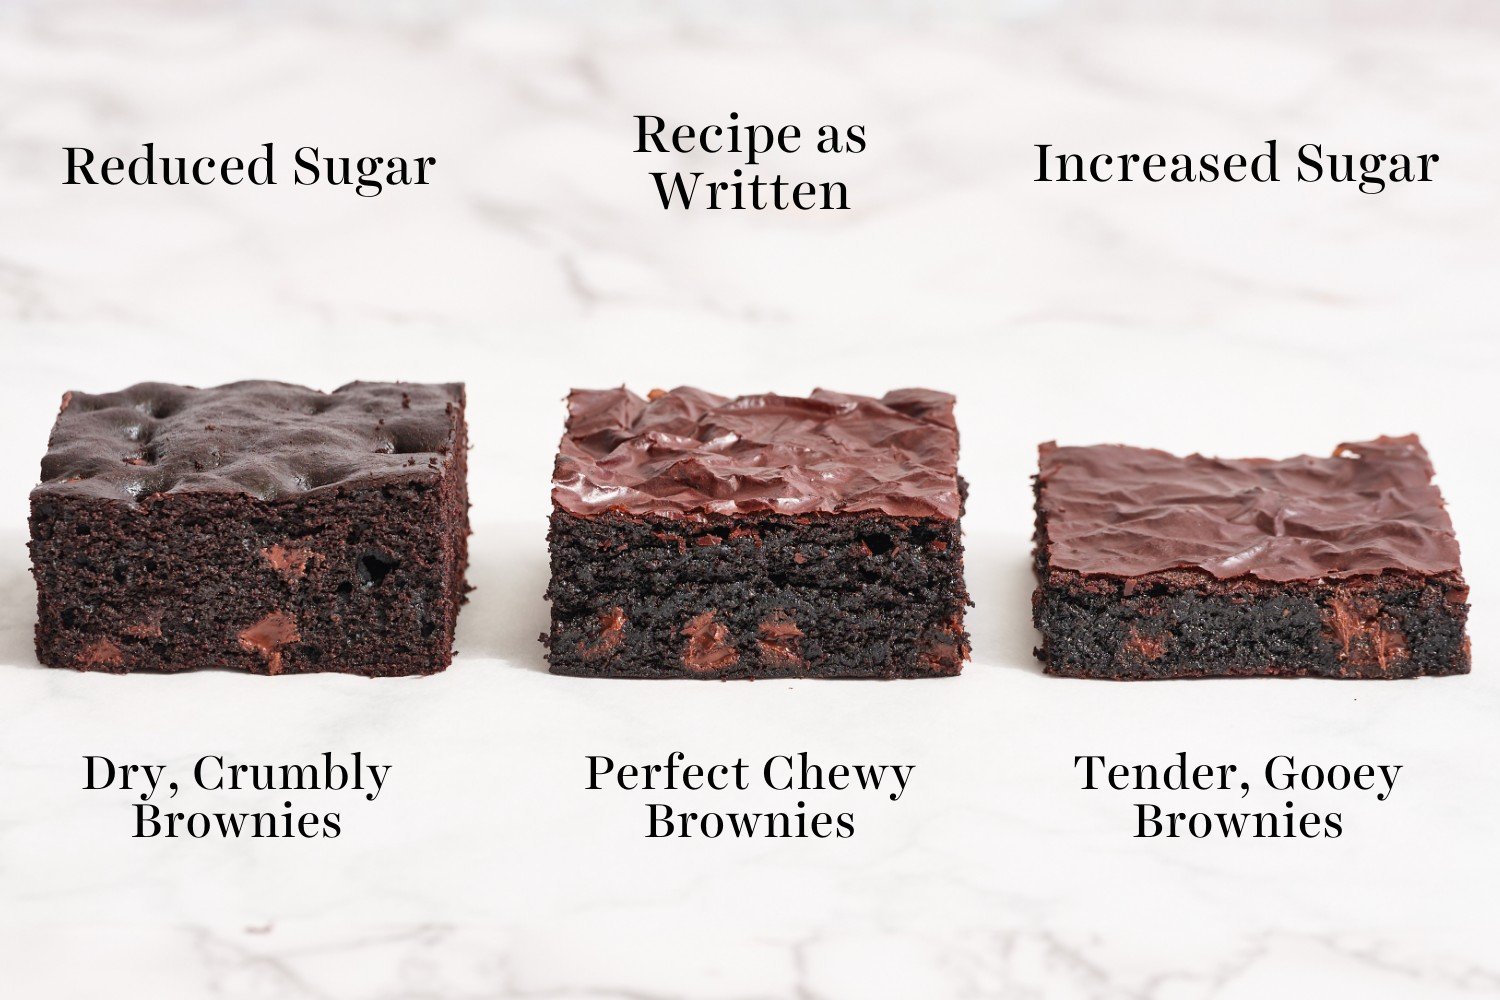
Don’t reduce the sugar in this Brownie Recipe, as this will cause dry, crumbly brownies that will stale faster. Learn more about sugar’s functions in brownies here.
The Eggs
These Chewy Brownies use two whole eggs plus an additional egg yolk for EXTRA chewiness and richness. Using cold eggs prevents doming and increases moisture.
The Flour
A small amount of all-purpose flour is essential for creating Chewy Brownies — but avoid adding too much, as this can cause dry, cakey brownies. Use a digital kitchen scale to prevent accidental over measuring. If you don’t have a digital scale, use the spoon-and-level method described here.
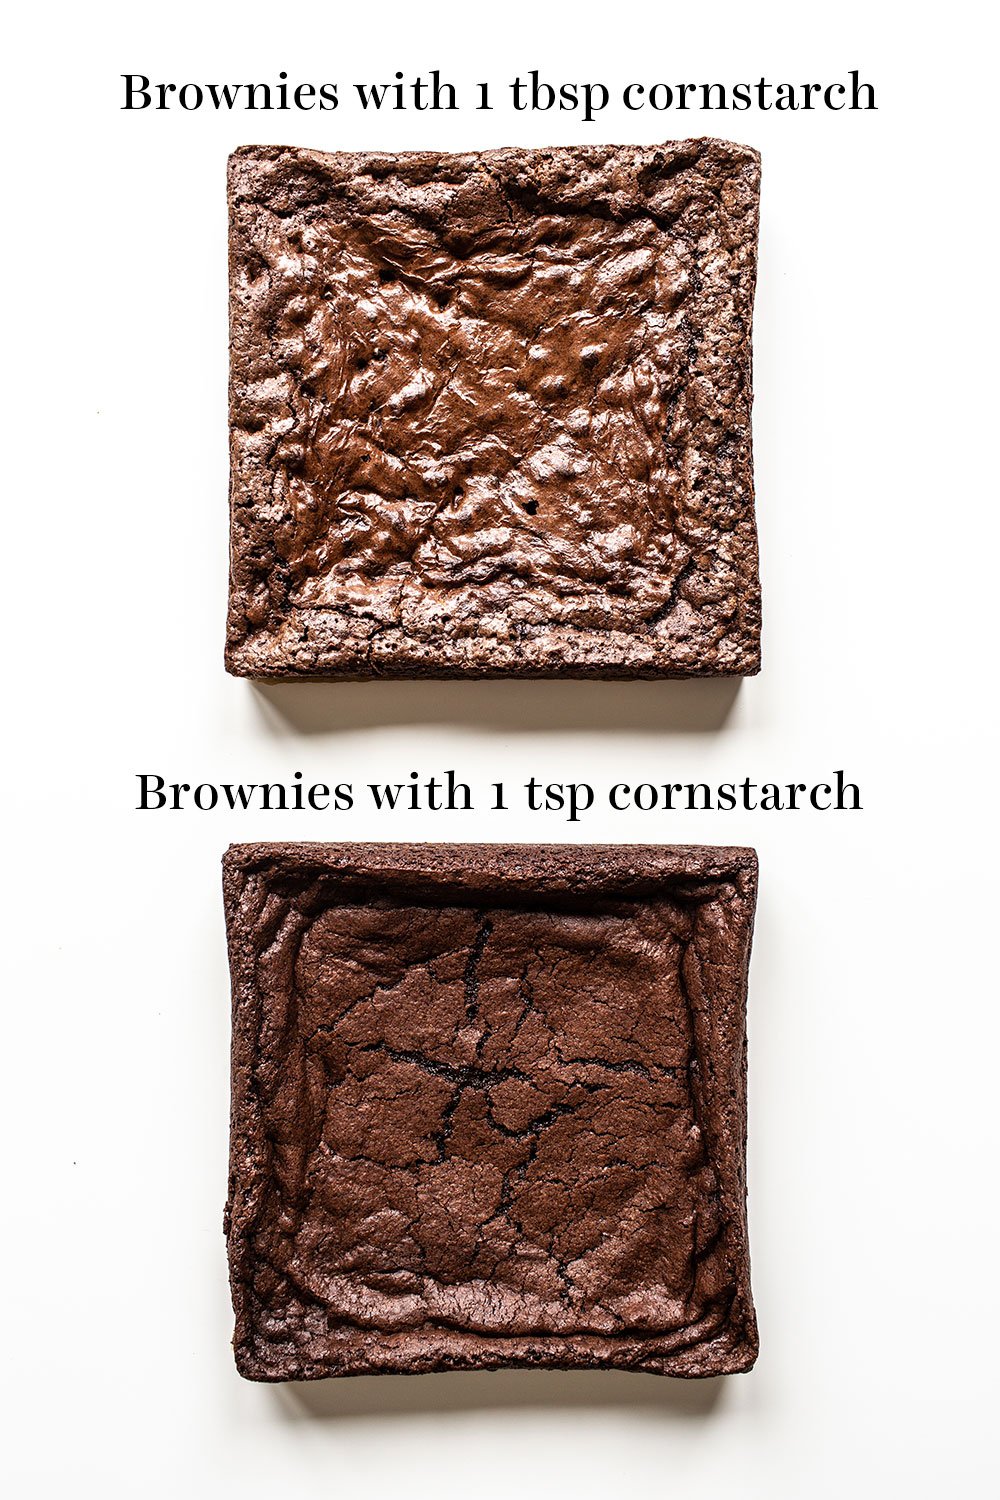
Secret Ingredient: Cornstarch!
Cornstarch mimics the texture of box mix brownies, creating thicker, chewier brownies with a nice shiny crackly top. Don’t skip it if possible.
The Best Pan for Brownies:
Struggling with gummy, sunken, underbaked (even raw) or dry-edged brownies? Ditch the glass square pan and use a light-colored metal baking pan instead.
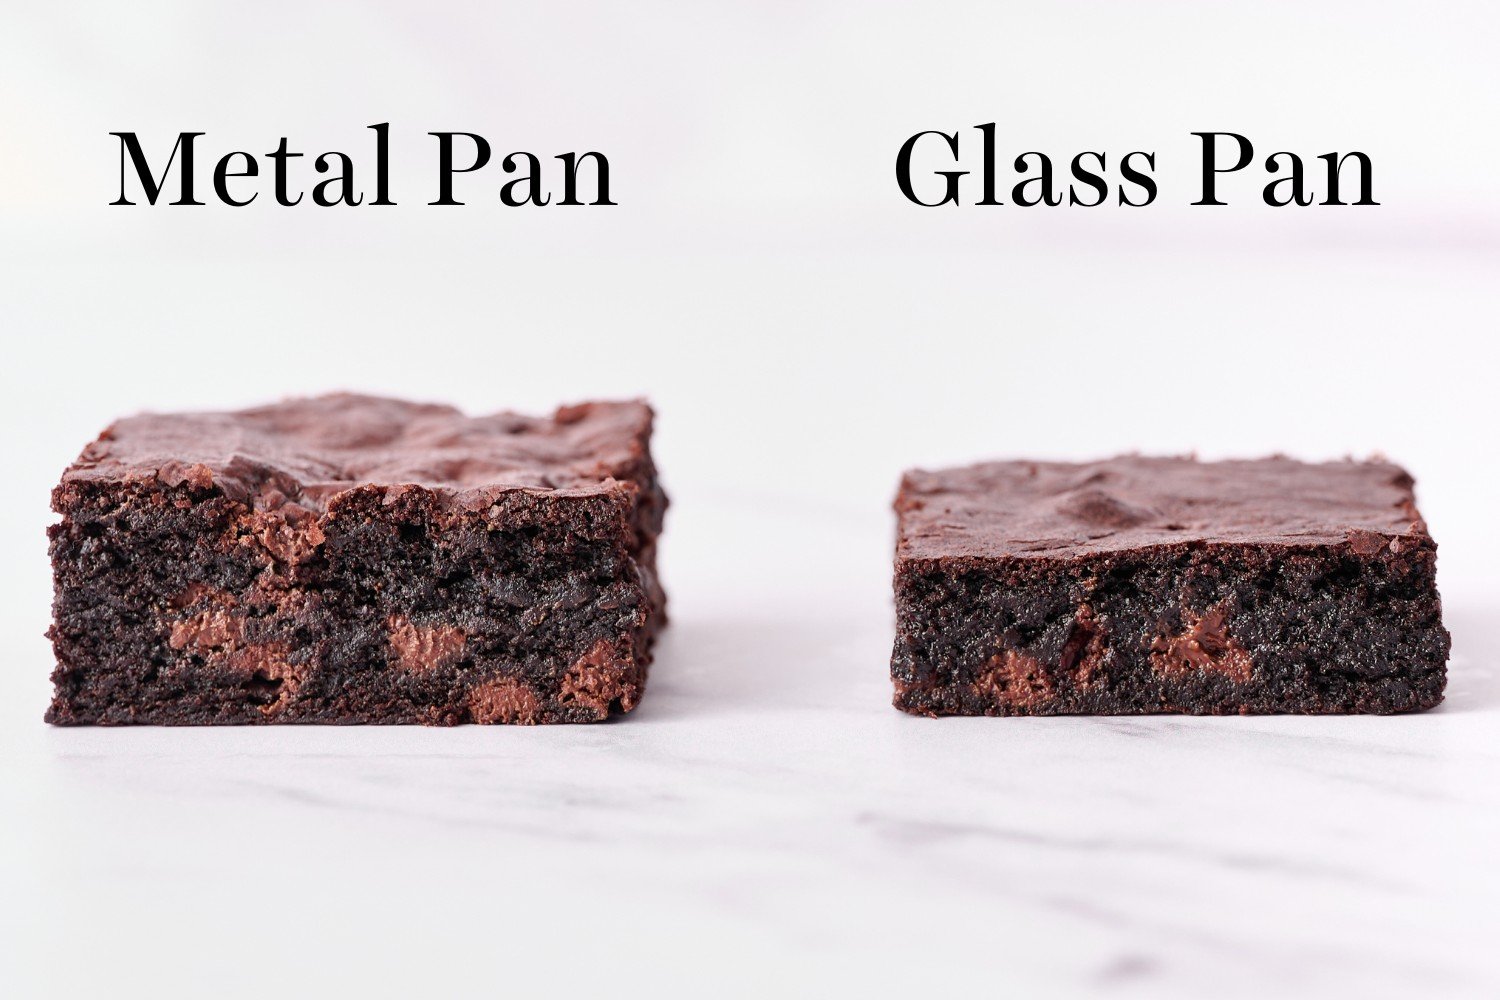
Metal conducts heat far more effectively. If all you have is glass or ceramic, add an extra 5-10 minutes baking time. Learn more about the differences between Glass vs. Metal Baking Pans here.
Storing & Freezing Brownies
Store in an airtight container for up to 3 days at room temperature or up to 5 days in the fridge. They are fudgier when they’re chilled!
To freeze, wrap the cooled whole slab or individual slices of brownies in plastic wrap inside an airtight container. Store in freezer for up to 3 months. Thaw overnight in the fridge, or for a couple hours at room temperature, before serving.
FAQs
Can I double this brownie recipe?
Yes! Double all ingredients and bake in a 9 by 13-inch light-colored metal baking pan (don’t use a glass pan!) and add a few minutes to the baking time.
Why is there no baking soda or baking powder?
I prefer no baking soda or baking powder for rich, dense brownies that are not even remotely cakey. If you’re team cakey, don’t even bother with this recipe. It’ll be far too chewy and fudgy for you!
Can I leave out the chocolate chips?
You can, but note that the brownies will be thinner and may not develop that shiny crust on top.
Why use melted butter instead of creamed butter?
Not only does this make the recipe quicker and easier, but it yields denser, chewier, and fudgier brownies.
Can I use gluten-free flour?
I haven’t tested that, but readers have had success with a 1:1 gluten-free flour blend. You may need to add 1/4 teaspoon xanthan gum if your GF blend doesn’t have any binders.
Can I make this recipe dairy free?
Yes, replace the butter with an equal amount of a vegan butter block that’s firm at room temperature. Use dairy-free chocolate chips. Or, try my Coconut Oil Brownies with dairy free chocolate instead.
Can I make this recipe egg free?
I have not found a suitable replacement for the eggs in brownies yet. Feel free to experiment!
How to tell when brownies are done baking?
A cake tester or toothpick inserted into the center should come out with moist crumbs attached. For me, 30 minutes yields my perfect brownie that’s just ever-so-slightly gooey in the center. If you prefer a drier consistency, bake for 33-35 minutes.
What’s the best way to cut clean brownie slices?
Surprisingly, the best tool is a plastic knife! Yes, like the ones you buy for a picnic or BBQ. If you don’t have one, use a large sharp knife and run under hot water and wipe off after each slice.

Best Ever Chewy Brownies
Email This Recipe
Enter your email, and we’ll send it to your inbox.
Ingredients
- 5 tablespoons (71 grams) unsalted butter
- 1 1/4 cups (249 grams) granulated sugar
- 2 large eggs plus 1 egg yolk, cold
- 1 teaspoon vanilla extract
- 1/3 cup (74 grams) neutral oil (like vegetable or avocado)
- 3/4 cup (75 grams) cocoa powder*
- 1/2 cup (63 grams) all-purpose flour, measured correctly
- 1 tablespoon cornstarch
- 1/4 teaspoon fine sea salt
- 3/4 cup (128 grams) semisweet chocolate chips
Instructions
- Preheat the oven to 325°F. Line an 8 by 8-inch light-colored metal pan** with foil or parchment paper and spray with nonstick cooking spray.
- In a microwave-safe bowl, add the butter and sugar. Microwave for about 1 minute, or until the butter is melted. Whisk in the eggs and egg yolk, whisking vigorously for 1 minute. Whisk in the vanilla, then stir in the oil and cocoa powder.
- With a rubber spatula, stir in the flour, cornstarch, and salt until combined. Stir in the chocolate chips.
- Spread the brownie batter evenly into the prepared pan. Place in the oven and bake for 30 minutes, or until the brownies are set and a cake tester inserted into the center has moist crumbs attached. Do not overcook. Let cool completely to solidify before cutting and serving.
- Brownies can be stored in an airtight container at room temperature for up to 3 days. Brownies will be gooey when served warm, chewy when served at room temperature, and fudgy when served chilled.
Recipe Notes
More Brownies Recipes You’ll Love:
- Malted Brownies – made with brown butter!
- Toffee Brownies
- Copycat Cosmic Brownies – ultimate nostalgia!
- Peanut Butter Stuffed Brownies
- How to Make the Perfect Caramel Sauce
This recipe was originally published in 2017 and has been updated with additional baking tips and new photos. Recipe photos by Joanie Simon and Baking Science photos by Ashley McLaughlin.











I’m baking for someone who has a pretty serious dairy allergy. I know we shouldn’t substitute ingredients, but if I were to use vegan butter, would I have to modify the recipe to account for that? (For brownies and any other recipe!)
Hi Kimmy! I’m sorry, but as we don’t bake with vegan substitutions, we really can’t say for sure! It may take a little experimenting. Good luck and let us know how it goes!
Baking and I don’t get along but I was surprised how good these brownies turned out.
Recipe was straightforward and easy to follow.
I followed the recipe exactly as printed, the only thing I would change is adding a bit more flour due to my local environment making the recipe alittle more fudgy than I expected.
Will make it again definitely!
The flavour was incredible, but the texture was far too gooey. I couldn’t get a clean toothpick even after 35 minutes in the oven. I wrapped it with foil and let it sit until cooled overnight on the counter. Upon cutting, it was still extremely fudgy. I expected slightly more crumb, even with the minimal flour content. It just felt underdone to me. Would make again for a fudgy request, but not what I was hoping for. I did use a metal pan and scale, so I’m certain it just wasn’t the recipe for me.
Hi – I haven’t made the recipe yet, and I don’t know if yours might have been underdone, but I do know that covering/sealing the warm pan would have allowed the brownies to further steam and hold in moisture that was meant to evaporate. This recipe is rated highly enough that it might warrant another go, but, of course, there are lots of options… Best!
Oh my goodness. This is the best brownie I have ever made. Moist and so chocolaty! I doubled the recipe and let it bake for 5 minutes longer in a glass pan. I used a half of a dark chocolate bar instead of chips. Saving this!! ❤️
if baking in a 9 x 13 pan, how much longer do I bake for
Hi Bonnie! Doubling the recipe for a 9×13 pan will bake for just a few minutes longer than specified in the recipe. Let us know what you think once you’ve given these brownies a try! 🙂
Do you think you could triple the recipe and cook it in a 11×15 metal “Fat Daddio’s cake pan?
Hi Robbye! We haven’t tried that, so I can’t say for sure! We typically recommend doubling this recipe for a 9×13 pan, but feel free to experiment in the larger pan and let us know how it goes 🙂
wonderful recipe… after making it a 2nd time (and reading the directions that time) and not making up my own rules! thank you!
Best chewy brownie I’ve found so far! Made it twice already.
I made this recipe this weekend but with some changes (graham cracker bottom and toasted marshmallow cream and marshmallows on top). I also made them in a pan with 12 cavities, so the recipe made 14 individual brownies. It was my first time making brownies from scratch and they came out delicious, thanks to your recipe.
I didn’t see the comment about doubling the recipe for a 13×9 pan until after I’d doubled the recipe and baked it. (8×8 pan = 64 sqin, 13×9 = 117 sqin). My question is this: When I doubled, I used 5 whole eggs instead of 4 whole eggs and 2 egg whites. What impact would this have on the brownies?
I’m sitting here typing this as I am waiting for the brownies to cool. They look absolutely gorgeous!
(FYI – I am shocked and pleased to see new comments and replies)
Hi Jim! So glad to hear that your brownies look so wonderful – hopefully they taste amazing too! The additional egg whites could cause your brownies to be slightly cakier than they would have been with the additional yolks only, as egg whites add additional moisture without much fat. They should still taste great, though! We hope you enjoy your brownies and please let us know how they compare if you give the recipe a try without the added egg whites. Happy baking!
It would SEEM that my second reply wiped out my first reply…. so I’m creating a THIRD reply that incorporates everything…
Welp…. to be honest, I must have done something wrong. As I said, the original recipe called for 2 whole eggs and 1 egg white. I doubled this for a 13×9 pan standard thickness aluminum pan. But instead of 4 whole and 2 whites, I used 5 whole eggs. well….
I discovered (too late) that my oven (which is an “analog” dial with lines for 300, 325, and 350) was about 20 degrees too cool when set at 325. I did the “toothpick” test in the center after half an hour, but it came up “batter.” I tried again at 45 min, same thing…. and same thing after 55 min.
Worrying about baking too long, I took it out. It still looked great, but it’s definitely not cakey. Not sure what I did wrong.
Hi Jim! I’m sorry to hear that your brownies didn’t turn out as they should, but I’m glad they weren’t cakey! The original recipe calls for 2 eggs plus 1 egg yolk, so ideally, a doubled recipe will use 4 whole eggs plus 2 yolks. The difference in eggs will account for some alteration in texture, as that will mean a difference in fat, protein and moisture. Unfortunately, the difference in oven temperature will also mean a longer bake time and can mean the edges dry out before the center has a chance to bake through, and will take longer to bake all the way through. It sounds like something else may have gone wrong if your brownies took almost an hour to bake through – perhaps another ingredient was accidentally mis-measured? In any case, I hope you give these brownies another try sometime! Happy baking 🙂
What I was hoping for is a chewy cake texture (along the lines of fresh chocolate chip cookies). The center was closer to a chewy fudge texture (and crunchy on the edges due to the extended bake time LOL). I wouldn’t have thought substituting an egg yolk for an egg white would make THIS much difference, but I’m by no means an expert.
I will be making these again, being super careful about measurements. Next time, I’ll set the over to 375 in order to get it close to 350, checking after 30 min
Sounds great, Jim! We can’t wait to hear how it turns out next time 🙂
This is a really good recipe! Usually, my homemade brownies or even the box recipes turn out mushy in the center and hard along the edges of the pan. I didn’t have chocolate chips and these still turned out chocolatey and chewy. My grandson loved them!
Such a great recipe to elevate a brownie. The dutch processed cocoa makes a difference is scent and flavor. The batter smells richer! I will say I needed to double the recipe for a 9×13 pan and needed to bake them way longer than 30 minutes. Is there anyone else that had this issue? I realize it could be an oven issue or maybe it was due to using a disposable aluminum pan. Either way they were delicious!
Hi Mary! Both things you mentioned could account for your longer bake time – disposable pans won’t conduct heat as well as a regular light-colored aluminum pan (our recommendation for brownie baking), and ovens often run a little warmer or cooler than they’re telling you. We recommend investing in an oven thermometer for this reason – they’re inexpensive and ensure you’re baking at the right temperature. Personally, my gas oven runs about 20°F cooler than it says, and takes at least 10 minutes longer than the oven’s beep to actually preheat! Read more about this in Tessa’s article here. I’m glad you still enjoyed these brownies! Happy baking 🙂