


Tessa’s Recipe Rundown
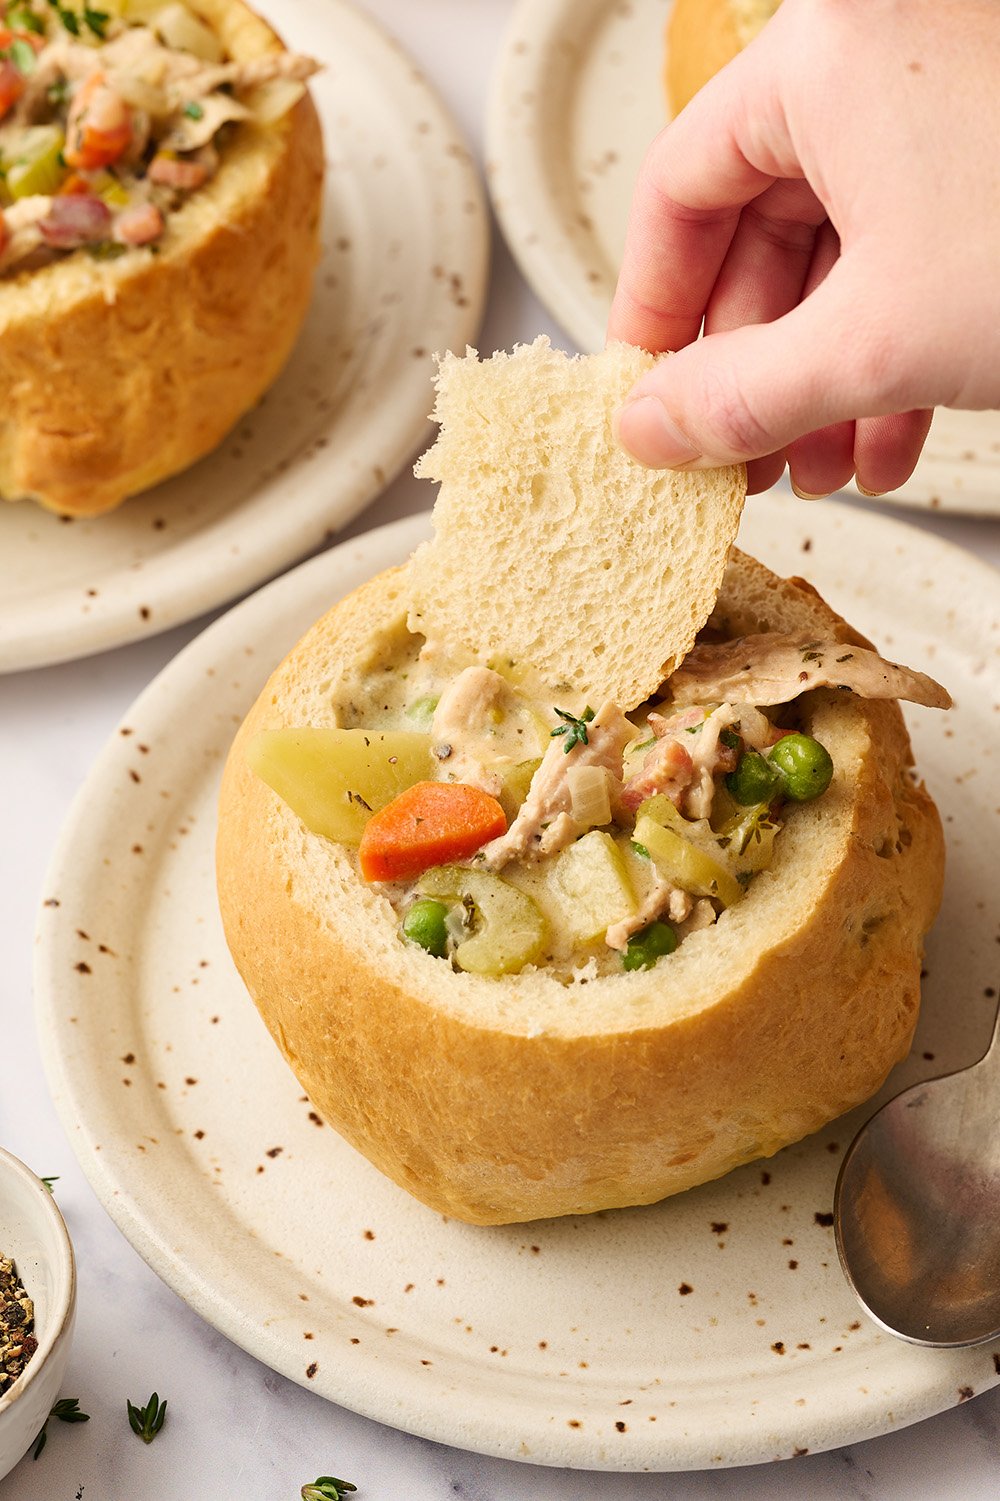
Taste: A perfect accompaniment to any soup! So much better than crackers.
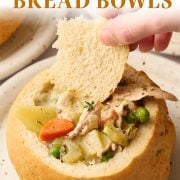
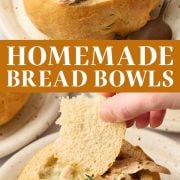
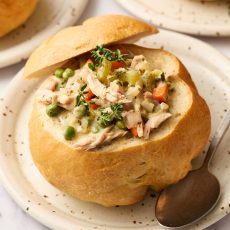
Texture: Crusty on the outside, soft and fluffy inside. When you add a creamy soup inside, it’s the ultimate cozy comfort meal.
Ease: Surprisingly easy.
Why You’ll Love This Recipe: Restaurant-quality food at home, for the best soup experience of your life!
This post may contain affiliate links. Read our disclosure policy.
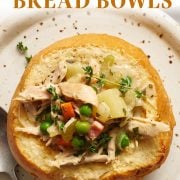
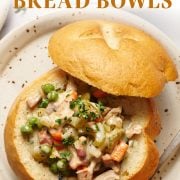


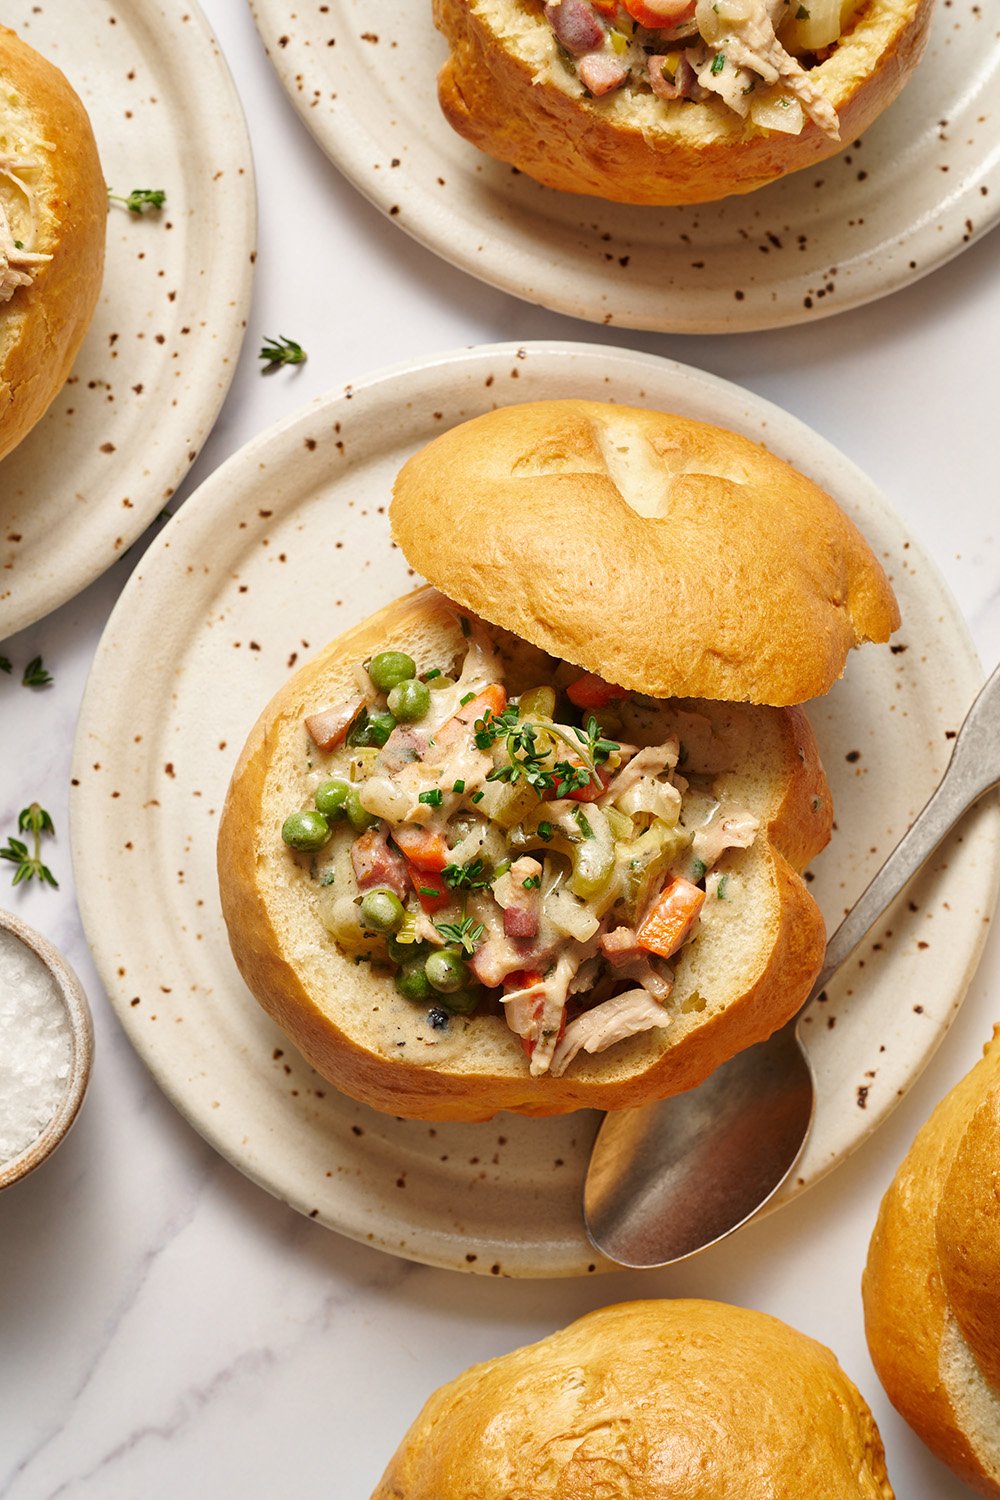
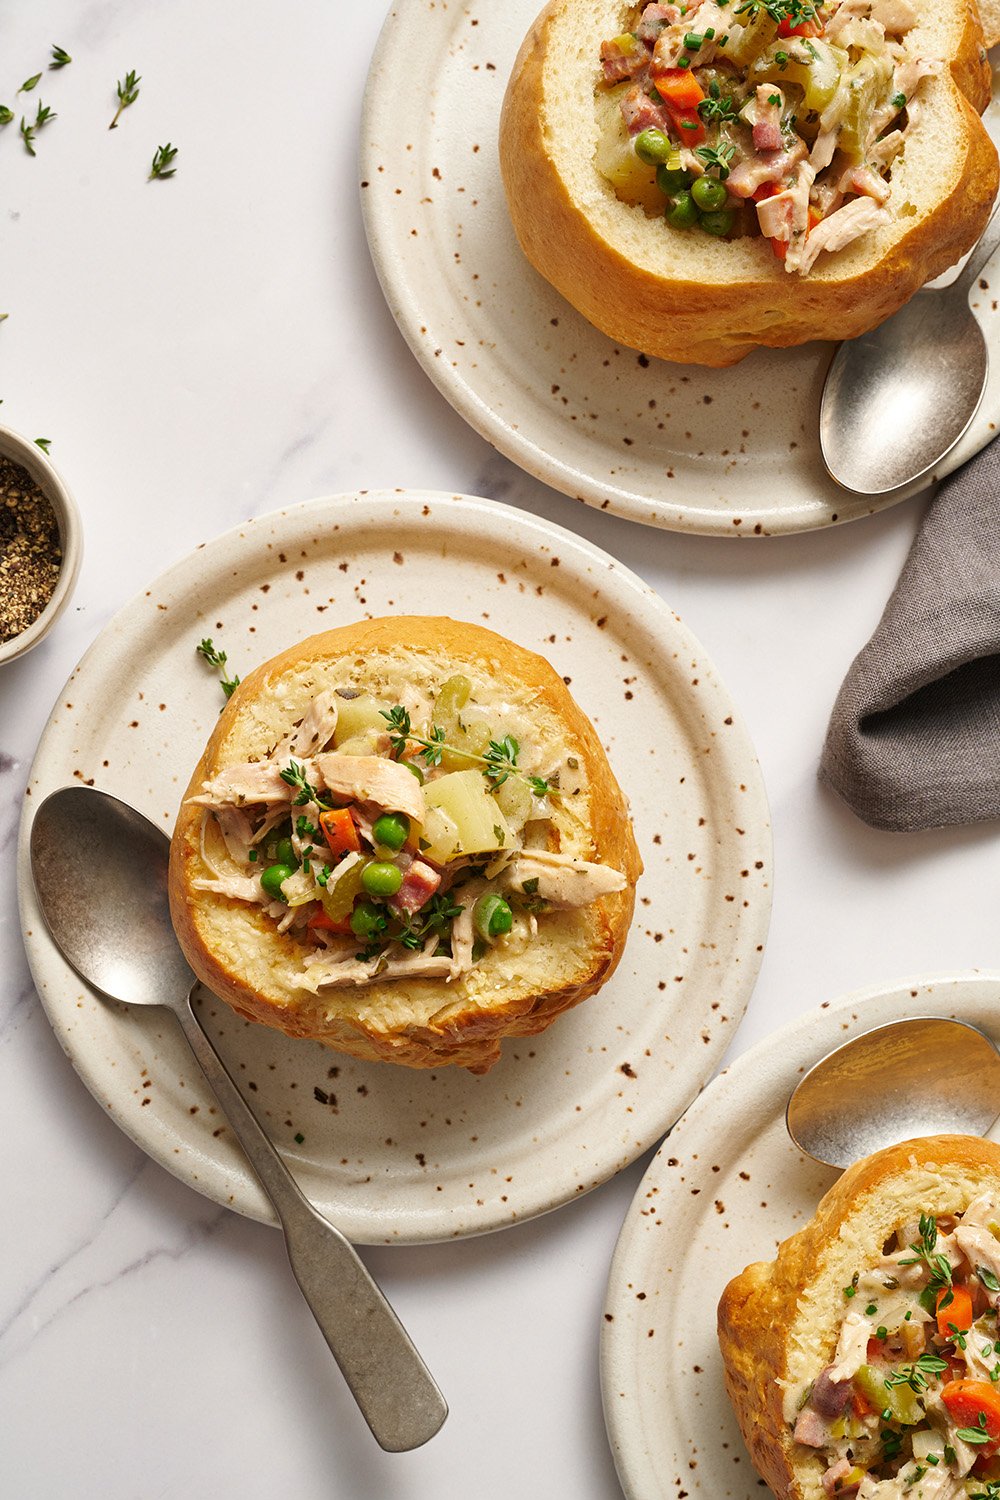
There’s nothing quite as comforting as a bowl of piping hot soup, especially when it’s inside a golden brown and fluffy homemade bread bowl!
Your family will think your dinner was catered by some fancy café. They don’t have to know these are actually quite simple to make!
Reader Love
I’ve never made bread bowls before, but I made your recipe today. It was very easy to make, and they turned out great. We had them with beef stew. I took your suggestion and placed the hollowed out bowls back in the oven to get crispier. I’ll definitely make them again.
–
My current favorite soup to fill these babies with is my Pot Pie Soup. So cozy and wonderful!
What will you fill yours with?

Sprinkle of Science
Ingredient Notes for Success
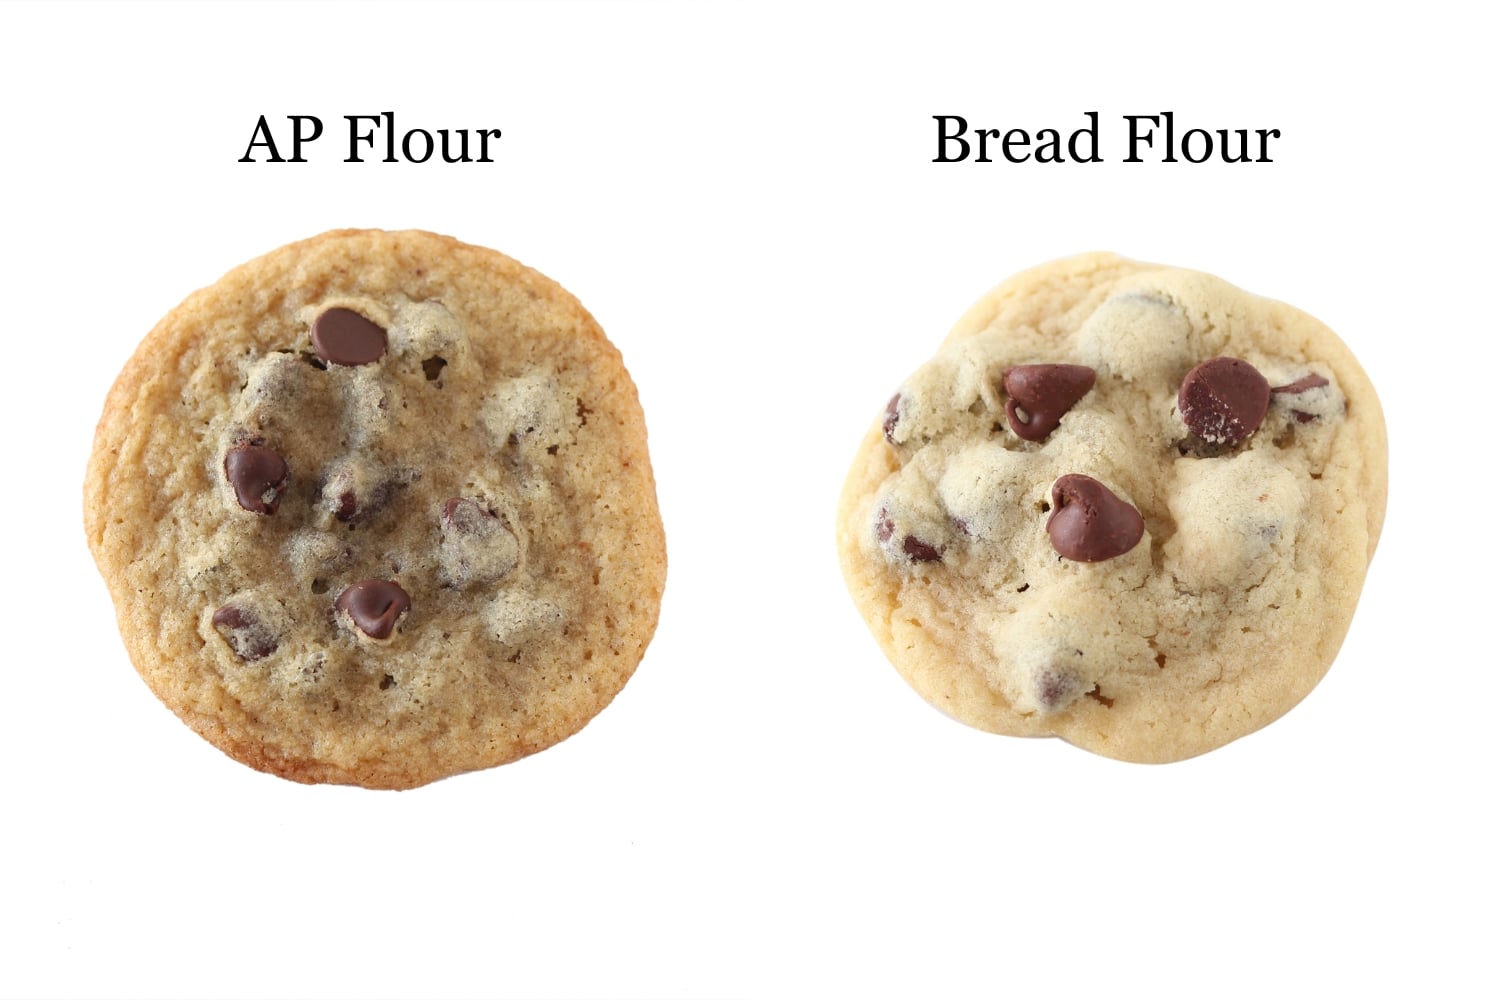
The Flour
My recipe uses both bread flour and all-purpose flour. Bread flour contains a higher percentage of protein, so you gain the structure the bread bowls need. Plus it makes the bread nice and chewy. All-purpose flour will keep the interior of the bread soft.
The Yeast
Both instant yeast and active dry yeast will work just fine here. Active dry yeast will take a little longer to rise. Read about the differences between Active Dry Yeast vs. Instant Yeast here.

Cornmeal
Yellow cornmeal can be used under your shaped bread bowls to rise and bake on. It’s a totally optional addition, and if you prefer to skip it, simply line the baking sheets with parchment paper instead.
How to Knead Dough
If you have a larger capacity stand mixer, such as a 6qt size, that’ll be ideal for this recipe. Make sure your mixer is fitted with the dough hook. It’s quite a lot of sturdy dough so older mixers on their last legs will likely struggle to knead.
How to Tell When Dough is Risen
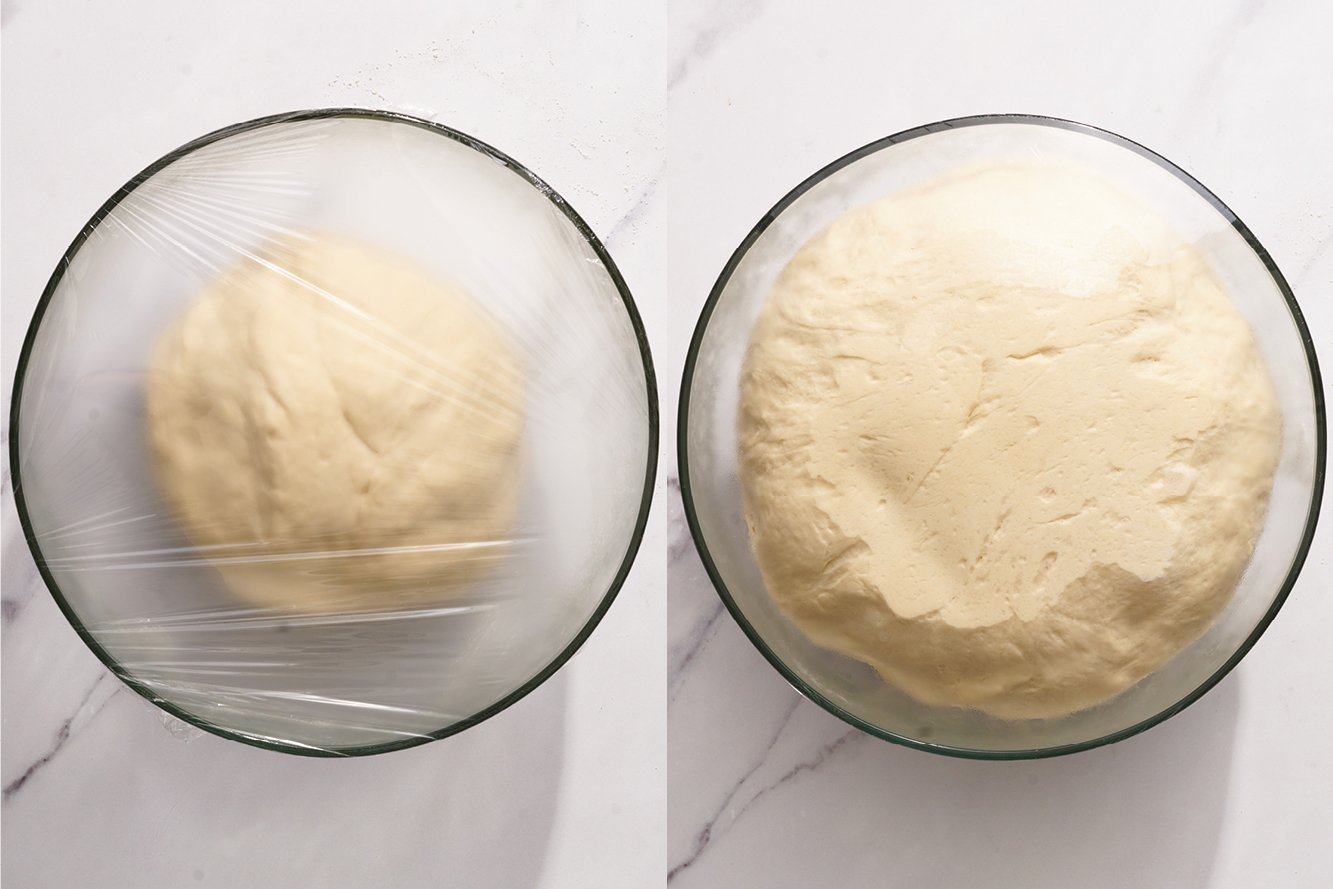
After the first rise, it should be about doubled in size. Use a clear bowl or container to better tell.
Ripe Test: To see if it’s raised enough to proceed, insert two fingers about a knuckle into the dough. If indentations remain once you remove your fingers, it’s ready to go. If not, it needs to rise longer until the indentations remain.
After the second rise, gently press one finger into the dough. If the indentation remains, it’s ready to be baked!
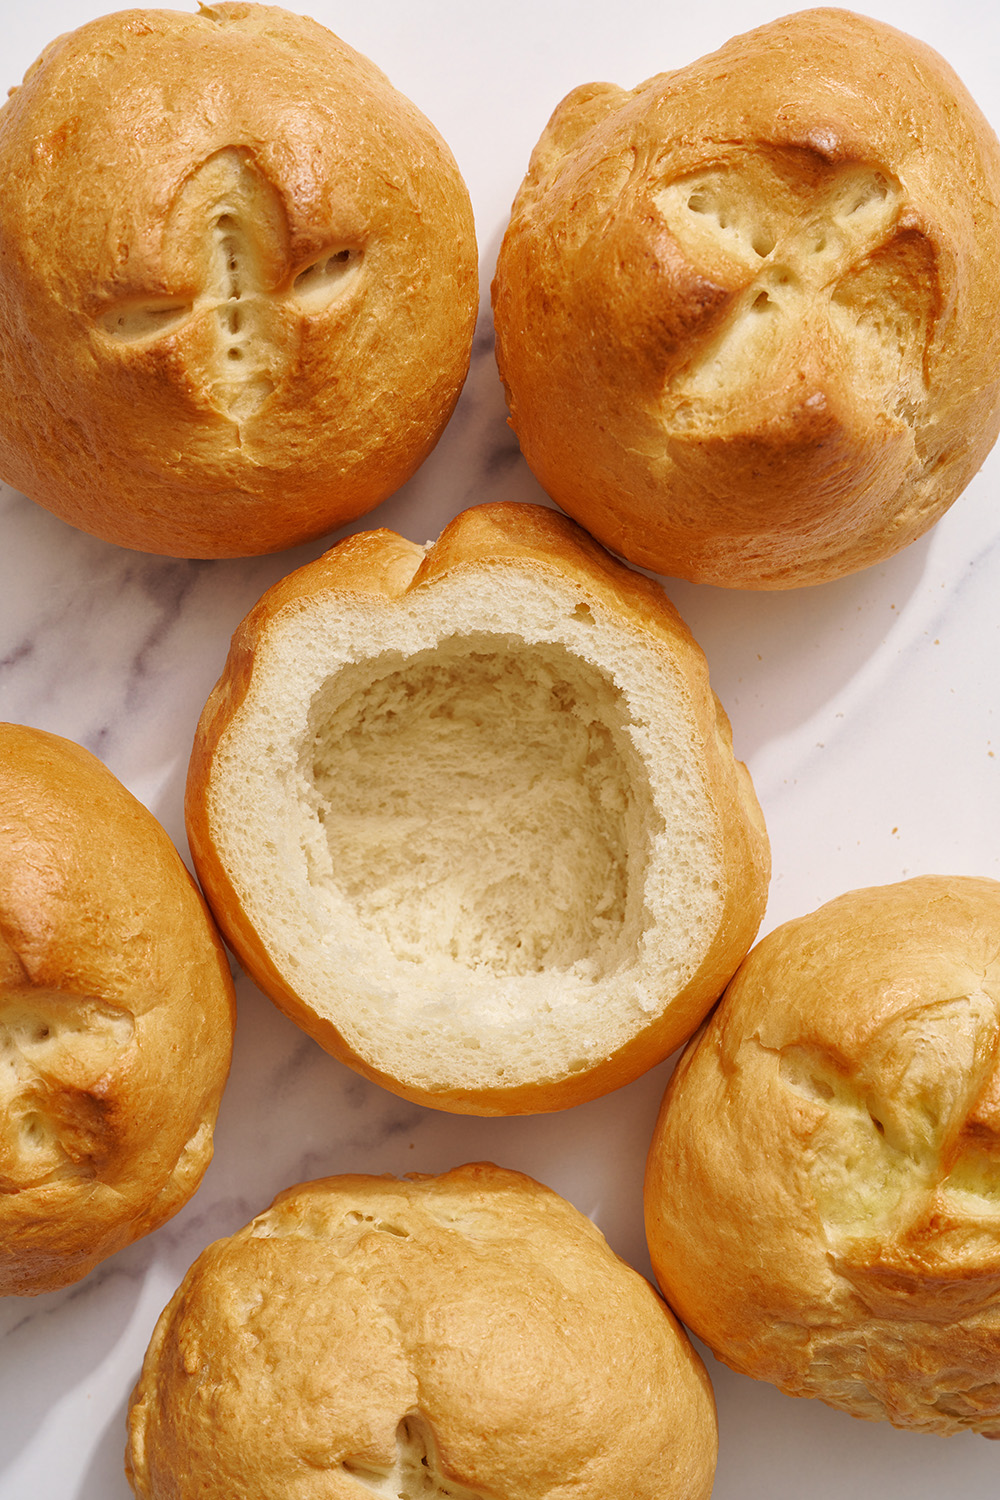
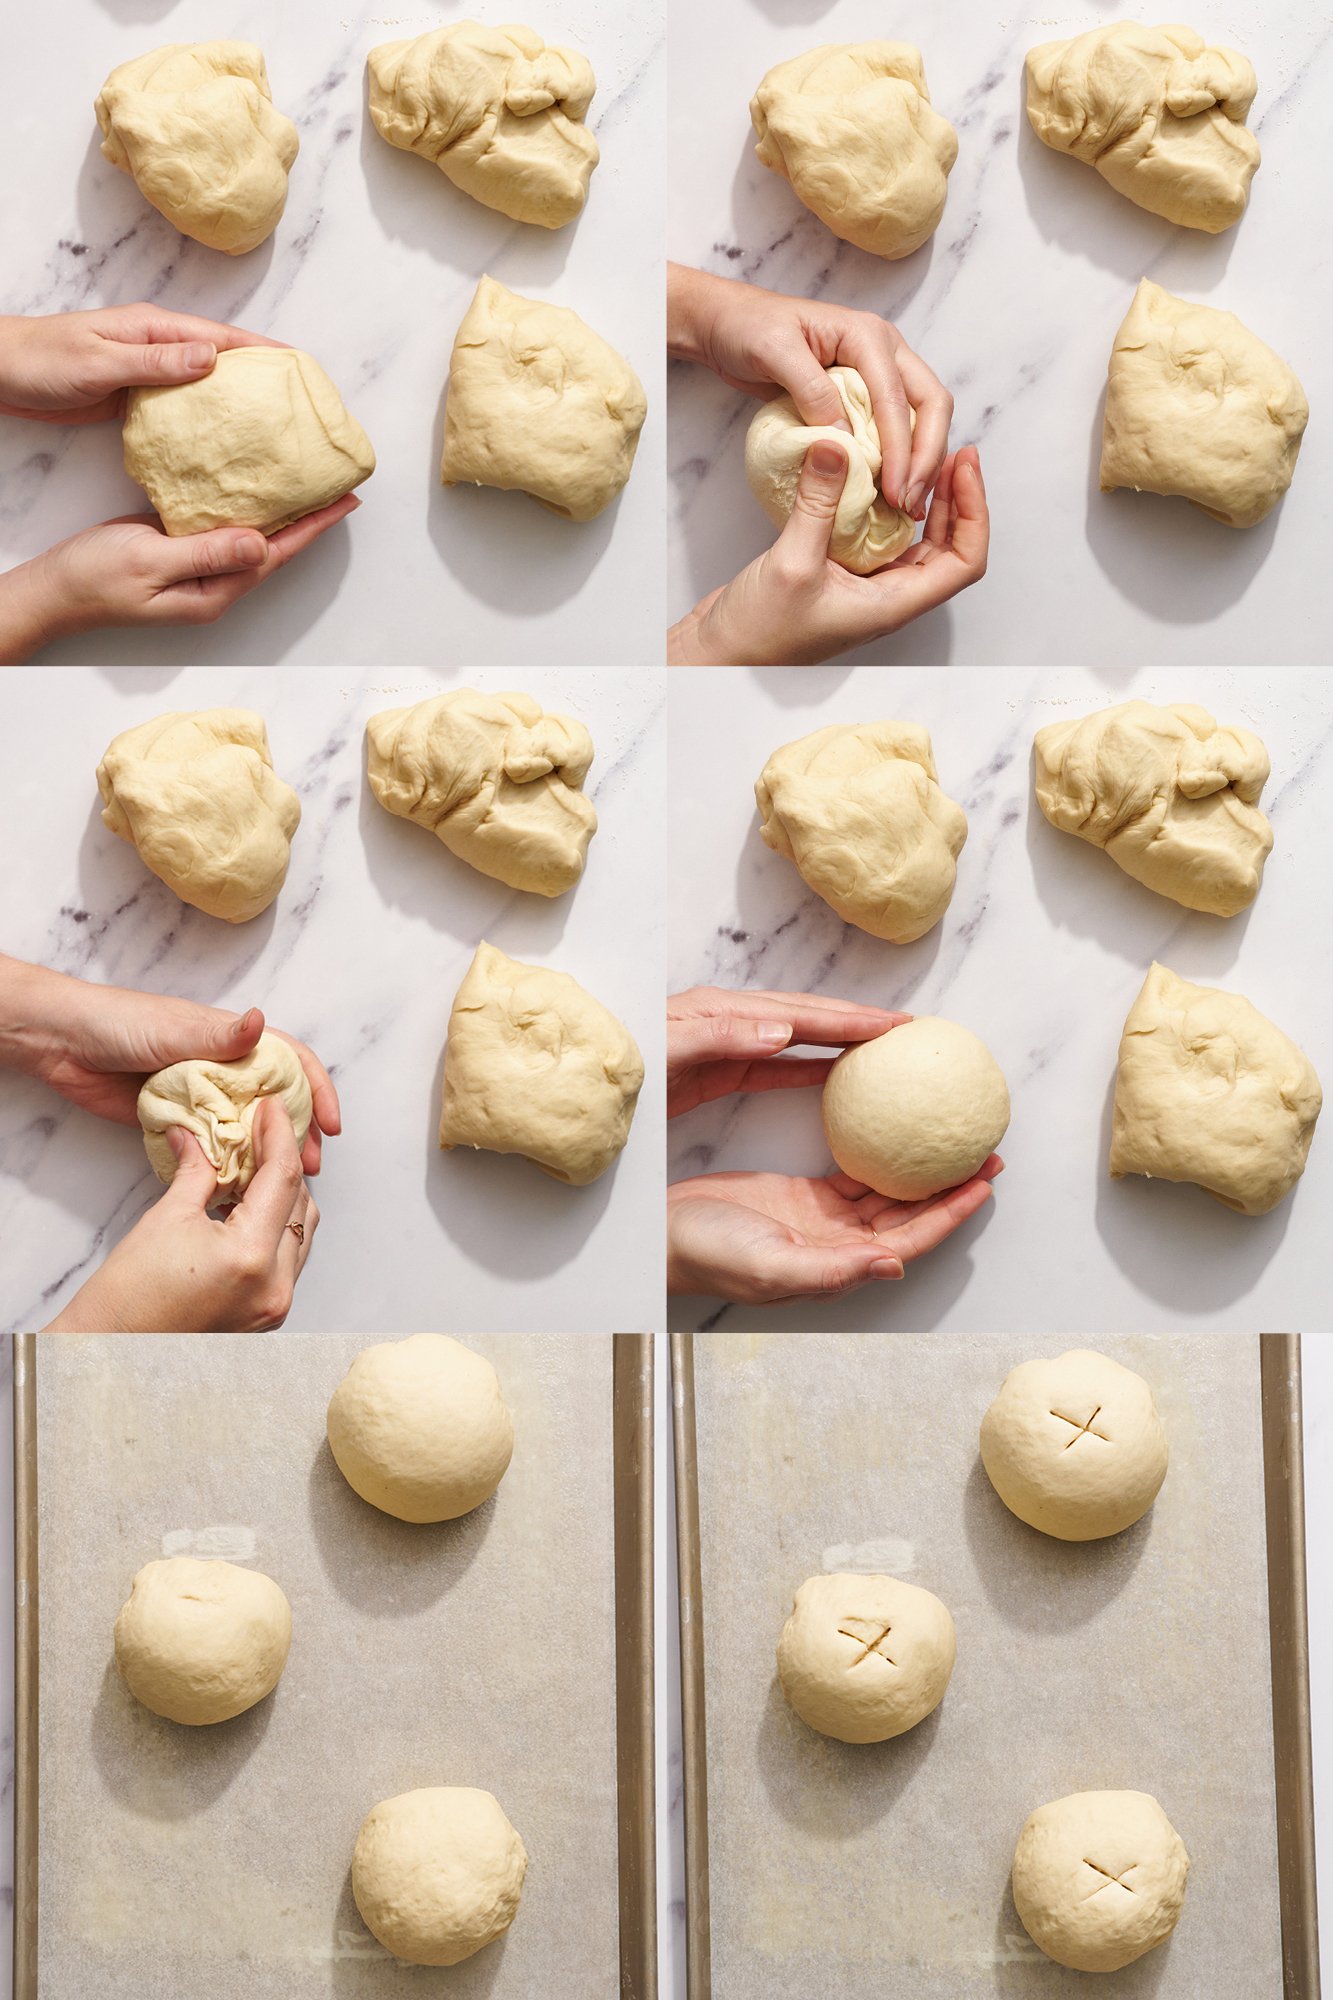
How to Shape Bread Bowl Dough
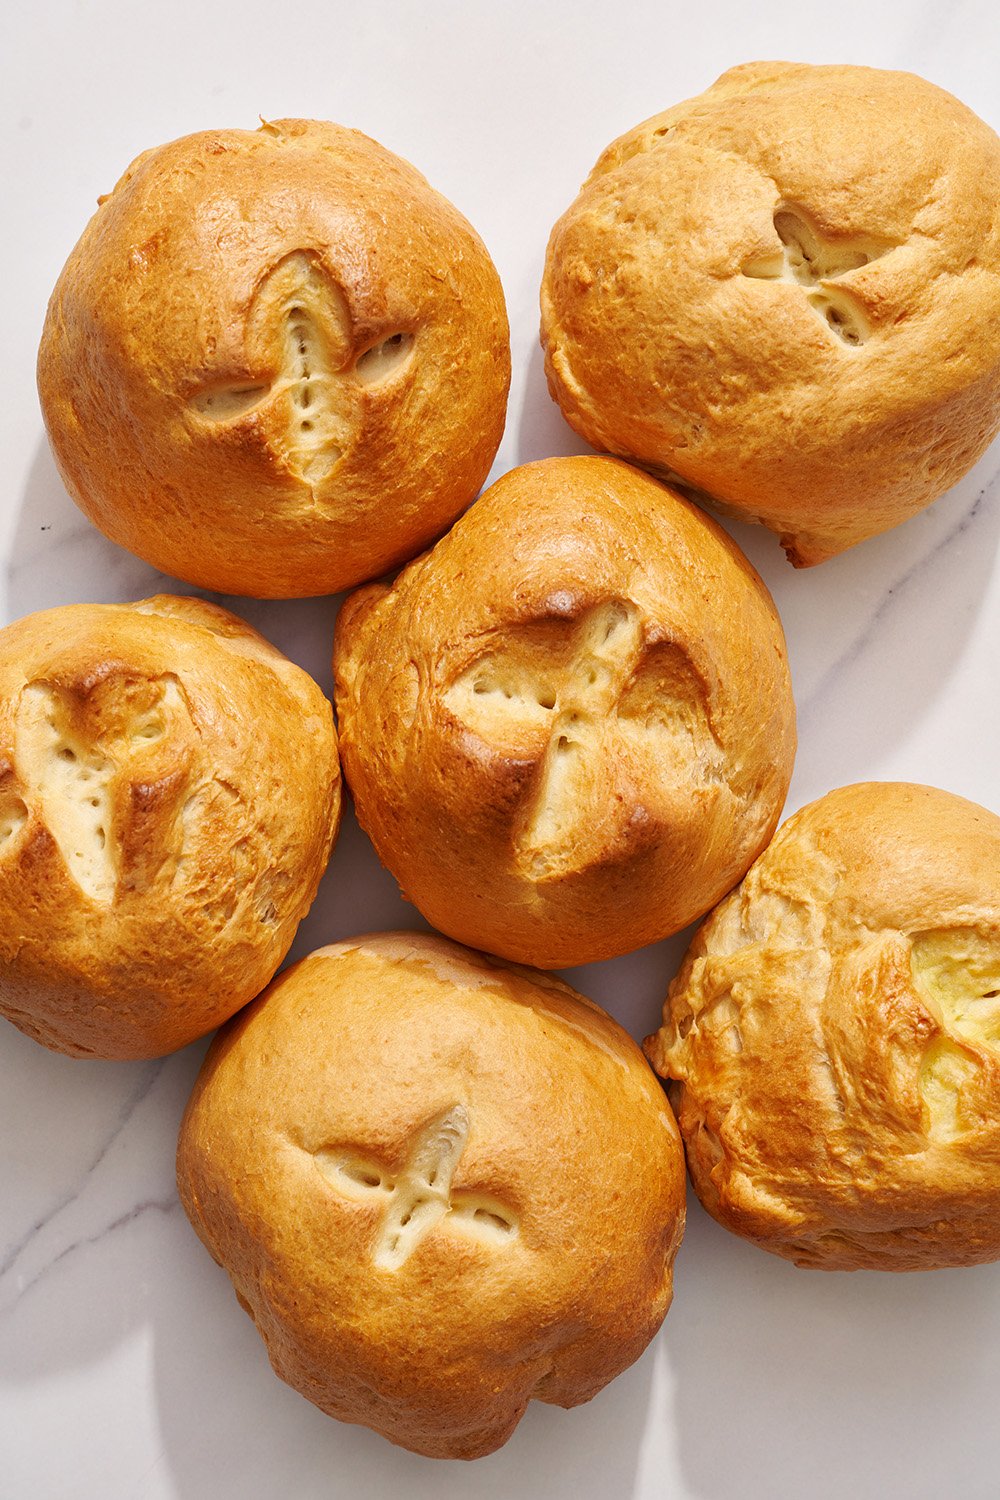
Using your fingers, gather sections of dough towards the same central point at the bottom and pinch together so you form a very taut ball. If your dough ball is not a tight shape, it will not rise up nice and tall.
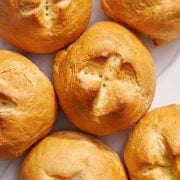
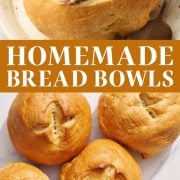
Roll around the seams around the counter to seal. Place 3 dough balls per sheet on your prepared baking sheets. Score each dough ball so it can expand in the oven.
How to Store & Freeze
These will keep for 3 days in an airtight container, stored at room temperature. Don’t refrigerate as it will dry them out faster. Refresh in a 400°F oven for 5-10 minutes, or until warm, before filling with soup and serving.
Freeze the fully baked bread bowls. Once cooled, place in an airtight container in the freezer for up to 3 months. To thaw, leave at room temperature for a few hours or overnight, and reheat in a 400°F oven for 5-10 minutes, or until warm, before filling and serving.
Email This Recipe
Enter your email, and we’ll send it to your inbox.
Ingredients
- 1 cup (152 grams) cornmeal, optional, for baking sheets
- 4 1/2 teaspoons (2 packets or 14 grams) instant yeast
- 2 1/2 cups (590 ml) warm water* (110°F)
- 2 tablespoons (25 grams) olive oil
- 1 tablespoon (13 grams) granulated sugar
- 4 cups (508 grams) bread flour
- 3 cups (381 grams) all-purpose flour
- 1 teaspoon garlic powder
- 2 teaspoons fine sea salt
- 1 egg, for egg wash
- 1 tablespoon water, for egg wash
- 1 cup (236 ml) hot water, for oven

Instructions
- Line two rimmed baking sheets with parchment paper. Or, for added texture (and to prevent sticking), take 1 cup of cornmeal and divide between the two baking sheets in place of parchment. Set aside.
- In the bowl of an electric stand mixer, stir together the yeast, water, olive oil, and sugar. Let the mixture bloom for 10 minutes.
- In a medium-sized bowl, whisk together both flours, garlic powder, and salt. Attach the dough hook to your mixer and gradually add the dry ingredients to the yeast mixture on low speed. The dough will come together and start to look a bit shaggy.
- Turn speed to medium-low and knead until the dough is smooth and elastic but still sticky, about 5 minutes. You can also slightly moisten your hands with oil and knead by hand for about 10 minutes.
- Transfer the dough to a large, lightly oiled bowl, turning to coat. Cover with a damp cloth or plastic wrap, and let rise in a warm place until doubled in size, about 30 minutes to 1 hour.
- Gently deflate the dough and turn it onto a lightly floured surface. Using a floured bench scraper, divide the dough into 6 equal pieces, each weighing around 250 grams.
- Stretch each portion into a tight ball, pinching the bottom with your fingers and rolling around on the counter to seal and shape. If the ball is shaped too loosely it may deflate while baking, so be sure to make a nice tight shape.
- Place 3 balls onto each prepared baking sheet. Slash the top with a sharp knife to score in an X shape. Cover and let rise again until doubled in size, about 30 minutes.
- Meanwhile, preheat the oven to 400°F and place an empty broiler tray on the top shelf.
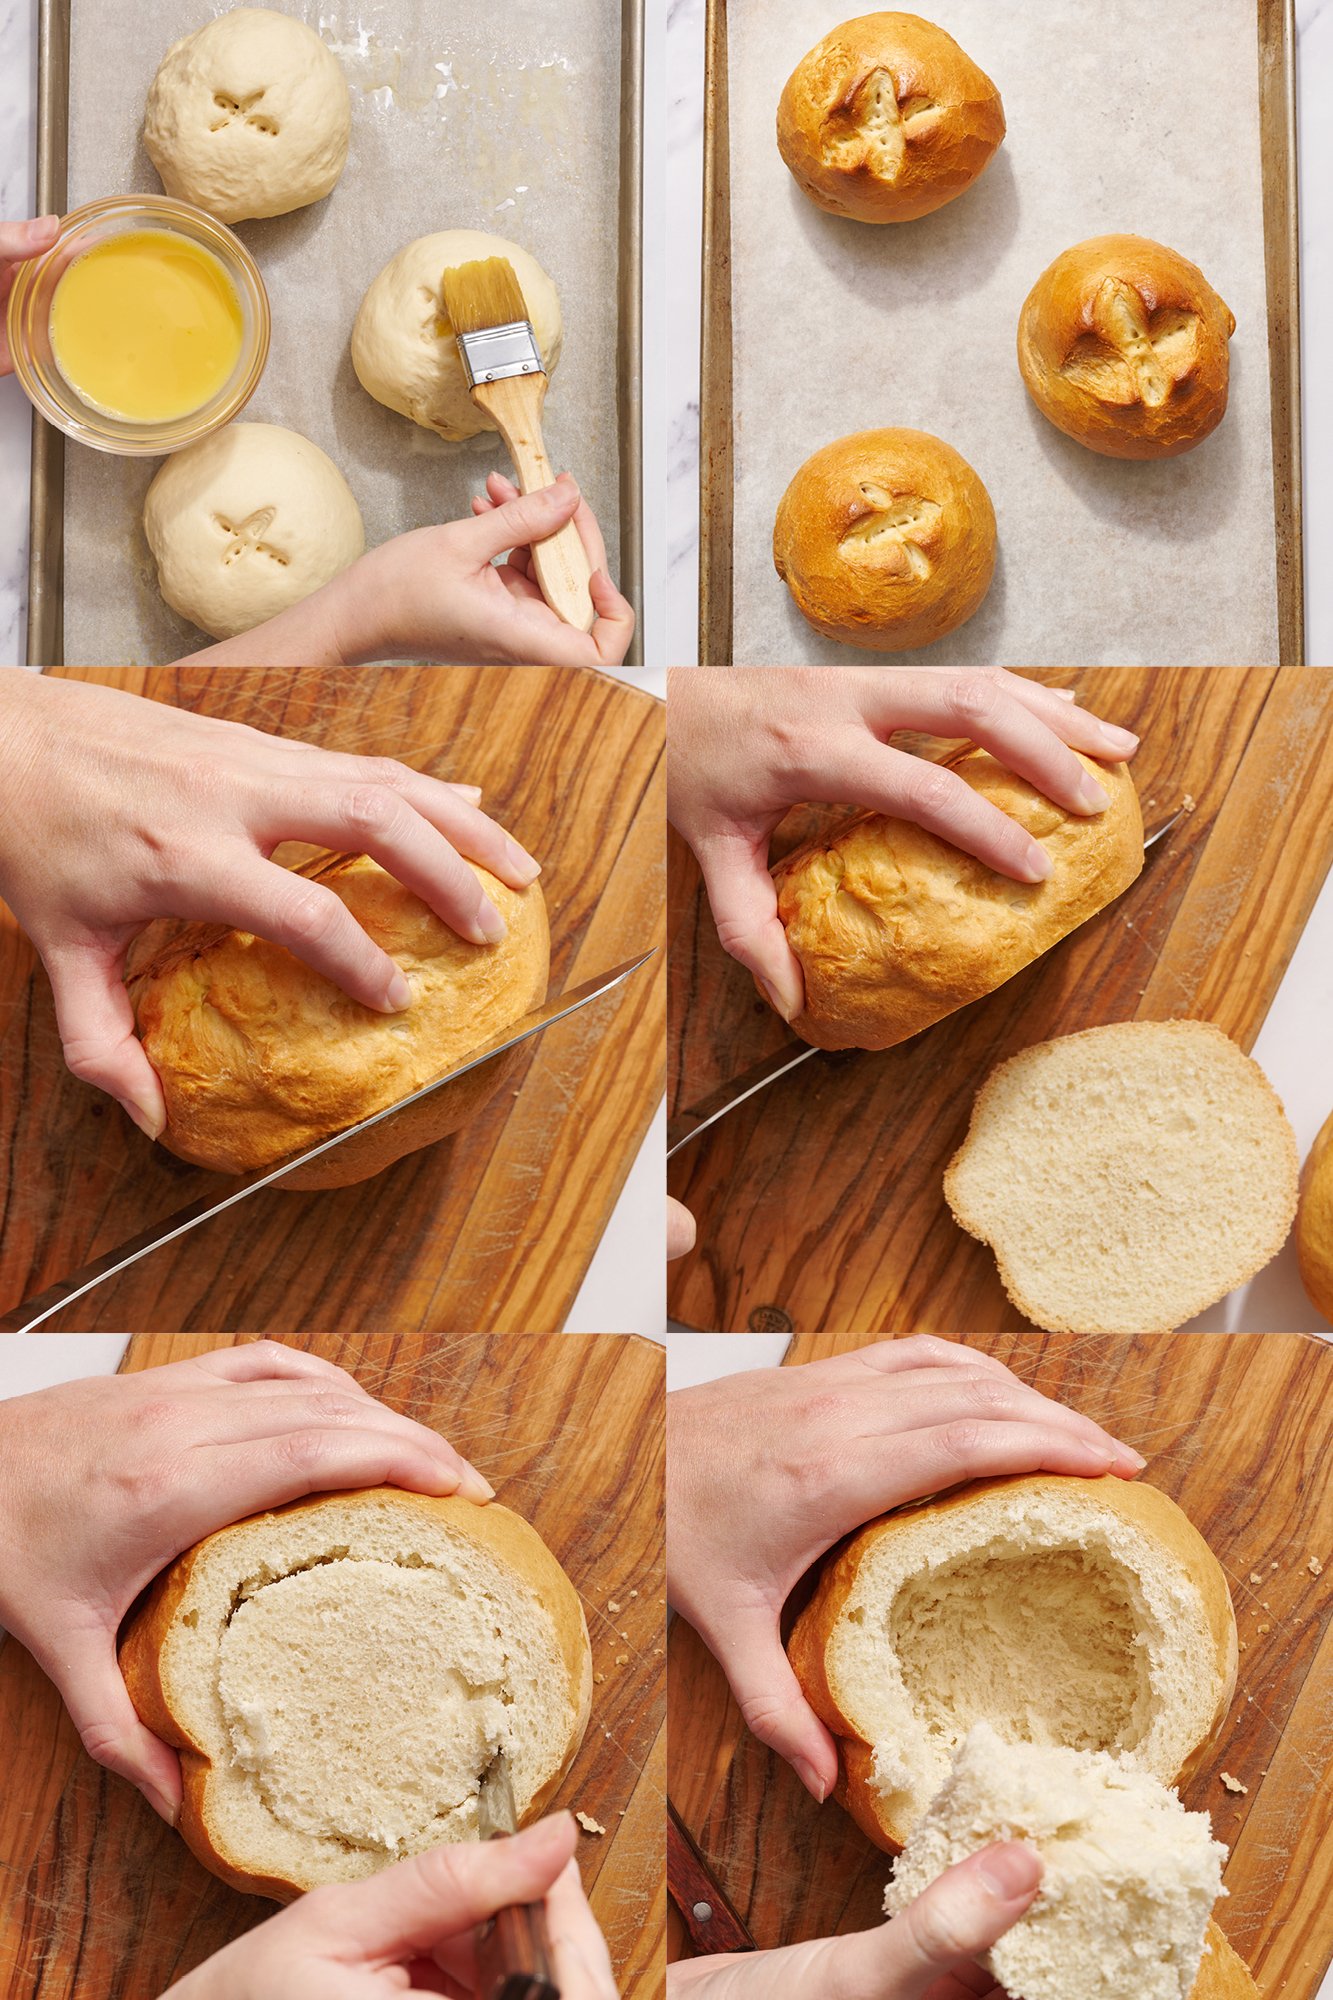
- In a small bowl, beat the egg with 1 tablespoon of water. Brush evenly over the shaped bread bowls.
- Place baking sheet on the center rack. If both baking sheets fit into your oven, place them both on the center rack; otherwise, bake one at a time.
- In a swift movement, pour 1 cup of hot water into the broiler tray and quickly close the oven door. Bake for 25 to 30 minutes, rotating the pan(s) halfway through the baking time. Bake until the tops are golden and when carefully tapped underneath, the bread bowls sound hollow.
- If baking another pan, refill the broiler tray with more water before baking.
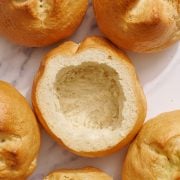
- Let the bread bowls cool completely on the pan. Cut a large round from the top of each loaf and scoop out the center. Fill with hot creamy soup and serve immediately.
Notes
Soup and Dip Recipes to Fill Your Bread Bowls:
More Homemade Bread Recipes:
This recipe was originally published in 2014 and updated in 2022 with new photos and recipe improvements. Photos by Joanie Simon.


Hi Tessa! I made these homemade bread bowls today and they turned out perfect (better than the homemade potato soup I made to fill them!). I’ve never had any luck with breads turning out, and was very excited that these actually worked for me. I think your video was fantastic and I’m pretty sure that’s the reason they turned out so well! This recipe is a keeper and is going in my recipe box!
Thanks again!
Wonderful!! So happy to hear that 🙂
Hi from Amarillo!! Just found this recipe and had to make it. Problem, I don’t have a stand mixer so I have to do by hand. Question, how by hand do I get dough smooth and shiny? Help 🙂
Lots of upper body strength 😉
if I don’t have a stand mixer yesterday handheld can I make this?
So excited to make these! Can the recipe be doubled? Thanks!
Love the recipie and the bread bowls came out beautiful, only thing, they must have cooked a scootch too long because they are stuck on my cookie sheet! I even put down some corn meal on the oil but the bread is cemented on. It looks like to remove them I’m going to have to destroy these beautiful chewy domes. I think parchment paper next time
Yummy, what a great recipe. been looking for decent bread making recipe. Thanks for sharing.
Simon
These bread bowls turned out pretty well and I think it was really simple to make. I had the time so I let them rise for at least an hour each rise. I couldn’t figure out how to roll them like you did so I just rolled them into a ball as best I could. I was nervous about the egg wash causing deflation based of previous comments so I brushed 3 prior to the second rise but it didn’t cause deflation at all. I made your loaded potato soup to serve in them and unforunately that turned out like mashed potatoes so it was a pretty big let down but oh well. It was my fault for making that soup as I should have made broccoli cheddar. I will be using the leftover bowls to make cheesy garlicky pull apart bread and I think that will be really good!
First off, the recipe really does come out tasting great! As someone else noted, there was deflation after putting on the egg wash, happened immediately. I was actually making two batches at the time, so the second batch did not get any egg wash. Granted the initial batch with egg wash had a nicer color, but wouldn’t make a good bread bowl. The second washless batch were perfect, though not as pretty, granted most of the good color is being cut out anyway.
Wish I read that comment before cooking and added the wash prior to rising.
One other note, the recipe seems to imply you can make these on a single baking tray. I could only fit three per tray, these make large bowls!
Hi! I am planning to make these this weekend. One question, did you use instant dry or active dry? I have active dry so I am assuming I would just need to proof it first if I don’t pick up instant dry. This is my first homemade bread attempt so I want to make sure I understand. Thanks these look amazing!
I made these bowls using your YouTube video for a small dinner party at my house where we served stew. They turned out great! Overfilled each bowl, pouring a bit of the stew to one side as if it was overflowing from the bowl, and placed the trimmed up top of each bowl back in place. Served the centre’s we cut out as separate little balls of dipping bread. Had enough left over that my.partner and I split the last loaf between us and hollowed out either side for lunch the next day.
Will definitely be making these again very soon. Thanks!
Loved these bread bowls! You gave some great tips and mine came out perfect! One thing I did wrong I think (but was still able to make great bread bowls) was I let my yeast mixture proof. I realized later that yours was soupy and it does not say anywhere in recipe to proof – it was just a bread making habit (I make a lot of bread). I would highly recommend this recipe to anyone and it was easy!
Oh I think the deflating issue some were having was possibly not from getting all the wrapping dough in a tight enough ball for the second rising thus leaving too much air in dough? Just a thought.
I’ve made these twice in barely over a week, once for a Super Bowl party, then again for a birthday party the following week with the same group of friends. Instead of making them as soup bowls, I needed something for a spinach dip, so I made 2 larger loaves instead of the 6 smaller ones. It was such a hit at the Super Bowl party that when I showed up to the birthday party, bread in hand, there were actual cheers. I hollowed out one loaf for the dip, and cut the other loaf up to use as ‘chips’. I guess I won’t have to think about what to bring to parties anymore. I have my ‘thing’.
I have a question Tessa, could we incorporate garlic in this bread bowl recipe? We are wanting to make Garlic bread bowls and put spaghetti in them. My husband and I have really been into cooking shows and on line videos and recipes. And we both love to eat healthy. Thanks Angel