


Tessa’s Recipe Rundown
Taste: The little bit of nutmeg combined with the sour cream and sweet glaze makes these doughnuts taste just like the ones at your favorite bakery, if not better!
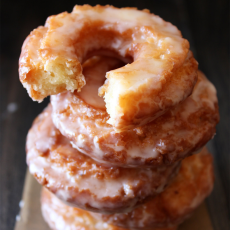
Texture: Slightly crunchy on the outside, cakey and soft on the inside. All the little cracks in these doughnuts just soak up the shiny, crackled glaze.
Ease: There’s no yeast in this recipe so you can have these doughnuts IN YOUR MOUTH in a little more than an hour from start to finish.
Pros: I think the pros are inherently implied, they’re doughnuts!
Cons: Deep fried sugary goodness ain’t too good for your diet.
Would I make this again? Yes, whenever I’m craving these old-fashioned cake doughnuts I’ll whip this recipe out.
This post may contain affiliate links. Read our disclosure policy.


I have huge sweet tooth cravings on the regular. Can you relate?
When I get a doughnut craving, it’s intense.
In my experience, a lot of doughnut shops make pretty bland and greasy doughnuts that leave a weird residue on your tongue.
There are a few local shops that I LOVE, but I rarely have an excuse to make a trip to one of them.
This recipe honestly takes about the same amount of time that it takes to drive across town to my favorite bakery, so it’s kind of perfect. Plus, if you only eat doughnuts when you make them from scratch, you can’t really go overboard, right? That’s my logic at least.
These Old-Fashioned Sour Cream Doughnuts are just like the old-fashioned cake doughnuts from the bakery. They’re kind of crunchy and cracked on the outside, making those nooks just perfect for soaking up the thick, shiny, crackled glaze.
We completely dunk the doughnuts in that glaze in the recipe, and it’s amazing. The inside is soft and cakey with a more firm bite than yeast doughnuts. Plus you can’t beat sour cream – it’s good with just about everything.

I don’t always prefer old-fashioned cake doughnuts to yeast doughnuts, but when I do this is absolutely the recipe I use. You can’t beat how much less time these take than yeast doughnuts, too.

Sprinkle of Science
Old-Fashioned Sour Cream Doughnuts Recipe Tips
1. Use a Scale to Weigh Your Ingredients
Using a scale is a smart idea for these sour cream doughnuts. Any issues I hear about the dough being too dry or sticky are likely due to inaccurate measuring! If your doughnuts aren’t as fluffy and light as you’d like, it’s due to compacting too much flour into your measuring cup. You can learn more about how to measure flour the RIGHT way here.
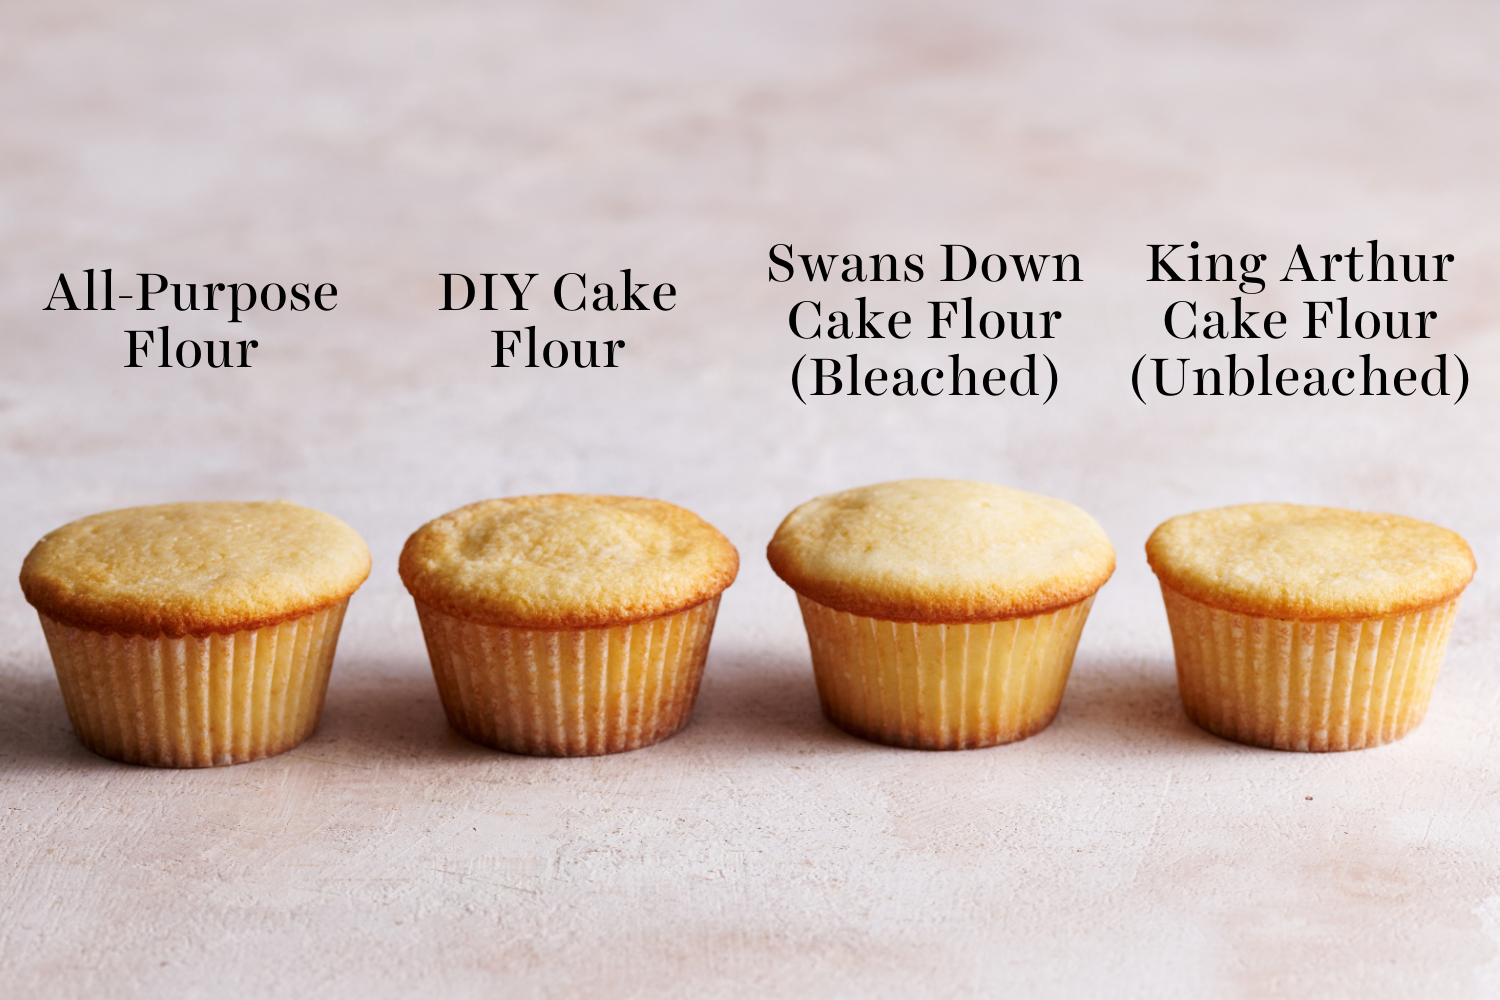
2. Use REAL Bleached Cake Flour
- This is a must for these sour cream doughnuts.
- Purchased cake flour will yield light and delicate doughnuts, just like the ones from a good bakery.
- DIY substitutions don’t really cut it.
- AP flour will not create doughnuts with that same soft texture.
- Bleached cake flour will work best. Unbleached (like King Arthur Flour) won’t absorb as much moisture and you may end up with doughnuts that crumble while frying.
- You can learn more about cake flour here.
3. This Recipe is FRIED
- Yes, you must fry these sour cream doughnuts
- This recipe was specifically designed to be fried and not baked.
- USE FRESH OIL. Oil goes rancid quickly, often before the date on the bottle.
- If it has *any* unpleasant smell, don’t use it, as that flavor will transfer to your doughnuts.
Can I Air Fry These Doughnuts?
I don’t personally own an air fryer, but a reader recently messaged me, letting me know that she had success air frying this recipe. Let us know in the comments below if you have success air frying these doughnuts, too!
My Favorite Doughnut Tools:
- Digital Scale – to ensure your ingredients are measured correctly
- Doughnut Cutter – for perfectly uniform doughnuts
- Deep Fry Thermometer – to ensure your oil maintains the correct temperature
- Dutch Oven – perfect for frying!
More Recipes You’ll Love:
- Krispy Kreme Copycat Glazed Doughnuts
- Baked Strawberry Lemon Doughnuts
- Chocolate Old-Fashioned Doughnuts
- Pumpkin Old Fashioned Doughnuts
- Classic Cake Doughnuts
Email This Recipe
Enter your email, and we’ll send it to your inbox.
Ingredients
For the donuts:
- 2 1/4 cup (255 grams) cake flour
- 1 1/2 teaspoons baking powder
- 1 teaspoon fine sea salt
- 1/2 teaspoon ground nutmeg
- 1/2 cup (100 grams) sugar
- 2 tablespoons (29 grams) butter, at COOL room temperature
- 2 large egg yolks
- 1/2 cup (113 grams) sour cream
- Canola oil, for frying


For the glaze:
- 3 1/2 cup (350 grams) powdered sugar, sifted
- 1 1/2 teaspoons corn syrup
- 1/4 teaspoon fine sea salt
- 1/2 teaspoon vanilla extract
- 1/3 cup hot water
Instructions
For the donuts:
- In a bowl, sift together the cake flour, baking powder, salt, and nutmeg.
- In the bowl of a stand mixer fitted with a paddle attachment, beat the butter and sugar together until sandy. Add the egg yolks and mix until light and thick. Add the dry ingredients to the mixing bowl in 3 additions, alternating with the sour cream, ending with the flour.
- Mix for 30 seconds on low speed or until the dough is smooth but slightly sticky. You want to mix enough that the dough doesn't fall apart in the oil, but not so much that it becomes tough. If the dough is unbearably sticky, add extra flour one tablespoon at a time (especially if you live in a warm & humid climate).
- Cover with plastic wrap and chill for 1 hour, or until firm.
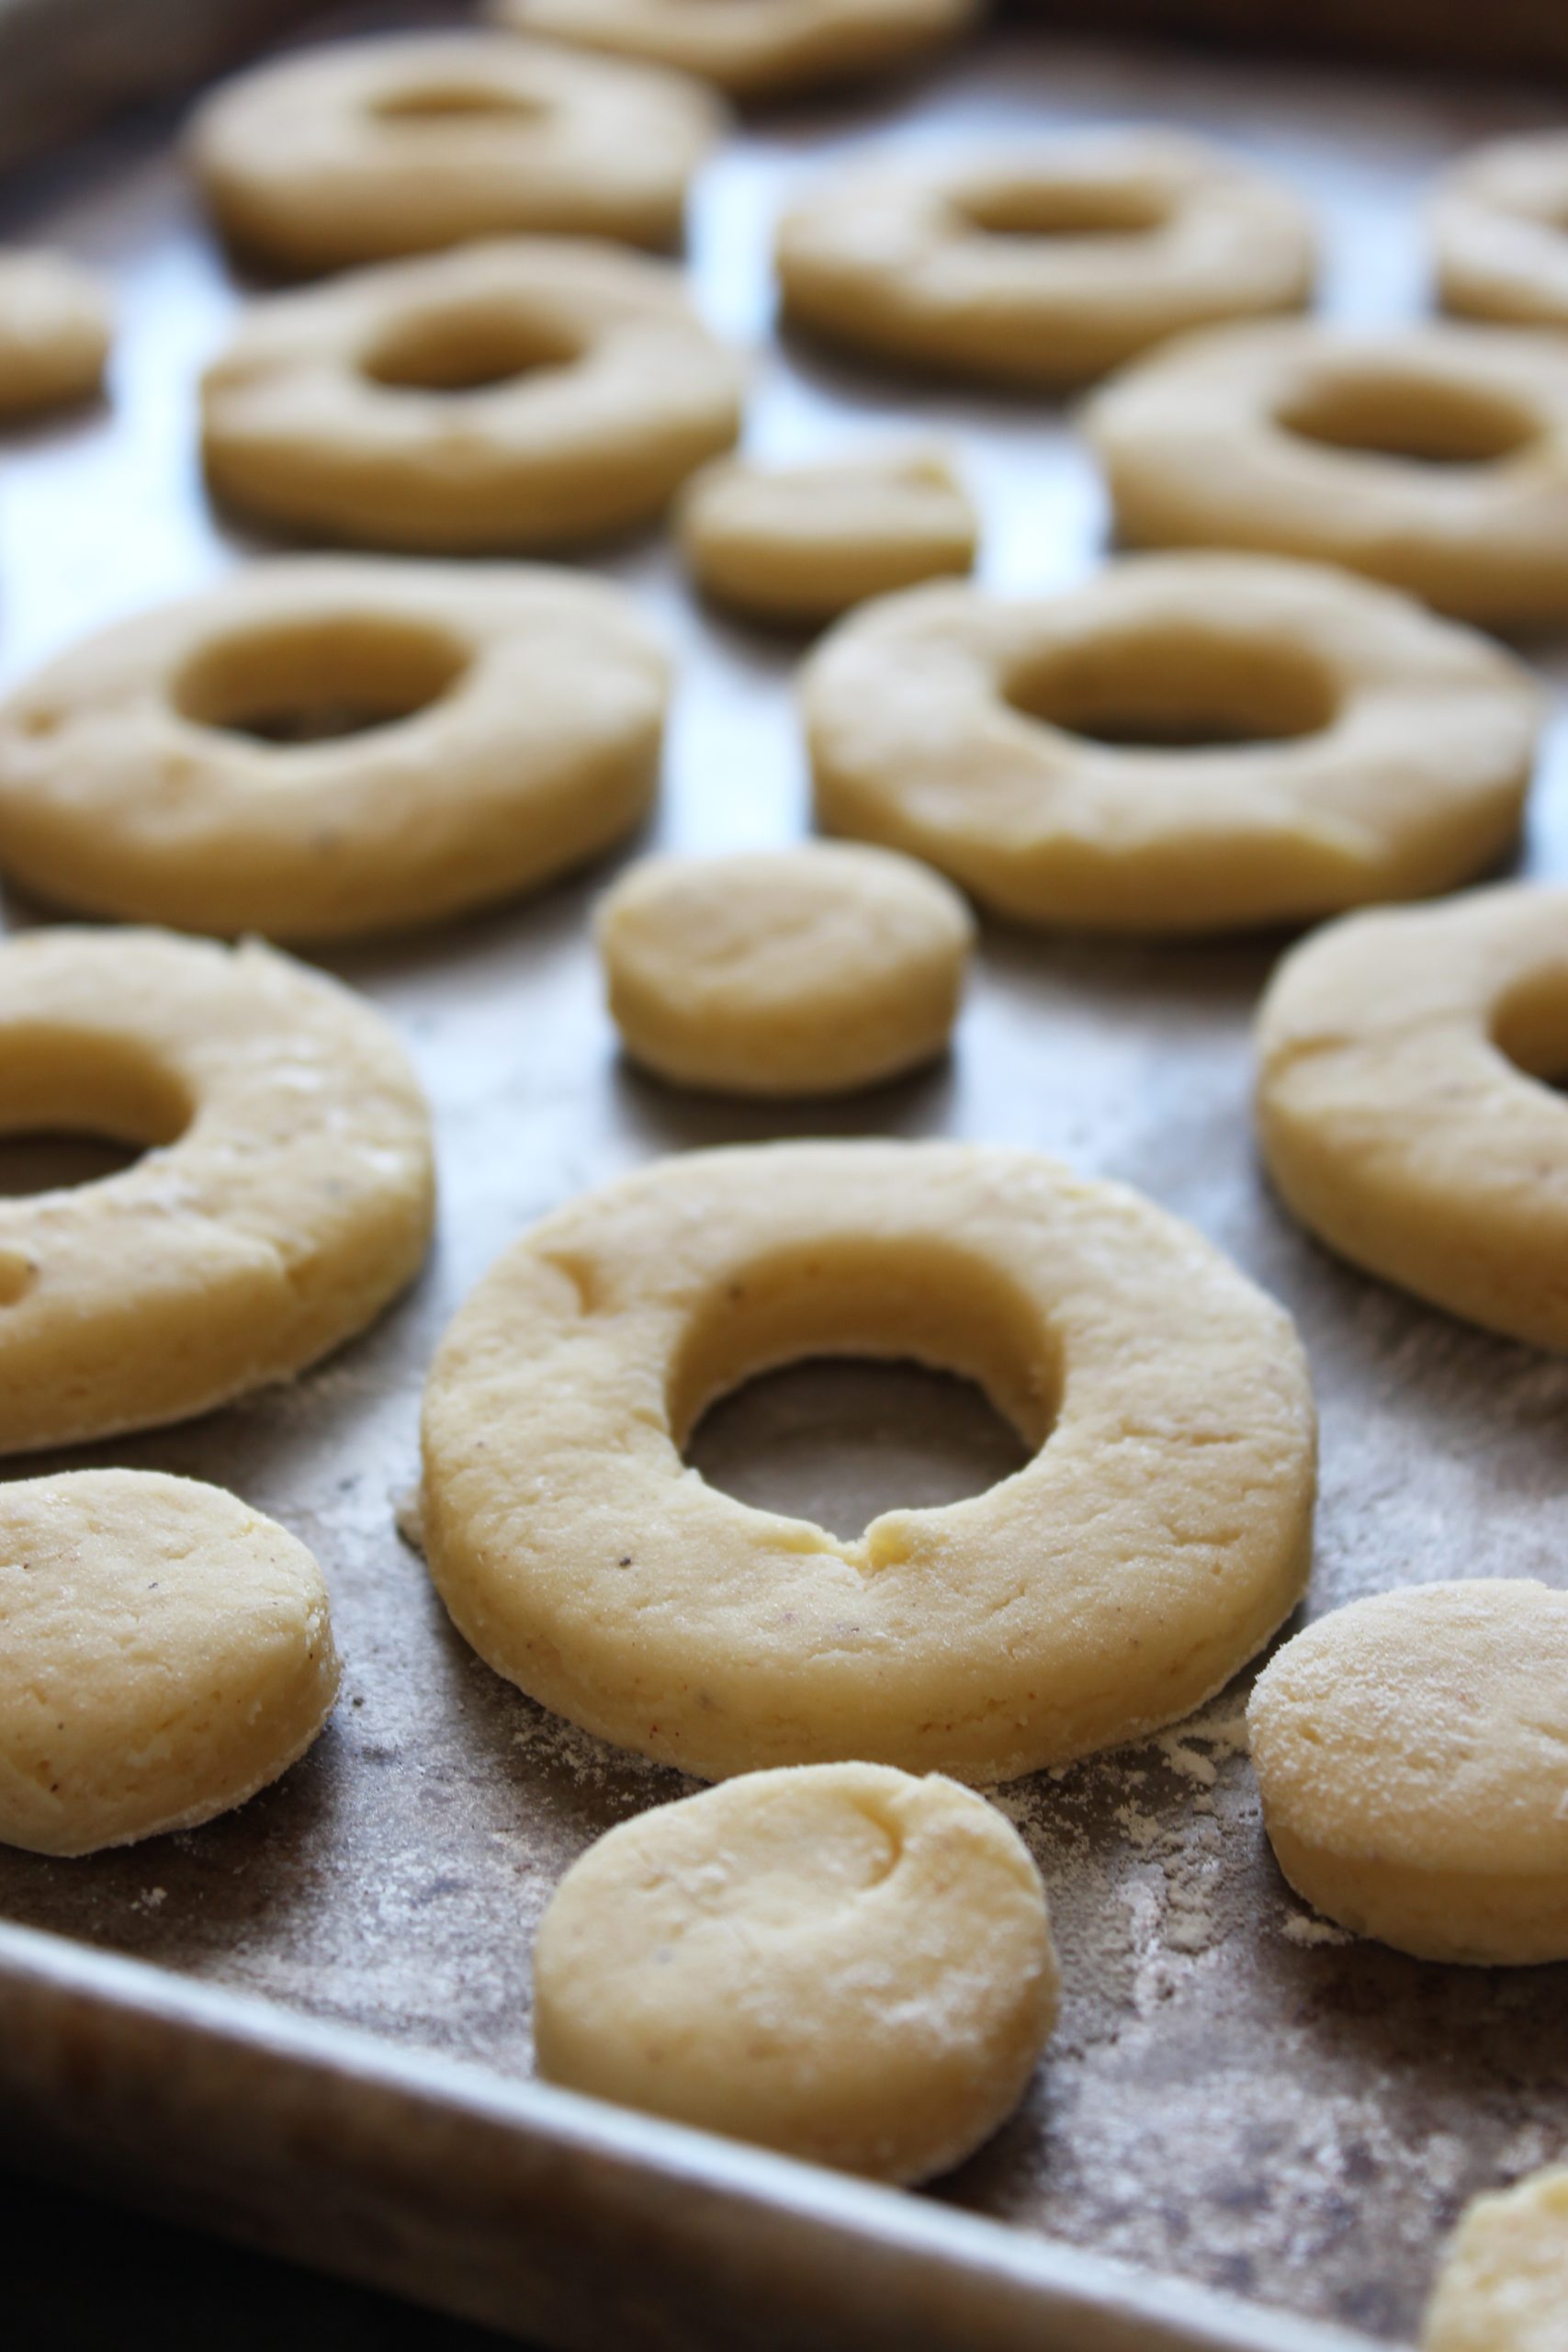
- On a floured surface, roll out the dough to about 1/2 inch thickness. Use a doughnut cutter or two differently sized biscuit cutters to cut out as many donuts as possible, dipping the cutters into flour as necessary to prevent sticking. You should get about 12 doughnuts and holes. If the dough gets too loose, sticky, or greasy at any point, return to the fridge to firm it back up before continuing. Refrigerate while you heat the oil so the dough is slightly cold when it fries.
- Pour 2 inches of canola oil into a heavy-bottomed pot with a deep-fry thermometer attached. Heat to 325°F. Fry the doughnuts a few at a time, being careful not to overcrowd the pot. Fry on each side about 2 minutes, being careful not to let them burn. Keep an eye on the thermometer and adjust your stove heat to maintain the correct oil temperature. Let drain on a paper bag to soak up the excess grease.
For the glaze:
- Mix all ingredients in a bowl with a whisk until smooth. Immerse each doughnut into the glaze. Place on a wire rack above a sheet pan to catch any excess glaze. Let sit for 20 minutes until glaze is set. Doughnuts are best served the day they are made but may be store in an air tight container at room temperature for a few days.


Thanks for the recipe! I made them this morning and they were delish! The only adjustment I made was using a pinch of cinnamon and nutmeg and adding about 1/2 tsp of grated lemon zest. I think next time (there will definitely be a next time) I will roll them thicker so I get more of the cakey texture in the middle. Thanks again. 🙂
Have you considered trying a gluten-free version? I plan on attempting just that! My girlfriend absolutely loves these doughnuts, but she has given them up due to my new eating lifestyle. (I have stroke-like migraines, and gluten is a main trigger for me.) So, I would love to find a way for her to continue being supportive and have her doughnuts, too!
I made these over the weekend and they turned out really wonderful. I’ll be trying the chocolate old fashioned donut recipe soon. I did have to add an extra large spoonful of sourcream to the dough because it was very dry/sandy. I noticed that your chocolate donut recipe is very similar except that the sour cream in that one calls for 1 cup instead of the 1/2 cup that this recipe calls for. Could that be the reason that some people have issues with dry dough? Thank you for a lovely recipe.
By the dates in the comments section, looks like it’s been a while since this recipe has surfaced but it has via my Facebook page and so I want to say thanks. I’m an old hand at donut making and I was highly praised for my ability to make the best Old Fashion’s but, that was in a bakery not at home. I’m now poised to once again don that crown thanks to you ! The fact that these contain sour cream and fresh grated nutmeg reveals to me just how they will taste and I’m anxious to get going tomorrow and make a batch ( actually a double batch), I have people waiting ! I was even prodded into replenishing my supply of whole nutmeg. I’ll let ya know how they come out, thanks again 🙂
Oh. I will try to make it for my kids. So i’m sure, they like it.
Thank for share. hihi. Now i have a new repice.
Just like Mom’s
hi, i dont know why my dough not sticky.any idea? thanks
So, is it possible to bake these bad-boys? Or if not, would the new air fryers work on this recipe? These look amazing. And, I was wondering, how did you set up the photos with so much natural light and then suddenly a dark background? Just my curiosity at work there. 😉 Gorgeouspics. Thanks for the recipe!
Ehhh I’d be hesitant about baking, the texture definitely wouldn’t be quite as mouthwatering. And I’ve never used an air fryer so I’m not sure! Thanks for your note about the photos 🙂 I believe I actually blocked the light in the background with black poster board so only the doughnuts were getting hit with light. Hope that helps!
mmmm ilike it
I will add that I used to own donut shops and these donuts look great with a great recipe. If you want more cracks in your donuts here is the way. Use cool ingredients (not below 65 though) and after you put them in oil flip them after 15 seconds let them cook (usually about 90 second) and back again for the remaining 1 min 15 sec. I would also cook them at 375 to reduce the oil consumption. This is how we always did it and they cracked wide open. Glaze them while warm (not hot) and the glaze will bond better with the donut and not flake off as much.
Thanks for the tips Doug!
Hi Tessa
I love the recipe and sour cream doughnuts always been my favorite.
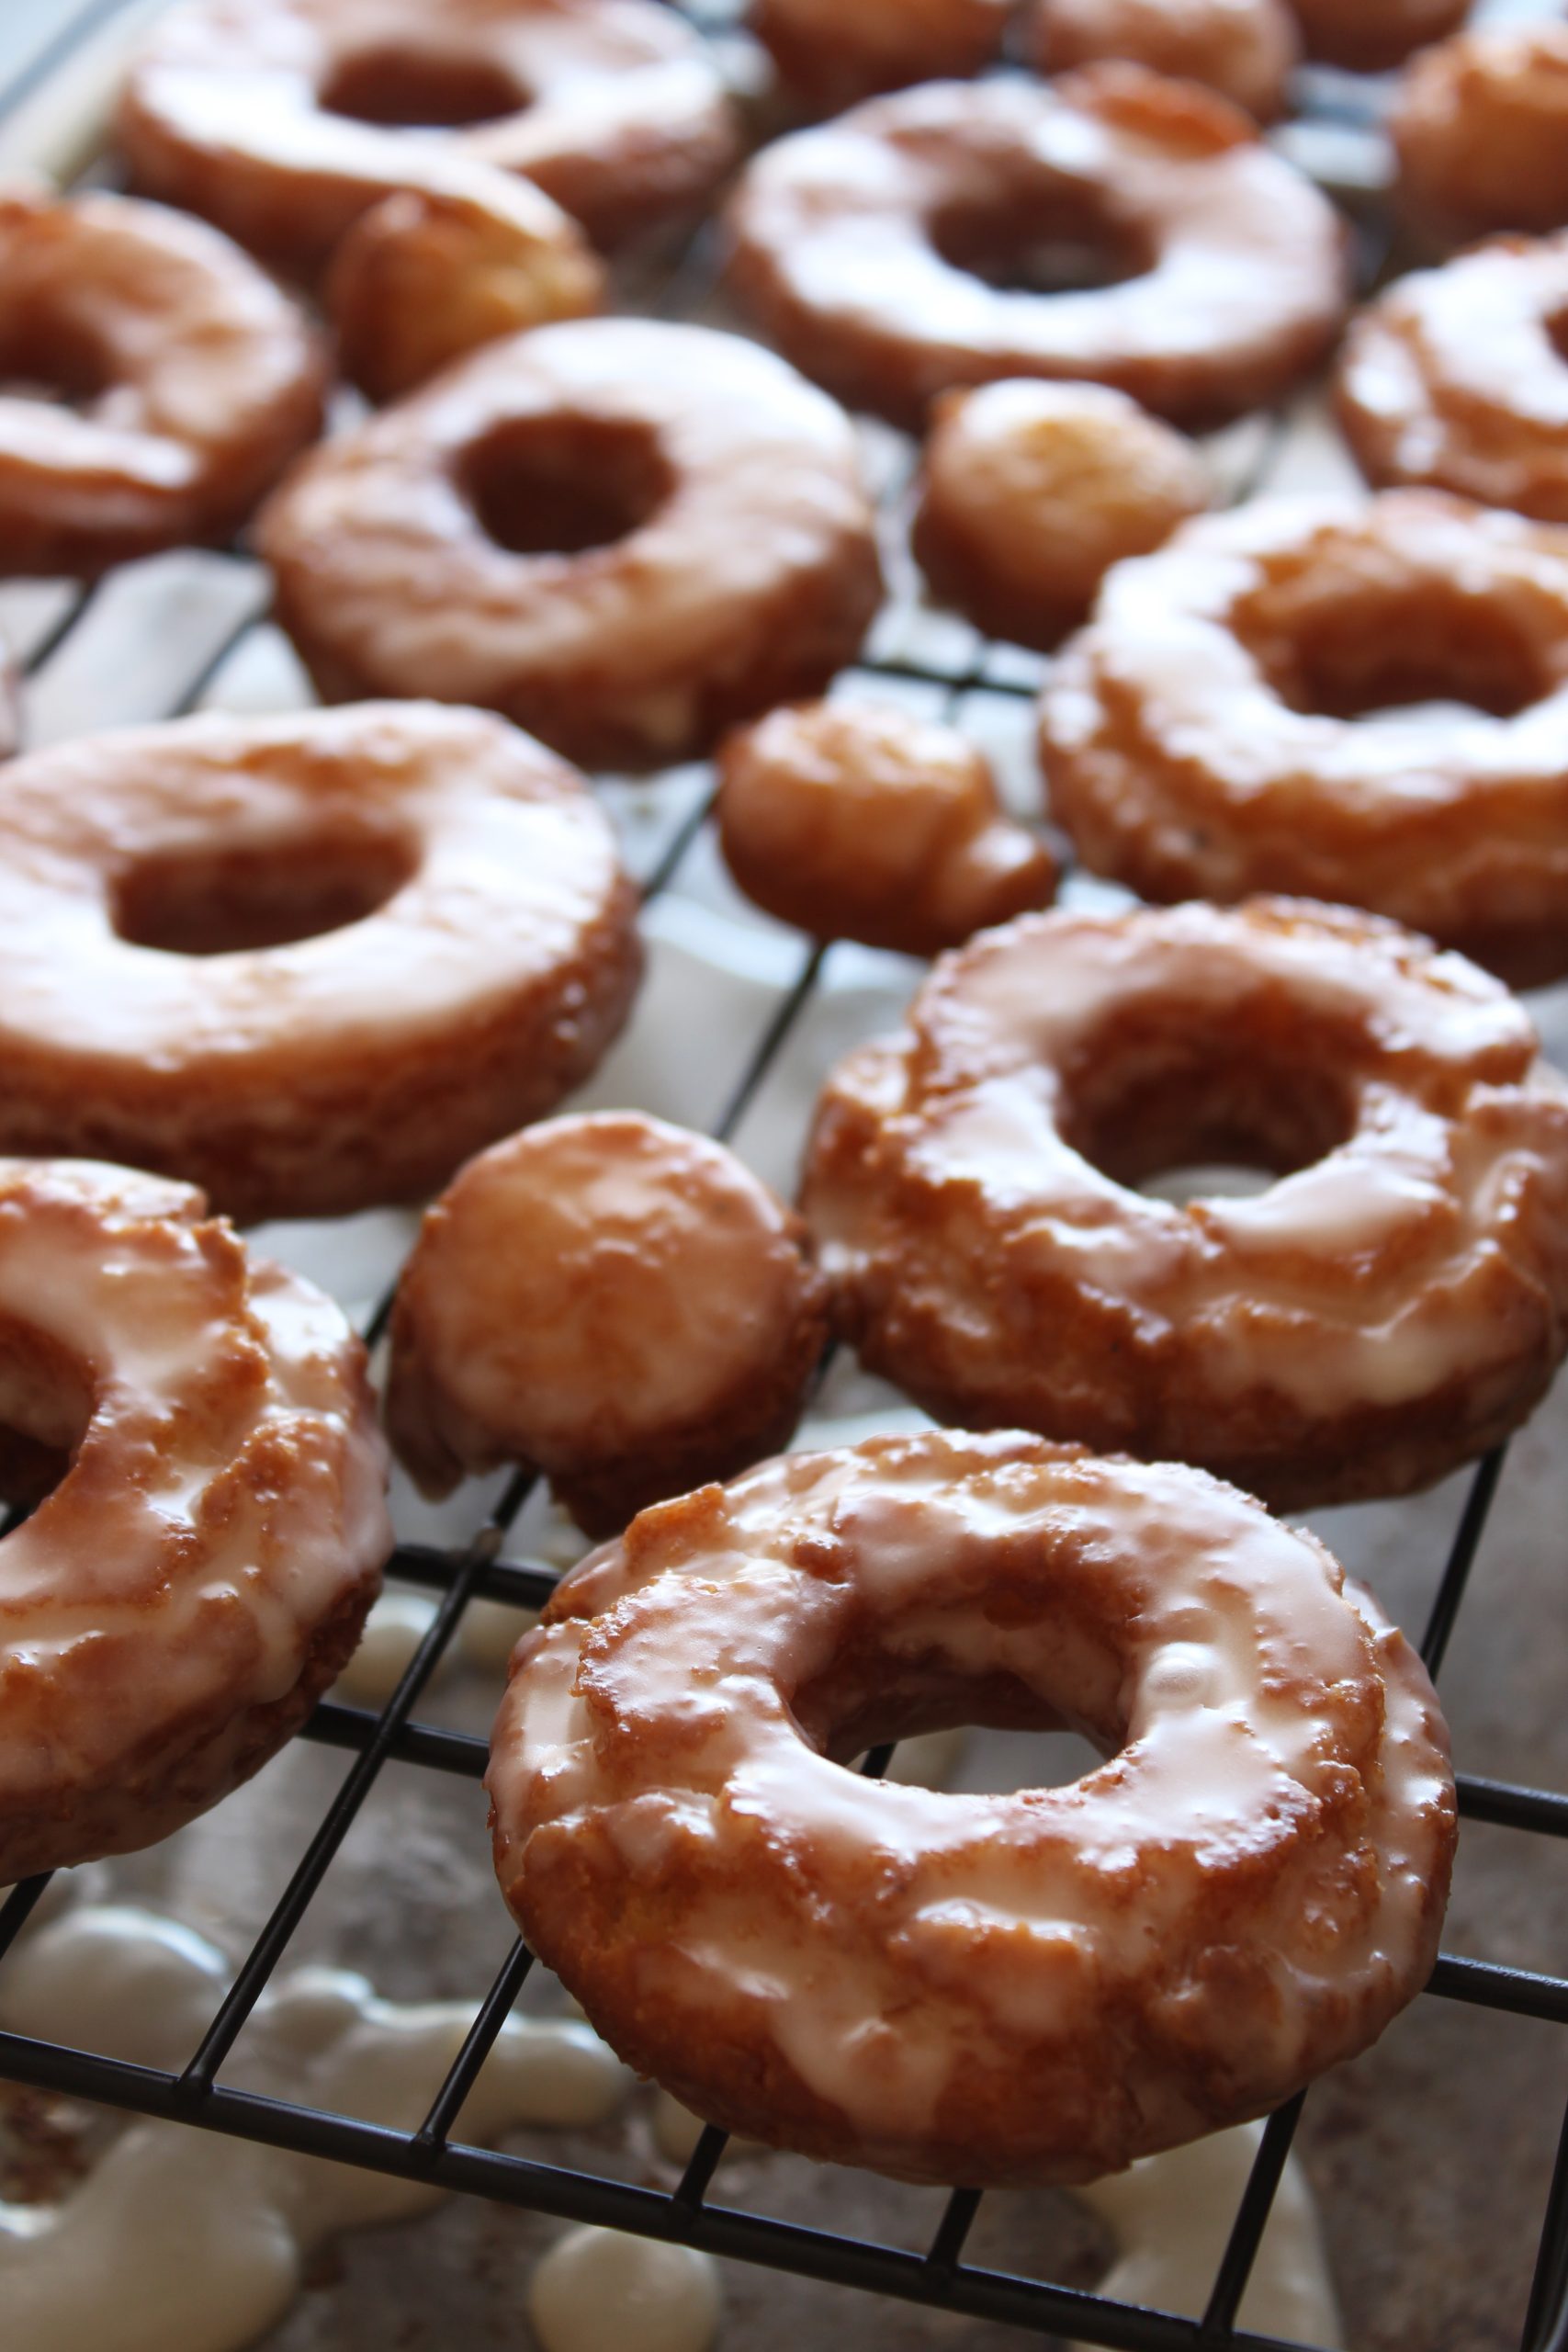
I noticed in the picture that some of the doughnuts in the second row that are out of focus are missing some cracks on the surface. Is there any tips on how to get cracked surface just like the sour cream doughnuts you find at the store? Thank you!
Thank you! The cracks mostly depend on the temperature of your oil. When it’s at the perfect temperature the cracks should occur. Unfortunately unless you have an electric fryer, it’s pretty difficult to maintain perfect oil temperature while frying multiple batches.
I made these today. I followed the recipe exactly except that I kept the dough in fridge for 2 days before rolling and frying. Everyone seems to be enjoying them, I think the two days in the fridge did dry the dough out a little bit. We are going to make them again and this time I’ll substitute a little bit of lemon juice for water in the glaze and add a bit of zest. Then next time, maybe orange. Then maybe some cinnamon in the dough instead of nutmeg….
Ah, yeah 2 days probably did dry the dough out a little. Love your flavor ideas! Be sure to come back and let us know which ends up being your favorite 🙂