Tessa’s Recipe Rundown
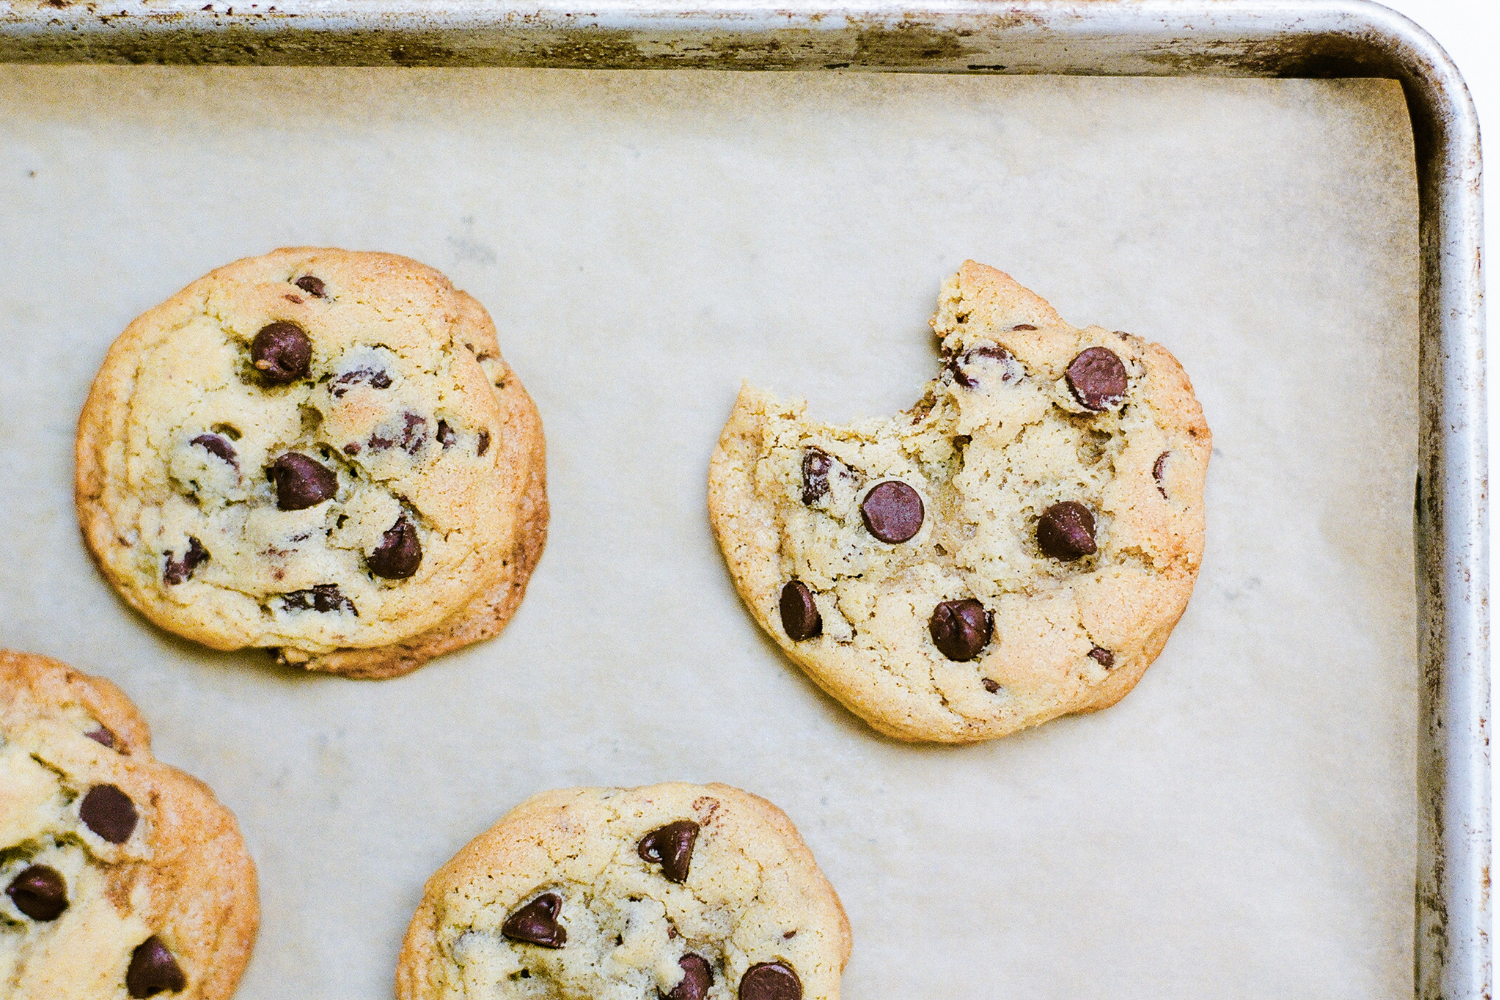
Taste: Big butterscotch flavor without being too sweet. These cookies taste how you imagine a chocolate chip cookie should taste!
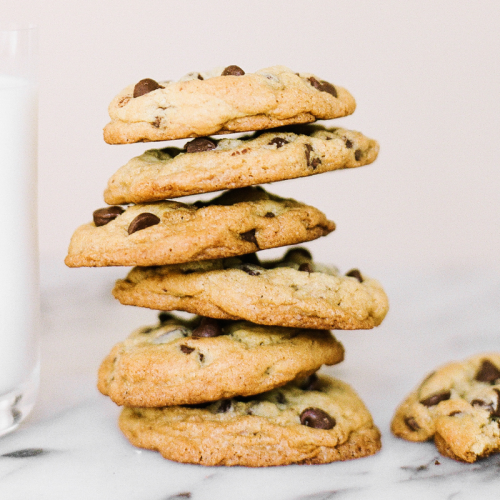
Texture: The best part! These babies are big, thick, super chewy yet soft on the inside, and crisp at the edges. Perfection!
Ease: Very easy, though I do use two different flours and there is a chilling period so patience is involved. You can make a double batch, shape the dough into balls, chill for a day or two, then freeze the balls. Bake when the cookie cravings come!
Pros: My all-time favorite cookie recipe.
Cons: None.
Would I make this again? A thousand times yes, I’ve made this recipe countless times and have extra dough stashed in the freezer at all times.
This post may contain affiliate links. Read our disclosure policy.
I’m super duper excited to share with you my Ultimate Chewy Chocolate Chip Cookies complete with a video to show you exactly how they’re made.
This is a perfect recipe to learn some of the basics of the science of baking because with cookies it’s so easy to see how different tweaks impact the final result!
If you’re anything like the hundreds of people who have taste tested and tried this recipe, you’re going to love it! (Just read some of the comments below!)
Be sure to check out my Ultimate Guide to Chocolate Chip Cookies before you make these!

You may be asking yourself, what makes this recipe the “ultimate?” Well, these cookies have HUGE butterscotch flavor, which is exactly what I adore in a chocolate chip cookie. Beyond the flavor is the texture, which is nothing short of incredible.
These cookies have my version of the ultimate texture combination: thick, super chewy, soft, and a little gooey in the middle, crisp and slightly crunchy at the edges, with gooey chocolate chips throughout. Does anything get better than that? I don’t think so. I would want these cookies to be a part of my last meal on earth, that’s how much I love them!
How to Make Chewy Chocolate Chip Cookies
Do you remember my Ultimate Guide to Chocolate Chip Cookies Part 1 and Part 2? That is where I discovered ALL the secrets to making my version of the best chocolate chip cookie.
Why This is the Ultimate Chocolate Chip Cookie Recipe
- This recipe utilizes half bread flour, which lends chewiness to the cookies.
- It also uses a good amount of brown sugar, which lends that butterscotch flavor and thick and soft texture.
- The extra egg yolk in this recipe also helps keep these cookies soft yet chewy and adds richness in flavor.
- You can think of the 24 – 72 hour chilling period as a “marinating” period. The flavors intensify and the texture will become thicker and chewier. It’s pretty amazing.
Do I Really Need to Use Bread Flour?
You don’t absolutely HAVE to use bread flour, but it adds a ton of chewy texture to these cookies that’s worth the extra trip to the store. If you can’t get bread flour, then use all AP flour in its place.
Do I Really Need to Chill the Dough?
- The last key element is the 24 to 72 hour chilling period which is a huge pain in the butt, I know, but it is so completely worth it.
- The flavor and texture improve SO much as the dough chills!
- If you’re absolutely strapped for time, you can bake off some cookies as soon as the dough is done. But I’d definitely encourage you to try chilling and see all the wonders it works on your dough.
- Make the dough and scoop into balls using a cookie scoop. Place in an airtight container and place in the fridge for 24-72 hours. Bake straight from the fridge when ready. Learn more about chilling cookie dough here.
- The colder the dough, the thicker the cookies!
Can you Freeze Chocolate Chip Cookies?
I love cookies straight from the oven. I always keep pre-scooped balls of chocolate chip cookie dough in a resealable bag in my freezer so I can bake cookies off and have them warm from the oven in a matter of minutes whenever I want. Here are more tips for freezing cookie dough.
How to Keep Cookies Soft
- Most cookies can be stored in an airtight container at room temp for up to 3 days. Be sure they are completely cooled before storing.
- To keep your baked chocolate chip cookies soft, you can add an apple wedge, piece of bread, or a tortilla on the top and bottom of the cookies to the container a day or two after baking them, or whenever you find the texture starting to harden.
- The moisture from the bread or apple will migrate to your cookies, making them soft and chewy again.
- A tortilla is a new favorite of mine because it takes up much less room than a slice of bread, and doesn’t transfer any flavors or aromas like an apple wedge, and takes up almost no room!
How to Refresh Stored Cookies
If desired, reheat and refresh the cookies in a 350°F oven for 3-5 minutes. Your toaster oven should work just fine. This improves the texture, and there’s nothing like a warm chocolate chip cookie!
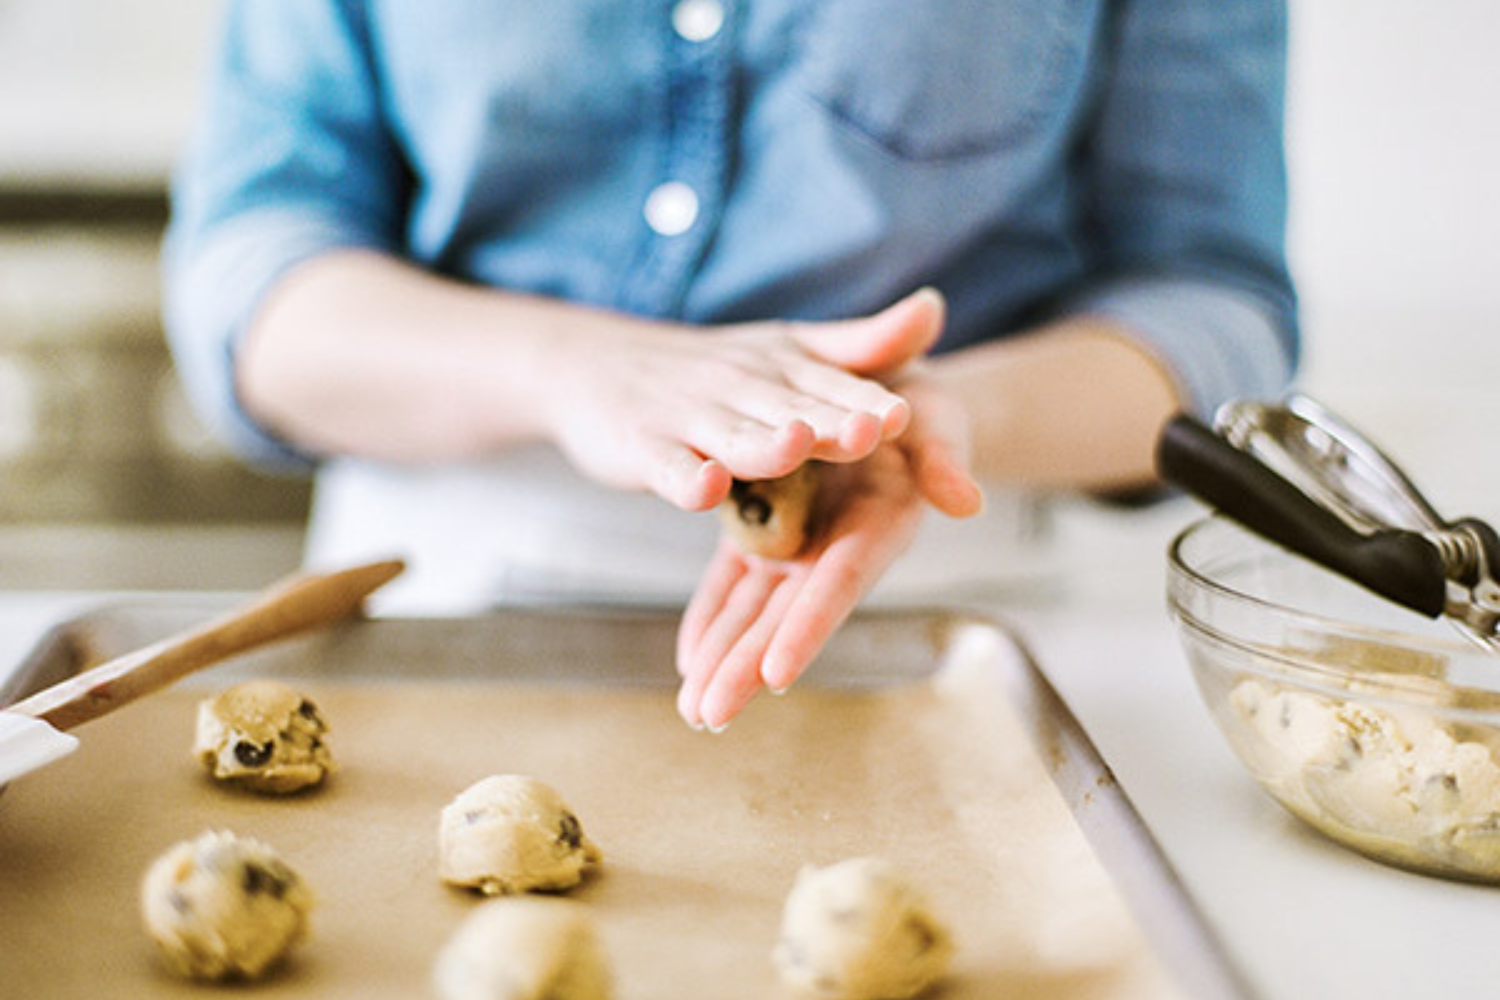
Step-by-Step Video
If you want to watch me demonstrate how to make this cookie dough LIVE, with all of my scientific explanations, tips, and tricks, check out this live Facebook video I did a while back!
More Chocolate Chip Cookie Recipes:
- Bakery Style Chocolate Chip Cookies (one of my most popular recipes!)
- Oatmeal Chocolate Chip Cookies
- Chocolate Chip Cookie Cake
- Soft Double Chocolate Chip Cookies
- Giant Reese’s Pieces Peanut Butter Cookies
See ALL of my chocolate chip cookie recipes + tips & insights into the SCIENCE of cookie baking here!
Ultimate Chocolate Chip Cookies
Ingredients
- 1 1/2 cups (191 grams) all-purpose flour
- 1 1/4 cups (159 grams) bread flour
- 1 teaspoon baking soda
- 1 teaspoon baking powder
- 1 teaspoon fine sea salt
- 2 sticks (227 grams) unsalted butter, at cool room temperature
- 1/2 cup (100 grams) granulated sugar
- 1 1/4 cups (250 grams) lightly packed brown sugar
- 2 teaspoons vanilla extract
- 2 large eggs plus 1 egg yolk, at cool room temperature
- 2 cups (340 grams) semisweet chocolate chips
Instructions
- If baking right away, preheat oven to 350ºF. Line baking sheets with parchment paper.
- In a medium bowl, whisk together the flours, baking soda, baking powder, and salt.
- In the bowl of an electric mixer, beat the butter, granulated sugar, and brown sugar on medium-high speed until light and fluffy, about 2-3 minutes. Add the eggs and yolk, one at a time, beating well after each addition. Add the vanilla. Slowly beat in the flour mixture. Stir in the chocolate chips.
- Using a large spring-loaded cookie scoop, divide the dough into 3-tablespoon sized balls.
- If time permits, wrap dough balls in plastic wrap and refrigerate for at least 24 hours but no more than 72 hours. This allows the dough to “marinate” and makes the cookies thicker, chewier, and more flavorful.
- When ready to bake, place dough balls on prepared baking sheets, at least 2 inches apart.
- Bake for 12-15 minutes, or until golden brown. Cool for 5 minutes before removing to wire racks to cool completely.
- Although I prefer cookies fresh from the oven, these can be stored in an airtight container for up to 3 days. See pink tip box above the recipe for storage tips.
This recipe was originally published in October 2013 and updated in 2021 with more baking tips and new photos. Photos by Constance Higley.








Hi if I want to double the recipe do I double the ingredients as well or are there any chnages in measurements
Hi Berna! Yes, you’ll need to double all ingredients. Just make sure your electric mixer is large enough to hold two batches and you should be good to go! Enjoy 🙂
can you add walnuts to this recipe I love walnuts in my cookies.and will it make it dry if I add nuts to the recipe
Hi Wanda! Sure, you can add walnuts! I would just recommend keeping the total weight/volume of chocolate chips and nuts about the same as the chocolate chips listed in this recipe (so 340 grams total), to keep the ideal texture. I also recommend lightly toasting the walnuts and cooling them before adding to your dough – this brings an amazing depth of flavor! Let us know what you think when you have tried these cookies! Happy baking
Hello,
I made the cookies and were amazing, just have one question, i refrigerated them for 24 hours and went straight to the oven, or is it better to let them sit a couple of minutes at room temperature, and after bake them? thanks
Hi Paulina! So glad to hear that these cookies were delicious 🙂 We typically prefer to bake them while still cold whenever possible, as this helps create a thicker cookie. Learn more about the process here!
What are the key differences between this chewy chocolate chips recipe and your bakery style chocolate chips cookies recipe?
Hi Farah! The key difference is simplicity! The Bakery Style Chocolate Chip Cookies were designed to be easy, simple and quick – so they use ingredients many bakers will already have in their home, for ease and the quickest cookies possible! The Ultimate Chewy Chocolate Chip Cookies, however, involve slightly more complex ingredients (such as bread flour, plus additional leavener and an extra egg yolk). These ingredients maximize chewiness, but you may not have them readily on hand. They’re both absolutely delicious cookies, and I highly recommend trying both, to see which you love more! I also recommend reading through all of Tessa’s wonderful tips, tricks and information in the pink tip box, above the recipe on each page. I hope that helps! Happy baking 🙂
I’d like to have batches of pre-measured dry ingredients in separate mason jars for each ultimate cookie recipe, where all I have to do is add the wet ingredients. Would this affect the recipe? This would make quick work of making cookies for me.
Hi Donna! While you can certainly do that with the dry ingredients, I wouldn’t recommend adding the sugars in there – this article will explain why in better detail than I can in this space 🙂 Let us know if you have any questions 🙂
Outstanding recipe! Made these for Christmas and a birthday and the result was beautifully crisp on the outside and chewy on the inside. I used a GF blend of white rice flour, buckwheat flour, arrowroot and tapioca starch.
Love this formula. I use it as a base for all of my CC cookies.
I add a 1/2 tsp of ghost pepper chili sauce for that “mild” chili-chocolate flavor. I use ghost pepper because the mild heat starts in the back of your mouth and works forward whereas other peppers the heat starts at the teeth.
I’ve also used Ande’s mints in a ratio of 80:20 with semi-sweet mini chips. this is where the question comes in, The Ande’s mints create a flatter cookie and I believe that is because of an ingredient in the Ande’s mint.
I did do a batch of espresso chips and found that they were too much coffee taste, and I’m a coffee lover, maybe do what I did with the Ande’s and go with an 80:20 maybe 75:25 ratio with the semi chips.
So my awesome friend Peggy made these and posted her pictures on facebook to which I immediately loved and asked for the recipe. I consider myself a pretty good baker, but chocolate chip cookies always bomb in my kitchen (and I’ve lived in 2 houses so I know its not some bad mojo in the kitchen ;)). Peggy shared the recipe and I immediately got to work to let them marinate and be able to bake them Thanksgiving morning. While they didn’t look quite as appealing as your pics above, they were delicious!!!! My daughter’s 10th birthday is coming up and she always likes to challenge me with baking her favorite sweet treat for dessert. Since that’s under a month away she’s already obsessing and was going through different treats for her choices until she remembered the cookies. It was full-on googly eyes when she said “not that…make those cookies Mom! ohhhhhh my God, please make the cookies!”.
Many thanks for this recipe and ALL the tips about how the different ingredients impact the appearance and texture (I’m a scientist so I really enjoyed reading that stuff too!).
Aww, that’s so sweet and wonderful to hear, Missy! So glad these were such a hit for you and we are thrilled that your daughter enjoyed them so much!!
Okay, dedicated myself to this recipe-
I have made it now on two occasions- identical methods but the first time I “marinated”‘the dough for 72hours before baking and the second time only 24 hours.
ABSOLUTELY blown away by the 72 hour cookies- they were significantly more flavourful and tender/chewy. When I go to make this in the future it will forever and always be a 72hour marination period because it’s that worth it. These are beautiful cookies as well! Thank you Tessa 🙂
So happy you enjoyed these so much, Emily! We love the 72-hour marinated cookies SO much too!! 🙂
I was disappointed with this recipe. I was looking for a recipe that was chewy on the inside and crispy on the edges.It was not crispy on the edges like it said. The ingredients were in room temperature like stated. I use the highest quality vanilla yet the cookies still lack taste. I used See’s candy semi sweet chocolate chips which are very high-quality.I chilled the dough for 48 hours. ( I studied in culinary school.)
These cookies taste wonderful but they seem very greasy. They leave grease on your hand when eating them. I weighed the butter and all of the other ingredients. Any thoughts on why that might be?
Hi Nancy! There are a couple possibilities here! Firstly, was your butter possibly a bit too warm when you started? If butter is too warm when creamed, this can change the entire structure of the cookie! We recommend about 67°F most of the year, but even 65° might be better if your kitchen is a bit hot this time of year! Tessa talks more about this in this article here! Alternatively, perhaps your oven is a little cool? If your oven is running cooler than it says, it may have caused some of the butter to leak out before they could set and fully bake! Tessa talks more about that in this article on ovens here! Please let me know if you wish to troubleshoot further – we are always more than happy to help!! 🙂
Kiersten, Thank you so much for all of your helpful information. Using an oven thermometer, it is registering between 350 and 375 degrees. You’re saying that if my oven is running cool this might cause the greasiness. What about if my oven is running say 12 degrees hotter and if so, is that enough to make a difference in the end result. I’m noticing that my cookies are getting medium golden brown but when breaking it in half, center almost seems underbaked; not raw but very soft even after baking them for the full 13 minutes. When they’re cool, the center of the cookie is a deeper color brown. I’ve noticed that different color on all of the cookies I’ve been baking lately. Frustrating. LoL
Hi Nancy! If the oven is too hot, that could be why your cookies are getting so golden on the outside, but seem underdone in the middle. I would recommend trying to adjust the temp down a little, so your oven thermometer registers at the temperature specified in the recipe. I also still think the greasiness may be caused by butter that is a little too warm, as Tessa discusses in the article I linked to previously. Another thing to look at could be the type of pan you’re using to bake your cookies on. Different materials of pans conduct heat differently, so some will cook the bottom quickly, and not leave the cookie appropriate time to spread out gently and evenly. Tessa discusses and shows the differences between a variety of baking pans, and how their metals change the baked result, in this article here! Lastly, I just want to mention your leavening agent. If your baking/soda powder are not fresh, they won’t do their jobs and your baked goods can not rise properly, fall after baking, brown too much or too little, and much more. Tessa talks about the science behind leavening agents, and how to test for leavener freshness, in this article here! Hopefully something here helps! Feel free to reach back out to us with any further questions – we are always happy to help!! 🙂
Hi , Love your Chocolate chip cookie recipe. My husband thinks jt’s the best chocolate chip cookie He’s ever tasted. I do have a question, though. I have been wanting something different like a white chocolate and cranberry cookie. Do you think that the dough in your chocolate chip cookies could be altered to make white chocolate cranberry cookies? I do not want it incredibly sweet, but thought the “base for the CC cookie might be suitable for a white chocolate, cranberry cookie (possible with macadamia nuts). If it can be done, would there need to be any alteration for the other incredients?
Hi Judy! I’m so happy to hear that you and your husband love these cookies! I definitely think you can try this cookie as a “base” for other types of cookies! I would just recommend keeping the total weight of your white chocolate/cranberries/macadamia nuts about the same as the chocolate chips in this recipe (so 340 grams total), and experiment from there if you wish. The base of this cookie is pretty versatile, so I believe it should work well for pretty much any other flavors and mix-ins your heart desires! Let us know what you think when you have experimented! Happy baking! 🙂