


Tessa’s Recipe Rundown
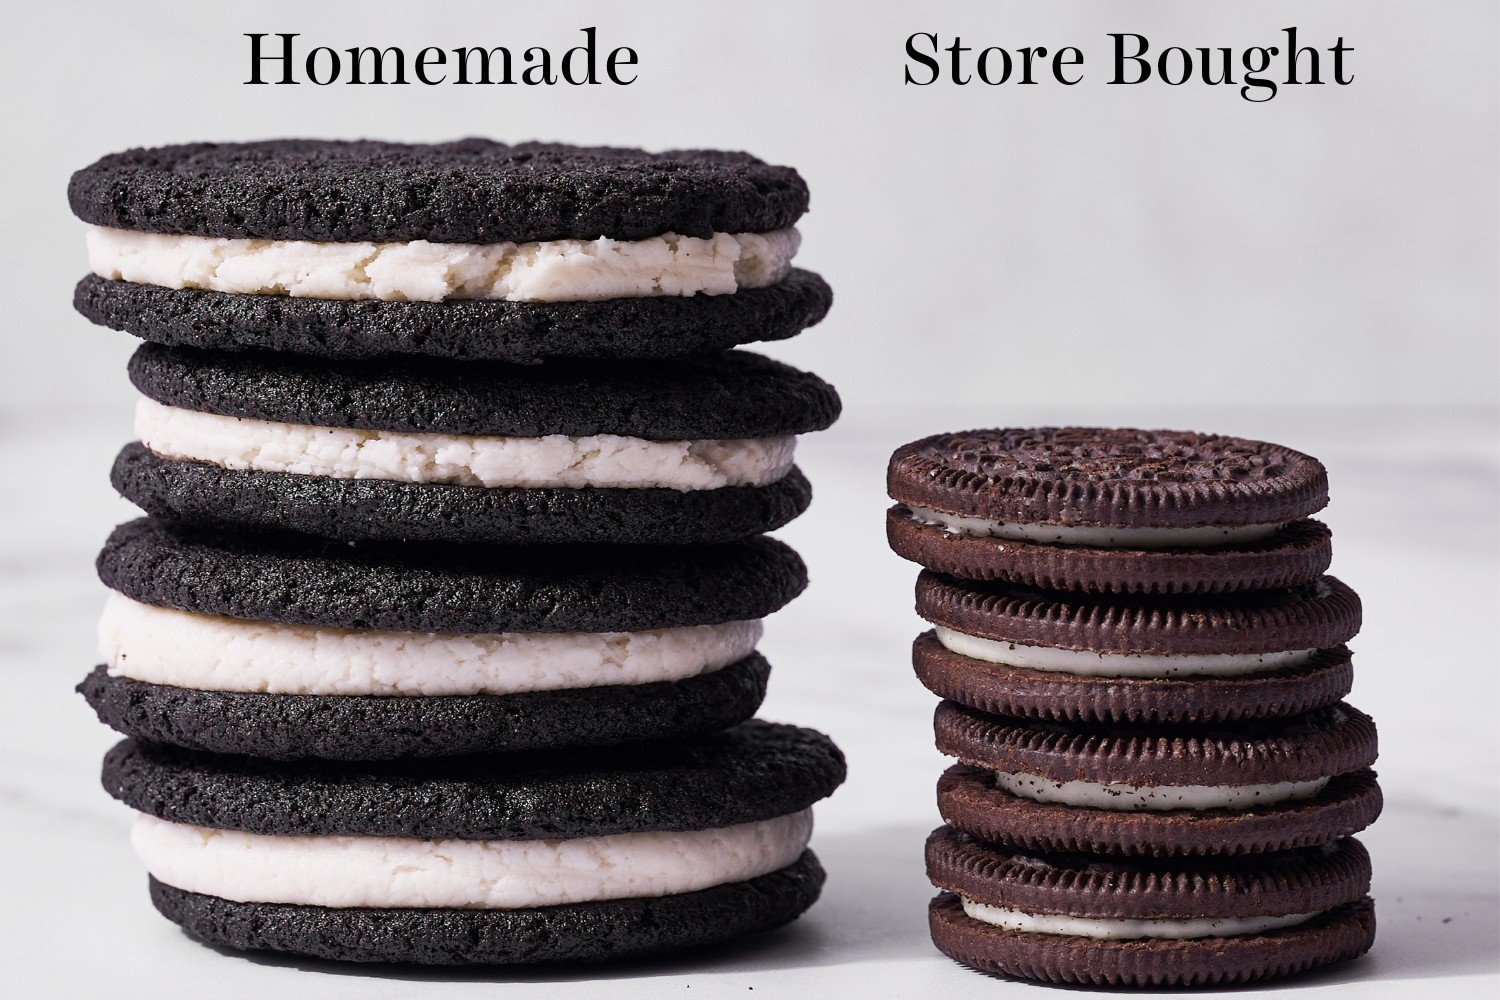
Taste: Surprisingly very much like a store-bought Oreo cookie sandwich – but better! Plus, you get to be in control of how much filling you want 😉
Texture: The texture of the cookie is pretty similar to store-bought Oreos, just a little bit softer and chewier, yet still with a satisfying snap and crunch.
Ease: The electric mixer and/or food processor do most of the work. Filling and assembling takes a bit of hands-on time, but is completely doable!
Why You’ll Love This Recipe: The perfect back-to-school or after-school treat!
This post may contain affiliate links. Read our disclosure policy.


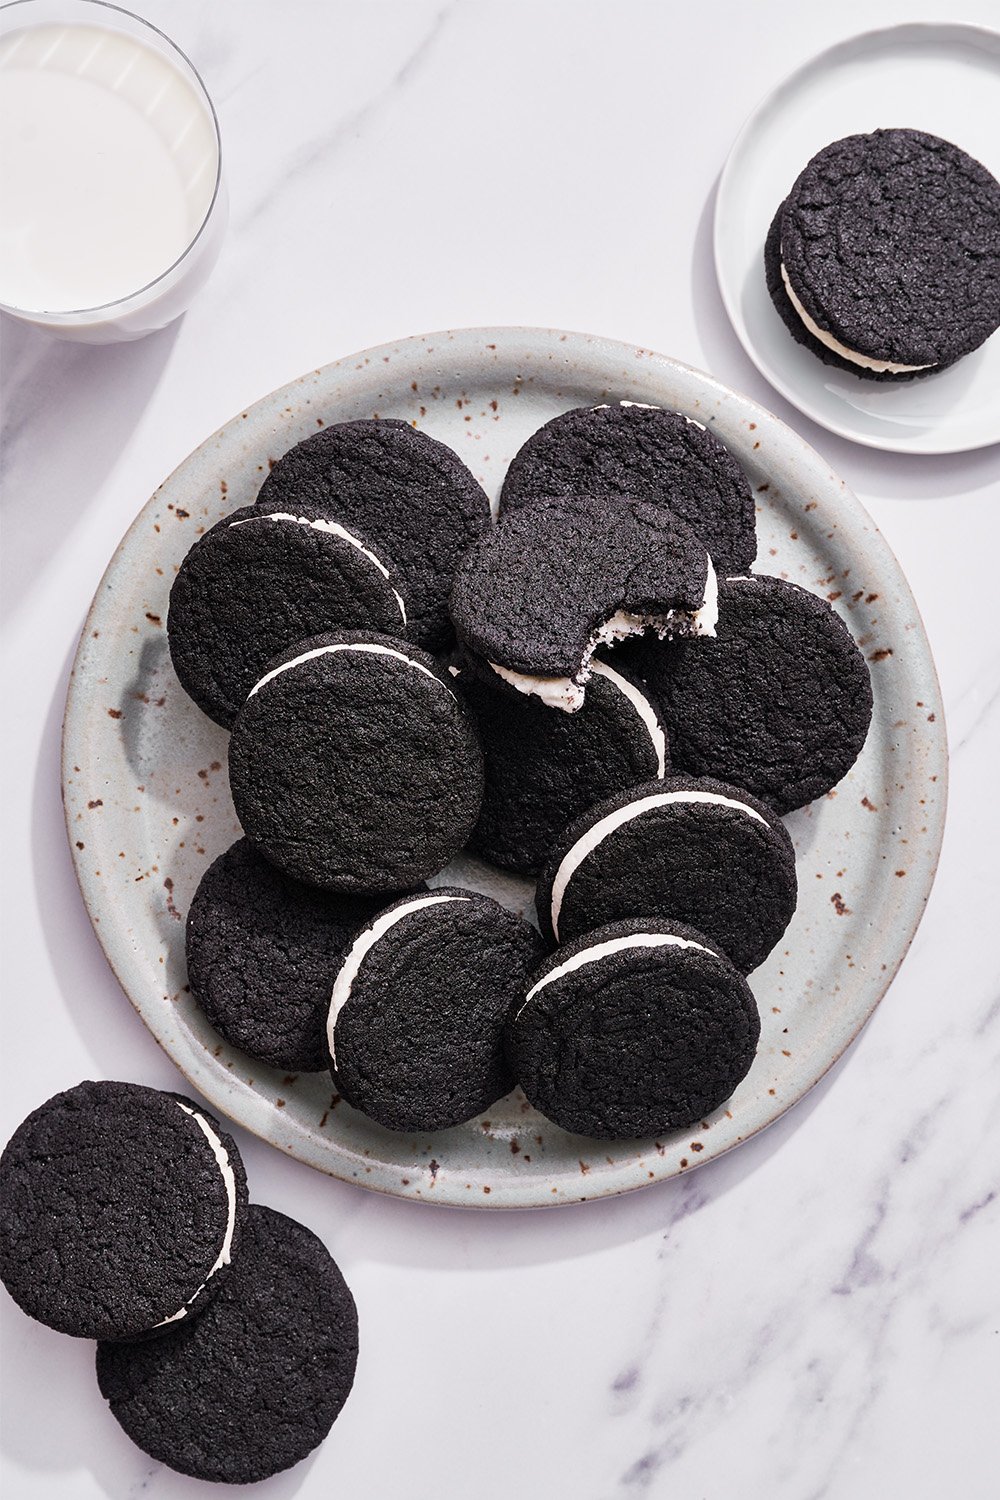
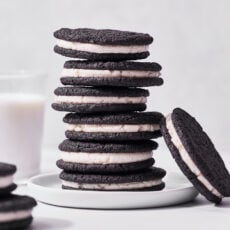
I’m so excited to share this recipe for the BEST Homemade Oreo Cookies. Let me just say, these copycat Oreos taste about a million times better than the store-bought kind!
It took some tinkering and adjustments in the Handle the Heat test kitchen, but we nailed it!
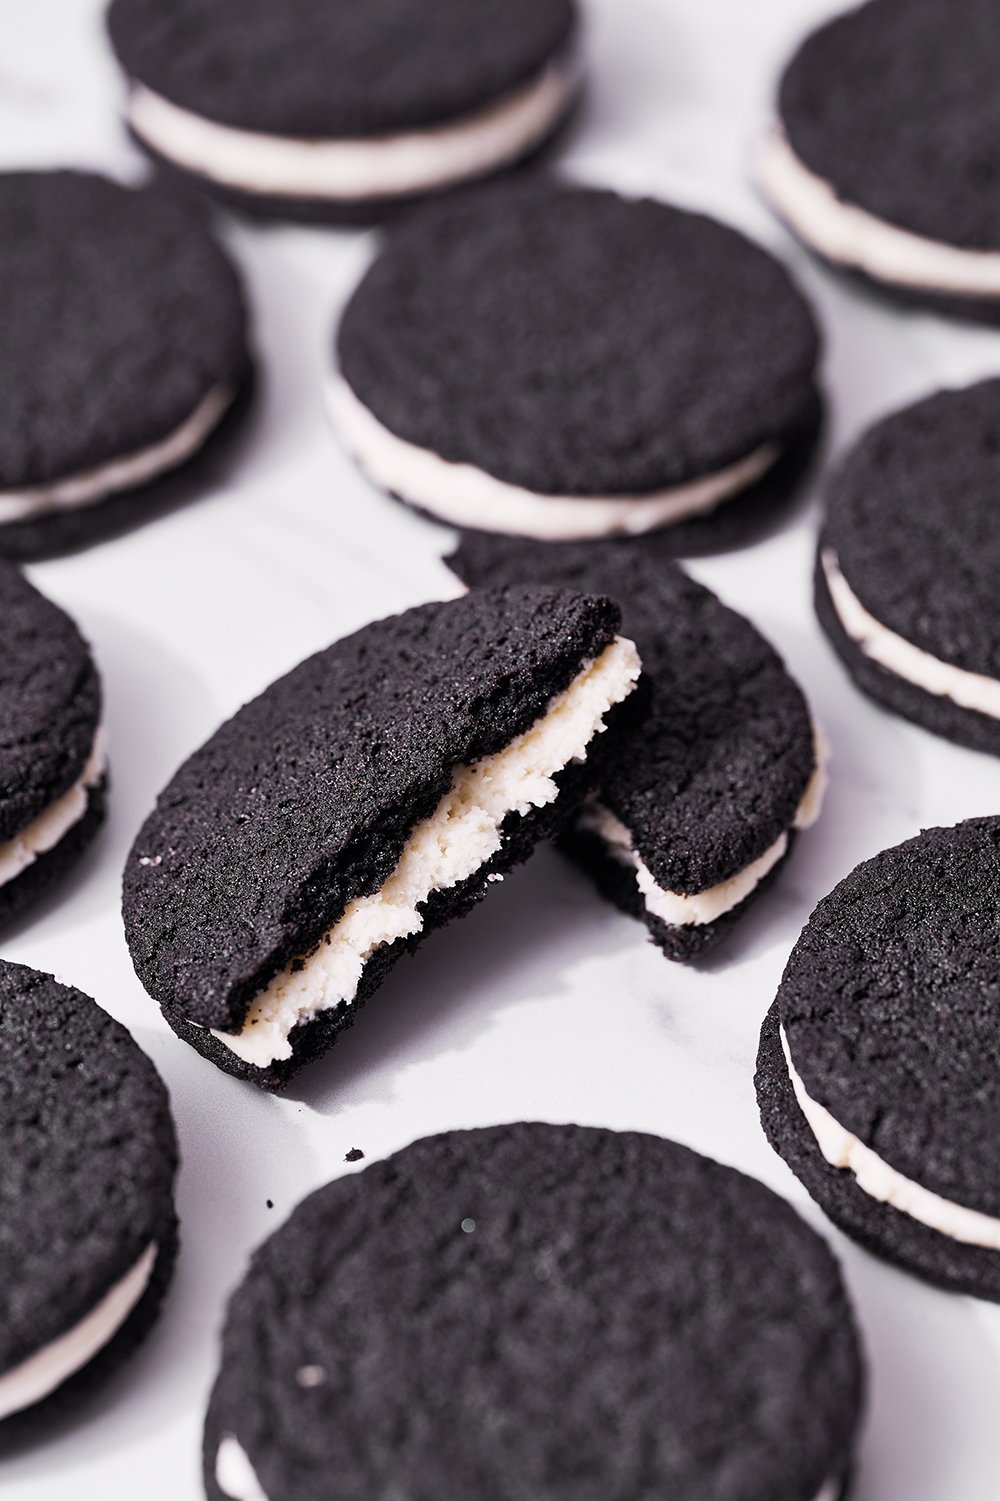
Perfectly crunchy chocolate cookie. Delicious cream filling. All made from scratch, ready in under an hour (no cake mix here!).
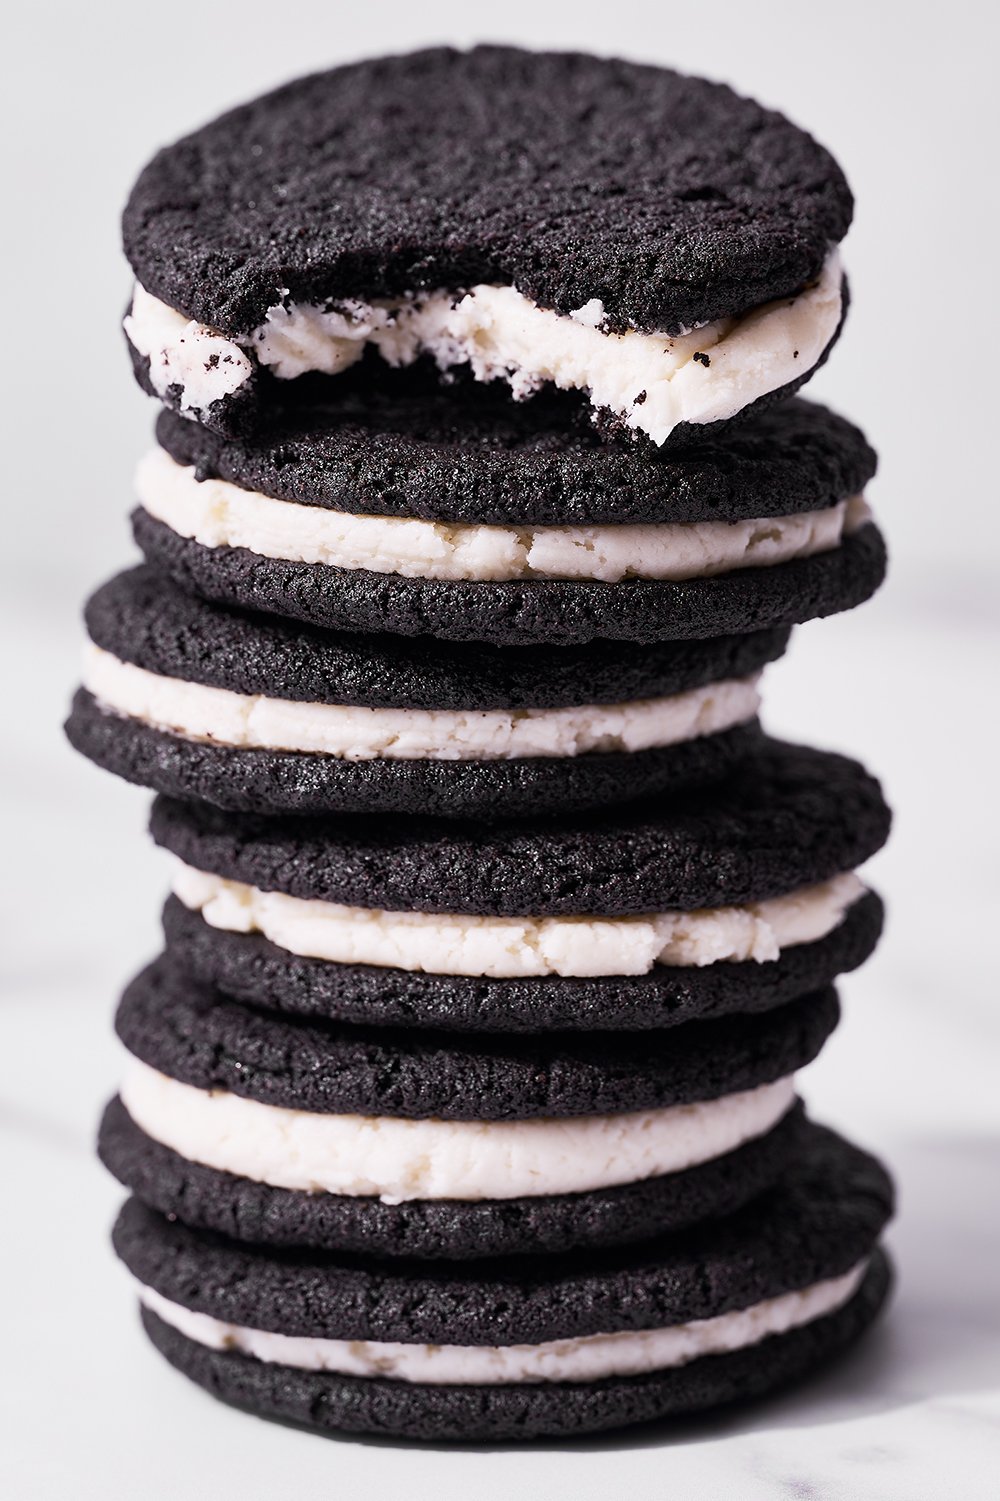
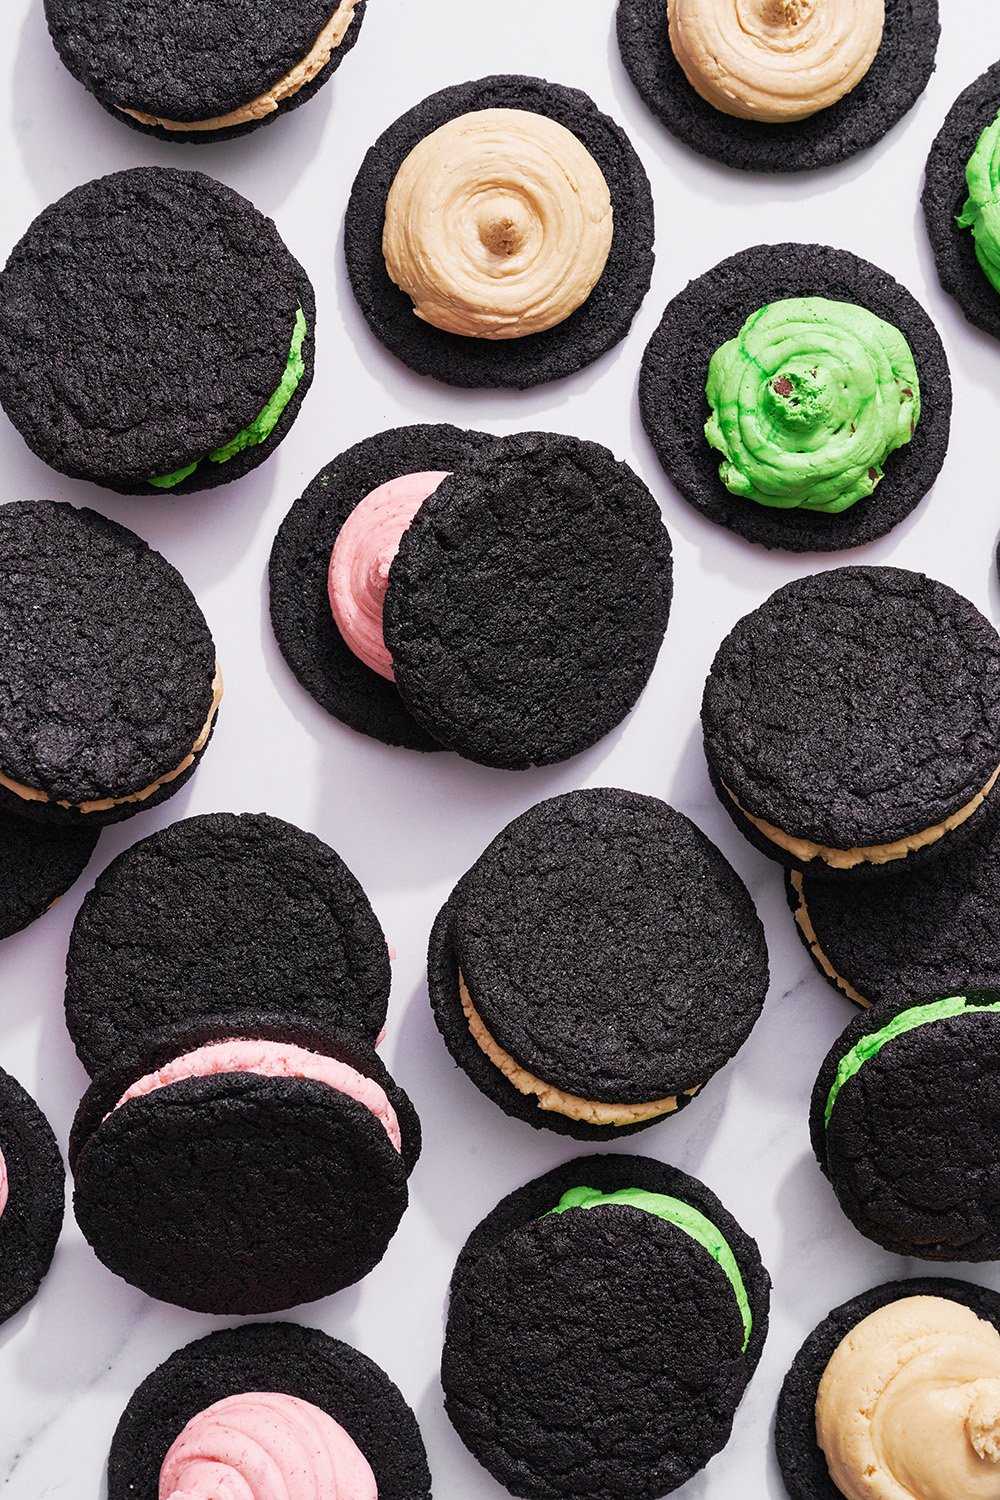
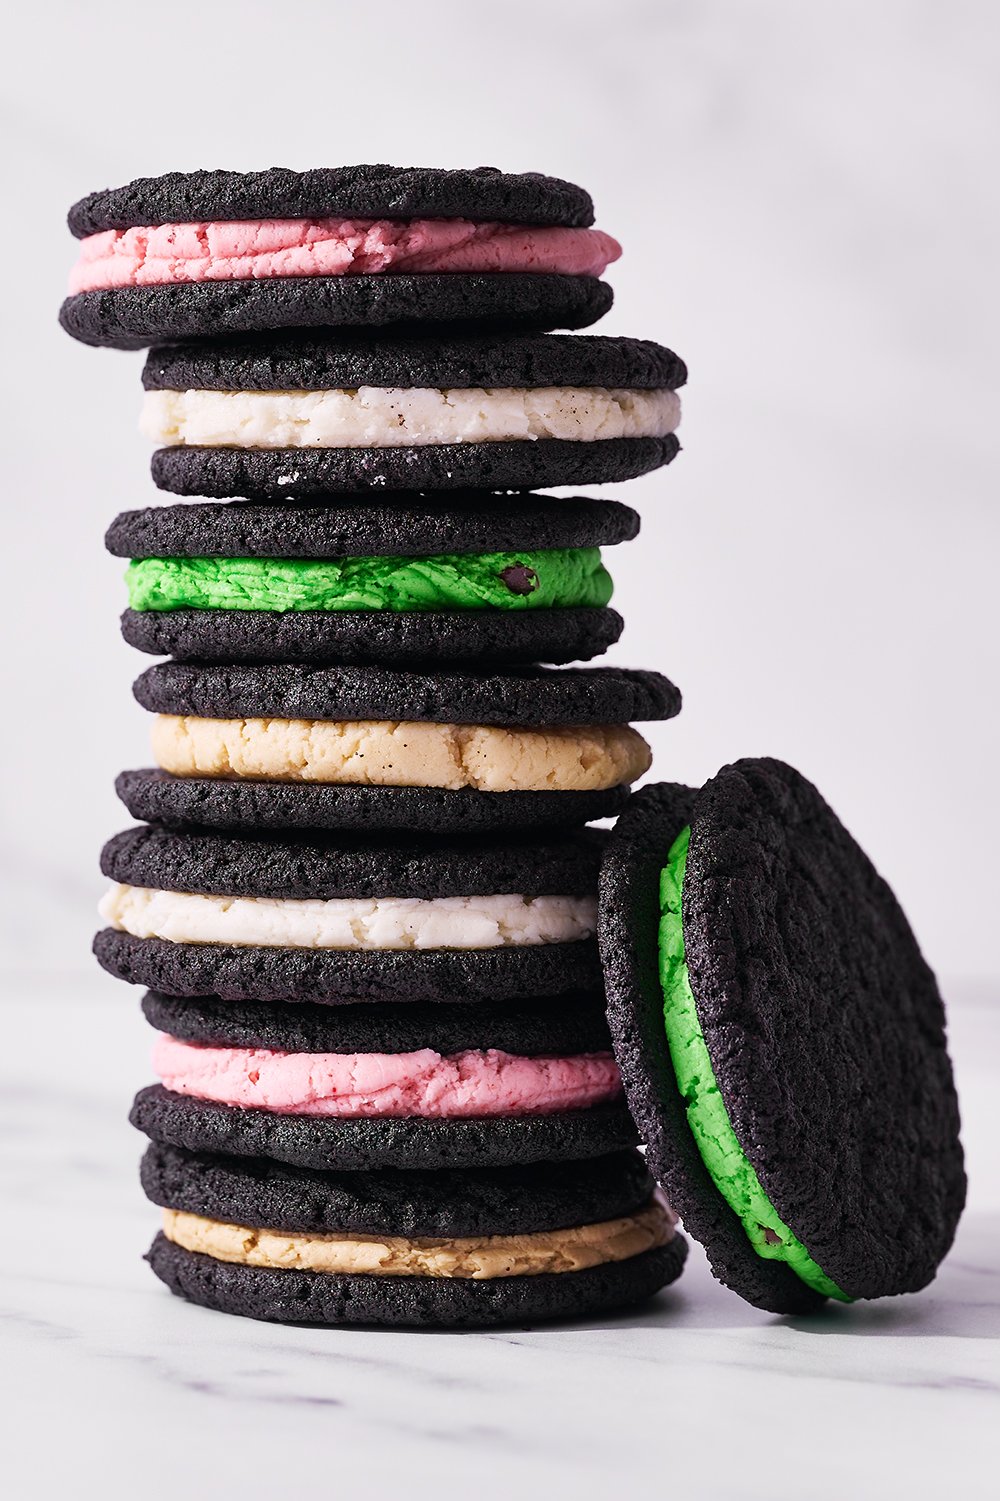
The best part? You can add as much filling to each sandwich cookie as you want – AND you can get creative with the filling flavors!
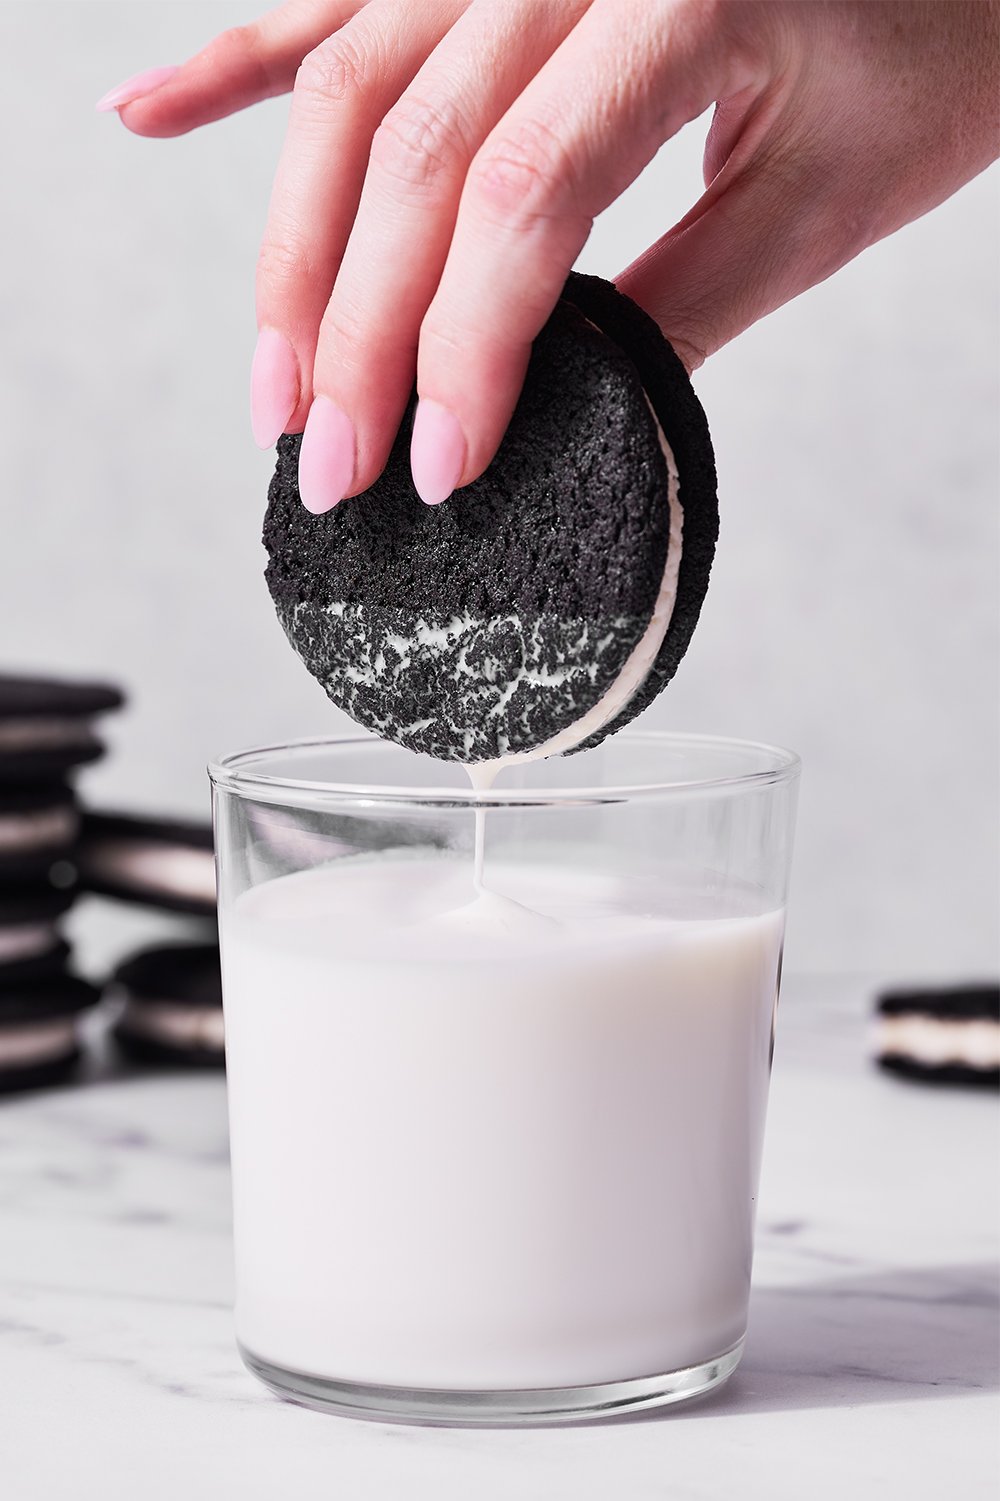
Pour yourself a glass of milk and enjoy these homemade Oreo sandwich cookies!
Tips for Perfect Homemade Oreo Cookies:
- Weigh Your Ingredients: Be sure to measure your ingredients correctly – particularly your flour and cocoa powder. I highly recommend using a digital kitchen scale, but if you don’t have one, use the spoon-and-level method. If you add too much flour, you may end up with chewy or flavorless Homemade Oreos instead of cookies with a perfectly crunchy texture with a snap to them.
- Don’t Reduce the Sugar: Sugar is essential to any cookie recipe! In this recipe, sugar is not only needed as a flavor enhancer, but to allow the cookies to spread and develop crispiness. Learn more about sugar’s role in baking cookies here.
- Make Sure Your Leaveners Are Fresh: Your baking soda and baking powder must be fresh for these cookies to spread and crisp as they should. Leaveners can actually lose their effectiveness before the date printed on the can. Learn more about the differences between Baking Powder vs. Baking Soda, and how to test for freshness here.


What Kind of Cocoa Powder is in Oreos? Why are Oreos Black?
Packaged Oreo cookies contain Black Cocoa, which gives them their dark color and distinct, mild chocolate flavor. It can be difficult to source in stores, but purchased easily online.
You can also use Dutch-process cocoa, but note that using Dutched cocoa will change the color and flavor of your cookies. My favorite brands of Dutch-process cocoa powder are E. Guittard, Penzey’s, or Valrhona.

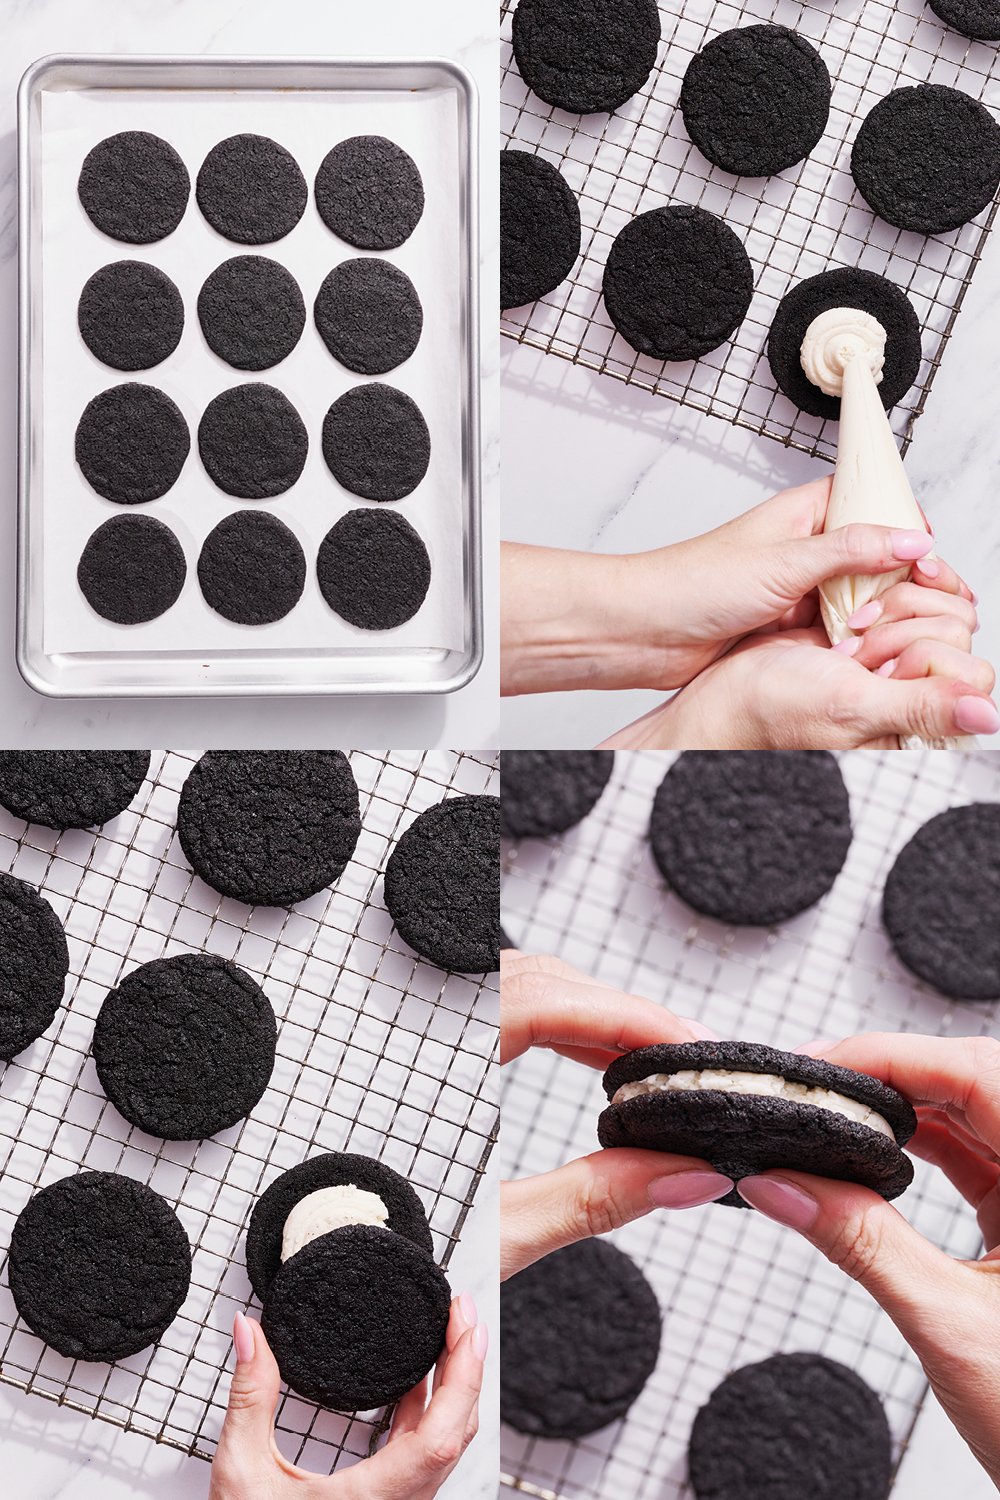
How to Make Homemade Oreos:
- Prepare the Oreo cookie dough.
- Portion the dough out into balls and bake.
- Make the Oreo cookie filling.
- Assemble the homemade Oreo cookie sandwiches and serve!
How to Make Double-Stuffed Oreos:
Increase filling to 1 tablespoon (or more, to your preference!) per cookie sandwich.
How to Make Smaller Oreos:
If you’d like to make your Homemade Oreos closer to packaged Oreo size, use a 1-teaspoon cookie scoop (or about 10 grams of dough for each ball), and continue following the instructions as written.
Storage & Make ahead
Room Temperature: Store unfilled cookies in an airtight container to make ahead of time. They will soften the longer they sit, especially if it’s humid.
Fridge: Store assembled cookies in an airtight container in the fridge for up to 2 days. Allow to soften for 5-10 minutes before serving.
Freeze: In an airtight container for up to 1 month. Defrost to room temperature before assembling the cookie sandwiches and serving.
Homemade Oreo Filling Variations
Choose your own Oreo adventure! Here are some different filling recipes for your version of the best homemade Oreos.

Peanut Butter Buttercream Filling
1 stick (113 grams) unsalted butter, at a cool room temperature
½ cup (135 grams) creamy peanut butter*
2 1/2 cups (313 grams) powdered sugar, sifted
1/8 teaspoon fine sea salt
2 ½ teaspoons pure vanilla extract
1 teaspoon of warm water, about 100°F

In the bowl of an electric mixer fitted with the paddle attachment, whip the butter and peanut butter for about 2-3 minutes on medium speed until light and fluffy. Scrape down the edges of the bowl with a spatula. On low speed, add the powdered sugar a ½ cup (63 grams) at a time to ensure that the powdered sugar has been fully incorporated. Once all the powdered sugar has been added, add the salt and mix on medium speed for 1-2 minutes. Lastly, add the vanilla extract and water, mixing until fully combined.
*Conventional peanut butter (like Skippy or Jif) is best, though natural peanut butter could be substituted if mixed really well.
Strawberry Buttercream Filling
1 stick (113 grams) unsalted butter, at a cool room temperature
2 1/2 cups (313 grams) powdered sugar, sifted
1/8 teaspoon fine sea salt
2 ½ teaspoons pure vanilla extract
3 tablespoons (0.4 ounces) freeze-dried strawberries (finely ground in food processor)
In the bowl of an electric mixer fitted with the paddle attachment, whip the butter for about 2-3 minutes on medium speed until light and fluffy. Scrape down the edges of the bowl with a spatula. On low speed, add the powdered sugar a ½ cup (63 grams) at a time to ensure that the powdered sugar has been fully incorporated. Once all the powdered sugar has been added, add the salt and mix on medium speed for 1-2 minutes. Lastly, add the vanilla extract and the freeze-dried strawberries, mixing until fully combined.
Mint Chocolate Chip Buttercream Filling
1 stick (113 grams) unsalted butter, at a cool room temperature
2 1/2 cups (313 grams) powdered sugar, sifted
1/8 teaspoon fine sea salt
2 teaspoons mint extract
1 teaspoon green food coloring, optional
½ cup (85 grams) finely chopped semi-sweet chocolate chips or mini chocolate chips
In the bowl of an electric mixer fitted with the paddle attachment, whip the butter for about 2-3 minutes on medium speed until light and fluffy. Scrape down the edges of the bowl with a spatula. On low speed, add the powdered sugar a ½ cup (63 grams) at a time to ensure that the powdered sugar has been fully incorporated. Once all the powdered sugar has been added, add the salt and mix on medium speed for 1-2 minutes. Add the mint extract and food coloring (if using), until just combined. Lastly, fold in the chopped chocolate chips with a spatula.
Espresso Buttercream Filling
1 stick (113 grams) unsalted butter, at a cool room temperature
2 1/2 cups (313 grams) powdered sugar, sifted
1/8 teaspoon fine sea salt
2 teaspoons espresso powder dissolved in 1 teaspoon hot water
In the bowl of an electric mixer fitted with the paddle attachment, whip the butter for about 2-3 minutes on medium speed until light and fluffy. Scrape down the edges of the bowl with a spatula. On low speed, add the powdered sugar a ½ cup (63 grams) at a time to ensure that the powdered sugar has been fully incorporated. Once all the powdered sugar has been added, add the salt and mix on medium speed for 1-2 minutes. Lastly, add the dissolved espresso liquid until just combined.
More Homemade Copycat Dessert Recipes:
- Cosmic Brownies
- Brown Butter Rice Crispy Treats
- Homemade Fudge Rounds
- Hostess Cupcake Cookies
- Milano Cookies
- Lofthouse Cookies
- Homemade Marshmallow Fluff
Check out all my Cookie Recipes here!
Email This Recipe
Enter your email, and we’ll send it to your inbox.
Ingredients
For the cookies:
- 1 1/4 cups (159 grams) all-purpose flour
- 1/2 cup
(43 grams) Dutch-process cocoa powder or Black cocoa powder* - 1 teaspoon baking soda
- 1/4 teaspoon baking powder
- 1/4 teaspoon fine sea salt
- 1 cup (200 grams) granulated sugar
- 10 tablespoons (142 grams) unsalted butter, at a cool room temperature, cut into chunks
- 1 large egg, at room temperature
For the filling:
- 1 stick (113 grams) unsalted butter, at a cool room temperature
- 2 ½ teaspoons pure vanilla extract
- 2 1/2 cups (313 grams) powdered sugar, sifted
- 1/8 teaspoon fine sea salt
Instructions
Make the cookies:
- Preheat oven to 375°F. Line two baking sheets with parchment paper.
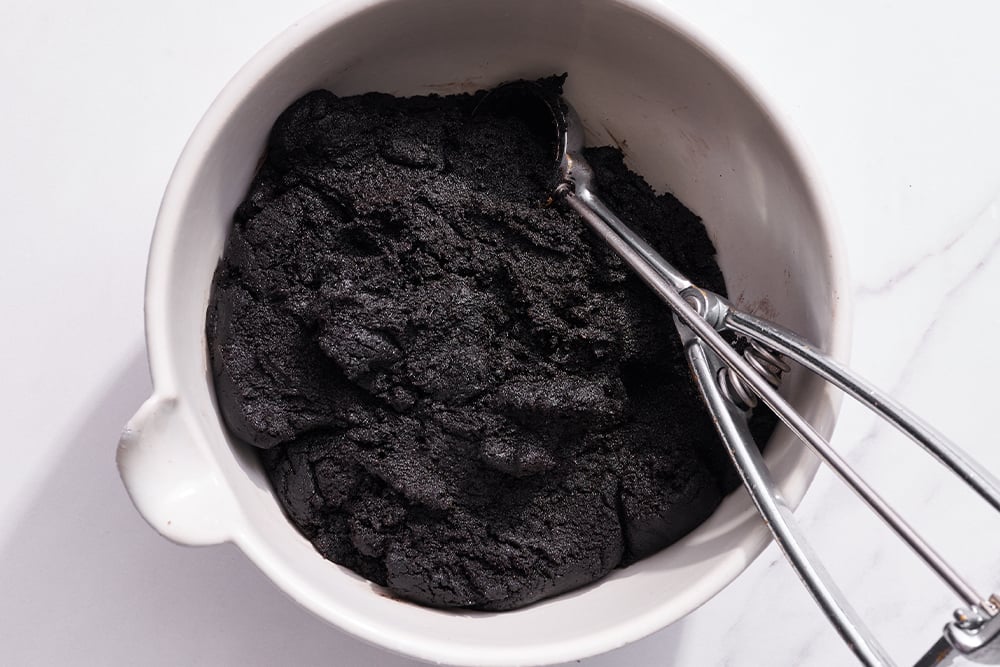
- In a food processor fitted with the S blade attachment or in the bowl of an electric mixer fitted with the paddle attachment, combine flour, cocoa powder, baking soda, baking powder, salt, and sugar. While pulsing, or on low speed, add the butter in several pieces at a time, then add the egg. Continue processing, or mixing, until the dough comes together in a mass, about 1 minute.
- Divide the dough into 1-Tablespoon sized balls using a small cookie scoop and drop onto prepared baking sheets, at least 2 inches apart.** Dampen the palm of your hand before flattening each ball of cookie dough to about 1/8-inch thickness. Chill each tray of flattened cookie dough for at least 10 minutes in the fridge before baking.
- Bake for 9 to 10 minutes, rotating once to ensure even baking, or until the cookies are fragrant and completely set. Set baking sheets on a rack to cool. At this point the cookies can be stored in an airtight container for 2 days. Note they may become less crispy the longer they’re stored.
To make the filling:
- In a stand mixer fitted with the paddle attachment, beat the butter and vanilla on medium-low speed until well combined. Scrape down the bowl. Gradually add the powdered sugar then the salt. Turn the mixer on high and beat for 2-3 minutes until filling is light and fluffy.
To assemble:
- Using a pastry bag or spatula, drop a teaspoon-size blob of filling into the center of one cookie. Place another cookie, equal in size to the first, on top of the cream. Lightly press down to work the filling evenly towards the outside of the cookie. Repeat with remaining cookies and filling.
- Serve the same day the cookies are assembled for best texture.
Notes
This post was originally published in 2011 and has been updated with new photos and recipe improvements. Photos by Joanie Simon.


Made them. Love them…maybe a little too much for someone who lives alone…has anyone tried freezing them and did they come out ok after freezing/thawing?
Hi Jacki! We’re so happy to hear that you enjoy these Homemade Oreos so much! We haven’t tried freezing the finished, filled cookies (and I believe that would likely make the cookies a bit soggy when thawing), but there’s tips on freezing the unfilled cookies in the pink tip box, above the recipe 🙂 I hope that helps!
Thank you for your reply. I gave some to my neighbors and I froze a few with the filling to see how they will come out. I haven’t thawed them yet. I also froze a few to add the filling later. They are very tasty, probably just as addictive as the store bought ones!
So glad you enjoy these so much, Jacki!
now that I can make Oreos better than the ones in store I’m in so much trouble haha thank you! Very yummy and quite easy!
Could I make this into one huge biscuit so it looks like a cake?
Hi Ashlee! We haven’t tried that, so I can’t tell you how well that will work or how long to bake it for, sorry! Let us know how it goes if you give it a try!
I made these for the first time a few days ago, but instead of using butter for the cookies I used unsweetened applesauce. The outcome was good but I’m not sure what it might’ve changed about the original. Overall, this recipe is very good and my family and I will continue using this recipe quite often.
Also, my two sisters made a cake out of this recipe and it turned out to be a pretty rad, delux-looking Oreo.
Can I make a cherry filling with freeze dried cherries following the strawberry filling?
I don’t see why not! Let us know what you think if you give it a try! 🙂
My family loved these and my son wants me to mail the espresso ones to him now. Lol.
Haha sounds like he’s a lucky son, Lesa 🙂 So glad your family enjoyed these so much!
Pretty easy cookie to make. The filling tastes just like the original even though I had a little bit of a hard time squeezing it through the pastry bag. Nothing a little muscle can’t handle.
So terrific to hear that, Mae!!
These are delicious!!! Everyone who has tasted them has gobbled them right up and my son things he’s hot stuff getting to eat homemade Oreos! I appreciate the info around what kind of cocoa powder to use if you don’t have black cocoa powder. I know I can order it, but wanted to just use what I have on hand this time. I chose to make smaller (6 gram) dough balls so they’d be similar to the size of a store-bought Oreo. I made a chocolate variation by mixing some rich chocolate buttercream I had in the freezer with some of the vanilla creme filling. Both kinds were AMAZING! Thanks for such a great recipe, Tessa!!
Sounds terrific, Taylor! So glad your Oreos were such a hit 🙂
The dough was surprisingly easy to make, and I thought it was easy to roll and flatten (I wore gloves). I’ll have to shave a minute or two off the baking time if I make these again (1 cookie started smoking even though my oven thermometer said it was the correct temperature). I can’t smell much due to post-COVID syndrome, so the cookies probably just hit the “fragrant” distinction without me noticing. The texture of the cookies is spot-on, and I think the flavor would have been perfect if I had removed them from the oven slightly sooner.
So glad to hear that these were fun and easy to make, Rae! I hope your sense of smell comes back soon!!
Very quick and easy!! Super good recipe for make with kids! So soft and delicious!
Deliciuos oreos, yet easy recipe. Loved it!
Yay! So happy to hear that, Judita!
These are addictive!!