


Tessa’s Recipe Rundown
Taste: Like a Thin Mint in handheld cake form!
Texture: The whoopie pies are cakey yet firm while the filling is smooth and thick.
Ease: You will dirty a few dishes, but it’s totally worth it, promise!
Why You’ll Love This Recipe: Cute, festive mint chocolate dessert that’s perfect for St. Paddy’s Day or Christmas.
This post may contain affiliate links. Read our disclosure policy.


I recently updated my Classic Whoopie Pies recipe, which immediately sparked so many ideas for other filling flavors I wanted to try…
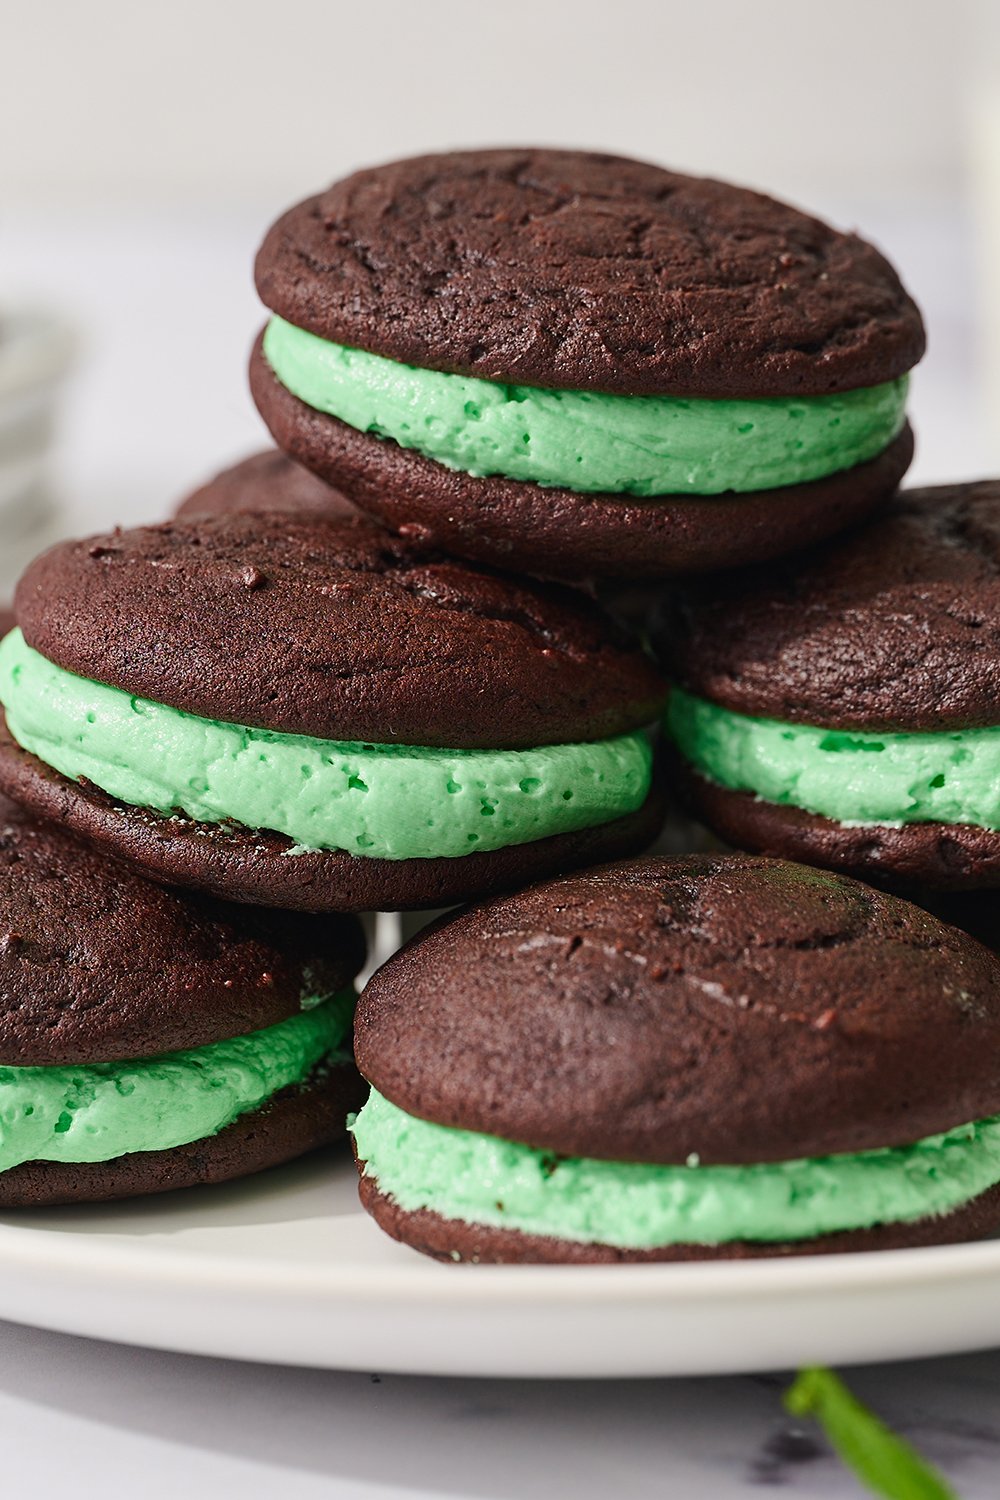
My very first flavor instinct? Mint Chocolate Whoopie Pies!
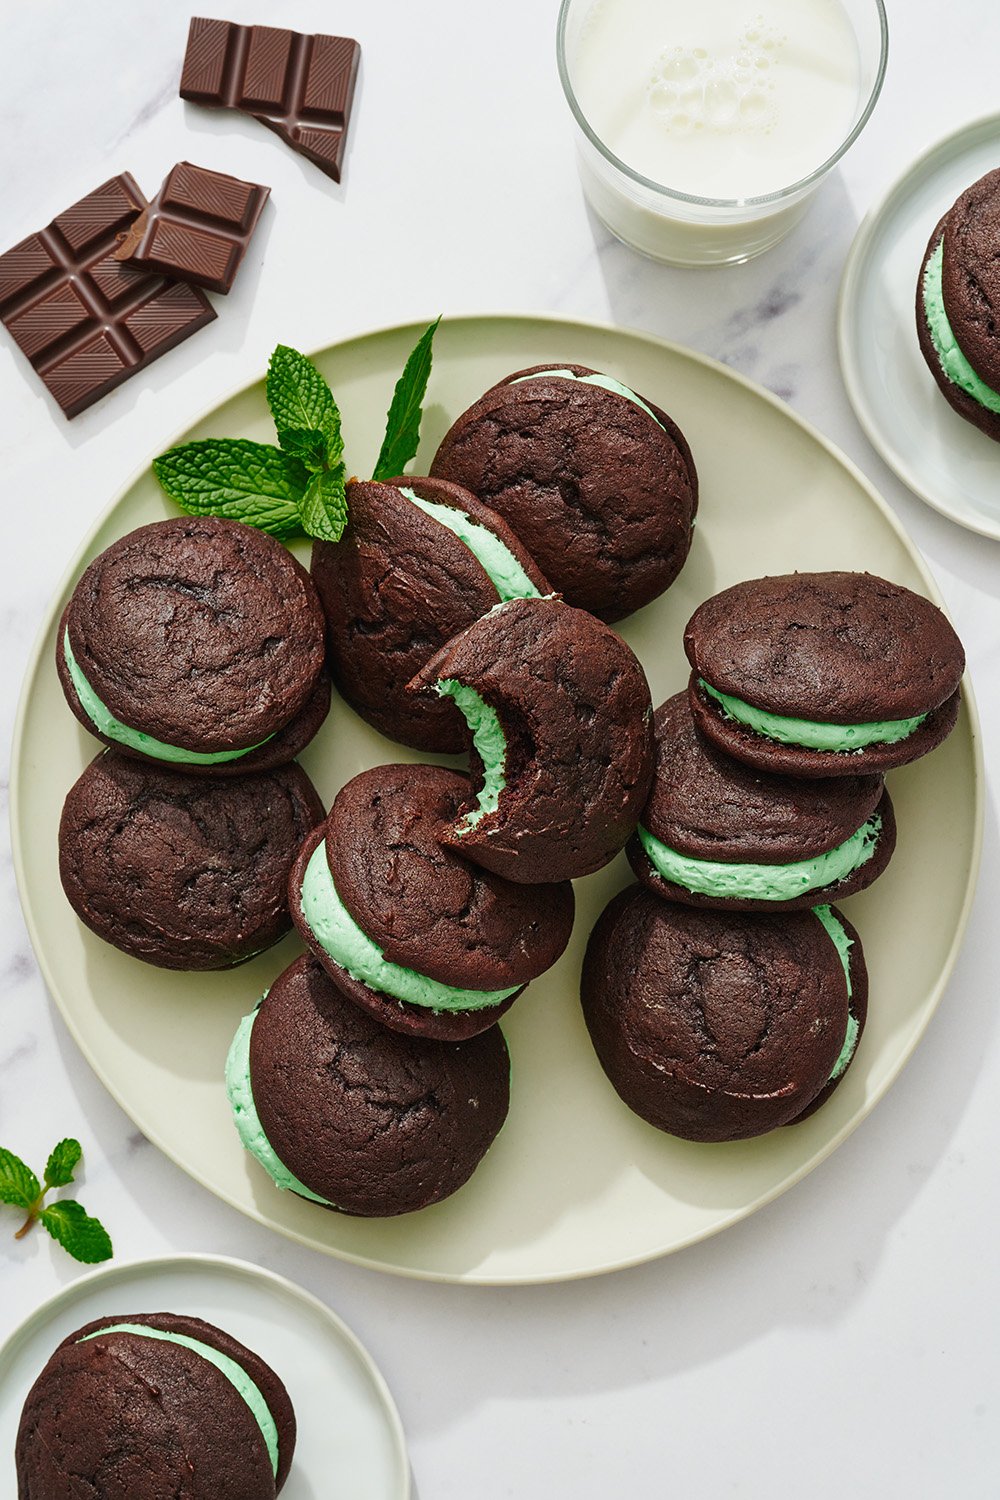
The peppermint filling makes these whoopie pies ultra flavorful and festive – the perfect St. Patrick’s Day dessert recipe, a fun and unusual Christmas dessert recipe, or any time you need a mint chocolate fix.
Add my decadent Guinness Chocolate Cake with Irish Buttercream or my delicious Bailey’s Cheesecake Bars, and you’ve got yourself a St Paddy’s Day party!

Sprinkle of Science
How to Make Mint Chocolate Whoopie Pies
What is a Whoopie Pie?
Whoopie pies are something of a misnomer. The outer pieces of a Whoopie Pie are neither pie, cake, or cookie. Their texture is somewhere between the latter two.
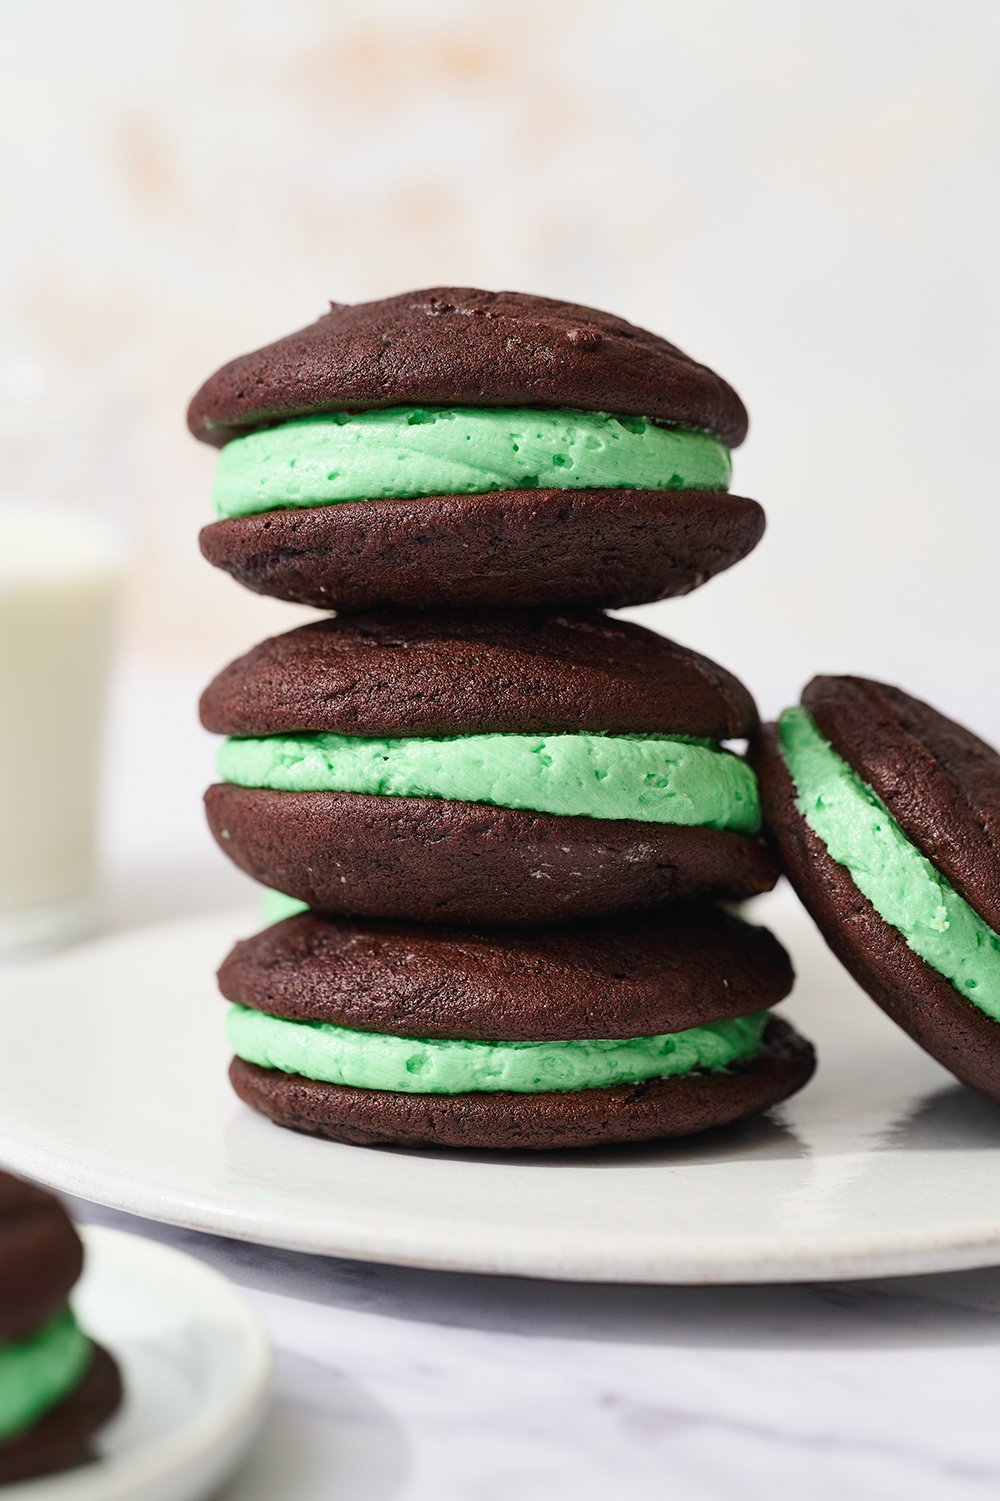
My Peppermint Chocolate Whoopie Pies recipe sandwiches rich, moist chocolate fudge cakes sandwiched together with a creamy mint-flavored buttercream frosting. They balance each other out perfectly, for a mouth-watering yet not sickly sweet treat.
The Cocoa Powder
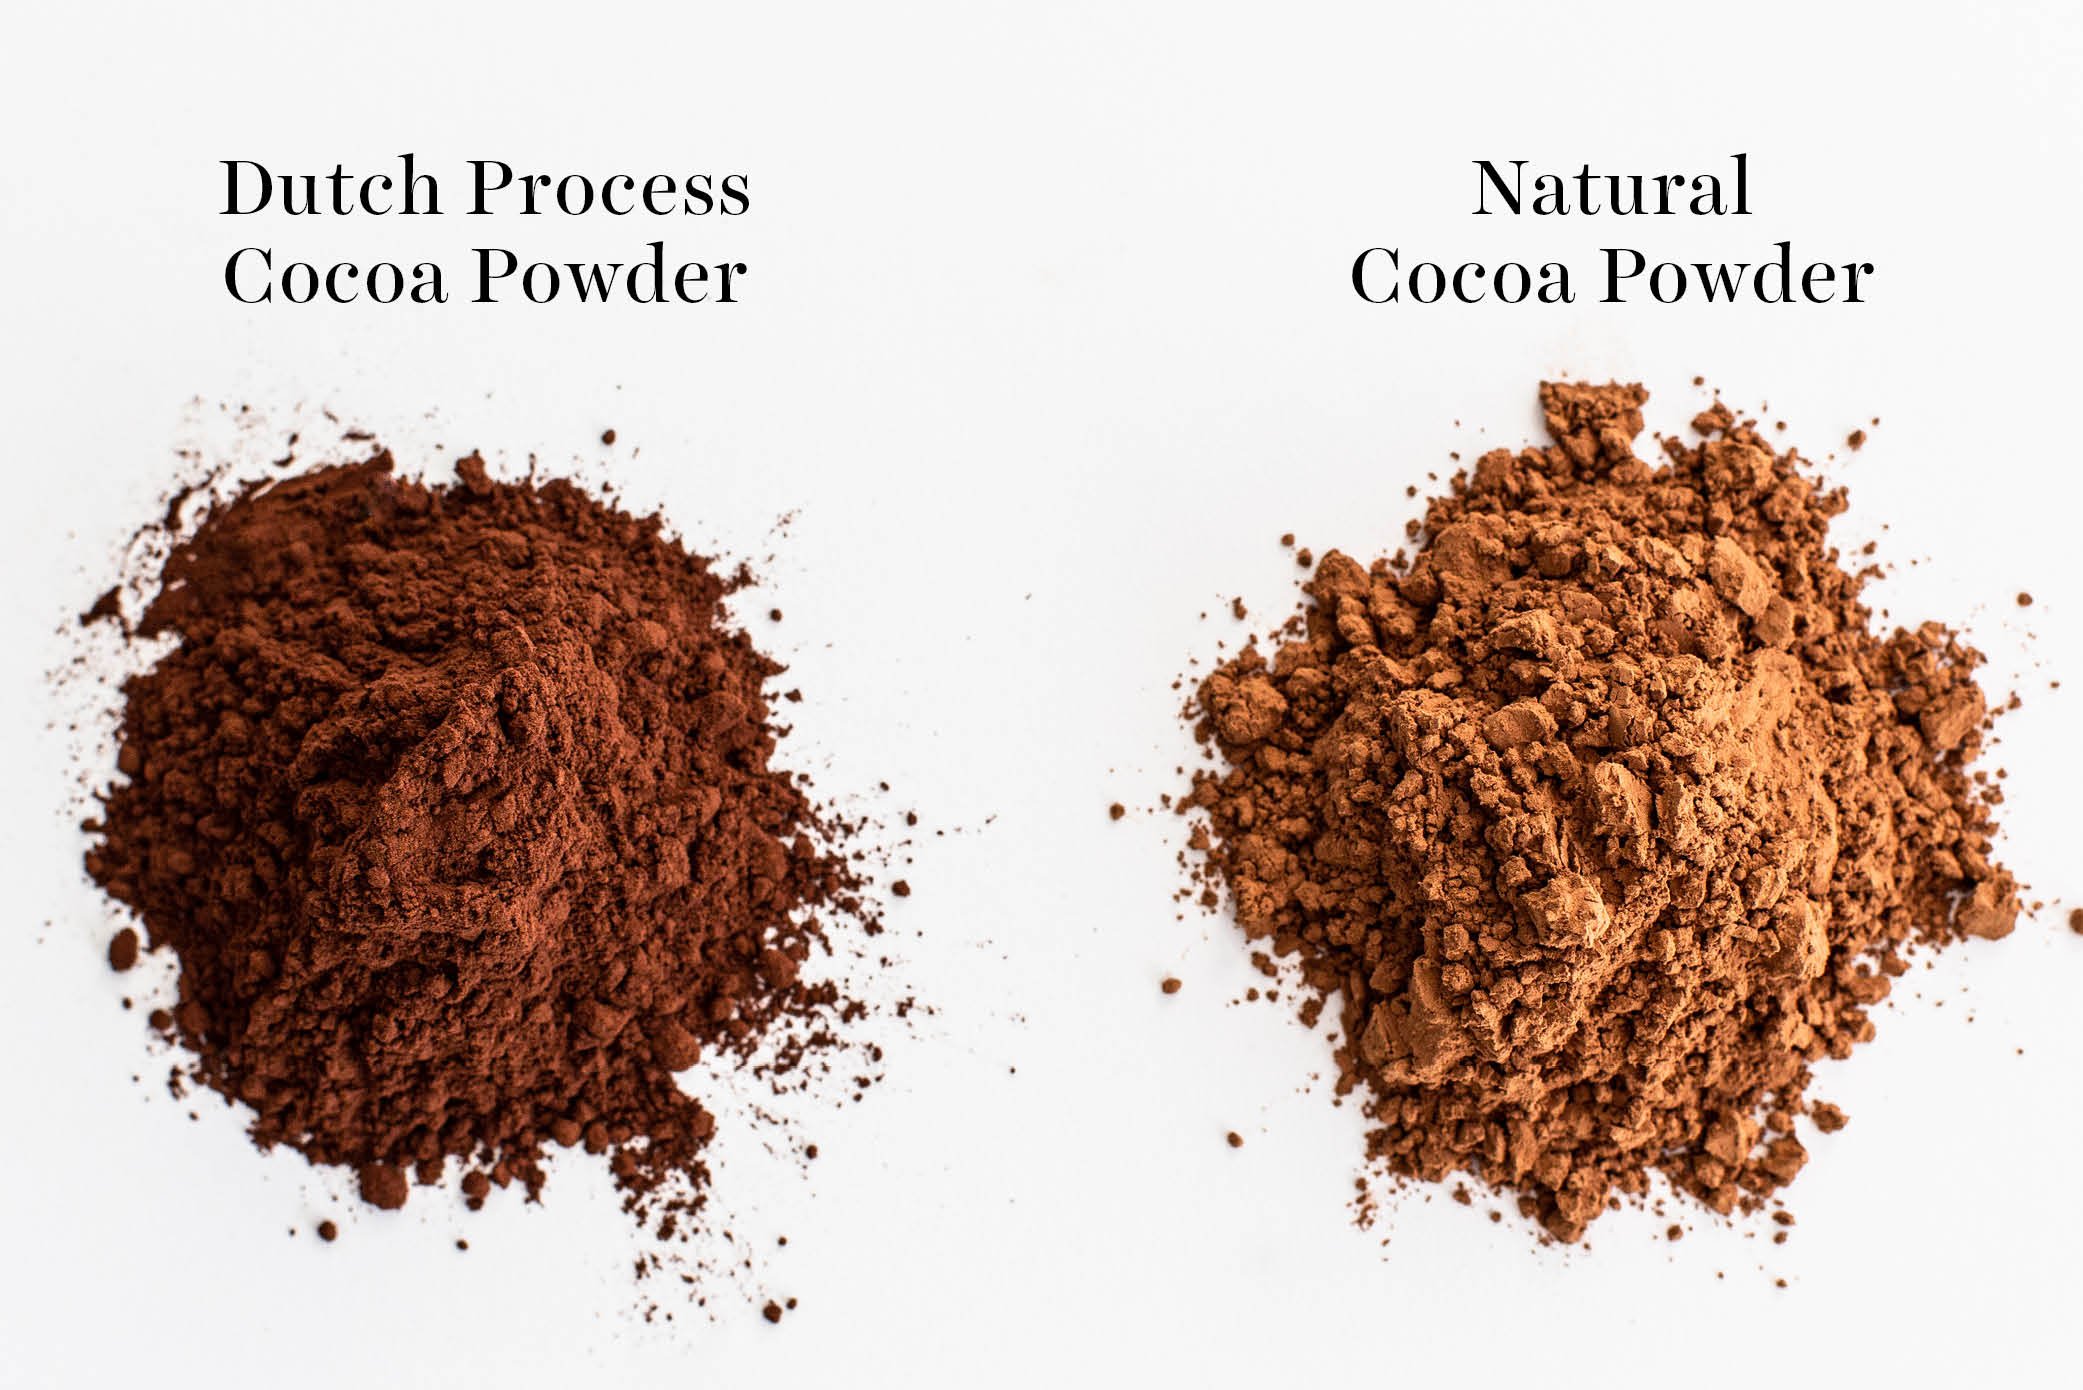
I prefer Dutch-process cocoa powder for this recipe for its delicious flavor, deep chocolate color, and higher fat content which helps prevent any dryness. You can learn more about the differences between cocoa powders here. You can use regular natural unsweetened cocoa powder instead, if needed – just note your Whoopie Pies may be lighter in color and slightly dryer in texture.

Although Dutch-process cocoa is typically paired with baking powder, I actually use baking soda in this recipe. This works because the buttermilk activates the baking soda. More on that below.


You can find Dutch-process cocoa at your local grocery store or many gourmet food stores, like Penzeys, Whole Foods, Sur la Table, and Williams Sonoma. I actually order a big container on Amazon because it’s such a great value!
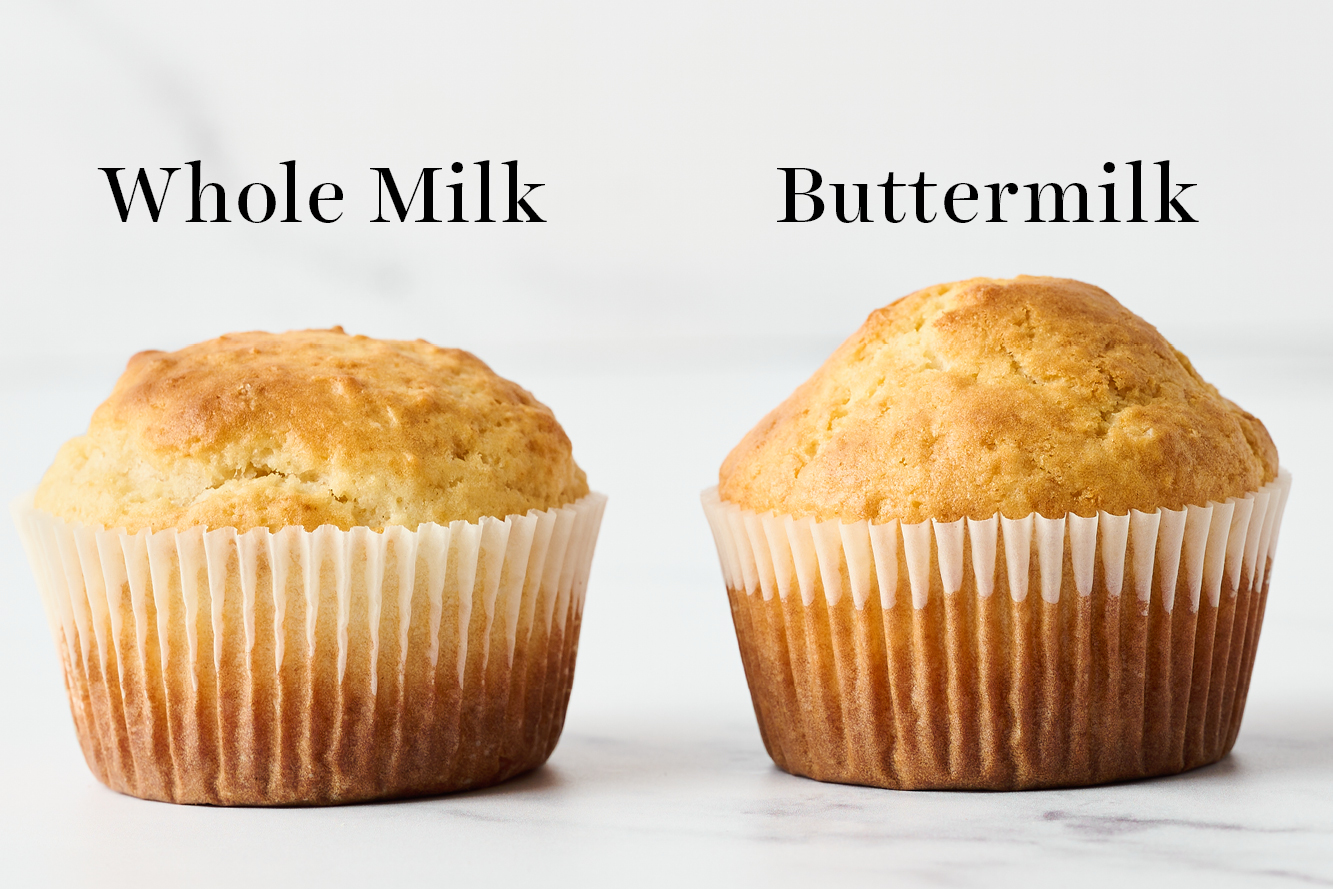
The Buttermilk
Buttermilk works best in this recipe to provide rich and tender ‘cakes.’ We need it not only for flavor and moisture, but to help activate the baking soda. Don’t use a buttermilk substitute. Learn more about buttermilk and buttermilk substitutes in my Buttermilk 101 article.
The Butter
Always use unsalted butter in baking. It’s important that your butter is at a cool room temperature, not too warm or greasy, otherwise your Whoopie Pies may spread too much. About 67°F is perfect (or even a few degrees cooler if your kitchen is very warm).
Measure Your Ingredients Correctly
If you add too much flour or cocoa powder, you may end up with dense, hard Whoopie Pies, so I recommend using a digital kitchen scale. If you don’t have one, use the spoon and level method instead.

The Powdered Sugar
For the absolute smoothest buttercream, I recommend investing in organic powdered sugar that contains tapioca starch instead of cornstarch because it dissolves much more readily – so no grittiness!
It’s still necessary to sift the confectioners’ sugar after measuring it, and before adding it into the mixing bowl. This will ensure no pesky lumps and clumps ruin the smoothness of your frosting. This is the brand of organic powdered sugar I usually use.
Organic powdered sugar is more pricey so if that’s not in budget, go ahead and use conventional powdered sugar.
Tips for the Mint Buttercream Frosting:
- Feel free to adjust the amount of powdered sugar to cream until you get the consistency of frosting you prefer.
- If using green food coloring, I much prefer gel coloring. It allows you to use just a small amount for an intense color. I like the Americolor brand the best. Start with a very small amount and add more as needed.
- Be sure to use peppermint extract to flavor the buttercream. Do not use mint extract or spearmint extract or your filling may taste like toothpaste.
How to Portion Out & Fill Whoopie Pies:
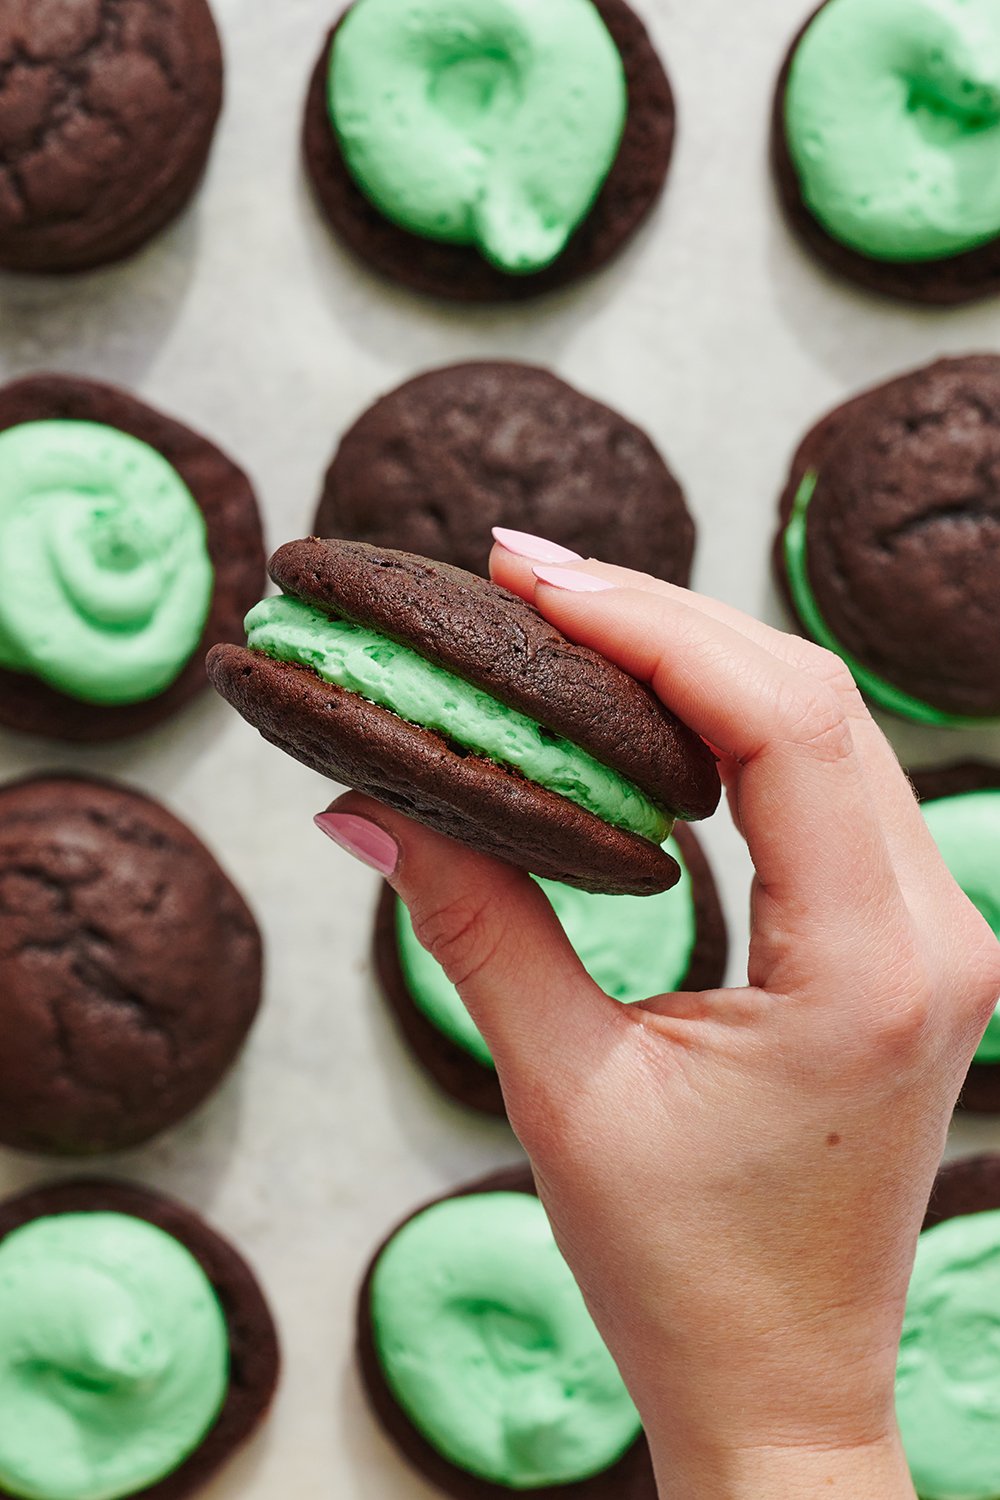
This Whoopie Pie batter is similar in consistency to a very thick cake batter. My favorite way to portion these out is to use my medium cookie scoop (1.5 tablespoons), which not only creates perfectly consistent Whoopie Pies that bake evenly, but also makes quick work of portioning out the batter/dough.
The same scoop also makes easy work of adding the mint buttercream, but if you prefer, you can pipe it on half the Whoopie Pies using a disposable piping bag and a large round tip before sandwiching together.

Mint Chocolate Whoopie Pies FAQs
I think these Whoopie Pies are pretty with a light green frosting swirled in the middle, but you can decorate these further if you like!
Drizzle the tops of your Whoopie Pies with a little melted white chocolate, or roll the edges in festive sprinkles, crushed candy canes, peppermint candies, finely chopped Andes mints, or anything else your heart desires!
Store at room temperature in an airtight container for up to a day, or in the fridge for up to 4 days. If transporting, chill the Peppermint Chocolate Whoopie Pies in the fridge for at least an hour before transporting, as refrigeration makes them firmer and less fragile. Best served at room temperature so the buttercream filling has time to soften.
Yes! I recommend placing the Peppermint Chocolate Whoopie Pies on a baking sheet in a single layer and freezing for an hour or so, until just solid enough to prevent them from sticking together. Then, simply place in a ziptop bag or an airtight container in the freezer for up to 1 month. Thaw for a few hours or overnight in the fridge or at room temperature (either is fine) before serving.
More Mint Desserts:
- Chocolate Mint Pinwheel Cookies (also perfect for Christmas OR St. Patrick’s Day!)
- Chocolate Peppermint Cookies
- Peppermint Chocolate Cake
- Chocolate Peppermint Cheesecake
- Peppermint Oreo Truffles
- Frozen Mint Chocolate Chip Ice Cream Pie

Email This Recipe
Enter your email, and we’ll send it to your inbox.
Ingredients
For whoopie pies:
- 1 2/3 cups (212 grams) all-purpose flour
- 2/3 cup (57 grams) Dutch-process cocoa powder
- 1 1/2 teaspoons baking soda
- 1/2 teaspoon fine sea salt
- 1 stick (113 grams) unsalted butter, at room temperature
- 1 cup (200 grams) lightly packed dark brown sugar
- 1 large egg, at room temperature
- 1 teaspoon vanilla extract
- 1 1/4 cups (296 grams) buttermilk, at room temperature

For mint filling:
- 3 cups (375 grams) powdered sugar, sifted
- 2 sticks (227 grams) unsalted butter, at room temperature
- 1/4 teaspoon fine sea salt
- 1/4 to 1/2 teaspoon peppermint extract*, depending on desired intensity
- 1 to 2 tablespoons heavy cream
- Green gel food coloring, if desired
Instructions
Make the whoopie pies:
- Preheat the oven to 375°F. Line large baking sheets with parchment paper.
- Sift the flour, cocoa powder, baking soda, and salt into a medium bowl.
- In the bowl of an electric mixer fitted with the paddle attachment, beat the butter and brown sugar on low speed until combined. Increase speed to medium high and beat for 3 minutes, or until light and fluffy. Scrape down the sides of the bowl. Add the egg and vanilla and beat on medium-high speed for another 3 minutes, or until very well combined.
- Add half of the flour mixture then half of the buttermilk to the batter and beat on low until combined, scraping down the sides and bottom of the bowl as necessary. Add remaining buttermilk and flour, beating until combined. Mixture will be fluffy and slightly sticky like a very thick cake batter.
- Use a medium 1 ½-tablespoon spring-loaded scoop to drop mounds of batter onto prepared baking sheets, spacing 2 inches apart. Bake for 11 minutes, or until pies spring back slightly when pressed gently and appear dry on top. Let cakes cool on pans for 5 minutes before moving to a wire rack to cool completely.
Make the filling:
- In the bowl of a stand mixer fitted with the paddle attachment, add the powdered sugar and butter. Mix on low speed until well blended and then increase the speed to medium and beat for another 3 minutes, or until the mixture is completely smooth. Scrape down the sides and bottom of the bowl as needed. Add the salt, peppermint extract, and cream and beat on medium for 1 minute, or until light and creamy, adding more cream if needed. Add in green gel food coloring, if desired, and beat until evenly colored.
Assemble:
- Use a medium 1 ½-tablespoon spring-loaded scoop to dollop filling on the flat side of half the whoopie pies. You could also use a piping bag fitted with a decorative tip. Sandwich gently with the remaining whoopie pies.
- Store at room temperature in an airtight container for up to a day or in the fridge for up to 4 days. Best served at room temperature so the buttercream filling has time to soften. If transporting, chill the whoopie pies in the fridge for at least an hour before transporting to make firmer and less fragile.
Notes
Photos by Joanie Simon.


I tried your recipe.
The tops cracked, I think 375 maybe too high. Next time I’m trying them at 350.
Hi Kathleen! Our whoopie pies aren’t completely smooth on top, but they also shouldn’t be fully cracked. Since we’ve tested this recipe many times at 375°F, I’d stick with that temperature. Cracking is most often caused by a bit too much baking soda or not properly measuring ingredients with a scale or the spoon-and-level method. Would you be open to trying the recipe again as written to see if anything may have been accidentally mis-measured? Also, just checking, are you at high altitude? We test all of our recipes at sea level so that could also affect the results and may require adjustments.
Can you use the regular marshmallow cream from your other whoopie pie recipe for this? Use peppermint extract instead of vanilla?
Sure! Use the same amount of peppermint extract listed in this recipe (1/4-1/2 teaspoon) though, and not 1 1/2 tablespoons in place of the vanilla extract as the original recipe calls for; otherwise, it’ll be too minty!
Hi! Wondering if this batter could be made in advance and kept in the fridge before baking? Thank you!
Hi Rani! We haven’t tried that, but I’m not sure how well it’d do chilled for too long since baking soda is used as the leavener, which activates upon being added to the other ingredients. These whoopie pies do last in the fridge up to 4 days, or you could freeze them in advance, if that’s helpful! You can find instructions above the recipe here.
I made this for a st. Patty’s day party! Few notes I’ve made:
Baked perfectly on a silicon mat. Exactly at 375 for 11 minutes. The timing was perfect!
– the whoopy pies were easy to scoop. They formed a nice dome, but it rose too much for what I wanted; so I flattened them with a baking pan. You can still see in the image that they have a ton of lift still. (I baked on a silicon mat, waited 1-2 minutes to cool, transferred to a cooling rack. Dished out the next pan for baking and once the cookies cooled for another 2-5 minutes I put the pan on. I found that if I put the pan on too soon the top became mushy. Which was my fault
– the whoopy pie cookie consistency is AMAZING. One of the best textures I’ve found. It’s soft and moist! If you are looking for a somewhat crunchy whoopy pie with a crisp top I wouldn’t recommend this recipe. This was soft through and through- something I would make for my grandma
-cookie flavour: a little disappointing. The cookie flavour itself is rather bland, tasting mostly like cocoa. It however does add a nice contrast with the sweet icing filling. Increase the salt and/or vanilla if you plan to make this recipe. You could probably get away with adding 1/4C of white sugar without too much issues of consistency; but I’d approach with caution.
-they cooked fast so it was easy to decorate and fill!
-I found the filling to be rather sweet and flavourful. It was a good contrast to the cookie!
Next time:
-I’ll increase the salt and vanilla to help the whoopy pie flavour
– Try to flatten them after scooping to see if it helps with how big they rise (again, this is my personal preference)
Which is it? Light or dark brown sugar. Says light brown in narrative ingredient list. Says dark brown on recipe card.
Hi Arlene! Apologies for the typo and thanks so much for pointing it out! I have fixed the error now. While either will work, we do recommend dark brown sugar for its additional moisture and flavor. I hope that helps! Let us know if you give these whoopie pies a try 🙂 Happy baking!
WOW, Tessa! These are delicious and so easy to make.
Some notes;
1. Make sure you are not hungry while baking. The batter is sooo smooth and that buttermilk, Yummy.
2. I used 1/2 tsp of good quality peppermint extract and it still wasn’t intense enough for me, but I didn’t want to overdo it.
3. Beginning bakers, make sure you weigh. The filling called for 2 sticks of butter, I weighed it (which I don’t usually weigh the butter) and found it was 3 sticks of butter.
I did not change the recipe.
I will make it again…this week.
Hi Kate! So glad to hear that you enjoyed these Whoopie Pies so much! I wonder what type of butter you’re using? Generally, one stick of butter is about 113.5 grams, so the two sticks called for in the buttercream should be 227 grams. Either way, weighing is always your bet option (as you found!) but it is unusual for sticks of butter to weigh less than that. Again, so happy you enjoyed this recipe 🙂 Happy baking!
Hi Kiersten,
Yes. I must’ve done something with the scale. Of course it is only 2 sticks of butter. Thank you for responding otherwise, I would keep adding 3 sticks. Very tasty but not necessary.
I’ve made them several times and passed on the recipe link.
Perfect Treat!