


Tessa’s Recipe Rundown
Taste: The brown butter + brown sugar give these brownies such an incredible depth of flavor!
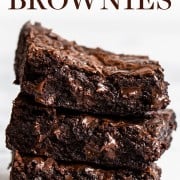
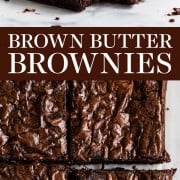
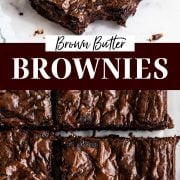
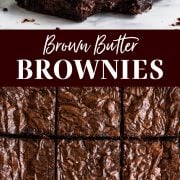
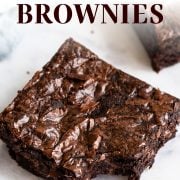
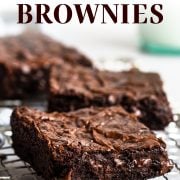
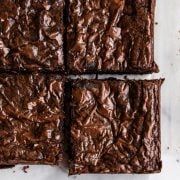
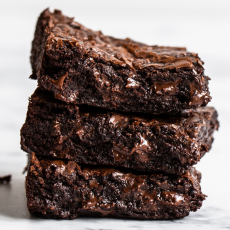
Texture: Ultra-rich, fudgy, and slightly chewy.
Ease: Not the easiest recipe. This one involves browning the butter on the stove and an electric mixer. But it’s so worth the effort when you want something extra special!
Pros: Fabulous brownie recipe to add to your repertoire.
Cons: Dirties several dishes.
Would I make this again? I make these often!
This post may contain affiliate links. Read our disclosure policy.

This Brown Butter Brownies Recipe literally came to me in a dream.
The image of exactly how I wanted them to look came to my mind, and I knew I immediately had to get to work on creating this recipe.
It took over 7 trials until I had these brownies *just* how I pictured them.
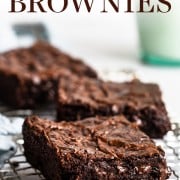
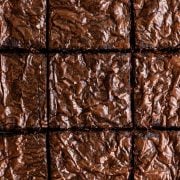
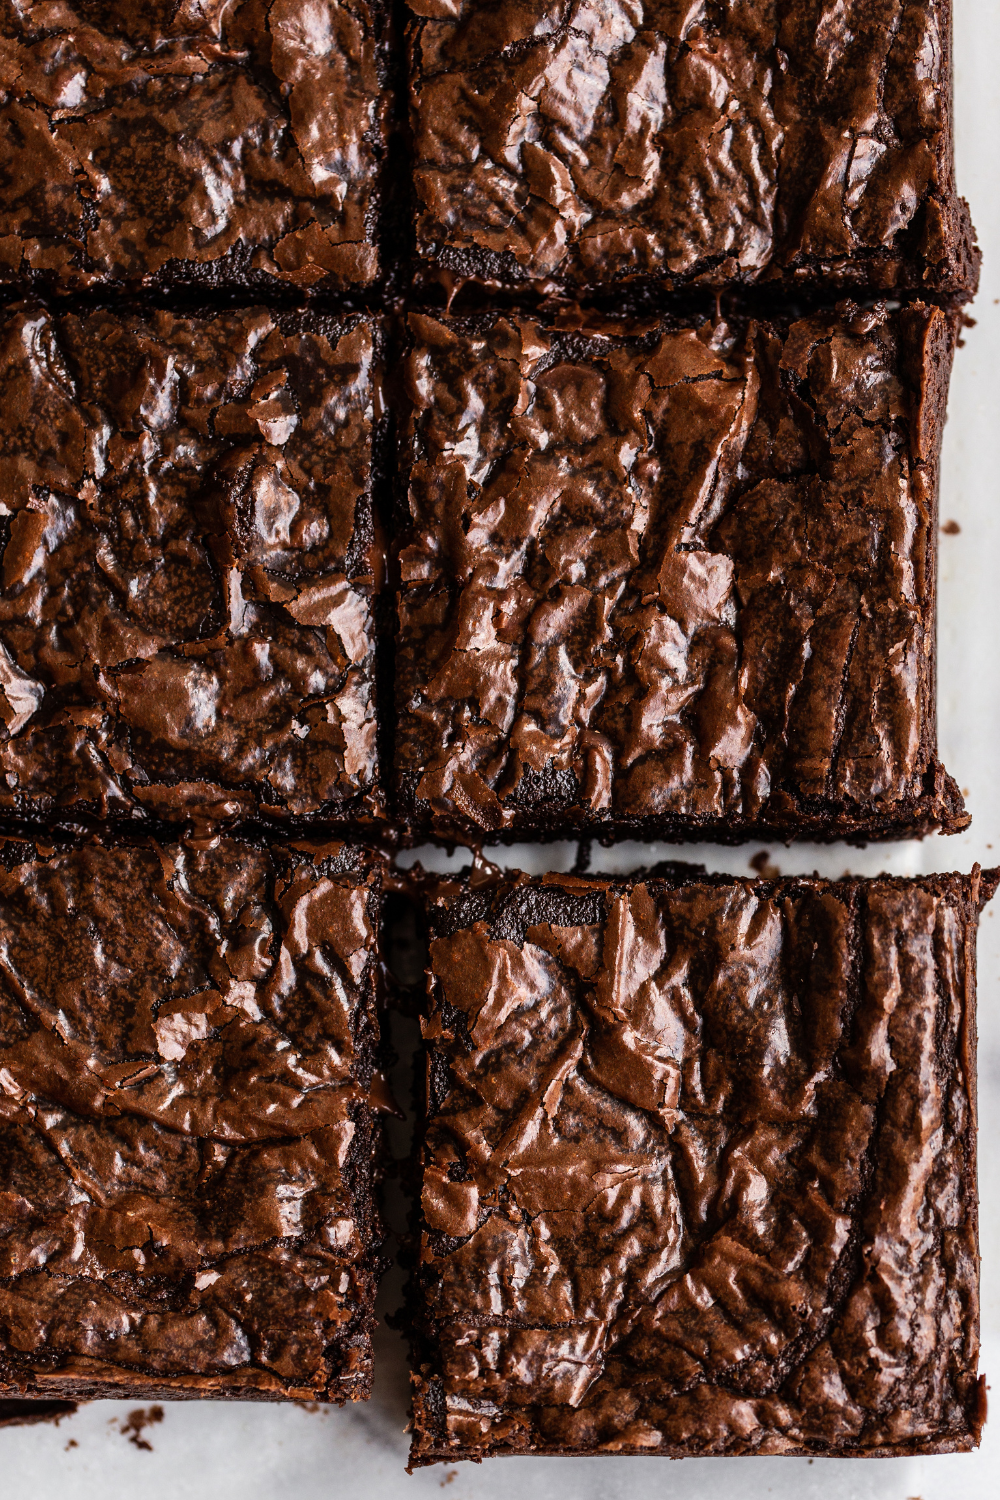
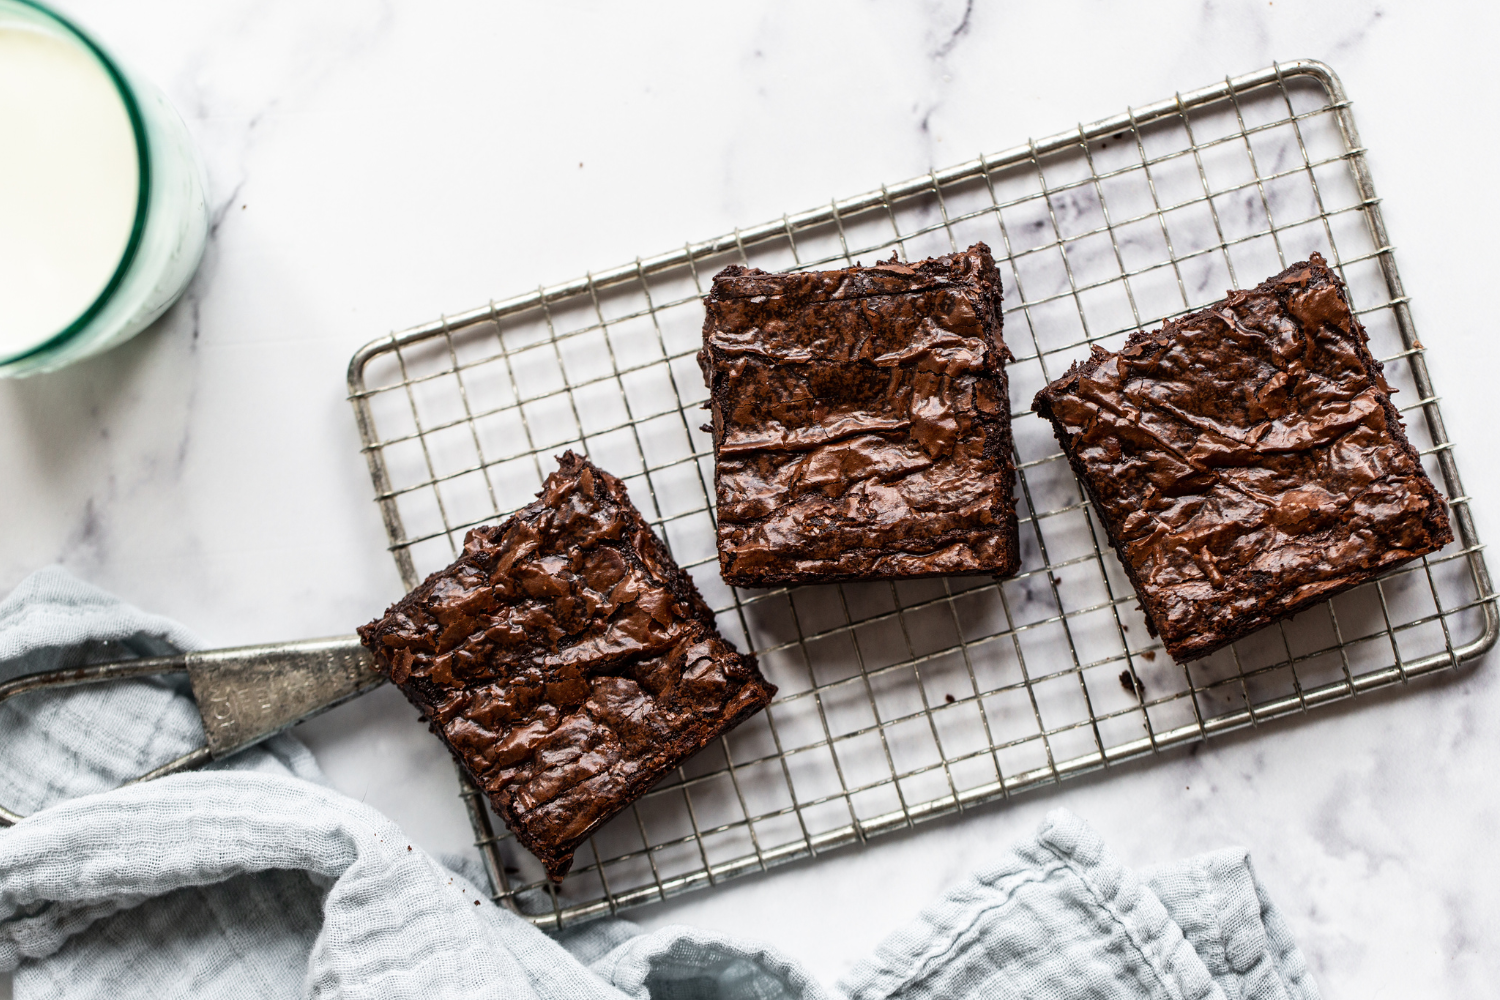
The most important part I wanted to nail was that shiny crust on top.
I knew I could achieve the most picture-perfect shiny crust, while simultaneously creating fudgy, moist, and incredibly flavorful brownies, elevated by that brown butter.
If you follow me at all, you know that browning butter is one of my secret tricks to improving the flavor of just about every classic baked good – and these brownies are no exception!
This brownie recipe is definitely a little more labor-intensive than my crazy-popular Chewy Brownie recipe, but they’re worth it if you have a little more time on your hands and want something deliciously special.
In the pink box below, I’ve included tons of tips and information, so you can nail these delicious brownies every time.
I truly hope you’ll give them a try!

Sprinkle of Science
How to Make Fudgy Brown Butter Brownies
Below are tips and insights into the HOW and WHY of brownie baking. I recommend reading through these tips before making the recipe! And if you want even more info on the science of brownies, check out my original Ultimate Brownie Guide here.
How to Brown Butter for Brownies
A skillet works better than a saucepan for browning butter because there’s more surface area for the brown bits to develop. Whatever you do, never use nonstick for browning butter. Check out my How to Brown Butter article here.
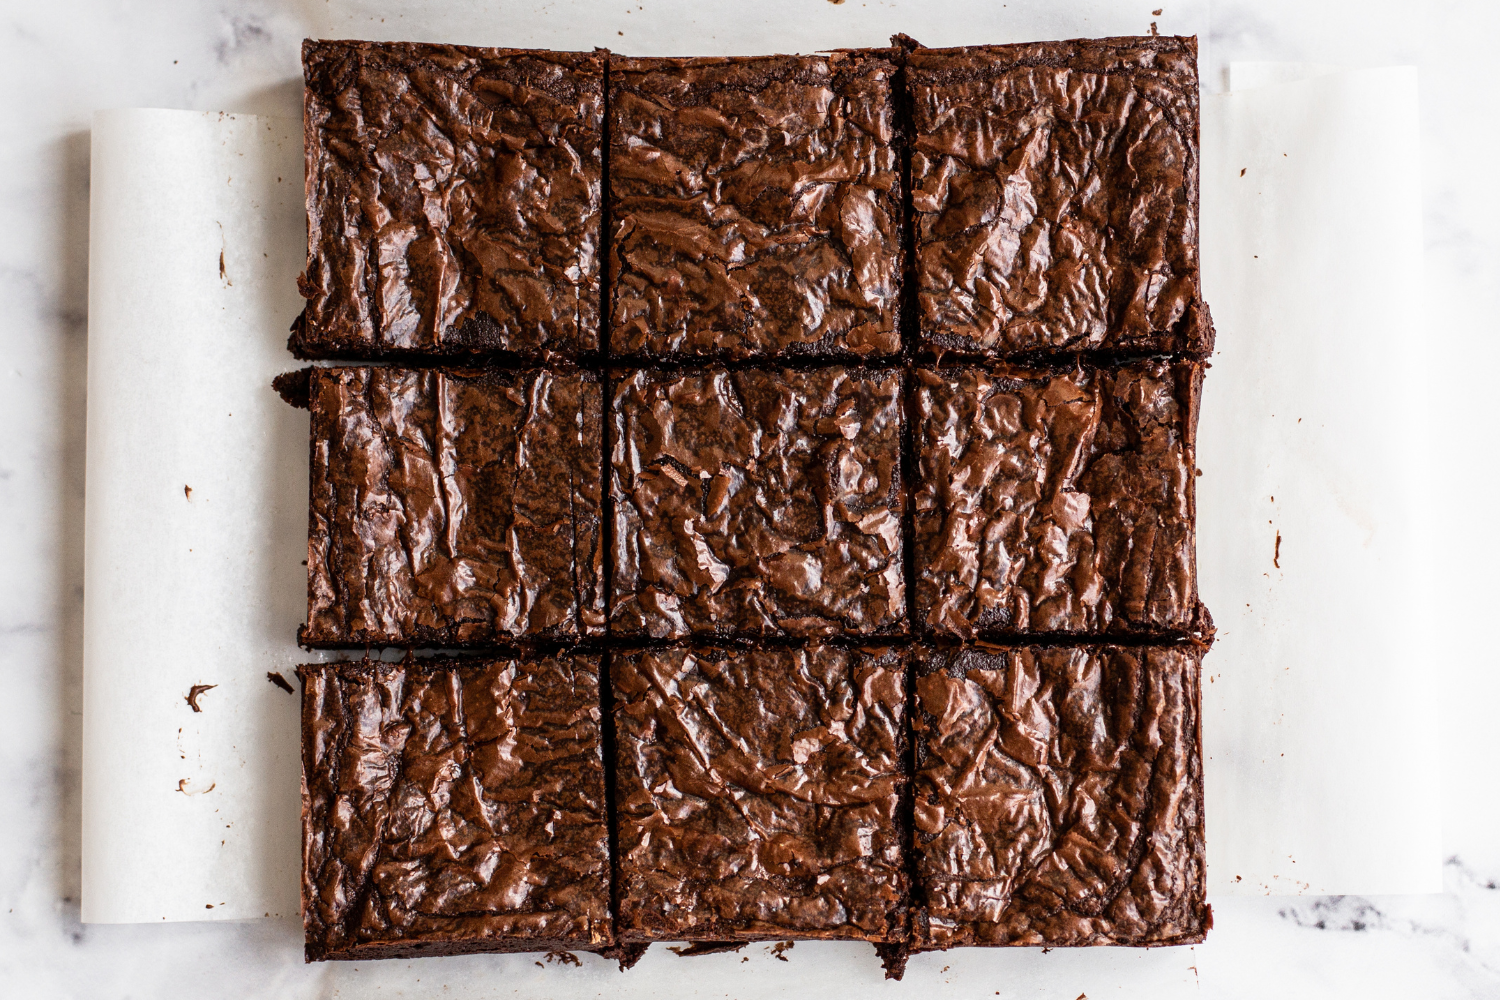
How to Make Brownies with Shiny Thin Crust
This is arguably the best part of any brownie, but also often the most elusive to achieve.
- If you follow the directions in this recipe exactly by using an electric mixer to whip the eggs and sugar, you will get that beautiful tissue-thin crust on top.
- The key here is to allow the sugar to completely dissolve into the eggs to create an ultra-light, pale, and fluffy foam.
- The amount of time this takes will completely vary depending on your kitchen environment and your mixer, so pay attention to the visual clues over the time listed in the recipe.
- More tips for achieving those perfectly tissue-thin, crinkly crusts in brownies in my How to Make Brownies with a Thin Shiny Crust article.
Tips for Chewy Fudgy Brownies
- Brown sugar and Dutch Process cocoa powder help contribute richness not just in flavor but in that moist fudgy texture.
- Don’t reduce the sugar, it adds moisture. Learn more about sugar’s many roles in baking brownies here.
- A very small amount of flour is used to also help achieve a fudgy brownie. Too much flour and brownies become cakey or dry. Make sure not to over-measure the flour or cocoa powder.
Do I Have to Use Dutch Process Cocoa Powder?
- Since there’s no leavener (baking soda or powder), you can use Dutch Process OR natural unsweetened cocoa powder.
- I find Dutch process creates a deeper chocolate flavor and richer, fudgier texture.
- If you only have natural cocoa powder, that will work just fine – but keep in mind that most grocery store cocoa powder products are low in fat and high in starch, yielding a drier texture. Learn more about the fat content of cocoa powder here.

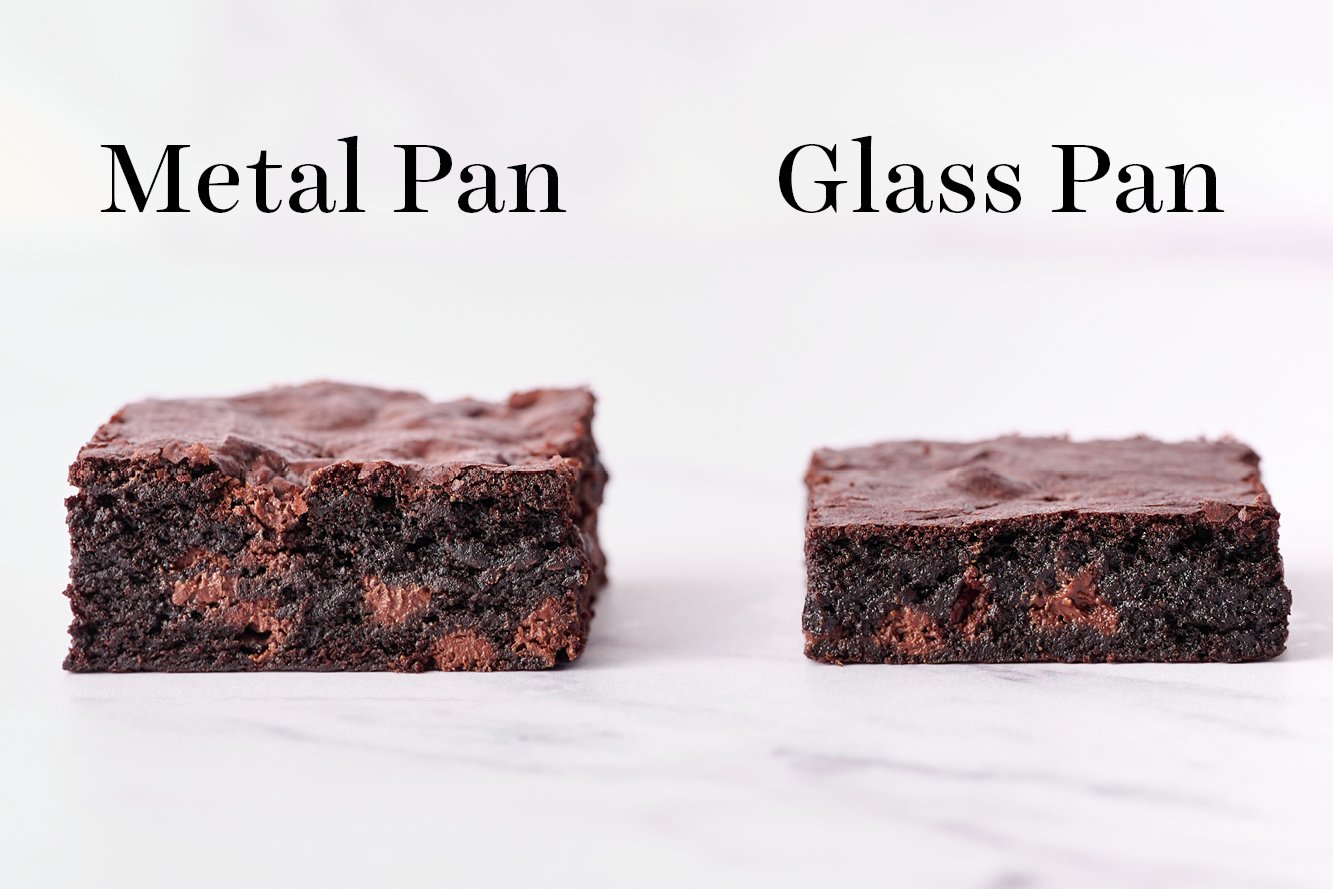
The BEST Brownie Pan (so important!)
- I highly recommend using an 8 by 8-inch light-colored metal baking pan. I like this baking pan.
- Dark metal pans will dry out the edges, often before the center can cook through.
- Glass or ceramic baking pans will take LONGER to bake these brownies, and the texture may become more gummy.
- If you must use glass, reduce the temperature and add about 10 to 15 minutes to the baking times.
- Check out my Glass vs. Metal Baking Pans article for more tips.
When Are Brownies Done Baking?
- You never want to overbake brownies.
- I always err on the side of underbaking brownies. A toothpick inserted should have moist crumbs (try to avoid hitting a chocolate chip!).
- The residual heat of the oven will continue to cook them even after you place the pan on a cooling rack.
- I wouldn’t bake much longer than the recipe suggests unless you’re using a glass pan (see above), or your oven runs cold.
How to Store Brown Butter Brownies
Brown Butter Brownies taste best the day they are baked, but can be stored in an airtight container for up to 2 days at room temperature or up to 4 days in the fridge. They are even more fudgy when they’re chilled! You can microwave them for a bit to serve them warm and gooey, if preferred.
FAQs
Yes! Simply wrap slices of brownies in plastic wrap and place in a freezer bag or airtight container for up to a month. Thaw overnight in the fridge, or for a couple hours at room temperature, before serving.
You can easily double this recipe by simply doubling all ingredients and baking in a 9 by 13-inch metal baking pan for about 30 minutes.
Try using a plastic knife (yes, like the kind you buy for a picnic!). Alternatively, use a large sharp chef’s knife and run the blade under hot water between slices, wiping it dry.
More Amazing Brownie Recipes:
- Best CHEWY Brownies (perfect if you love box mix texture!)
- Malted Brownies (made with brown butter!)
- Peanut Butter Stuffed Brownies (for serious PB lovers only!)
- Copycat Cosmic Brownies (better than Little Debbie!)
- Toffee Brownies (so much fun!)
- Brown Butter Triple Chocolate Blondies
Email This Recipe
Enter your email, and we’ll send it to your inbox.
Ingredients
- 1 1/2 sticks (170 grams) unsalted butter
- 4 ounces (113 grams) semisweet chocolate, chopped
- 1/2 cup (100 grams) granulated sugar
- 1/2 cup (100 grams) light brown sugar
- 3 large eggs
- 1 teaspoon vanilla extract
- 1/2 cup (64 grams) all-purpose flour
- 1/2 cup (43 grams) cocoa powder*, preferably Dutch Process
- 1/2 teaspoon instant espresso powder, optional
- 1/2 teaspoon fine sea salt
- 1 cup (170 grams) semisweet chocolate chips

Instructions
- Preheat oven to 350 degrees F. Line a metal 8-inch square pan with parchment paper.
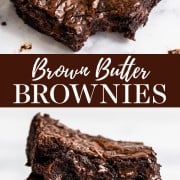
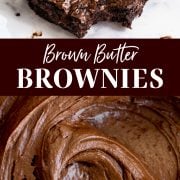
- In a small saucepan set over medium-low heat, melt the butter. Swirling the pan occasionally, continue to cook the butter, increasing the heat to medium. It should become foamy with audible cracking and popping noises. Once the crackling stops, continue to swirl the pan until the butter develops a nutty aroma and brown bits start to form at the bottom. Once the bits are amber in color, about 2 to 3 minutes after the popping stops, remove from heat and pour into a mixing bowl, scraping the brown bits into the bowl.
- Immediately add in the chopped chocolate and stir until melted.
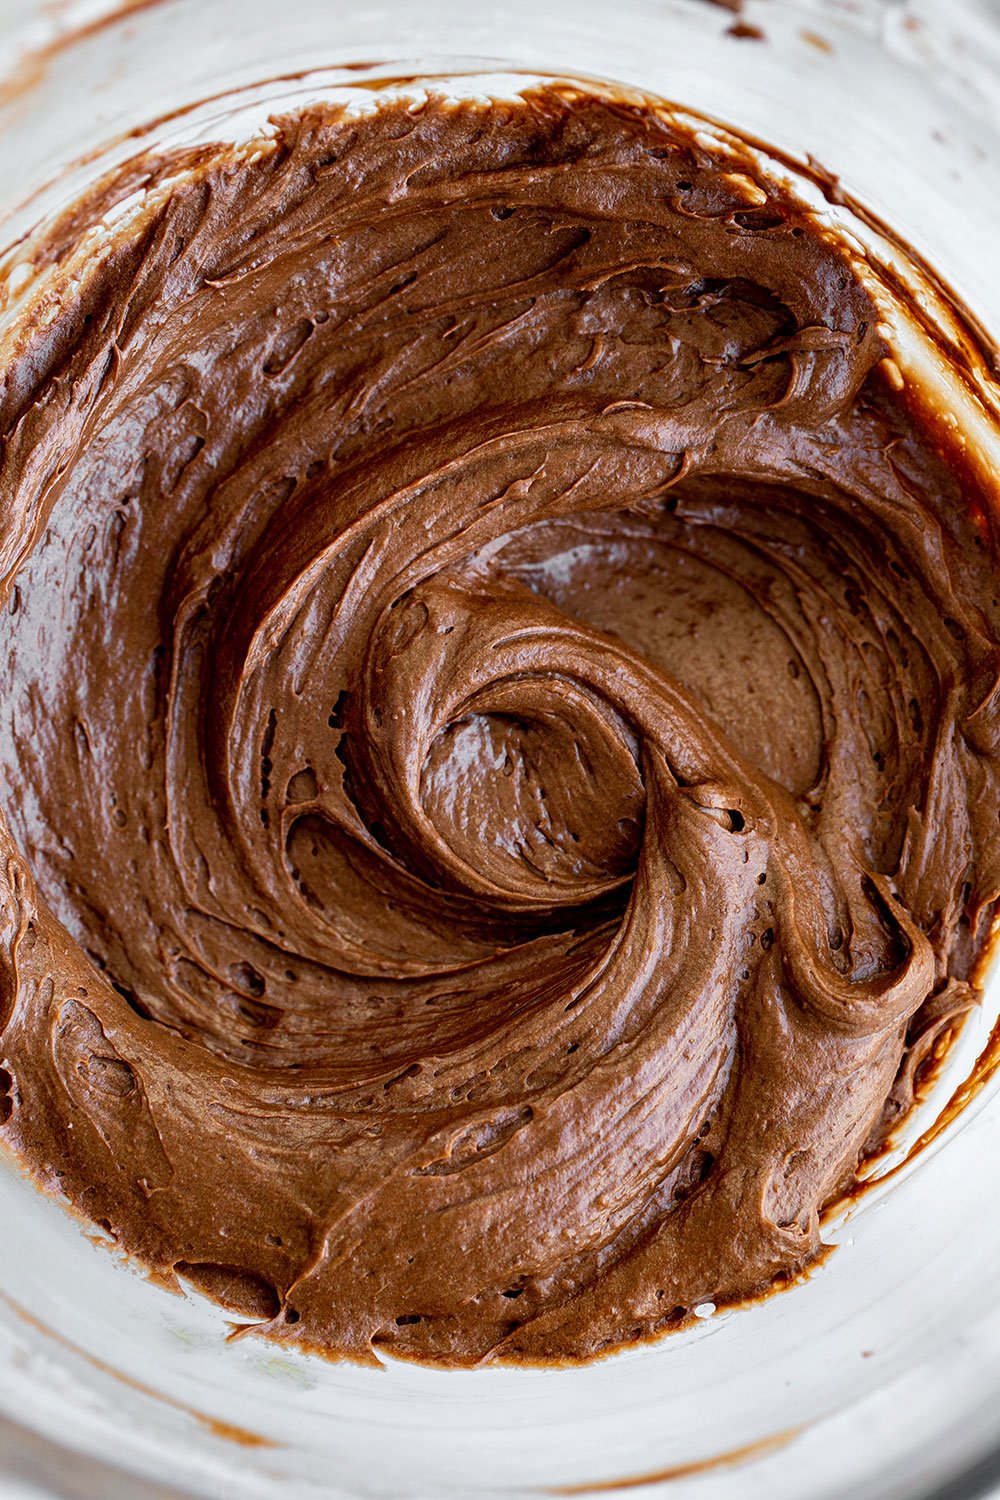
- In the bowl of an electric mixer fitted with the whisk attachment, combine the granulated sugar, brown sugar, eggs, and vanilla. Beat mixture on high speed until completely thickened and fluffy in texture and lightened in color, about 8 minutes. On low speed, gradually pour in the warm brown butter chocolate mixture.
- Use a rubber spatula to stir in flour, cocoa powder, espresso powder, and salt until just combined. Stir in the chocolate chips.
- Pour into prepared pan and smooth out with a spatula. Bake in the preheated oven for 22 to 25 minutes, or until set but not overbaked. Let cool in pan completely before slicing and serving.
- Brownies can be stored in an airtight container at room temperature for up to 2 days, or in the fridge for 4 days.
Notes
This recipe was created in 2020 and has been updated with additional baking tips. Photos by Ashley McLaughlin.


So delicious! These brownies have an intriguing deep flavor and texture. My husband’s new all-time favorite brownie!
So happy to hear that, Becky!! 🙂
These are delicious! Made them with my HTH Baking School today. Love the brown butter taste and how this recipe used 3 types of chocolate.
Happy to hear you enjoyed these brownies, Breanna!
There are no words to describe how delicious these brownies are. I am not a coffee drinker, and I could NOT taste the espresso powder. Rather, it enhanced the depth of the chocolate. My oven temped lower than 350 (which I discovered after the bake), so it took a little longer to bake them. But the wait was soooooo worth it! So fudgy and chocolately and delicious!!! This will be my go-to brownie recipe for the rest of time!!!
Yay!! So thrilled to hear that you enjoyed these brownies so much, Cheryl – and great note about being a non-coffee drinker but not tasting the espresso powder! Thanks so much for the feedback 🙂
I’m a brown butter believer, it just seems to make everything better. And these decadent, fudgey, wonderful brownies are proof of that!
So glad you enjoyed these so much, Emily! I agree with you about brown butter – it just makes everything better 😉
This recipe is terrible. They were completely undercooked in the center. I’m disappointed I wasted my time and money making these. There is no way this recipe has been tested well. I would not recommend.
Hi Maddie! I’m sorry to hear your brownies didn’t turn out the way you hoped! It definitely sounds like something went wrong here! We test every single recipe on our blog many, many times, across multiple parts of the United States with different climates, to ensure readers can rely on our recipes for success every single time. There are a few things that may be responsible for these brownies not working for you. Firstly, did you bake these brownies in a light-colored metal pan? We recommend this pan, but something similar will work too! Using a glass or ceramic pan will take much, much longer for the middle to bake, often drying out the edges in the process. Your oven also could be running too cold. Ovens are almost always lying to us about their real temperature! We recommend using an oven thermometer, to ensure accuracy, and make sure your baked goods are baking correctly! Tessa talks about the importance of oven temperature accuracy and using an oven thermometer, in this article here! Lastly, how do you measure your ingredients; by volume (using cups), or by weight (using a digital scale)? Measuring by volume makes it super easy to add too much flour into a recipe, messing with the chemistry of the recipe and throwing your end result off completely! In this article, Tessa talks about how to measure correctly, to ensure a great end result every time! I hope that helps, and I hope you give these brownies another try sometime; they really are so delicious!! Feel free to reach out to us at [email protected] for more help troubleshooting!
Best brownies I’ve ever made!! They were gone within the hour!
Wow, what a compliment! So happy you loved these brownies, Abby!!
Should I make half of the recipe if i want to bake it in a 8×8 square springfoam pan as i only have this ?
What will the baking time be then.
Hi Mayeesha! This recipe is actually written for a 8×8 square metal pan! I would take some extra care in lining it well with parchment or foil, to ensure it doesn’t leak out of your springform, but the baking time should not differ from the recipe! Make sure you cool them completely in the tin, as they will likely fall apart if you open the springform tin before they are cooled. Happy baking! 🙂
Hi, I made these and they were amazing! But just a quick question, if I wanted it to be a bit chewier, do you know what I should add, or maybe do, to get that tiny bit chewier? Thank you very much.
Hi Honey! That’ll have to be something you experiment with, but make sure that you read through Tessa’s tips in the pink box above the recipe for a little more help. You might also be interested in our Ultimate Brownie Guide, where Tessa actually breaks down different ingredients/techniques based on the type of brownie you prefer. I hope that helps!
This is the best brownie recipe I have ever made. 100% recommend – this is your sign to make these, RIGHT NOW!! Amazing recipe, thank you.
Yay!! So happy you loved this recipe, thanks for taking the time to comment and let us know! 🙂
I made this recipe immediately after seeing it pop up on my instagram feed. The only adjustments I made were blooming the coffee powder in the warm butter and chocolate mix and adding malton salt when they came out of the oven. My bake time was 23 minutes for a perfect ooey gooey middle. These were loved by everyone who tried them and I would make this again, especially because it doesn’t take very long to prepare or cook. Thanks for sharing this one!
Sounds AMAZING!! So happy you loved this recipe!
If I want to make this recipe eggless, is there a way I can do that? Can I use yogurt instead of eggs?
We don’t bake eggless recipes, so I can’t say for sure; however, we believe that the eggs are necessary for the texture and crinkly crust of these brownies. I’d recommend searching online for an eggless brownie recipe instead. Sorry I can’t further!
Wow wow wow! This is by far the most superior brownie I’ve ever made. Utter perfection! Thank you for this amazing recipe.
I wanted to ask what measurements you’d suggest for a 10inch tin please?
So happy you love this recipe so much 🙂 We haven’t tried making them in a 10-inch tin, only 8-inch, so I can’t say for sure. It really depends on how thick/thin you prefer your brownies, and you’ll want to watch the baking time. Let us know how it goes!